
Roku Not Finding Wi-Fi Network? 11 Expert Solutions Inside!

- Reboot both Roku and Wi-Fi router to potentially resolve network detection issues; for Roku, navigate to Settings > System > System restart > Restart, and for the router, disconnect from the power for 30 seconds and then reconnect it.
- Check if your Roku supports 5GHz networks, and if not, switch your Wi-Fi to 2.4GHz; for routers, adjust the channel via router settings (2.4GHz: channels 1-11, 5GHz: non-DFS channels).
- If connection issues persist: Disable network pings via a secret Roku menu, update Roku’s software if possible, improve Wi-Fi signal strength, opt for a wired connection, or perform a factory reset on the Roku device.
This article is for users whose Rokus are struggling to find a Wi-Fi network.
So, if your Roku can find Wi-Fi networks, but can’t connect to them, check out our article Your Roku Won’t Connect to Wi-Fi/Internet? Here Are 7 Quick & Easy Fixes.
All of these solutions have been tested, so you know that at least one of them will solve your Roku’s inability to discover nearby networks.
These methods not only tackle any possible underlying issues with your Roku but also troubleshoot your router.
Let’s get started!
Quick Navigation
- 1. Reboot Your Roku
- 2. Reboot Your Wi-Fi Router
- 3. Check If Your Roku Support 5GHz
- 4. Change Your Router’s Channel
- 5. Switch to b/g/n Wireless Settings
- 6. Scan for Networks
- 7. Disable Network Pings
- 8. Update Your Roku
- 9. Improve Your Wi-Fi Signal
- 10. Use a Wired Connection
- 11. Factory Reset Your Roku
- Wrapping Things Up
1. Reboot Your Roku
Have you ever turned on your computer and had some apps or features load incorrectly? The same thing can happen to Roku devices, making them unable to find a Wi-Fi connection.
If your Roku is stuck on the setup page, then your only option may be to unplug it from your TV and power it for a few minutes.
However, if you’ve already set up your Roku and can access the home screen, we strongly recommend restarting it via the settings. This will reboot your Roku’s software and reload its interface, hopefully fixing the network issues.
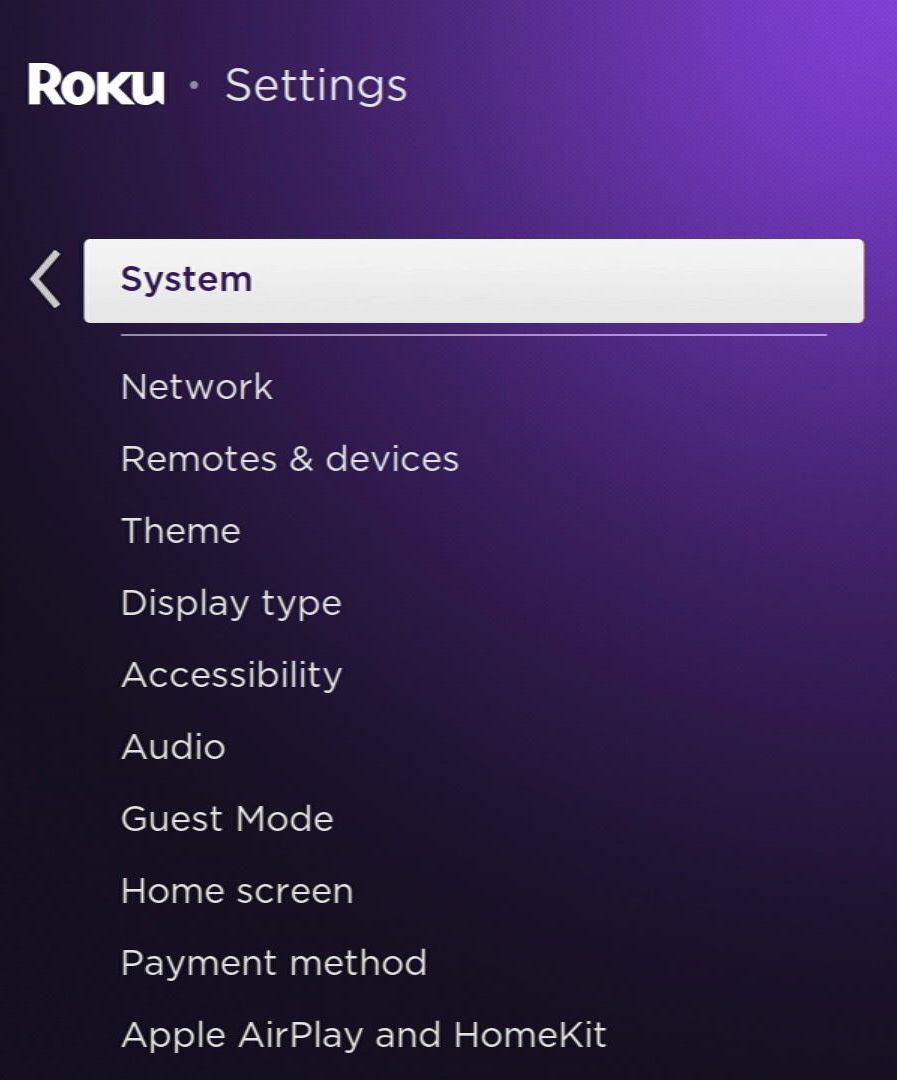
Step 1: On the Home screen, open the Settings found in the menu.
Step 2: Open the System option.
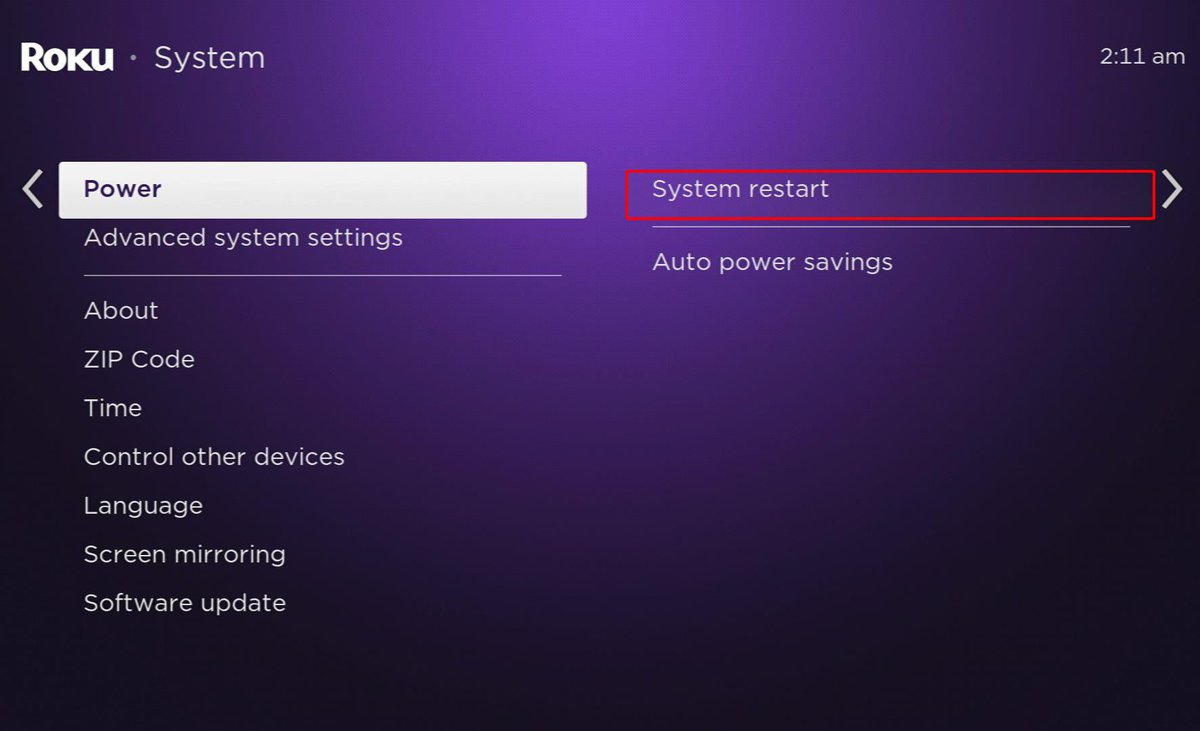
Step 3: Select System restart. You may have to select Power to arrive at this option, depending on your Roku model.
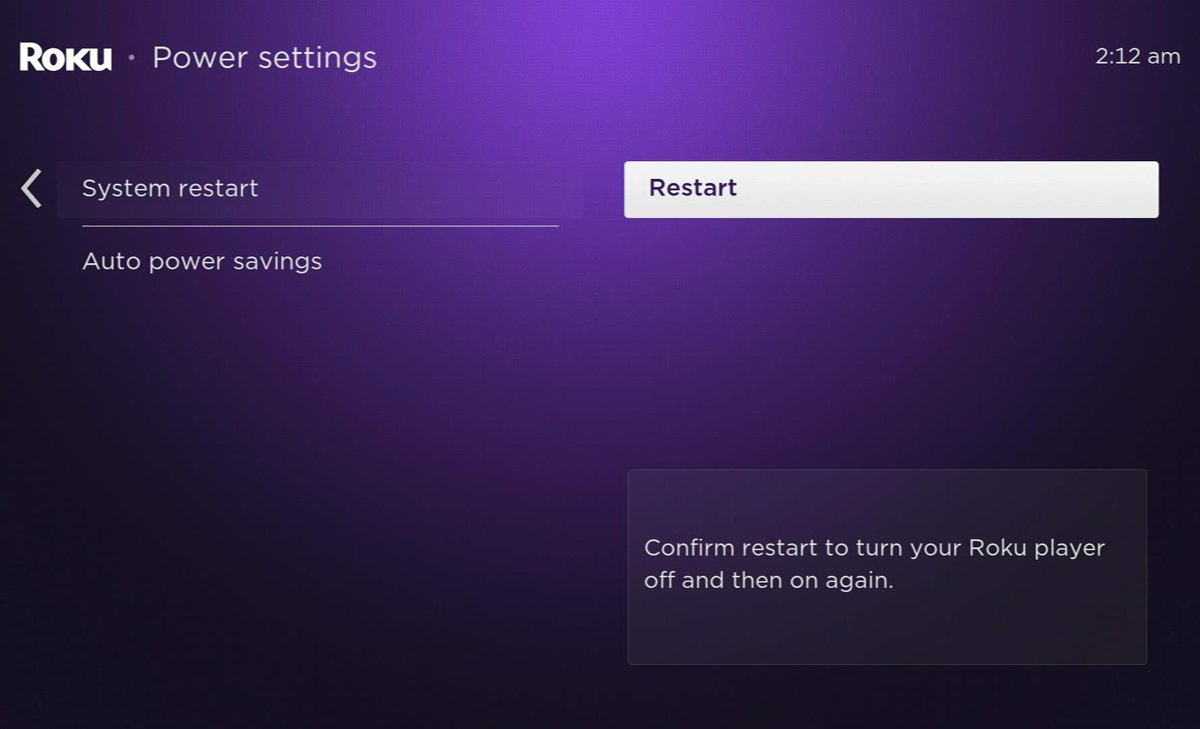
Step 4: Press Restart to reboot your Roku.
Once rebooted, see if your Roku can find the Wi-Fi. If it’s still struggling to discover the network, proceed to the next solution.
2. Reboot Your Wi-Fi Router
Your Roku may be in perfect condition, but there could be a problem with your Wi-Fi router.
First, observe your Wi-Fi router’s LED indicator lights. Are some of them yellow, orange, or red? Are all of them turned off?
Try connecting another device to the same Wi-Fi router and see the results. Can you browse the internet smoothly on your phone or laptop?
If not, there may be something wrong with your router.
Rebooting your router is an easy, but effective, way to establish a network connection.
Step 1: Remove all of your router’s connected cables, including the power cable.
Step 2: After a few minutes, plug everything back in.
Step 3: Wait for your router to fully restart, allowing the LED indicator lights to light up green.
Now that your router has rebooted, head back to your Roku Network settings and see if the router name appears.
If it does, connect to it and get streaming!
3. Check If Your Roku Support 5GHz

While your laptop may be able to connect to a 5GHz network, your Roku device may be another story. In fact, only a few Roku devices support 5GHz, as shown in this comprehensive list of all 5GHz-compatible Roku devices.
If you don’t see your Roku model on this list, it’s a good idea to adjust your Wi-Fi to the 2.4GHz band before searching for networks on your Roku once more. Proceed to the next section to learn how to adjust your router’s channel.
At times, your Roku may support the 5GHz band but still be unable to find the Wi-Fi network. If this is your case, check out our guide Can Roku Use 5GHz Wi-Fi?, which includes a comprehensive troubleshooting section that explains how to solve this problem.
4. Change Your Router’s Channel
Wi-Fi routers support two main bands: 2.4GHz and 5GHz. Which band you choose will depend on which one your devices support, your desired Wi-Fi speed, and the needed signal strength.
In this case, you should base this decision on which Wi-Fi band your Roku supports.
When using your Wi-Fi router on the 2.4GHz band, make sure it’s operating on channels 1 to 11.
To use the 5GHz band, set your router to operate on any non-DFS channel.
Once you’ve found which channel your Roku must be set to, follow the directions below to change your router’s channel.
Step 1: On your computer, open a web browser. Verify your router’s IP address (which can usually be found on the back of the router) and enter it into the URL bar.
Step 2: Log into your router’s admin page. These login credentials can also typically be found on your router.

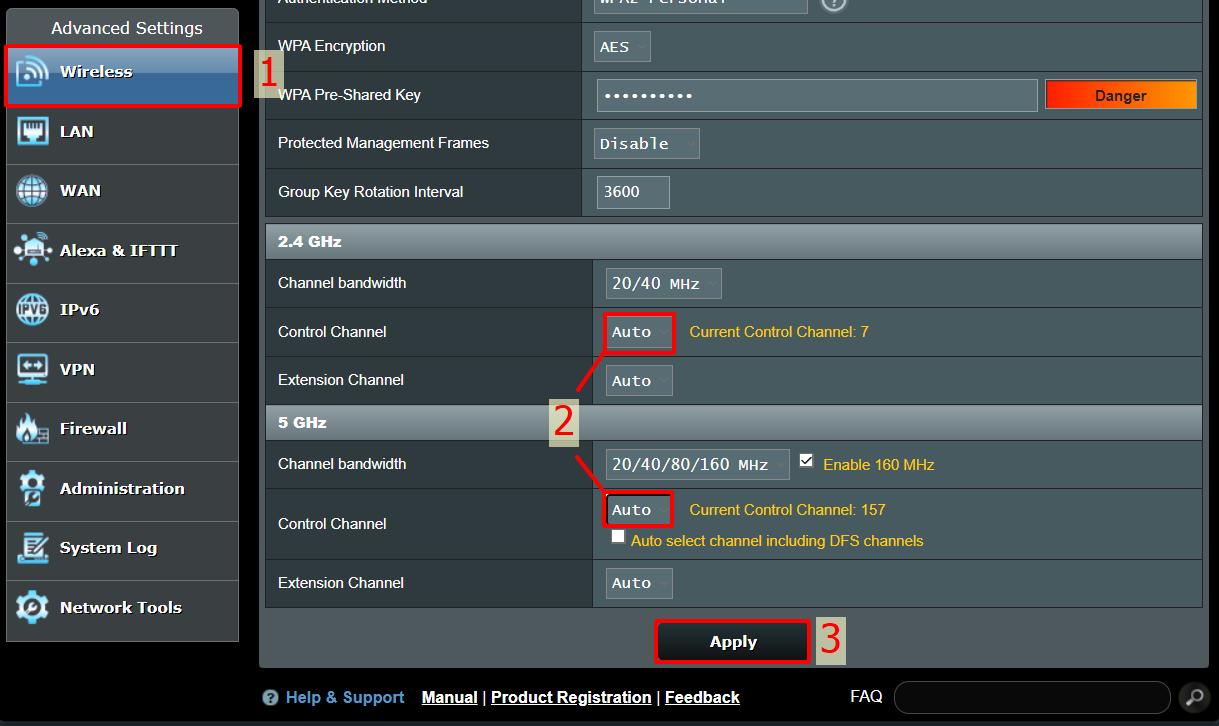
Step 3: In the router settings, head to Wireless/Network Settings.
Step 4: Go to the 2.4GHz or 5GHz band and enable it.
Step 5: Then, verify which channel your selected band is using.
Don’t forget, 2.4GHz uses channels 1 to 11.
Meanwhile, 5GHz uses these non-DFS channels: 36, 40, 44, 48, 149, 153, 157, 161, or 165.
Step 6: Once you’ve set your router to the appropriate channels, click Save or Apply to save your changes.
5. Switch to b/g/n Wireless Settings
Wi-Fi routers have three different standards.
These standards include:
- b: All Roku devices can connect to this setting as it’s the oldest one.
- g and n: These standards are newer, and consequently, are only supported by newer Roku devices.
You can set your router to connect to b/g/n, which will allow all Roku players to connect to it, regardless of whether they were made 10 years ago or 10 days ago.
Alternatively, you can use the g/n standard for newer Roku devices. This standard supports faster internet speeds, allowing you to seamlessly stream content on your Roku.
The g/n standard will not work with older, incompatible Rokus. So if you’re trying to connect an earlier Roku model to it, you’ll experience several connectivity issues.
To verify which standard you’re router is using and adjust it to b/g/n if needed, follow the instructions listed below.
Please note that these steps may vary depending on your router’s make and model, as well as your location. If the following steps aren’t applicable to your router, head to the manufacturer’s website for model-specific instructions.
Step 1: Head to the back of your router and find its IP address, username, and password. Then, navigate to the IP address in a web browser on your computer before using the login credentials to sign into your account.
Step 2: Go to the wireless settings, which may be labeled Wireless mode, 802.11 modes, or simply Mode.
Step 3: Adjust the mode to b/g/n. If you see a check box labeled Disable 11b, make sure it’s unselected.

6. Scan for Networks
It’s possible that your Roku couldn’t find your home’s Wi-Fi network the first time.
If this happens, you may have to have your Roku scan for networks a second time.
Step 1: Click on the Settings tab, and go to Network.

Step 2: Click on Set up connection, and select Wireless.

Step 3: If your Roku can’t find your Wi-Fi, click on Scan again to see all networks.

If your Roku still can’t find your Wi-Fi router, try the next solution.
7. Disable Network Pings
Your Roku device’s network pings could be enabled, making it difficult for you to connect to any network.
Disabling network pings won’t negatively affect your user experience and could solve this problem.
To do this, you will need to access a secret menu using a combination of buttons on your remote.
Let’s learn how!
Step 1: Press your remote’s Home (⌂) button five times.
Step 2: Press the Fast Forward (») button once.
Step 3: Press the Play/Pause (▶॥) button once.
Step 4: Press the Rewind («) button once.
Step 5: Press the Play/Pause (▶॥) once more.
Step 5: Finally, press the Fast Forward (») again.
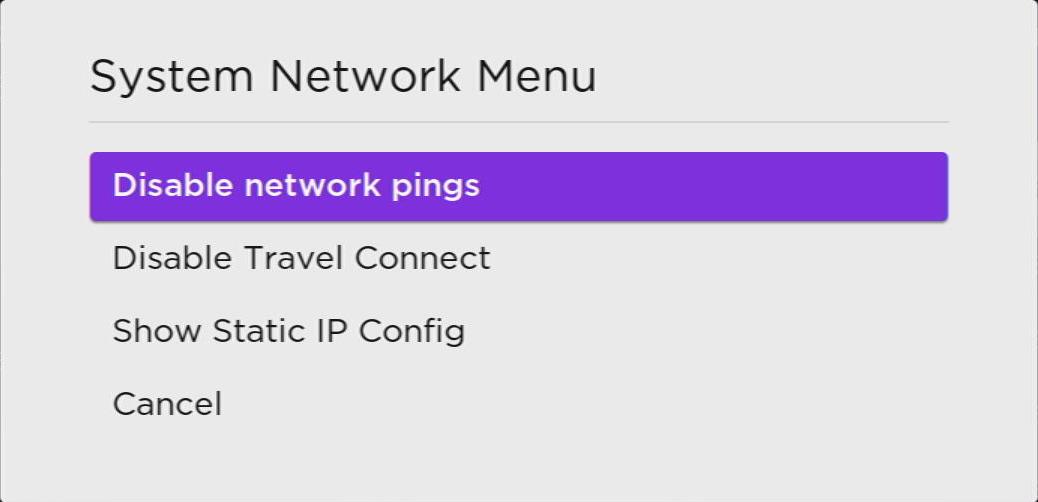
Step 6: Go to System Operations Menu.

Step 7: Click on Network Menu…

Step 8: Select Disable network pings. Once you’ve clicked on it, it should say “Enable network pings.”
Step 9: Press your remote’s Home button to return to the Home screen.
Step 10: Now, all you need to do is restart your Roku by following the first solution.
8. Update Your Roku
It’s no secret that Roku sometimes misses the mark on software updates.
So, if you’ve recently updated your Roku, you could have installed a glitchy software update that disables certain functions, like your Roku’s ability to find Wi-Fi networks.
If you’ve only recently installed this update, you may have to wait a while until Roku releases a new update that will fix these bugs.
However, it still doesn’t hurt to see if there are any available updates and install them.
If your Roku can connect to any network (even your mobile hotspot), you can update it from your Roku’s settings.
Go to your Roku’s Home screen before following the steps below.
Step 1: Use your remote to go to the menu on the left side of our screen. Then, scroll down and select Settings.
Step 2: Head to System.
Step 3: Click on Software update.

Step 4: Select Check now and wait while your Roku searches for updates.
Step 5: If your Roku has found any update, click Download and then Install.
9. Improve Your Wi-Fi Signal
In some cases, your router’s Wi-Fi signal may be too weak to be discoverable. This means that your Roku won’t be able to find it, let alone connect to it.
So, you must improve your Wi-Fi signal so your Roku can detect it. You can do this by removing any signal-blocking materials and adjusting your router’s location.
This is a common issue, so we already have an article addressing how to improve it.
Read our article What Materials Can Block Wi-Fi Signals? for a complete guide on how to boost your Wi-Fi signal in no time!
10. Use a Wired Connection
Your Roku may be struggling to wirelessly connect to networks, but it could be able to support a wired connection.
Try plugging your router into your Roku with an Ethernet cable.
This is a great option if you have a Roku Ultra or Roku Ultra LT since these models come with Ethernet ports.
If you have any other Roku device, you will need to get an Ethernet adapter. We recommend the Belkertech Ethernet Adapter, which plugs into your Roku’s micro USB port and has a USB cable to connect it to power.

Your router should come with an Ethernet cable, but if it doesn’t, check out the Amazon Basics RJ45 Cat-6 Ethernet Patch Internet Cable.
You may also need to change your Roku Network settings by following the steps below.
Step 1: Open your Roku’s Home screen.
Step 2: Click on Settings.
Step 3: Open the Network settings.
Step 4: Change the network settings to Wired.
Now, your Roku will be ready to receive a wired internet connection.
This gives you less flexibility when setting up your Roku, but it should provide a steadier network connection. If it works, you’ll also be able to update your Roku, which could solve your network issues.
11. Factory Reset Your Roku
Let’s try starting fresh by factory resetting your Roku.
This will only take a few minutes and can help to erase any custom settings you may have enabled that are causing your Roku’s network settings to malfunction.
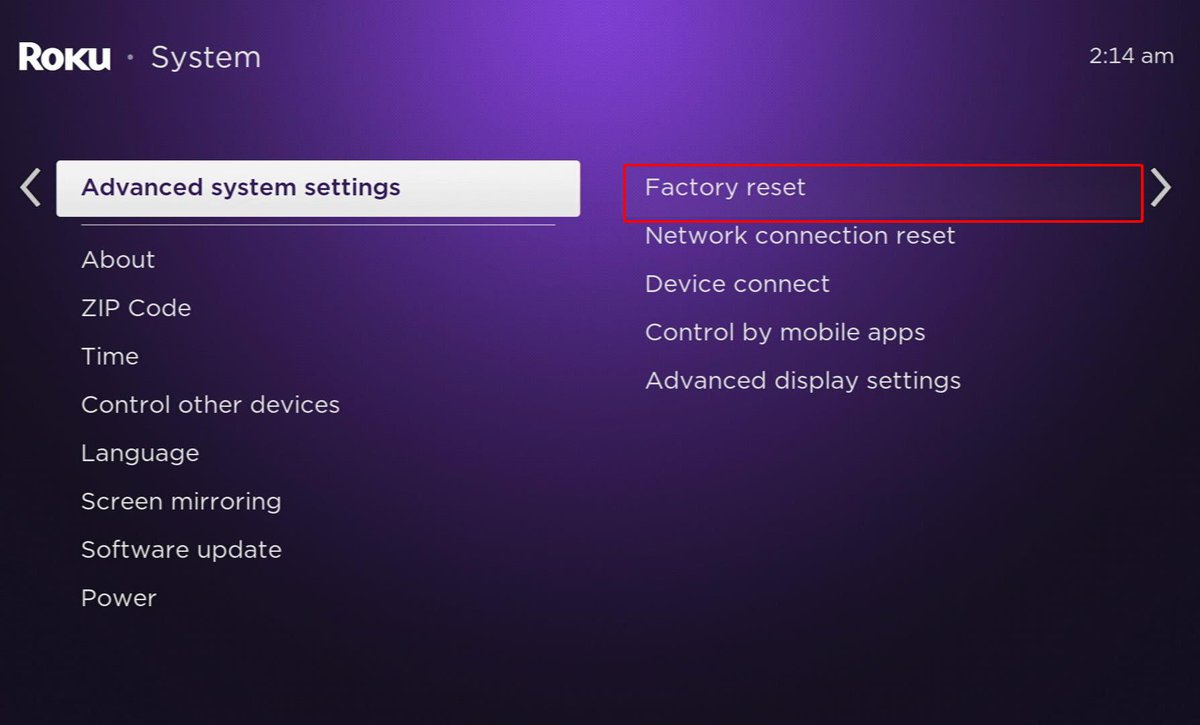
Step 1: Click on your Roku’s Settings, and go to System.
Step 2: Head to Advanced system settings.
Step 3: Click on Factory reset.
Step 4: Follow the on-screen directions, which will prompt you to enter a 4-digit code into the text input. Press OK on your remote to submit the code.

Step 5: Select Start factory reset to begin the process.

Wrapping Things Up
Under normal circumstances, your Roku should be able to find your Wi-Fi network in a matter of seconds. However, several issues can prevent this process from happening.
Rebooting your Roku and router are good first steps before trying more advanced solutions. At times, you may need to adjust certain router settings or scan for networks manually.
If your Roku has any pending updates, it’s a good idea to install them. You can also try boosting the Wi-Fi signal or using a wired connection if the signal is too weak to connect wirelessly.
What’s your experience with your Roku being unable to find a Wi-Fi network? Did this article help you finally connect your Roku to the internet?
Let us know in the comments below!

Yesenia Achlim is a technical copywriter and editor with a focus on AV equipment. She aims to break down complicated topics and make technology accessible, no matter your technical expertise. When she’s not teaching you how to replace a projector lamp, you can find her reading and baking.

Duy Anh is a seasoned technical editor specializing in helping readers troubleshoot TV, projector, and Wi-Fi issues. He’s always been drawn to logical problem-solving. His ability to approach matters from various angles with a neutral mindset enhances his technical expertise.