
No Source Found on Optoma Projector? Try 7+ Fixes for HDMI Issues

- Basic checks: press the Input/Source button, secure HDMI cables, test with a different cable, and consider a soft reset.
- Additional checks: Verify HDMI version compatibility, ensure the streaming device is turned on, and manually switch input sources.
- Advanced troubleshooting: match device resolution & refresh rate with the projector’s supported format; ensure proper ventilation, clean/replace filters, and avoid prolonged usage; remove intermediary devices for direct connection.
Facing issues with your Optoma projector not detecting its source?
It’s a common hiccup many encounter, especially when using HDMI connections.
This guide is crafted to help you troubleshoot this very challenge.
Drawing from our tech team’s expertise and solutions proven by users across various platforms, I’ll walk you through basic to advanced steps to get your projector seamlessly synced with its source.
Dive in, and let’s get that picture rolling!
Quick Navigation
- 1. Easy Solutions (Try These First)
- 2. Ensure Your Cable Is Compatible
- 3. Ensure That Your Streaming Device Is On
- 4. Adjust Input Source Settings
- 5. Reduce the Resolution & Refresh Rate of Your Laptop or Streaming Device
- 6. Cool Your Overheated Optoma Projector
- 7. Remove Any Intermediary Device In Your Wired Setup (Receiver, HDMI Splitter, HDMI Switch, Soundbar, etc.)
- Conclusion
1. Easy Solutions (Try These First)
In some cases, the problem may be simple. Before attempting more complex solutions, here are a few easy troubleshooting options if you have an HDMI source device.
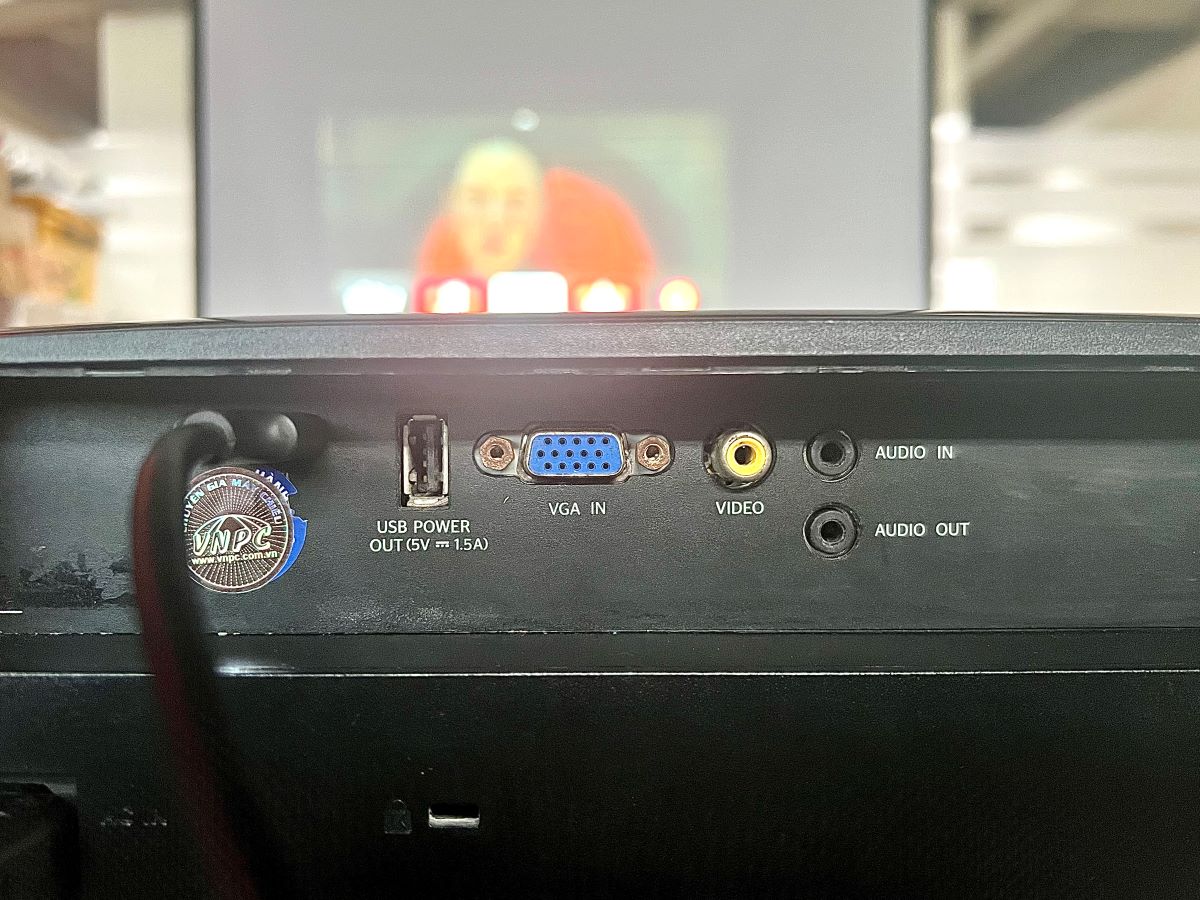
- Ensure you have pressed the Input/Source button on your Optoma and switched the source to HDMI.
- Ensure the HDMI cable is securely plugged into the projector and the source device.
- Try flipping the HDMI cable around.
- Try another HDMI cable.
- Connect another source device to your projector to see if the current one is faulty.
- Perform a soft reset (turn your projector off, unplug it from power for at least 30 seconds, and turn it on again).
Note: Even if you’re transmitting from a non-HDMI source, still follow the steps above. Just replace HDMI with your source’s transmission interface (i.e., VGA).
If the troubleshooting process doesn’t fix your projector’s issue, below are other alternative solutions you should try.
2. Ensure Your Cable Is Compatible
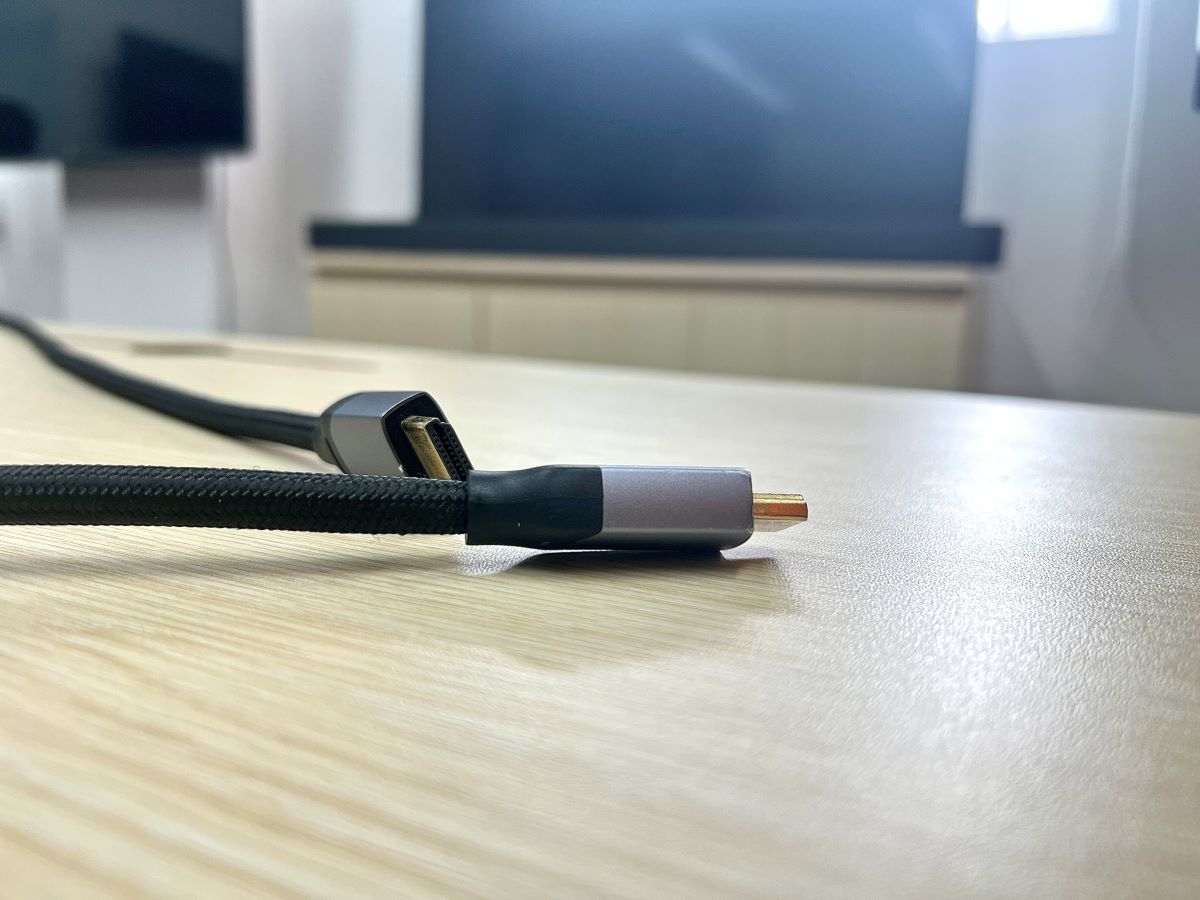
Incompatible connection cables are one of the most common reasons Optoma projectors keep searching for a source. Ensure that you’re using a compatible cable to rule out this possibility.
Your projector might be incompatible with older HDMI versions due to their limited bandwidth. There have been reports of cases where an HDMI cable couldn’t handle the high-quality signal transmission from the source device (i.e., your laptop) to the projector.
Refer to your projector’s user manual or the manufacturer’s helpline for more information regarding which HDMI versions are compatible with your projector.
You can also get acquainted with the different HDMI Cable specifications in our article HDMI ARC vs. Regular HDMI: Breaking Down the Differences.
3. Ensure That Your Streaming Device Is On
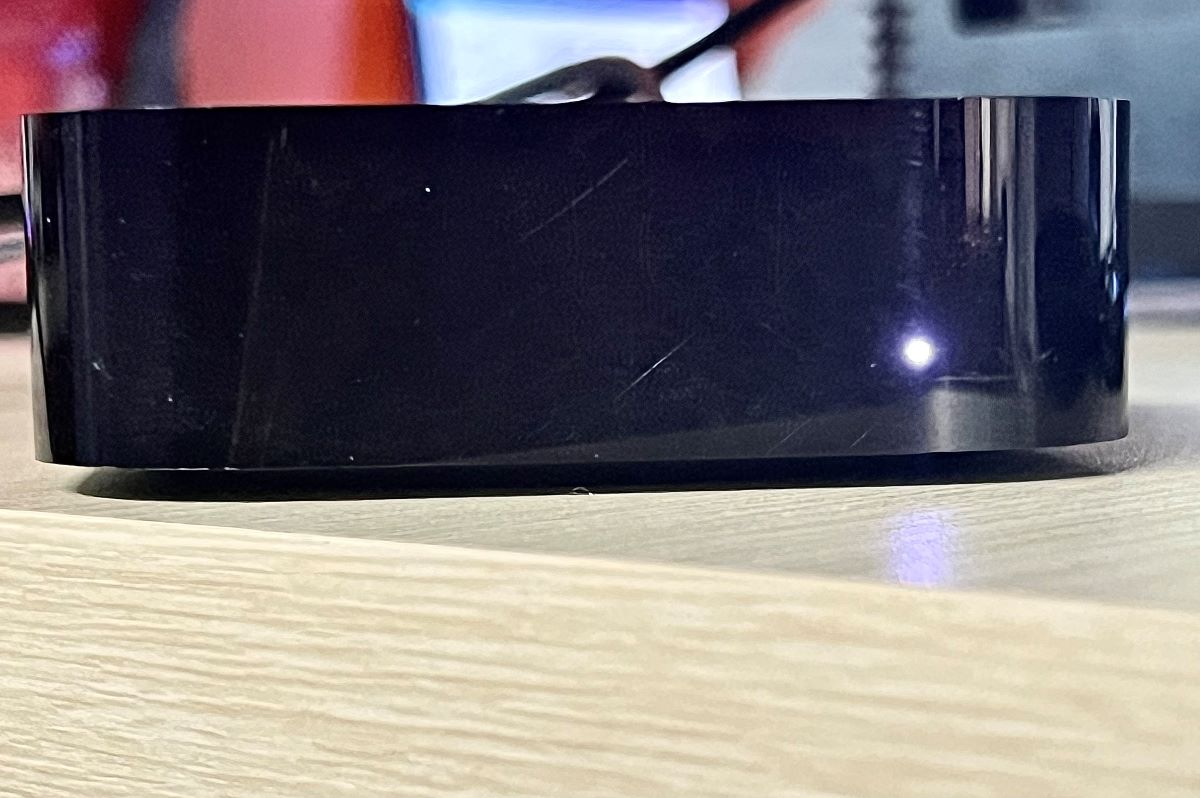
When your streaming device is turned off, the projector cannot recognize the device because no signal is transmitted — even if it’s connected properly.
Streaming devices are programmed to automatically go into power-saving mode and turn off after a period of inactivity. Hence, your streaming device can go off without your noticing.
If the power LED indicator on the device is off, use its remote to turn it on. For devices like the Roku Express, press the Reset button on the player.
4. Adjust Input Source Settings
This issue is common when you have multiple HDMI (and non-HDMI ) inputs on your projector.
Some projectors are equipped with automatic source detection, enabling the projector to switch to the appropriate input source once connection is established. However, this function is not failproof; it can malfunction when connecting multiple devices.
If your projector keeps automatically searching for a source, you can help it along by manually switching to your desired source. You can use the projector’s remote or buttons on the panel to switch between HDMI 1, HDMI 2, and other input sources.
5. Reduce the Resolution & Refresh Rate of Your Laptop or Streaming Device
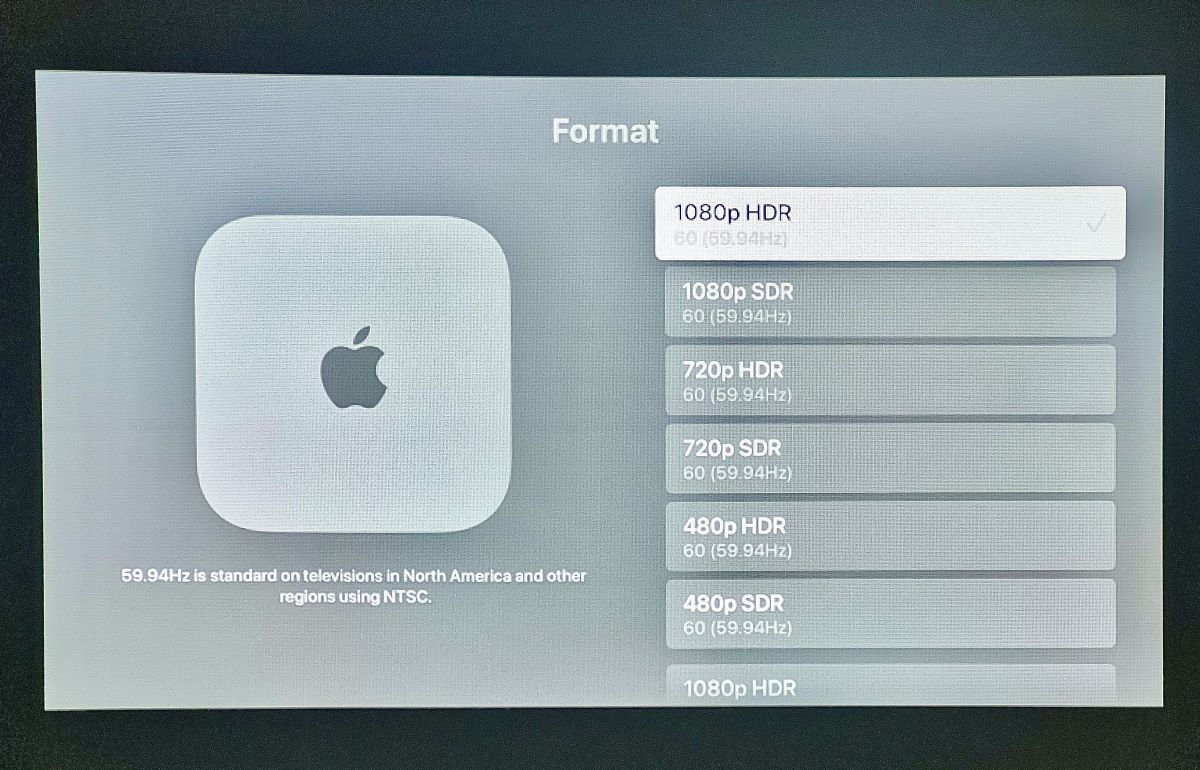
Some projectors only support specific resolutions at specific refresh rates. This limitation can apply to individual input interfaces or the entire projector.
For instance, some Optoma projectors only support 4K transmissions at 30Hz. They will not recognize the signal if your source is transmitting at 60Hz or more.
In this user’s case, their 4K projector only recognized signals from their laptop when they changed its refresh rate for 4K transmissions from 60Hz to 30Hz.
Find out the resolution and refresh rate settings on your laptop or streaming device from their user manuals. If your source device transmits an unsupported format, change its resolution and refresh rate settings to your projector’s recommended format.
Steps to change your laptop’s refresh rate:
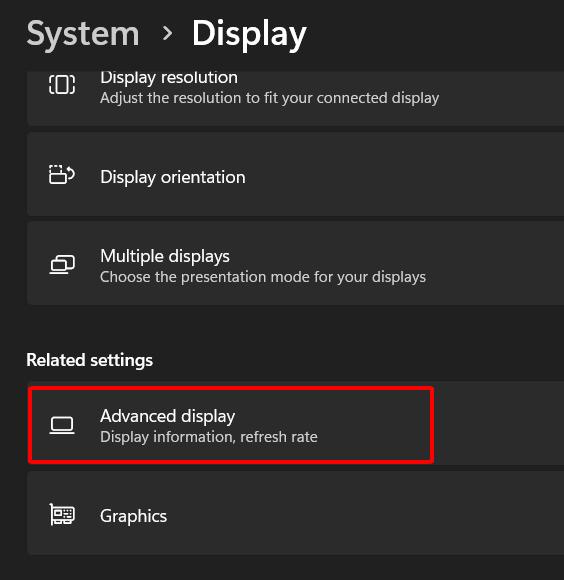
Step 1: Right-click on your laptop’s menu and navigate to System > Display.

Step 2: Select Advanced display.
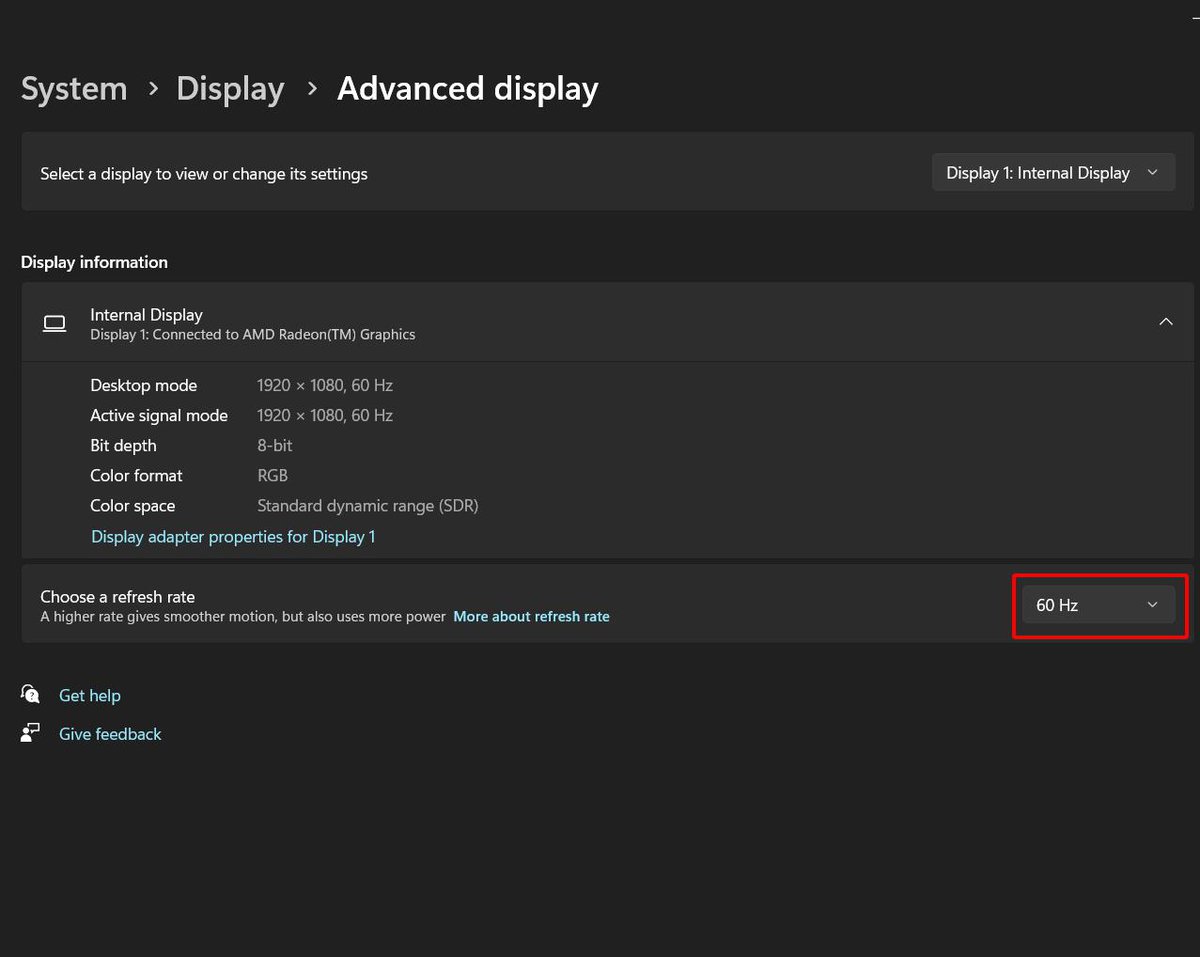
Step 3: Select your desired refresh rate from the list (the available options will vary for different PCs).
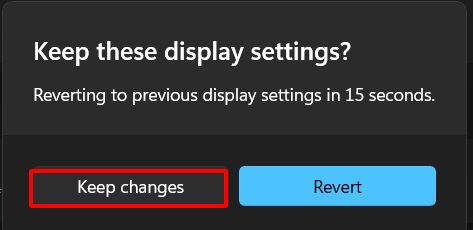
Step 4: select Keep Changes if prompted to confirm the new refresh rate.
Step 5: Close all windows and restart your laptop to apply the new refresh rate.
If your source device is a MacBook, Roku, FireTV, or Google Chromecast, we’ve got you! Check out our guide to change resolution and refresh rates on various streaming devices.
Note: Since your source device won’t appear on your projector, connect it to other displays (i.e., a PC or TV) to properly navigate its settings and make changes.
6. Cool Your Overheated Optoma Projector
Overheating can cause a projector to shut down or have difficulty recognizing source devices. Users have reported that some later Optoma projectors have poor cooling systems, making them hard to operate for extended periods.
When your projector overheats, turn it off and let it sit for a while. Even models with effective cooling systems can still experience overheating due to clogged filters or poor ventilation.
Below are a few ways to help your projector stay cool for extended periods.
1. Monitor room temperature
Ensure there’s appropriate ventilation wherever your projector is set up. If the room is small and has poor ventilation, you may need to keep the AC on while using the projector.
2. Change location
If the projector is mounted where an object or wall is blocking the vents, move the object or change the projector’s location to keep airflow steady.
3. Clean or change the air filter

If you have had your projector for a while, its air filter might be clogged. You can clean or replace it — the process is quite easy, and you can DIY if you like.
There are other ways to cool your Optoma projector, and we go into all of them in this article: How Do I Cool Down My Projector? Check it out!
7. Remove Any Intermediary Device In Your Wired Setup (Receiver, HDMI Splitter, HDMI Switch, Soundbar, etc.)
Intermediary devices in your wired setup (i.e., AV Receivers, HDMI splitters, HDMI switches, or Soundbars) act as pass-throughs between your source, display, and external audio devices. The image below describes the setup.
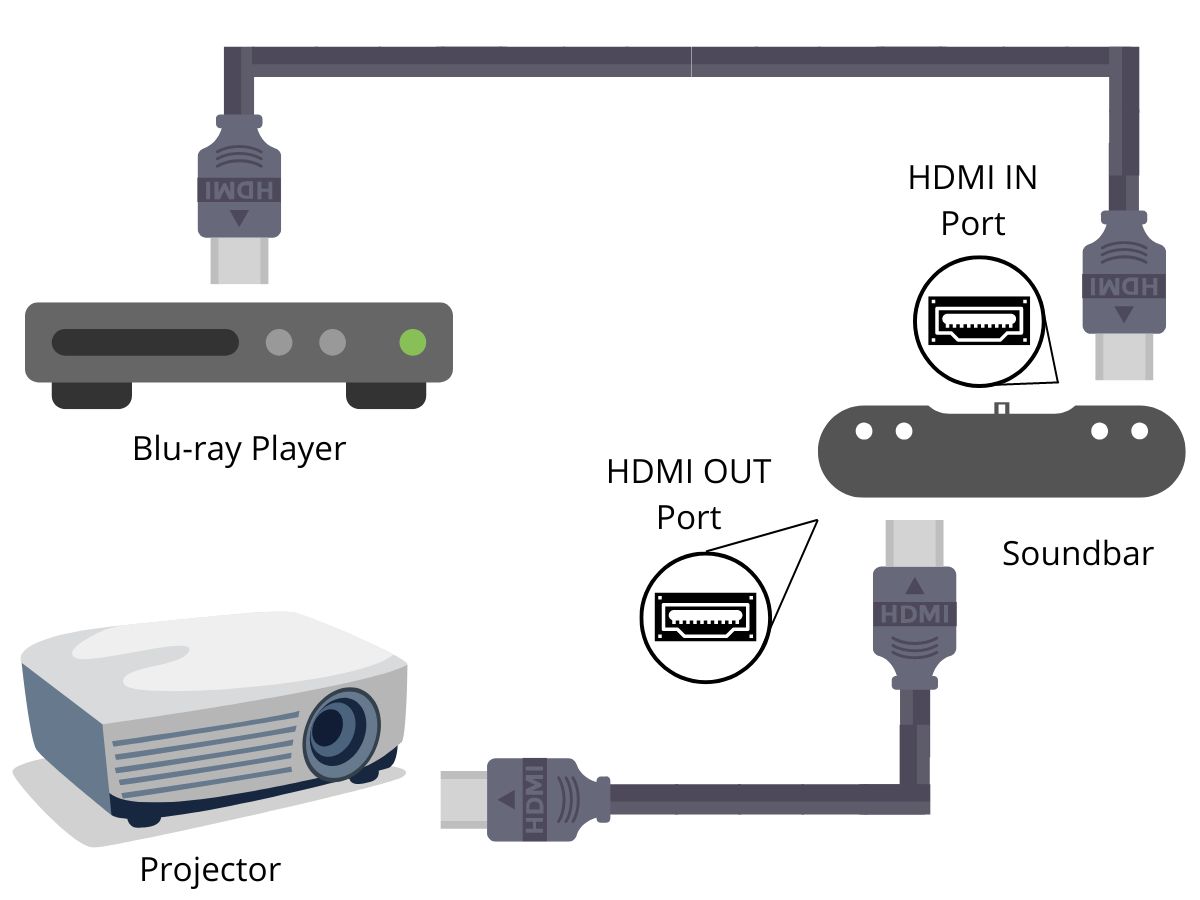
While these intermediary devices can be useful for reducing cable connections and using the HDMI ARC, some Optoma users have reported that they affect their projector’s capacity to detect signals from the source.
If so, remove any intermediary device in your wired setup and connect your source device directly to the projector.
If you need to use your soundbar, connect it to your projector or the source device via Bluetooth. Below are a few Bluetooth setup options that we can guide you through:
- Soundbar to Fire TV Stick
- Soundbar to Apple TV
- Soundbar to laptop/PC via Bluetooth or other audio ports (optical, 3.5mm)
Conclusion
There are several possible reasons your Optoma projector can’t detect signals from a source device. These reasons range from loose cable connections, incompatible resolution or refresh rates, and wrong input settings to overheating and faulty intermediary devices.
Identifying and addressing the root cause of the issue is the first step in solving them. Fortunately, we have provided information to help you navigate the troubleshooting processes and identify the problem with your projector.

Gabriella ‘Diogo is a technical writer with a vested interest in tech hardware and equipment. She shares her knowledge and processes in an easy-to-grasp, lighthearted style. When she’s not testing or researching device performance, you’ll find her writing short stories or rewatching episodes of her favorite sitcoms.

Duy Anh is a seasoned technical editor specializing in helping readers troubleshoot TV, projector, and Wi-Fi issues. He’s always been drawn to logical problem-solving. His ability to approach matters from various angles with a neutral mindset enhances his technical expertise.
My infocus projektor keep seeking souce intermittently
After a power break when the optomo HD28i was not switched on, the sources can not being found no more with hdmi. I tried everything from removing devices, cables, …