
How to Jailbreak FireStick With Latest Tricks for 2024

What To Know
- Jailbreaking a FireStick involves installing the Downloader app, enabling ADB debugging, allowing apps from unknown sources, and then using the Downloader app to install Kodi. Once Kodi is installed, users can add various add-ons to stream content.
- After setting up Kodi, users need to install add-ons to access content. The article gives an example of installing the Shadow add-on, which requires a Real-Debrid account for streaming movies and TV shows.
This guide will show you the easy steps to free your FireStick from its default limitations, discuss the Kodi app’s role in this liberation, and outline what you need to know about the risks involved.
Follow along for the insider tips you won’t find in the manual.
Quick Navigation
Disclaimer
Before beginning the jailbreak process, it’s essential to understand the potential risks involved.
Jailbreaking your Fire Stick may void your warranty, preventing you from receiving free or discounted repairs or replacements from Amazon. In certain cases, this process may even result in legal repercussions depending on what you choose to do with your jailbroken device.
Jailbreaking can allow you to view new content, but this doesn’t come without certain security risks that could put your personal information or your device’s stability in danger.
So, before jailbreaking your Fire Stick, carefully consider the potential threats of doing so and take any precautionary measures to keep your information safe.
While this article does outline how to jailbreak a Fire Stick, we must clarify that we do not recommend doing so under any circumstances.
Instead, I suggest using your devices’ official free and paid apps for all your free and paid content.
Not only is this approach both legal and ethical, but it also supports your favorite content creators as they receive royalties from your views, which helps them continue making the videos you love.
What Is the Kodi App?
Kodi is a third-party open-source app for all your free streaming needs.
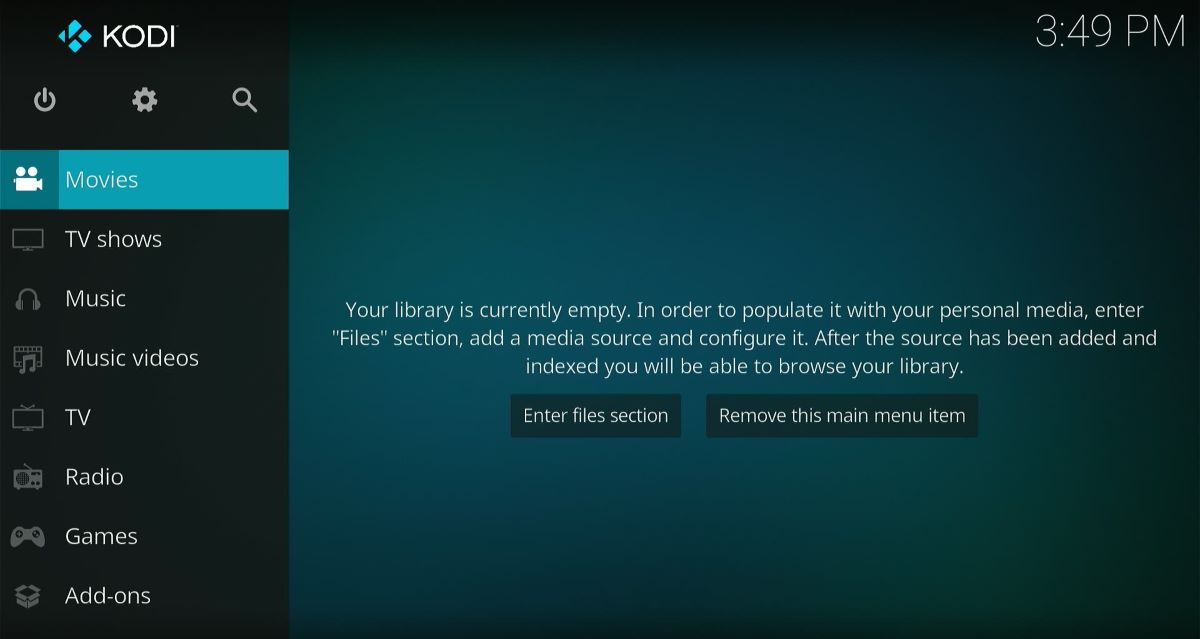
However, it’s crucial to understand that the Kodi app can not be downloaded from your Fire Stick’s native Amazon Appstore.
So, to install the app on your device, you must sideload it via the Downloader app, which allows you to download certain apps on your Fire Stick that would otherwise be unavailable.
Kodi is a great resource for streaming unpaid content, including movies, TV series, live TV, sports, and more!
How to Jailbreak Fire Stick?
I won’t sugarcoat it, jailbreaking a Fire Stick is a complex process with many steps. While this process isn’t necessarily difficult, it is time-consuming and does require a certain level of precision.
Luckily, I’ve divided this process into several easy-to-follow sections, so you can easily jailbreak your device as quickly as possible.
Before following the steps below, I urge you to carefully consider the possible risks, as un-jailbreaking your Fire Stick is an equally tedious process.
Preparation Steps
Step 1: On your Fire Stick, head to the Appstore and install the Downloader app. This app will allow you to download third-party apps from it.

Step 2: Return to the Home screen and launch the Settings menu followed by My Fire TV.

Step 3: Turn the Fire TV settings’ ADB debugging option ON.

Step 4: Then, go down and enable Apps from Unknown Sources.

Step 5: Next, navigate back to the Settings menu and head to Preferences.
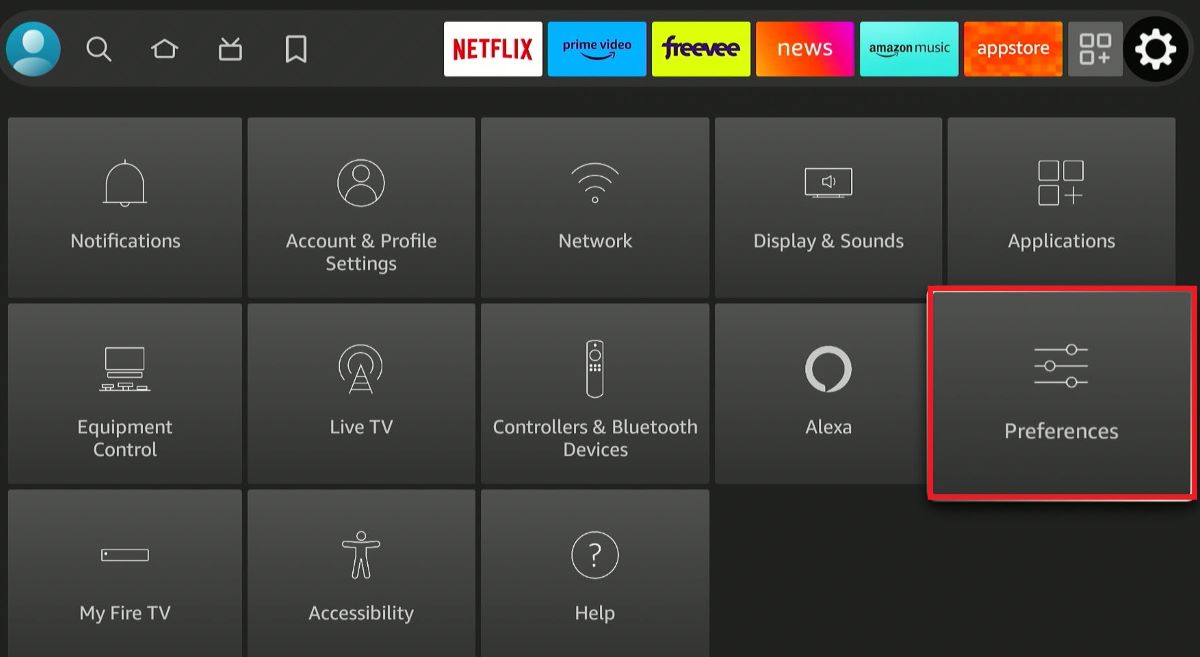
Step 6: Go to Privacy Settings.

Step 7: Disable Device Usage Data.

Step 8: Then, turn off Collect App Usage Data.

Step 9: Return to the Preferences section.
Step 10: Head to the Data Usage Monitoring tab and disable it.


Step 11: Now that you’ve adjusted the necessary settings, open the Downloader app you installed earlier.

Step 12: Type “firesticktricks.com/kapk” into the search bar before clicking Go.

Step 13: Wait for the Kodi app to download to your Fire Stick.

Step 14: Once downloaded, Install the Kodi app to your device.


Step 15: Now, Open the Kodi app to start using it.

Step 16: Follow the Kodi app’s on-screen instructions by selecting Continue.

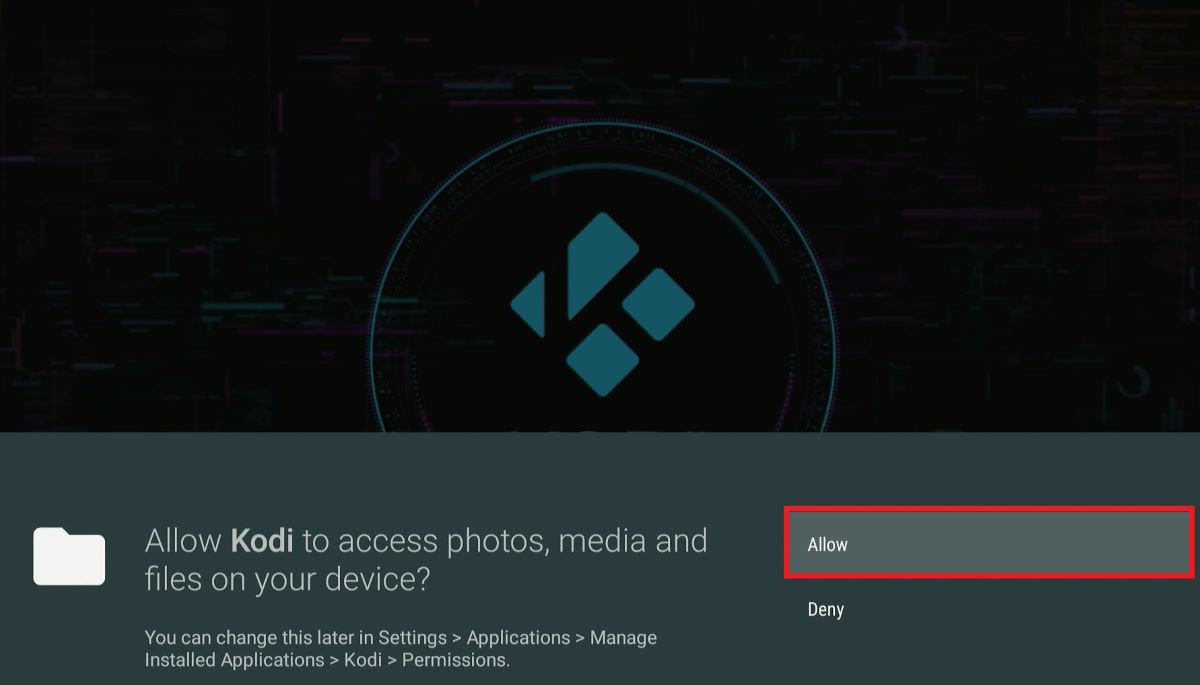
Step 17: When asked if you want the Kodi app to access your device’s files and media, click Allow.
Setting up the Kodi app is only the first step. Now, you have to download content for you to watch within the app.
To watch content, like movies, within the app, you must install an add-on.
Kodi supports a wide variety of add-ons depending on which content you’d like to watch.
Follow the instructions below to install an add-on in Kodi.
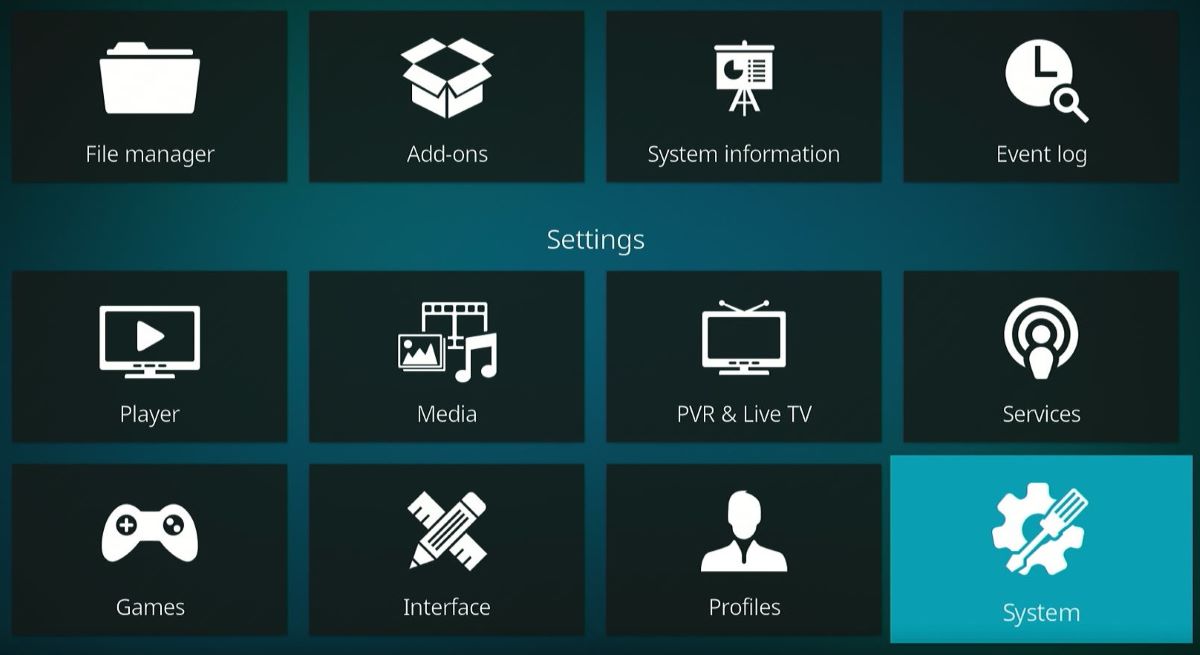
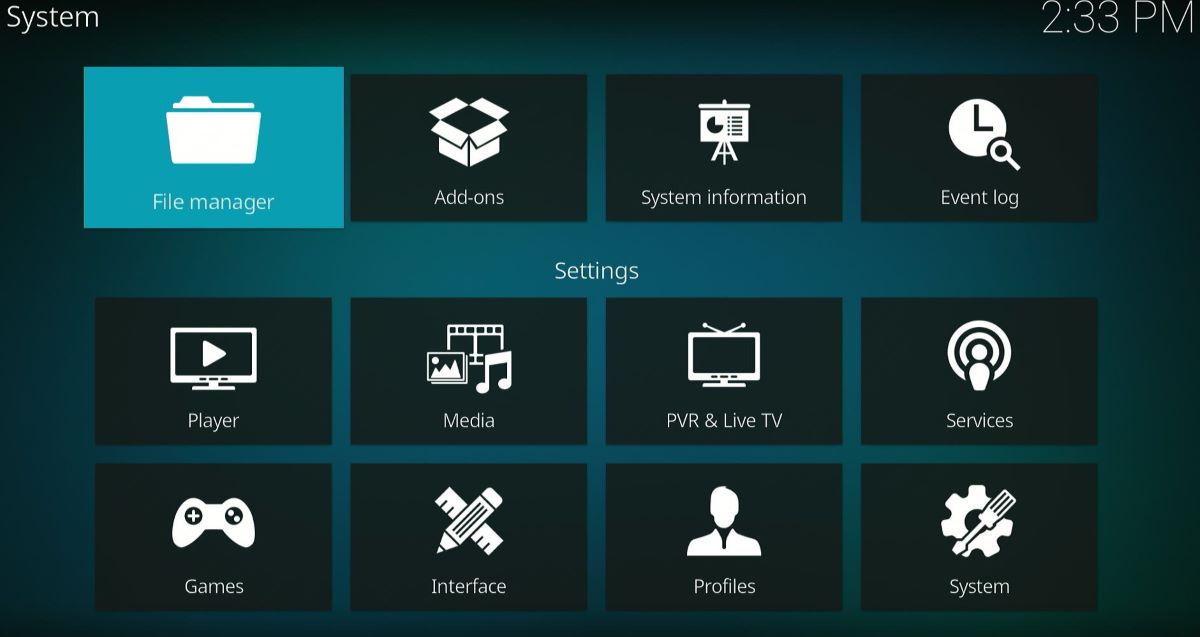
Step 1: Launch the Kodi app and open the Settings from the main menu.
![]()
Step 2: Navigate to System.
Step 3: Go to Add-ons and toggle on Unknown Sources.

Install Add-ons
Once you’ve adjusted the proper settings, you’re ready to install your favorite Kodi add-ons by following the steps below.
Step 1: Head to Settings and launch the File Manager.
Step 2: Go to the Add Source option found on the right-hand side.

Step 3: Click on None.

Step 4: Type “http://magnetic.website/repo” into the search bar.
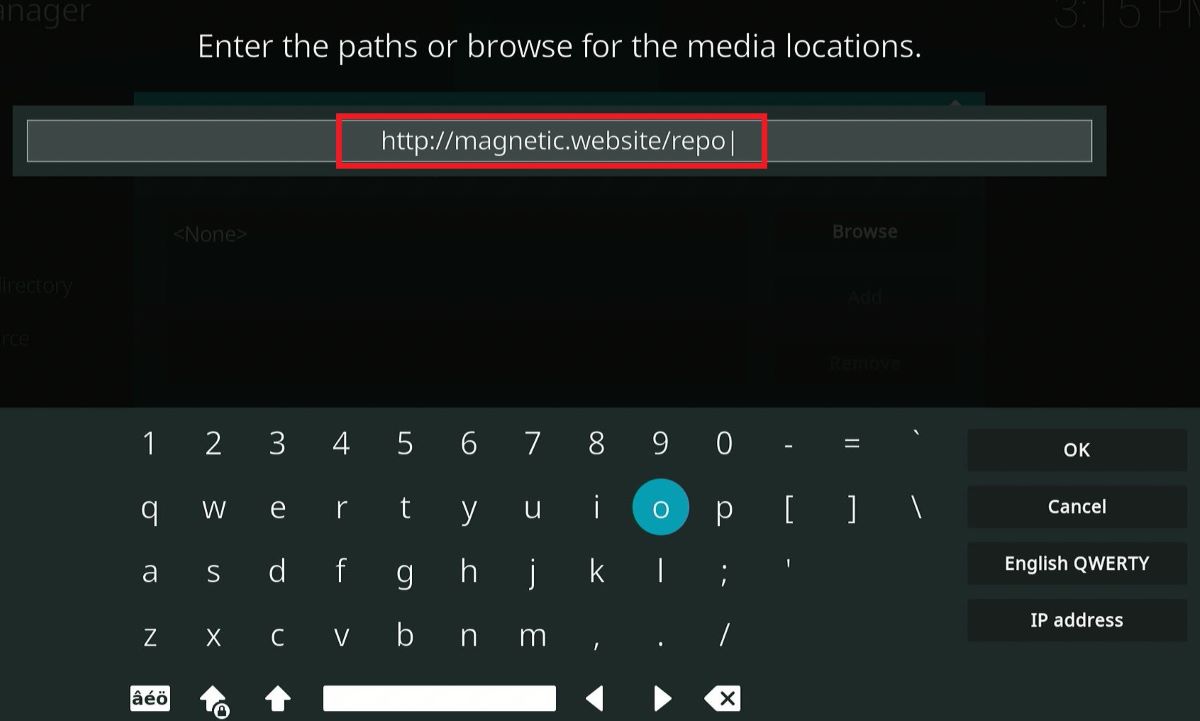
Step 5: Once you’ve correctly entered the above URL, select OK. Then, you will be asked to enter a name for the above URL. Choose whatever name your heart desires before clicking OK.

Step 6: Return to the Settings and go to Add-ons.

Step 7: Choose Install from zip file.

Step 8: Click on the file you named earlier.

Step 9: Then, select the correct zip file.

Step 10: Then, wait for the selected file to install until a notification (like the one shown below) appears on-screen.

Step 11: Next, go to Install from repository.

Step 12: Scroll down and click on Magnetic Repo.

Step 13: From here, navigate to Video and add-ons.

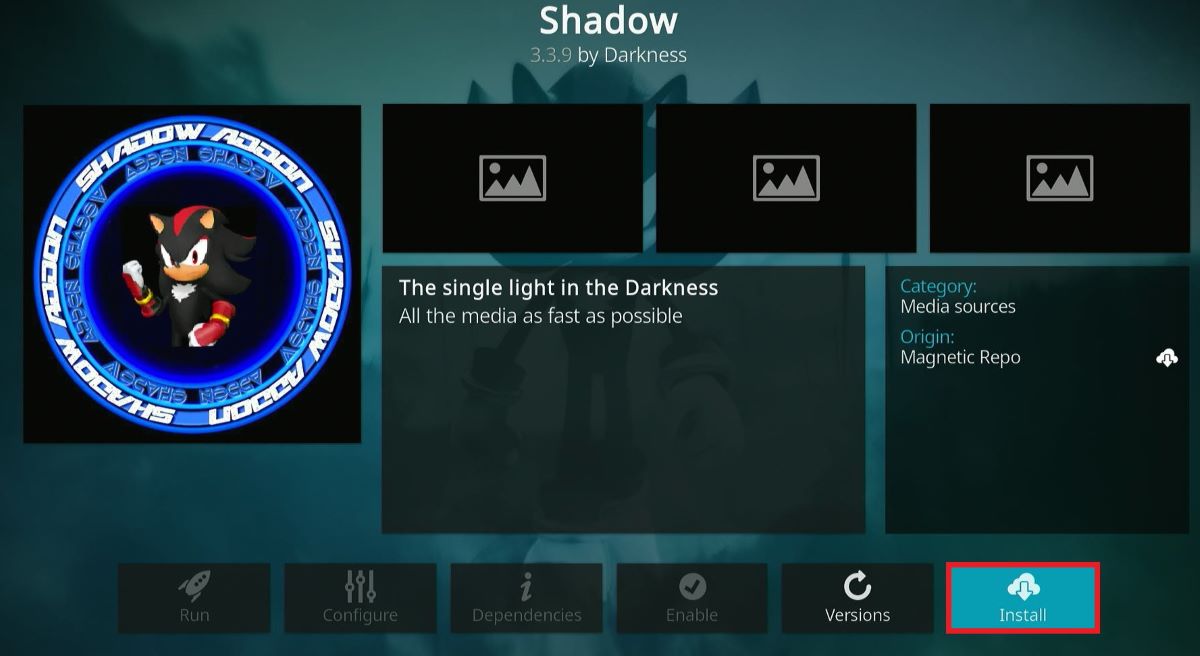
Step 14: Go to Shadow.

Step 15: Install the add-on.
Step 16: Once installed, you’ll see a notification like the one displayed below.

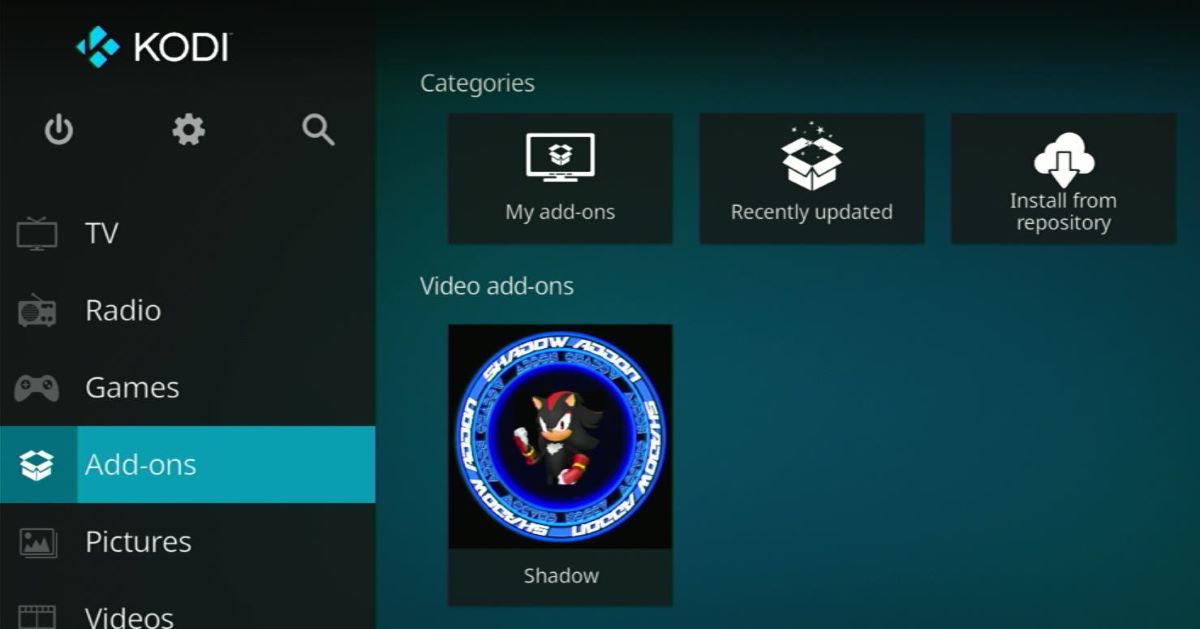
Step 17: Now you’re almost ready to use the Shadow add-on for all your streaming needs (e.g. movies, TV shows, etc.). Head back to the Kodi app’s main menu and choose Add-ons from the left-hand side.
Step 18: Once you’ve completed all the above steps, head to https://real-debrid.com/ in a web browser to create an account.
Register a Real-Debrid Account
You must have a Real-Debrid account to use the Shadow add-on. Otherwise, selecting the add-on will only prompt an error message reading “No Link Found.”

To register, you must have a subscription to Real-Debrid. They offer foud payment tiers varying in price and included features. Choose the one best for you.

Once you’ve decided which payment tier is best for you, follow the steps below to register for and use Real-Debrid.
Step 1: Launch a web browser on your laptop or PC before navigating to https://real-debrid.com/. You know you’ve reached the right website when you’re met with the homepage displayed below. From here, click on Sign Up.

Step 2: Enter any necessary information into the form before clicking the Sign Up button. Then, you should receive a verification email from the website.
Step 3: Once you’ve verified your email, return to the Real-Debrid website and go to Login.
Step 4: Now, turn your attention back to your Fire Stick’s Kodi app. Here, choose any shows or movies you’d like to watch. Once you’ve selected all your desired content, the add-on will ask you for a code.
Step 5: On your computer, go to https://real-debrid.com/device in a web browser. Take note of the code Kodi has given you on your Fire Stick.

Step 6: Then, enter this same code into the form on the Real-Debrid website on your computer and click on Continue.

Once you’ve completed the above process, you can start watching content on your Fire Stick through the Kodi app’s Shadow add-on.
Bonus: Install VPN
Installing a VPN is one of the easiest ways to protect your personal data from being seen by outside parties. In this scenario, it’s particularly helpful when preventing your Internet Service Provider (ISP) from seeing your download and stream history on your Fire Stick.
We’ve been using NordVPN to keep our data safe. So, for this demonstration, I’ll be using NordVPN as an example. It’s safe and reliable, so I strongly recommend giving it a try as well.
If you’re not worried about anyone tracking your online activity, you can skip this suggestion and use the Kodi app without it. However, I always recommend using a VPN for an added layer of protection. You can also adjust your VPN’s country to access content on streaming platforms that would otherwise be unavailable in your region.
Follow the steps below to install NordVPN on your Fire Stick.
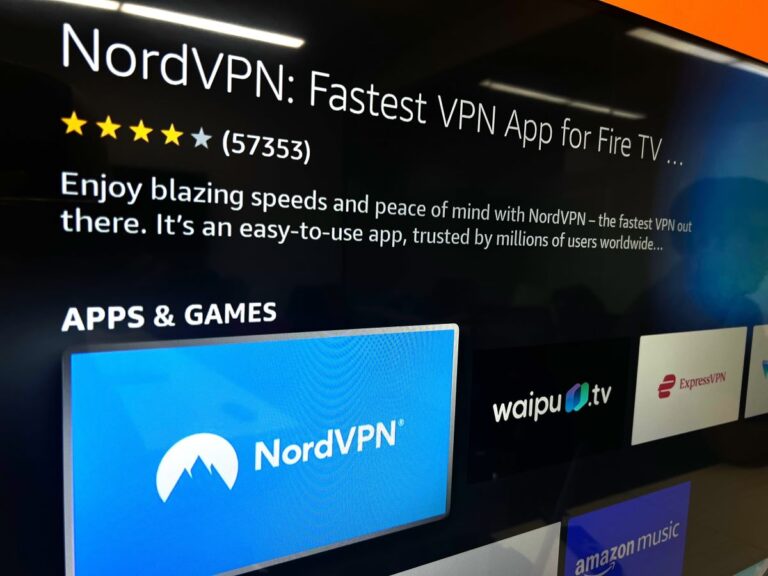
Step 1: Head to your Fire Stick’s Home screen and search for “NordVPN.”

Step 2: Install the app.
Step 3: Once installed, launch the NordVPN app. Ensure you have an active subscription to the service. If you haven’t created an account yet, you can make one here.
Pro Tip: If you’ve been on YouTube any time these past few years, you’ve probably stumbled upon a video sponsored by NordVPN. These sponsored videos always include great discount codes that can save you a pretty penny. So, if your favorite creator has partnered up with NordVPN, don’t forget to use their code and save a buck or two!
Step 4: Head to Log In.

Step 5: Choose a region to connect to.

Now you can navigate content from a wide variety of countries all while keeping your personal information secure!
Has Anyone Gotten In Trouble For Using Jailbroken Firestick?
Currently, there are no known reports of anyone facing legal troubles because of their jailbroken Fire Stick.
That said, there have been cases of people getting arrested and charged by the police for selling jailbroken Fire Sticks. So, if someone online is trying to sell you a jailbroken Fire Stick, steer clear! If you must jailbreak a Fire Stick, it’s best to do so yourself, rather than buy it pre-jailbroken from someone else.
You can learn more about one case where a few individuals selling jailbroken Fire Sticks were caught by watching the news clip below.

Wrapping Things Up
Jailbreaking a Fire Stick can come with several unprecedented legal and security risks. Thus, we are not encouraging this practice and instead recommend using your device’s official apps for all your streaming and gaming needs.
If you do decide to jailbreak your Fire Stick, you must do so using the Kodi app, which allows you to download and use unofficial apps. Remember, the Kodi app worked through add-ons, like Shadow, which requires a Real-Debrid account.
For an extra layer of privacy, consider installing a VPN on your Fire Stick. We use NordVPN, but any reputable VPN will work. Don’t worry, you can still use the Kodi app without one.
Finally, do not purchase any jailbroken Fire Sticks from other individuals. People have gotten in legal trouble for this in the past, so it’s best to avoid it at all costs.
What’s your experience jailbreaking a Fire Stick?
Let us know in the comments below!

Yesenia Achlim is a technical copywriter and editor with a focus on AV equipment. She aims to break down complicated topics and make technology accessible, no matter your technical expertise. When she’s not teaching you how to replace a projector lamp, you can find her reading and baking.

Tai “Ty” Luu, an Electronics Engineering graduate from Sheridan College, is a passionate technical editor with a deep love for technology and gaming. He constantly seeks new challenges to expand his expertise in the tech and gaming fields.