
6 Tested Solutions for Fixing Projector Discoloration: Explaining Blue, Yellow, Red, Green, and Purple Tints
- Projector discoloration can be caused by external factors like tinted screens or video inputs, and can often be resolved by testing with different content or on a white wall.
- Discoloration may also arise from hardware issues such as damaged VGA cable pins or a faulty color wheel, which can be fixed by cable replacement or wheel realignment.
- Incorrect projector settings, such as Custom RBG Offset, Tint, or Color Temperature, can cause color imbalances; therefore, adjusting these settings according to the user manual can correct the discoloration.
In this article, I will share with you six quick solutions to eliminate projector color issues or discoloration.
Let’s get started!
Quick Navigation
Common Causes & Solutions For Projector Discoloration
Projector discoloration is usually caused by one of the following six reasons:
- Corrupted video input or tinted projector screen
- Damaged or bent pins in the VGA cable
- Incorrect color settings
- Damaged color wheel
- Damaged polarizer
- Expired or aging projector lamp
You can refer to our comprehensive guide Why Is My Projector Green? 5 Things To Check to learn about causes one to five. Alternatively, you can continue reading this article to gain a better understanding about all the causes.
1. Corrupted Video Input or Tinted Projector Screen
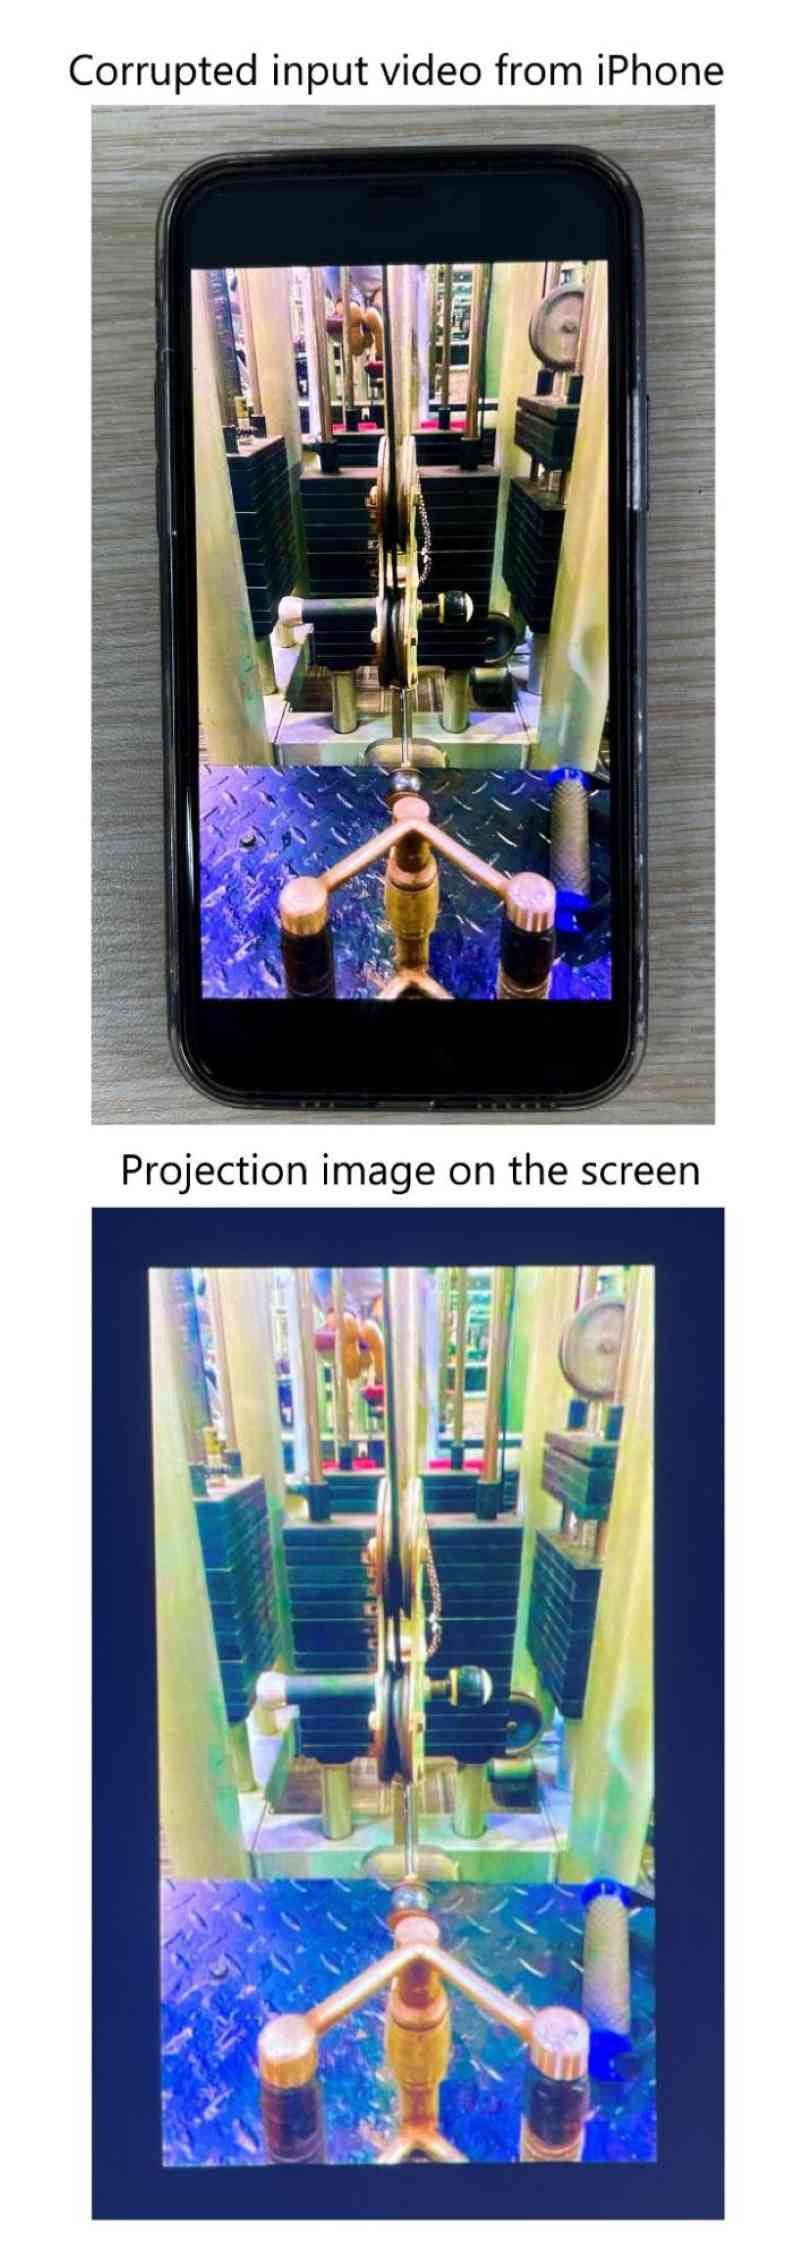
External factors like using a new projector screen or connecting your projector to a new video input, could be to blame for the image’s strange tinge.
For instance, if your video input (e.g. video game, movie on PC) is slightly tinted, green, yellow, blue, etc., then your projector will accurately reproduce the image with said tint. In this case, your projector is not at fault here, as it is correctly reproducing the image’s colors, including its tint.
Additionally, projector screens (or paints) tinted with a specific color (e.g. green, blue, red, yellow, etc.), will make the projector’s image appear tinged with that color, creating a discolored image.
To ascertain which issue is affecting your projector’s coloring, play a different video file with a color scheme you’re familiar with and observe if the same tint is present. If it is, then your projector may be the blame. If the new video file doesn’t display any discoloration, then the previous video file was the culprit.
Finally, try pointing your projector at a blank, white wall to see the projector screen’s affect on the image coloration.
2. Damaged or Bent Pins in the VGA Cable

Damaged or corrupted cables can lead to discrepancies in your projector’s video, such as discoloration. This phenomenon is common when using a VGA cable to connect your laptop to your projector.
The VGA cable connector plugged into your computer is made of several pins that transmit the video input’s red, green, and blue video signals. When any of these pins become bent or damaged, it can cause your projector image’s color to become slightly tinted or discolored.
For instance, if the cable’s pins responsible for transmitting blue signals become bent, the image may become tinted yellow.
Luckily, this issue is completely hardware-related and is easy to spot and resolve. Carefully, observe your cable’s pins and look for any discrepancies in their shape. You may also want to compare your cable to images online to ensure none of the pins are missing, especially pins one, two, and three.
Fixing a broken VGA cable can be a tedious process that yields unsatisfying results. So, rather than trying to fix the cable yourself, I recommend simply replacing it with a new VGA cable.
3. Incorrect Color Settings
The majority of decent-quality projectors will include a variety of color settings that allow users to adjust and customize the image’s color palette and balance.
If you’ve just unboxed your projector or have previously altered these settings, they may have been incorrectly configured, leading to discoloration such as the image boasting a blue, yellow, red, green, and purple hue.
Every projector brand’s settings will be laid out slightly differently, so it’s best to consult your model’s user manual or the manufacturer’s guidelines for comprehensive instructions on how to access and adjust your model’s color settings.
I found that my Epson projector has three settings that are used to control the image’s color. These settings include Custom RBG Offset, Tint, and Color Temperature.
Let’s go over what each of these settings does and how they’ll affect your projector image.
Custom RBG Offset
The RGB Offset setting controls your projector’s unique R (red), G (green), and B (blue) parts of the projector image’s color.
For instance, your projector may have an overall green hue if its G Offset’s value to too high. The same concept also applies to the R and B components.
While we recommend checking your projector model’s specific instructions, I’ve outlined how to navigate my Epson projector’s Custom RGB Offset settings as an example below.
Step 1: Hit the Menu button on your projector’s remote or control panel to open the Menu settings screen.

Step 2: Head to Image followed by White Balance.
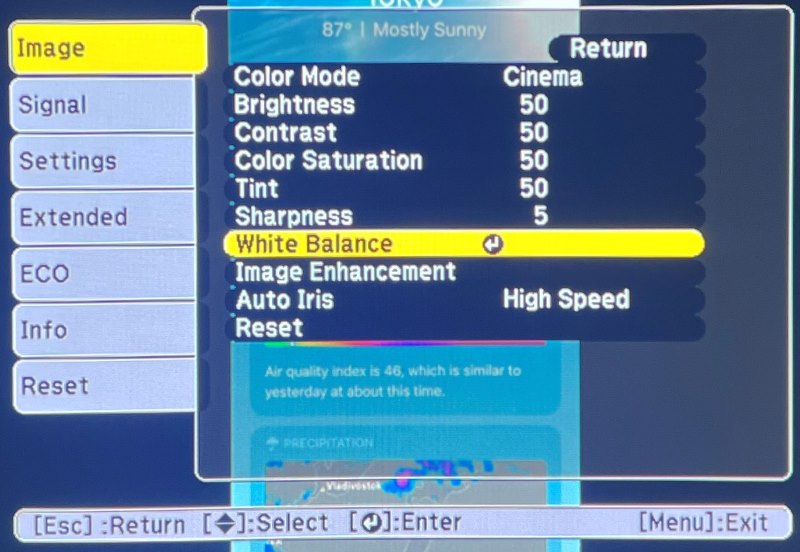
Step 3: Navigate to the Custom settings screen by clicking on Custom.
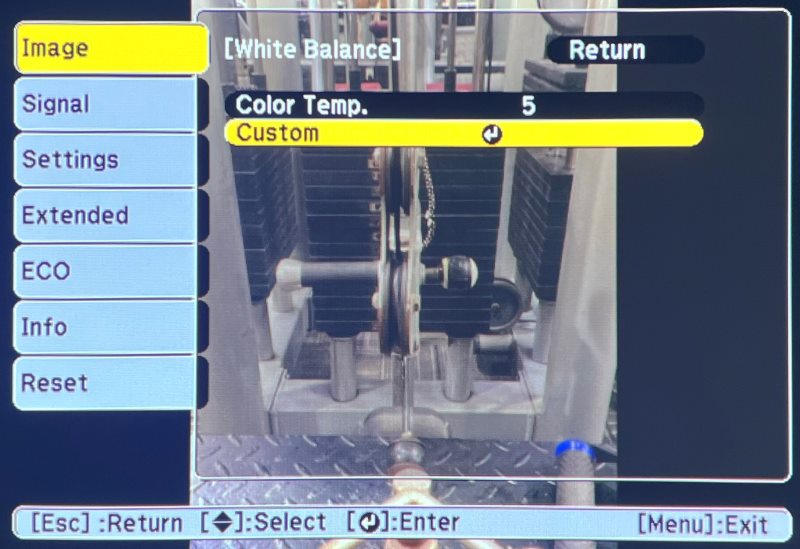
Step 4: The default value for Offset R, G, and B is 50.

So, if your projector has a red hue, decrease the Offset R value.
If your projector has a green hue, decrease the Offset G value.
If your projector has a blue hue, decrease the Offset B value.
If your projector has a yellow hue, increase the Offset B value.
Finally, if your projector has a purple hue, decrease both the Offset R and B values.
This process may take some trial and error, so feel free to play around with the Offset values until you find a balance that works best for your unit.
Tint
My Epson projector’s Tint setting is in the form of a slider scale. This scale’s value can be increased or decreased depending on the image’s tint color. Access your unit’s Tint settings by going to Menu settings screen > Image > Tint.

If your projector’s image has a red hue to it, the Tint value is too low and should be increased.
Should your projector have a green hue, the Tint value is too high and should be decreased.
Again, you will probably have to experiment with your unit’s Tint value to find the perfect balance.
Color Temperature
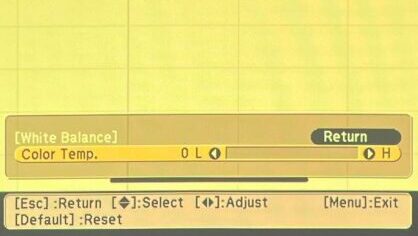
Last, but certainly not least, you should adjust your projector’s Color Temperature setting if your projector image is tinted blue or red. Similar to the Tint setting, the Color Temperature setting is also a slider scale.
If the image has a blue tint, the Color Temperature value is too high, so consider decreasing it. You can do this by heading to Menu settings screen > Image > White Balance > Color Temperature.
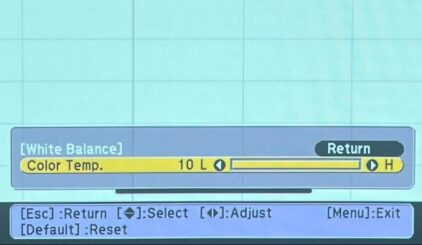
If the image has a red tint to it, the Color Temperature value is too low and should be increased.
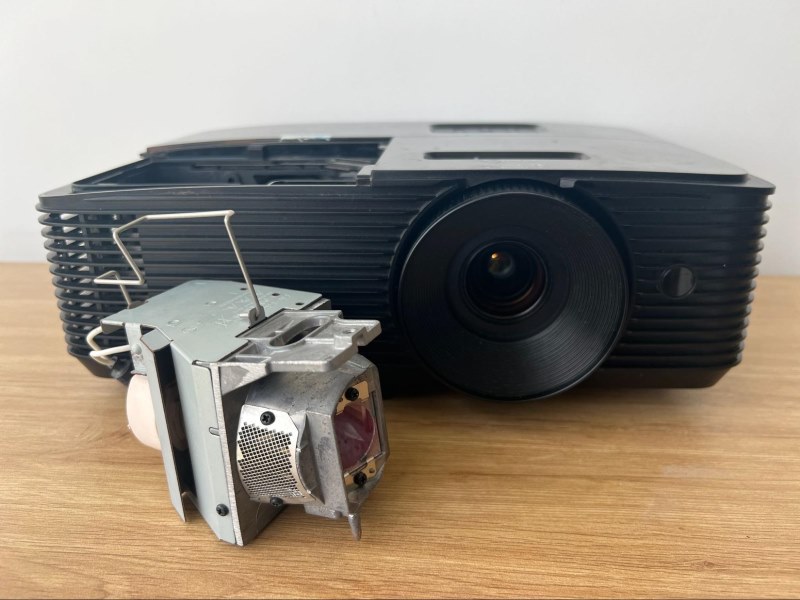
4. Damaged Color Wheel
As previously discussed, DLP projectors’ color wheels are imperative to their functionality and accurate color reproduction.
However, color wheels can become misaligned, worn out, or damaged, especially when your projector has been in use for several years. A broken color wheel often results in inaccurate color reproductions or the appearance of the rainbow effect, which tints your projector image several different colors.
Additionally, the wheel’s misaligned color segments can lead to color bleeding, which makes the image’s color muddle and bleed along the image.
If any of these issues sound similar to what you’re experiencing, consider replacing your unit’s color wheel. While any projector technician can complete this process, you can also try changing the wheel yourself by following the instructions outlined in the video tutorial below.

That said, if you have little or no prior technical experience, I suggest contacting the brand’s customer service or bringing your unit to a projector technician who will ensure the new wheel is correctly replaced and aligned. Please note that incorrectly replacing your projector’s color wheel could lead to further discoloration, so it’s best to ensure the replacement process is done correctly.
5. Damaged Polarizer
LCD projectors are fitted with polarizers that align the light that passes through the liquid crystal panels.
When damaged or burnt out, the polarizer can lead to color shift, reduced color vibrancy (dullness), or, in some cases, the complete lack of certain colors.
If you notice your projector’s image is incorrectly reproducing certain colors, is dull, or missing certain colors, it’s a good idea to replace the polarizer. While this process is a little lengthy, it’s easy enough to do at home. Follow the instructions outlined in iFixit’s guide Polarizer Replacement for Tri-LCD Projectors.
That said, it is always best to have a professional technician replace the polarizer for you. If your projector’s warranty is still valid, the manufacturer may even replace it for free.
6. Expired or Aging Projector Lamp
A projector’s lamp life can have several drastic effects on the image’s color quality and brightness. If the lamps expire or aging, you may notice the projector image is dull and weak, making it hard to see certain details or colors on-screen.
To ensure your projector is accurately reproducing colors vividly, you must replace the lamp as soon as its lifespan has expired. Most lamp projectors have a lamp life timer within their settings or will display a red/orange LED light when the lamp must be changed.
To learn about different projector lamps’ average lifespans (e.g. LCD, DLP, LED, laser) head to our article Projector Life Expectancy 101.
Once you’ve confirmed your projector lamp is indeed expired, check out iFixit’s guide BenQ HT1075 Projector Lamp Replacement to learn how to replace it yourself.
Finally, if your BenQ projector’s lamp is flashing red, head to our article Why Is My BenQ Projector Lamp Light/Indicator Red? for a comprehensive guide on how to fix it.
Additional Tips for Preventing Projector Discoloration
Once you’ve resolved your projector’s discoloration, it’s important to take a few extra steps to ensure this problem does arise again.
Follow our tips and tricks below to prevent projector discoloration from plaguing your movie nights.
1. Keep the Projector in a Dust-Free Environment
A dusty projector can drastically affect the image quality and, in some cases, even permanently damage the unit’s internal components.
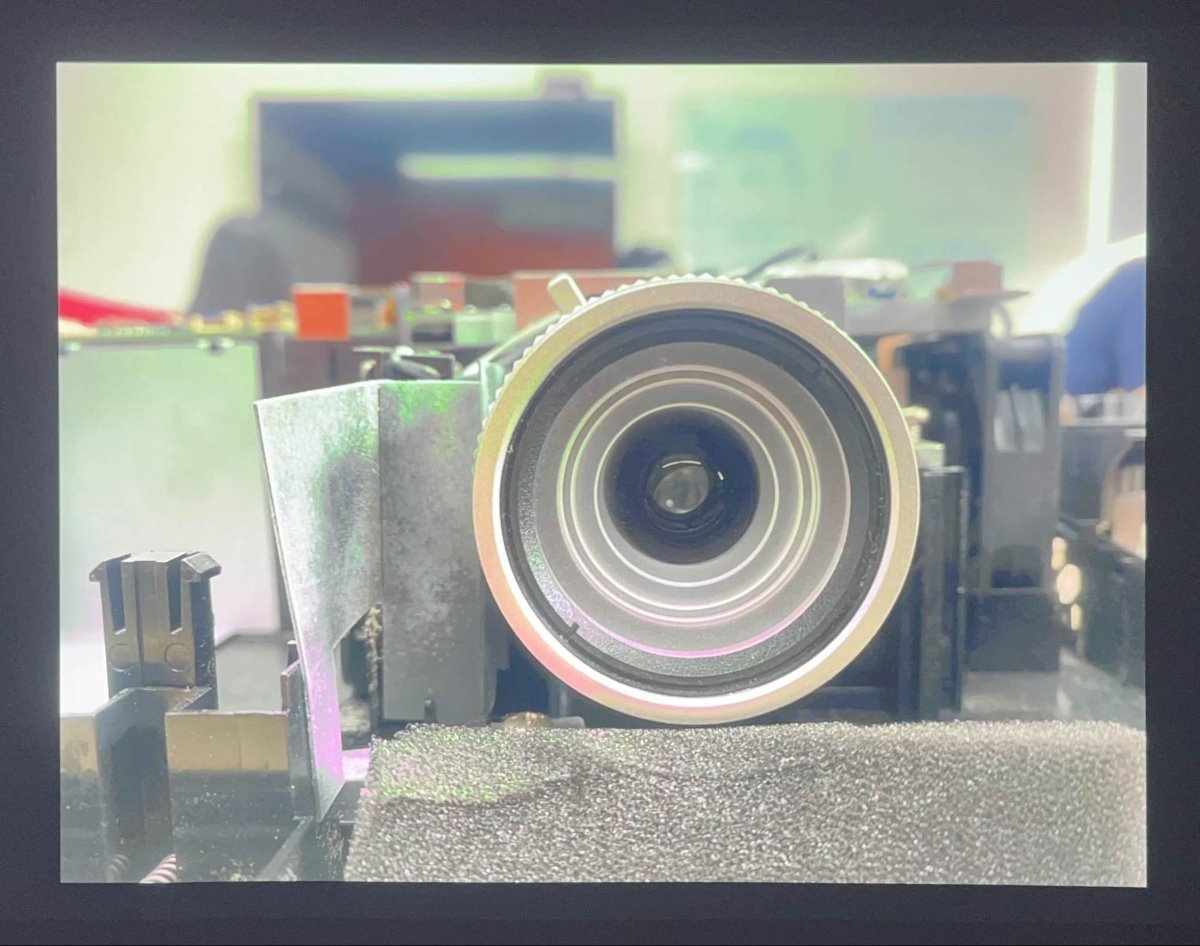
The dust particles create microscopic scratches along the lens’ surface, decreasing the image quality and dulling the colors’ brightness.
To ensure your projector’s image quality and color accuracy aren’t negatively affected by dust, frequently clean your unit’s vents, filters, and lens to prevent dust and debris from building up in its delicate components. These projector components are quite delicate, so make sure to follow your manufacturer’s cleaning instructions to avoid damaging them.
To learn how to safely clean a projector, check out our detailed guide.
2. Avoid Extreme Temperatures
High temperatures and overheating can cause your projector to malfunction and reduce the lamp and other internal components’ lifespans. Dusty and poorly-ventilated projectors are more prone to overheating as they cannot properly ventilate.
So, if you haven’t done so already, ensure your unit’s vents are clear of dust and aren’t being blocked by any foreign objects. Also, keep your room at a comfortable temperature that is neither excessively hot nor cold. Never place your projector right under or next to a heater or AC unit.
You can learn more about how to prevent overheating by heading to our comprehensive guide.
3. Use Power Surge Protectors
Power surges (e.g. due to lightning or fuse blows) can temporarily or permanently damage your projector’s sensitive electronic components. In some cases, these surges can cause minor issues (like image discoloration), while in other cases, they may completely ruin your unit.
To protect your unit from voltage fluctuations, invest in a reliable power surge protector. Some surge projectors even have multiple outlets, allowing you to connect multiple devices to them simultaneously. Just be mindful of its maximum voltage limit so you don’t overcrowd it.
4. Perform Regular Maintenance
The projector manufacturer should have comprehensive guidelines for routine maintenance to extend the components’ lifespans. You can see Epson’s guide to projector maintenance here. Following these guidelines can drastically increase the longevity of your projector’s lens, filters, lamps, and other accessible parts.
Most projector maintenance tasks only take a few minutes and can prevent further issues from arising that can result in discoloration.
Understanding How Projectors Reproduce Colors
Projectors use unique methods of replicating colors and creating the wide hue range we all know and love. However, sometimes this process can go array, giving the image a strange hue.
It’s important to understand exactly how projectors reproduce colors to understand why this phenomenon happens.
There are various types of projectors with each using a different color-reproduction method. However, for the sake of this article, I’ll focus on the two most popular projector technologies: DLP and LCD.
DLP Projectors
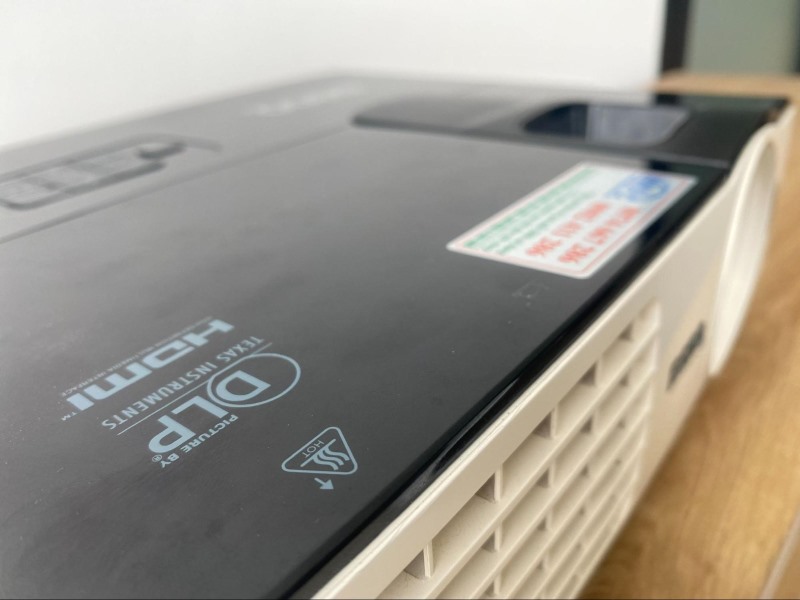
DLP (or Digital Light Processing) projectors create and reproduce every color of the rainbow by reflecting light through a color wheel using microscopic mirrors.
Each one of the projector’s microscopic mirrors corresponds to and controls a pixel, with the color wheel filtering the light into red, green, and blue (or RGB), components, creating the colors you see on-screen.
Every projector color wheel has four segments: red, green, blue, and white. These four colors then make up every hue the projector emits. Your projector’s microscopic mirrors reflect the wheel’s corresponding color segments as it spins, allowing the projector to reproduce almost every color accurately.
This process can be a little abstract to understand, but a visual depiction of this process can help. Watch the video below demonstrating how DLP projectors work.

LCD Projectors
Another common projector type is LCD (or Liquid Crystal Display). Instead of using mirrors to reflect color, LCD projectors accurately reproduce colors using liquid crystal panels.
Inside every LCD projector, you will find three distinct liquid crystal panels for each RGB color channel.
To create images, the projector’s light passes through each of these liquid crystal panels which, when combined, create color-accurate images.
In addition to using liquid crystal panels, LCD units also use polarizers which ensure the light is properly aligned when shining through the panels. These polarizers carefully filter light so only specific polarizations pass through each panel, creating accurate and realistic color reproductions.
Watch the video below demonstrating how LCD projectors reproduce colors.

Wrapping Things Up
Projector discoloration can be startling and shocking. However, it’s usually caused by something as simple as a corrupted video input, tinted projector screen, broken VGA cable, or incorrectly adjusted settings.
In some cases, you may need to replace your unit’s color wheel or polarizer if you find that none of the simpler solutions resolve the problem. If you’ve had your projector for several years, the discoloration may be a result of an expired lamp, which is easily replaceable.
To prevent further instances of discoloration, ensure to keep your projector dust-free, keep it away from extreme temperatures, use a power surge protector, and perform regular maintenance.
What’s your experience with projector discoloration? Which one of our solutions fixed your projector’s coloring?
Let us know in the comments below!

Yesenia Achlim is a technical copywriter and editor with a focus on AV equipment. She aims to break down complicated topics and make technology accessible, no matter your technical expertise. When she’s not teaching you how to replace a projector lamp, you can find her reading and baking.

Hai Huynh, an Electrical & Electronics Engineering graduate from Ho Chi Minh City University of Technology, is a passionate technical editor. He discovered his love for technology when he started playing Pokemon on a Gameboy as a child. Now, he writes and edits technical articles, focusing on smart TVs and streaming devices, to help readers solve problems.
I’m so glad that you bring what l need thanks