
How to Clean an Optoma DLP Projector? (Air Dust Filter, Lens)
")
What To Know
- For cleaning the lens and mainboard, specific instructions are given such as using a soft, lint-free cloth, avoiding touching with bare hands, and using a mini vacuum or anti-static brush for the mainboard, with cautious use of isopropyl alcohol for tough stains.
- If a dust filter warning occurs on a model without a dust filter, the solution is to adjust the Filter settings in the projector’s menu to indicate no filter is installed; for models with a dust filter, consult the manual for specific cleaning instructions.
This article will show you how to effectively clean your Optoma DLP projector, ensuring you continue to enjoy crisp, high-definition visuals without reverting to a smaller screen.
We’ll cover the importance of regular cleaning and provide you with a detailed guide to tackle this task.
Time to ensure your projector’s longevity and optimal functionality with a thorough clean.
Quick Navigation
How To Open/Disassemble Optoma Projector
Before cleaning your Optoma projector, you need to disassemble the projector to access the internal components.
Please note that the disassembly process may vary depending on the specific model of your Optoma projector.
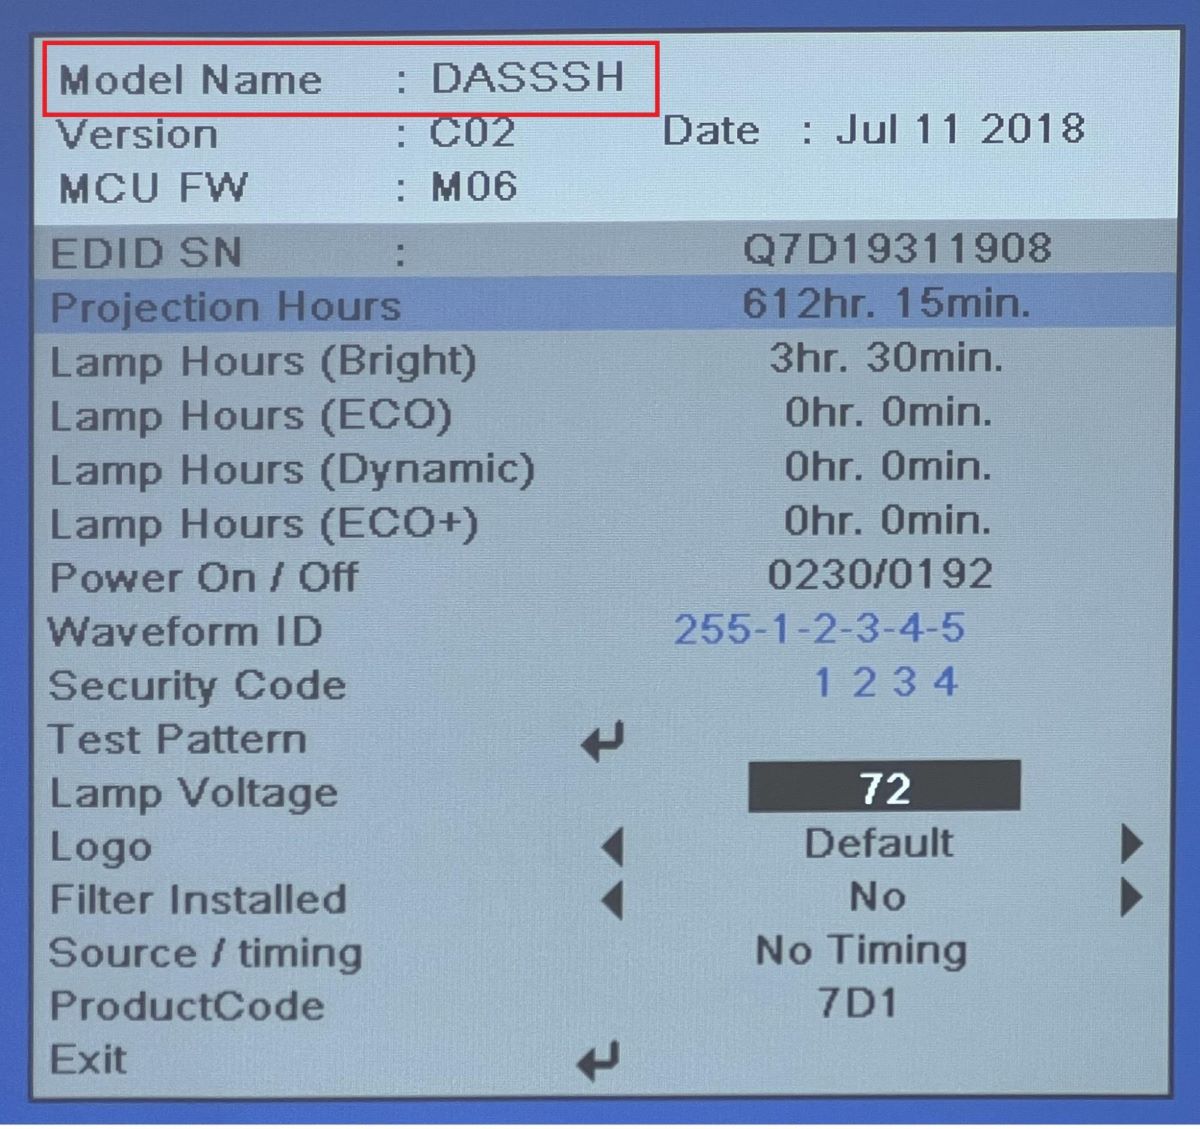
Let’s proceed with a step-by-step guide on how to disassemble my Optoma projector. The model of my Optoma projector is DASSSH.
If you have a different Optoma projector model, you can find the appropriate instructions by following the provided links for Optoma 180X, HD33 and HD70.
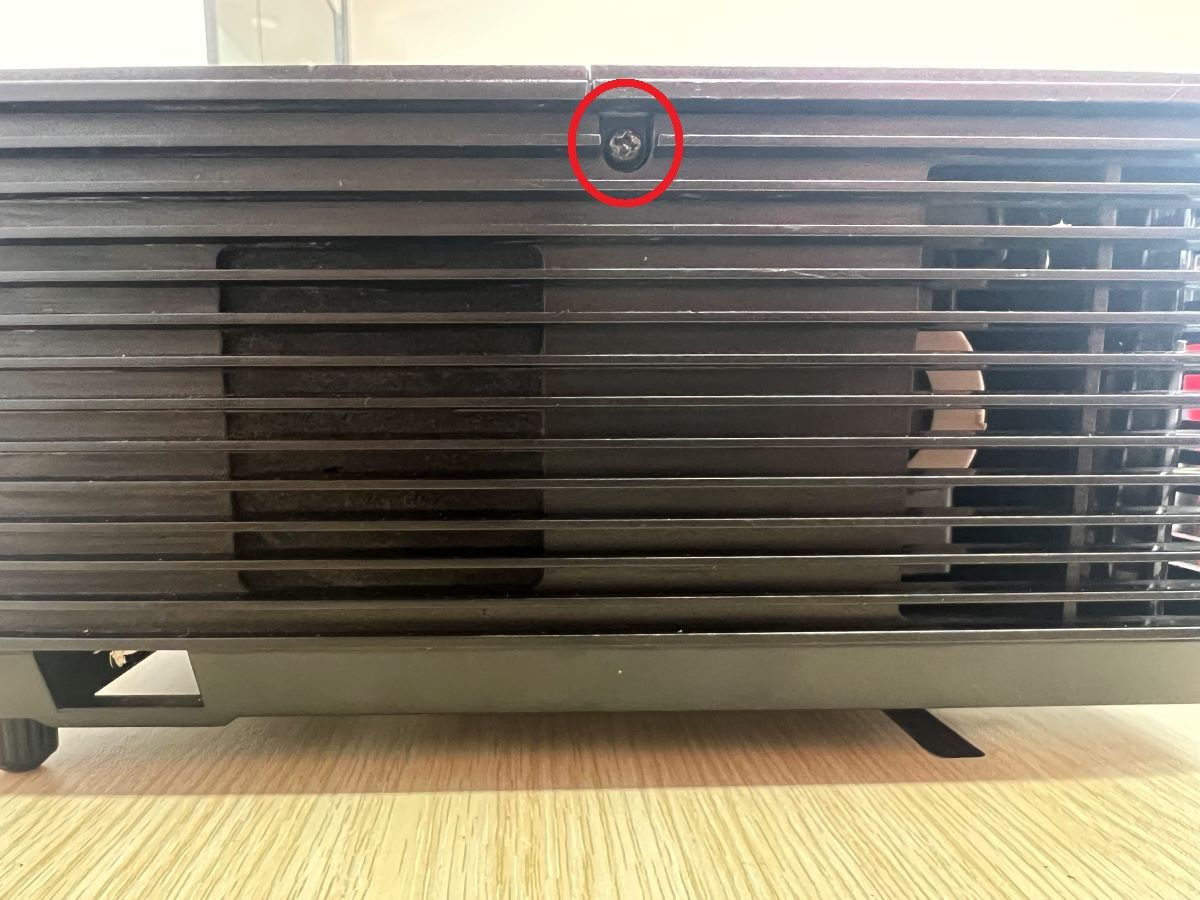
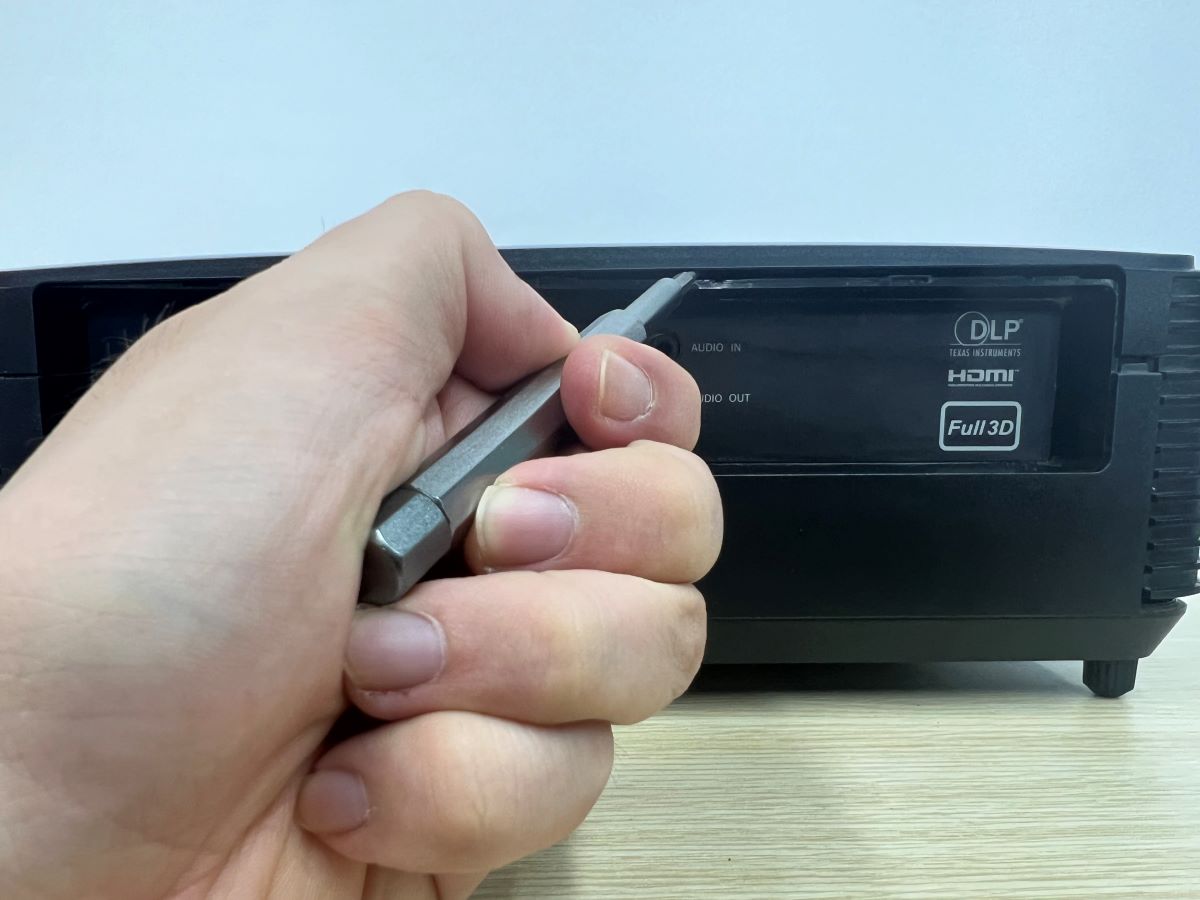
Step 1. Remove the projector light bulb covering, locate the screw on the side of the projector and unscrew it using a screwdriver.
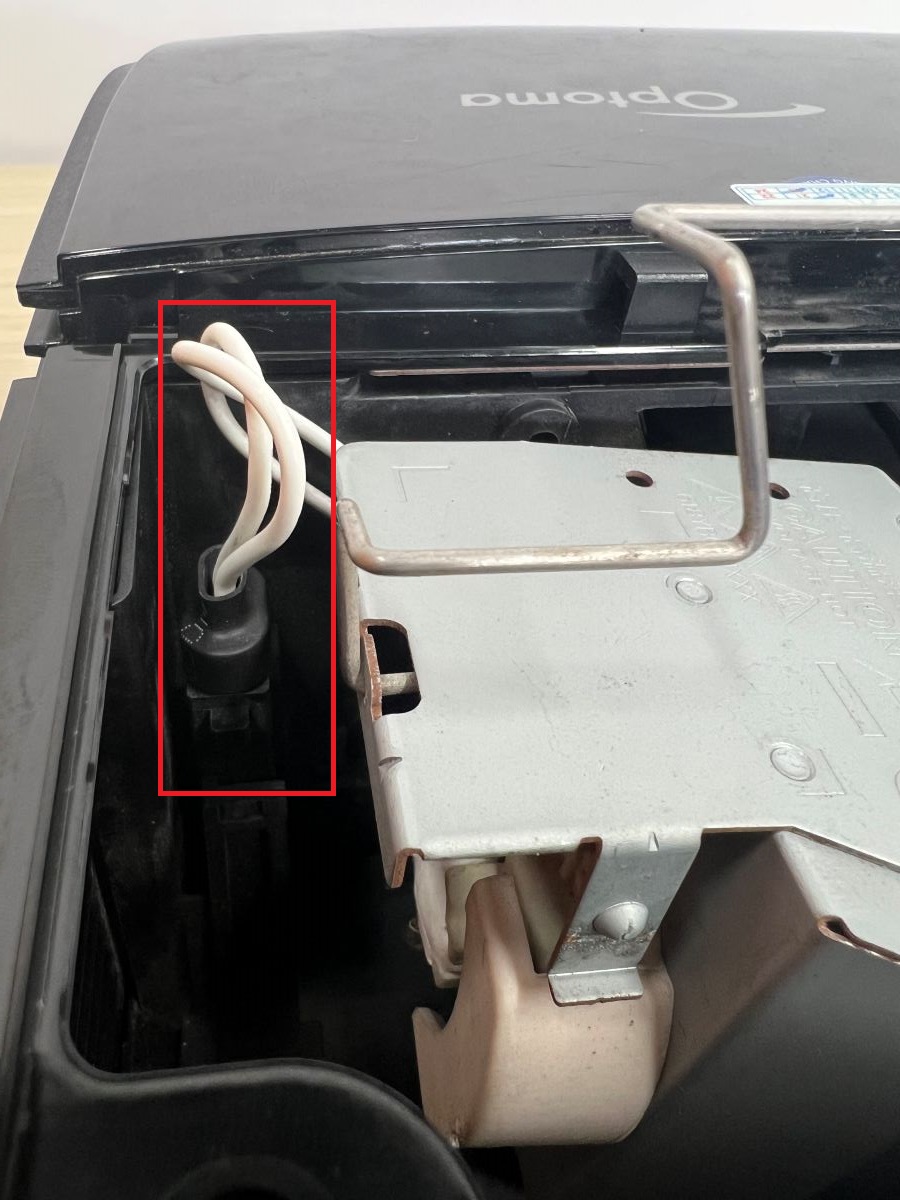
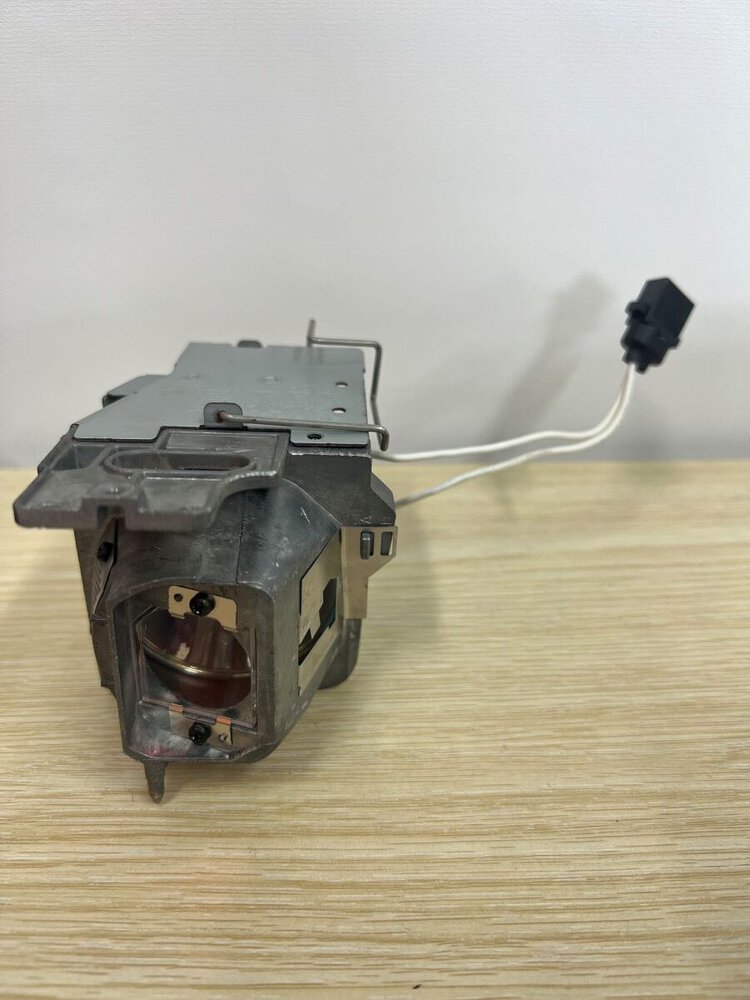
Step 2. To remove the light bulb, you need to unscrew the small screw that secures the light bulb in place using a screwdriver.
After removing the screw, remember to disconnect the power cord that supplies power to the projector light bulb.

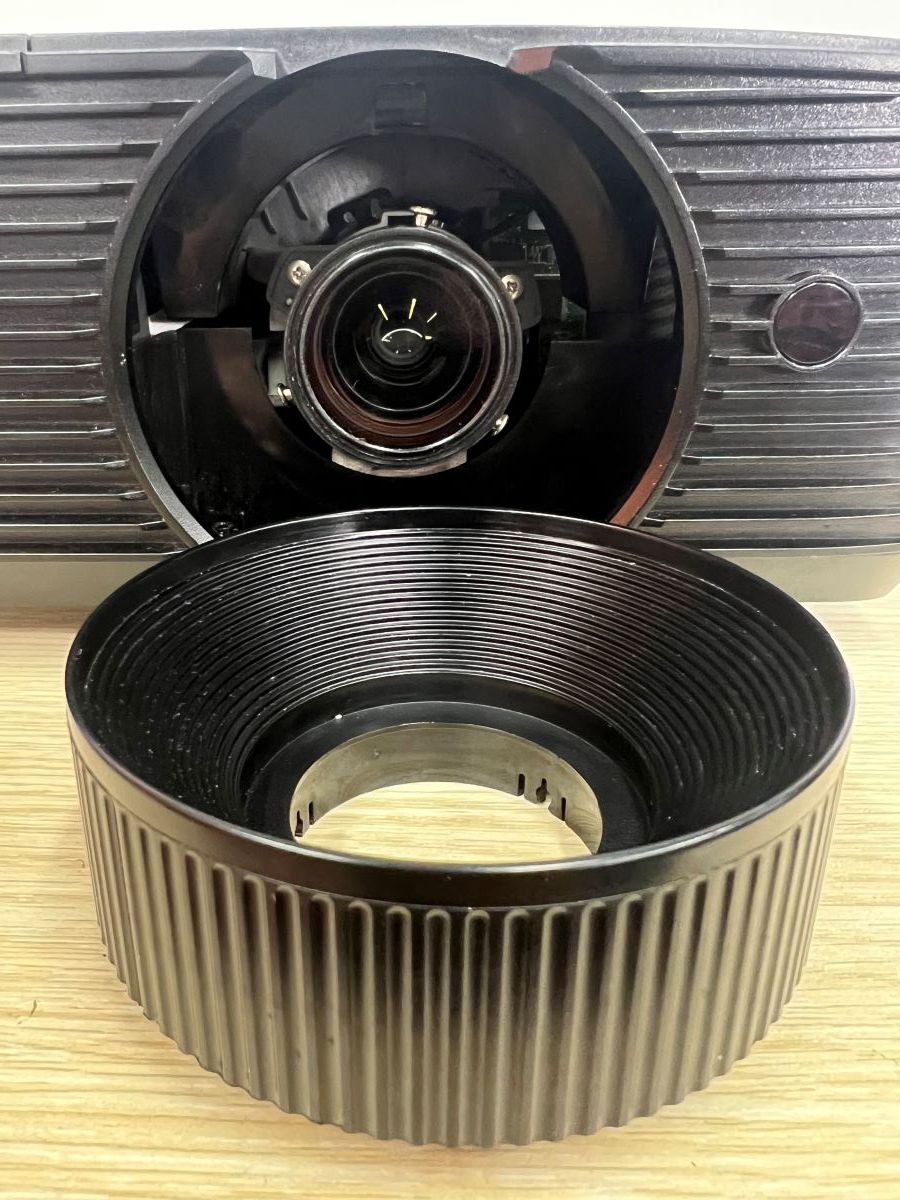
Step 3. Before removing the cover case of the entire projector, you will have to take off the focus wheel.
The focus wheel is secured by three screws, you should be able to easily unplug the wheel, but be careful, don’t use too much force or you could damage it.
Using your bare hands, apply enough force to twist and pull the focus wheel until you hear a clicking sound.
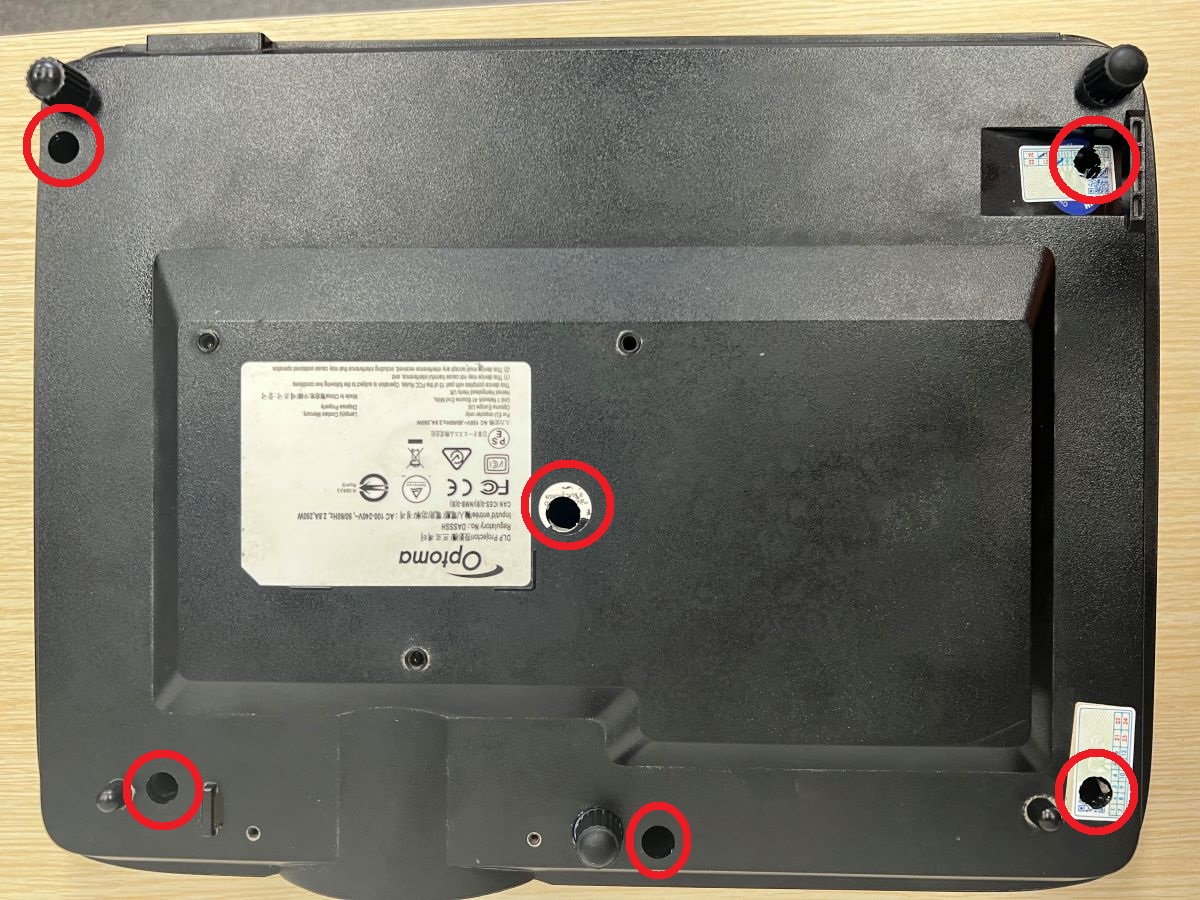
Step 5. Once the focus wheel has been removed, flip the projector over and unscrew the screws that hold the cover cases together.
On my projector, there were six screws that needed to be unscrewed, located at the bottom of the device. The image below indicates their location.
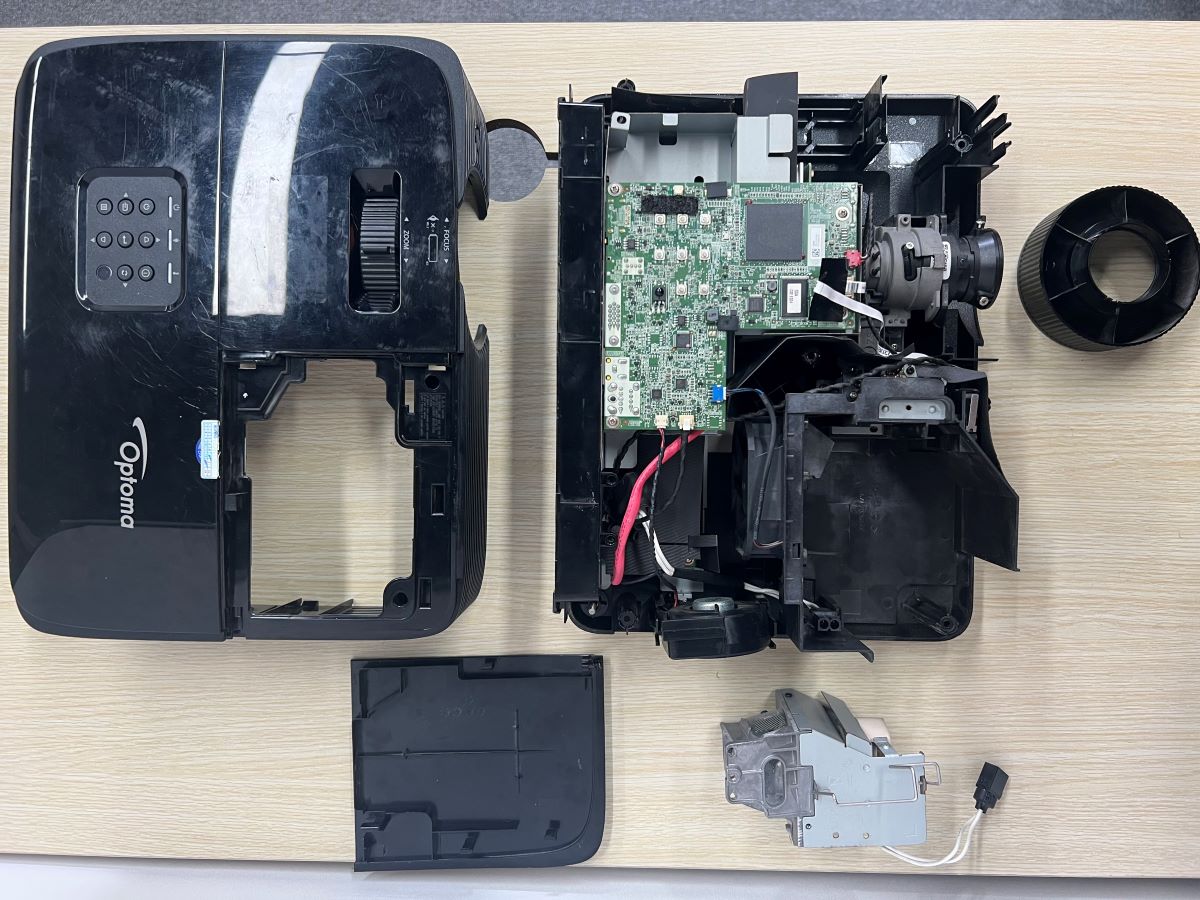
Step 6. Once the bolts have been removed, you can lift off the top cover of the projector.
There are several latches around the cover cases that are difficult to remove with bare hands. To facilitate the process, try using a flat tool, such as a screwdriver, to make the task easier.
Final result
Cleaning Your Optoma Projector
Now that you have disassembled your Optoma projector, you can proceed to clean specific parts.
The following guidelines will help you effectively clean your Optoma projector.
Cover Case

To clean the cover case of your Optoma projector, use a soft microfiber cloth or specialized electronics cleaning wipes.
Delicately wipe the surface of the cover case to eliminate any dust, fingerprints, or smudges.
To safeguard the surface and internal components of your Optoma projector, it is advisable to refrain from using harsh chemicals, abrasive materials, or excessive moisture as they have the potential to cause damage.
Light Bulb
Do not use alcohol spray, wipe cleaner, or any flammable substances when cleaning the projector light bulb.
The intense heat generated by the bulb poses a potential fire hazard.
Instead, use a soft, dry cloth or specialized electronics cleaning wipes to gently wipe the surface of the light bulb.
Fan
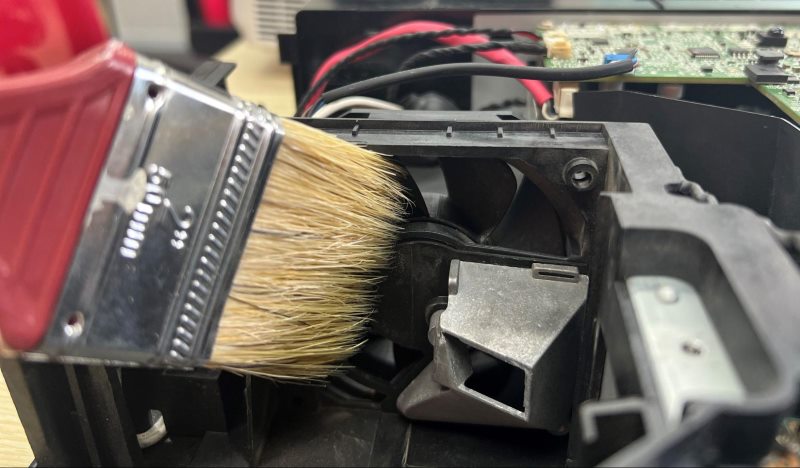
If possible, disassemble the fan from the projector and wipe off any dust using a dry cloth. If not, a vacuum or brush will suffice for cleaning.
Lens
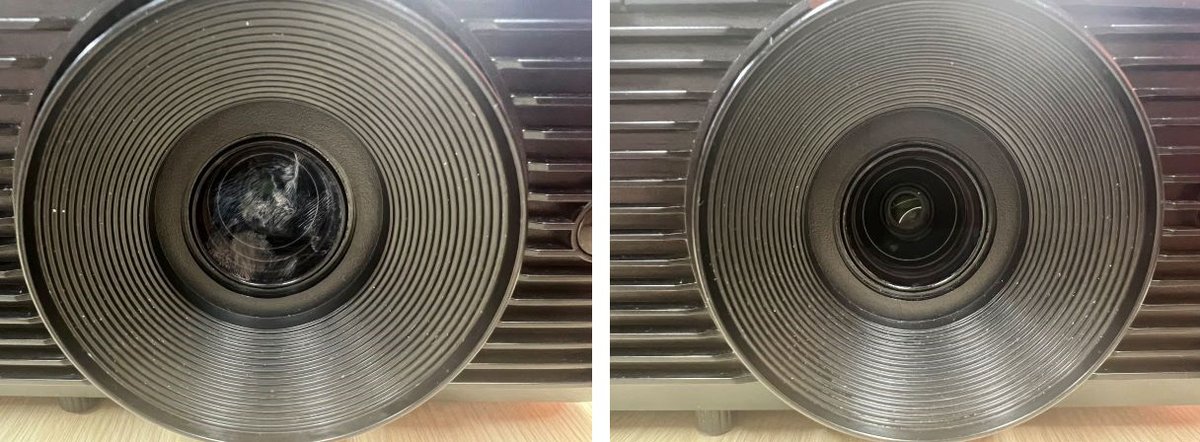
Cleaning the lens on an Optoma projector is relatively easy. Once the unit has cooled down, and you’ve disassembled and removed the faceplate, you will need the following:
- A soft, dry, lint-free cloth that you can buy at a camera or photography store
- A lens-cleaning solution
Once the projector is open, access the lens. Put a drop or two of the cleaning solution on a clean cloth and carefully wipe the lens in circular motions.
Do not touch the lens with your bare hands, as the oil from your fingers could leave burn marks when the lens heats up. Also, fingerprints are the hardest to remove and will affect the projector’s picture quality.
Do not use abrasive solvents or other cleaning chemicals as they can damage the lens. Do not use alcohol either.
Also, do not wipe the lens with paper towels or tissues as they have rough fibers that can leave scratches.
Mainboard
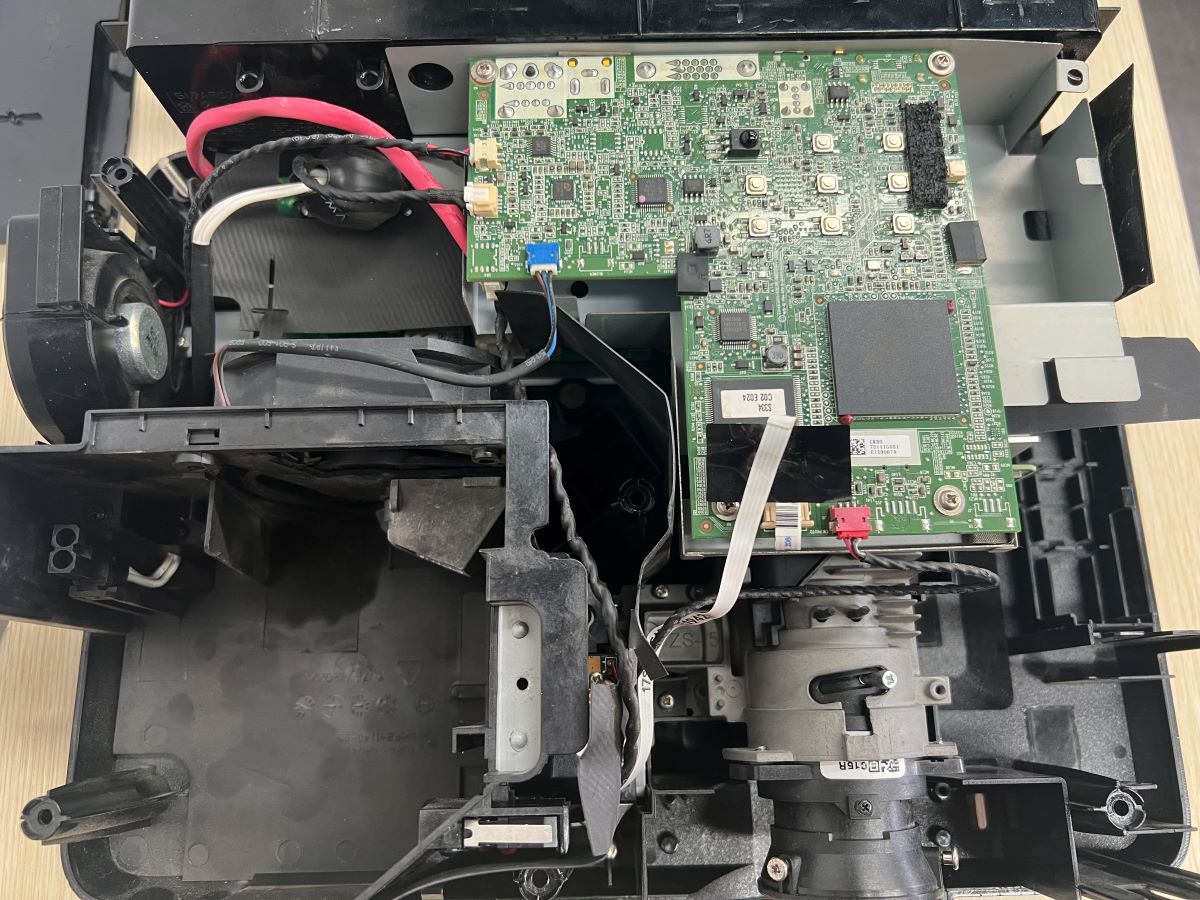
To clean the mainboard, use a mini vacuum to remove any dust. Avoid touching the mainboard with bare hands or any part of your body to prevent static damage to the mainboard’s components.
Use a soft, dry brush or an anti-static brush to gently remove any loose debris or dust from the mainboard. Avoid using abrasive materials or excessive force that could scratch or damage the components.
If there are stubborn stains or grime on the mainboard, lightly dampen an anti-static cloth or a lint-free cloth with isopropyl alcohol.
Gently wipe the affected areas, taking care not to apply excessive pressure. Allow the mainboard to dry completely before reconnecting the power supply and turning on the system.
How To Fix Optoma Dust Filter Warning
While certain Optoma projectors lack a dust filter, users might still encounter error messages instructing them to clean or replace the non-existent filter.
To resolve this issue, you need to change the Filter settings to indicate that there is no dust filter.
Here’s how:
- Plug in and turn on your Optoma projector.
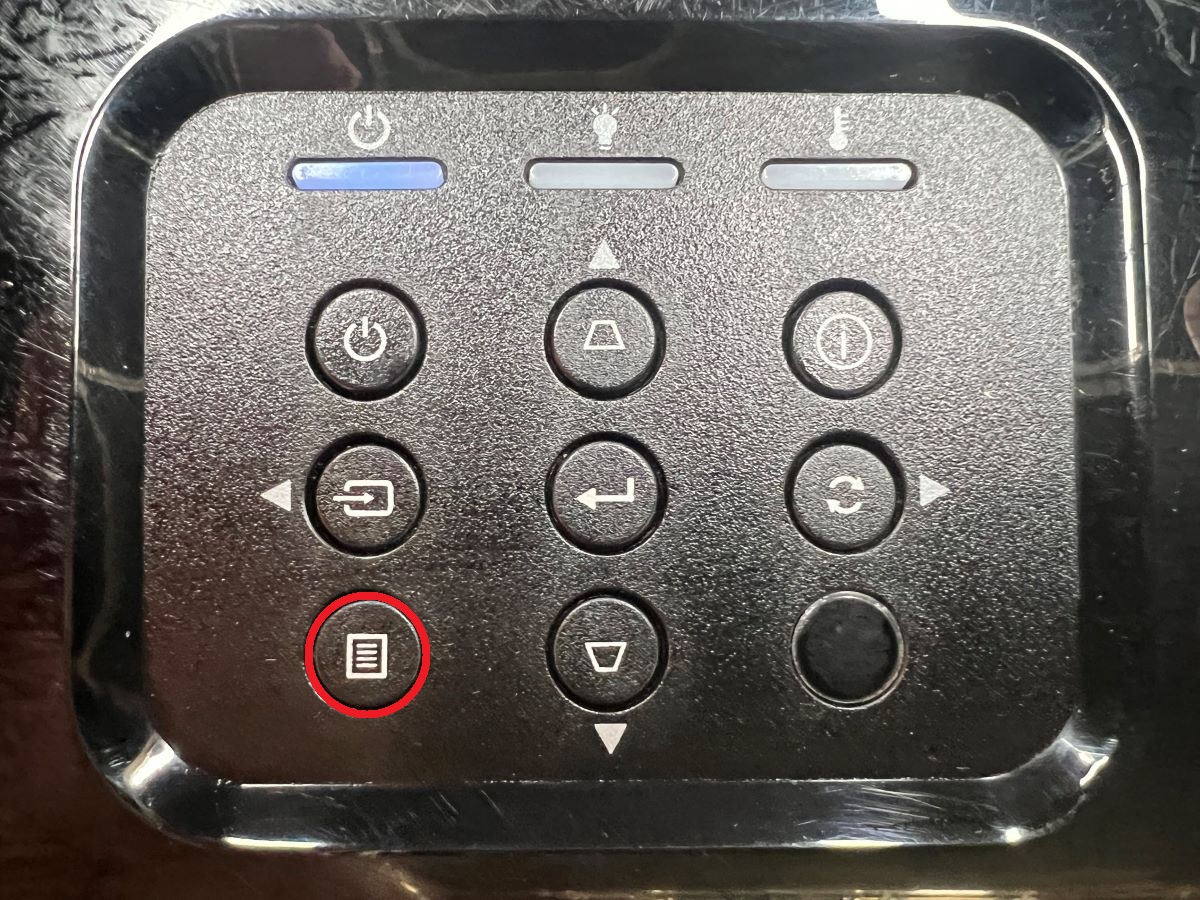
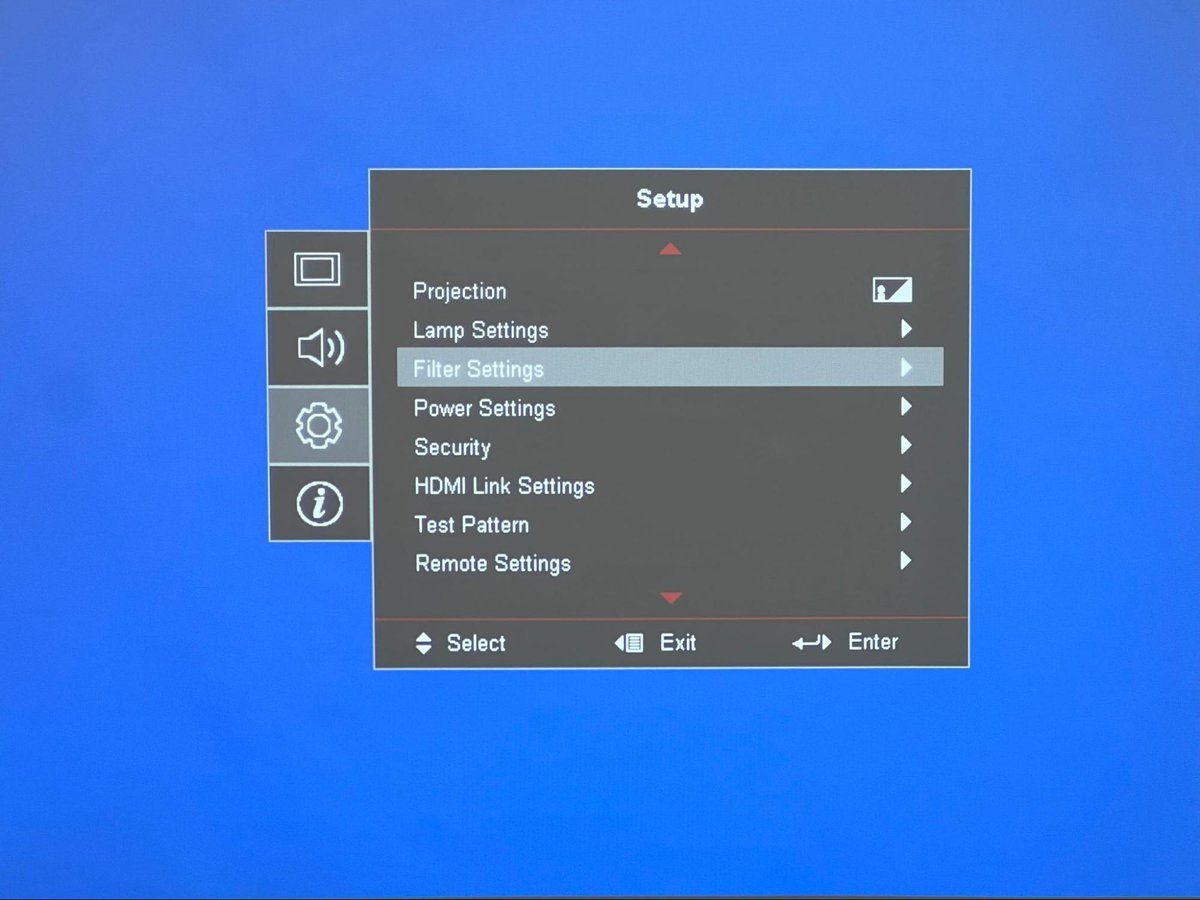
- Press the menu button on the projector.
- Select the Setup option.
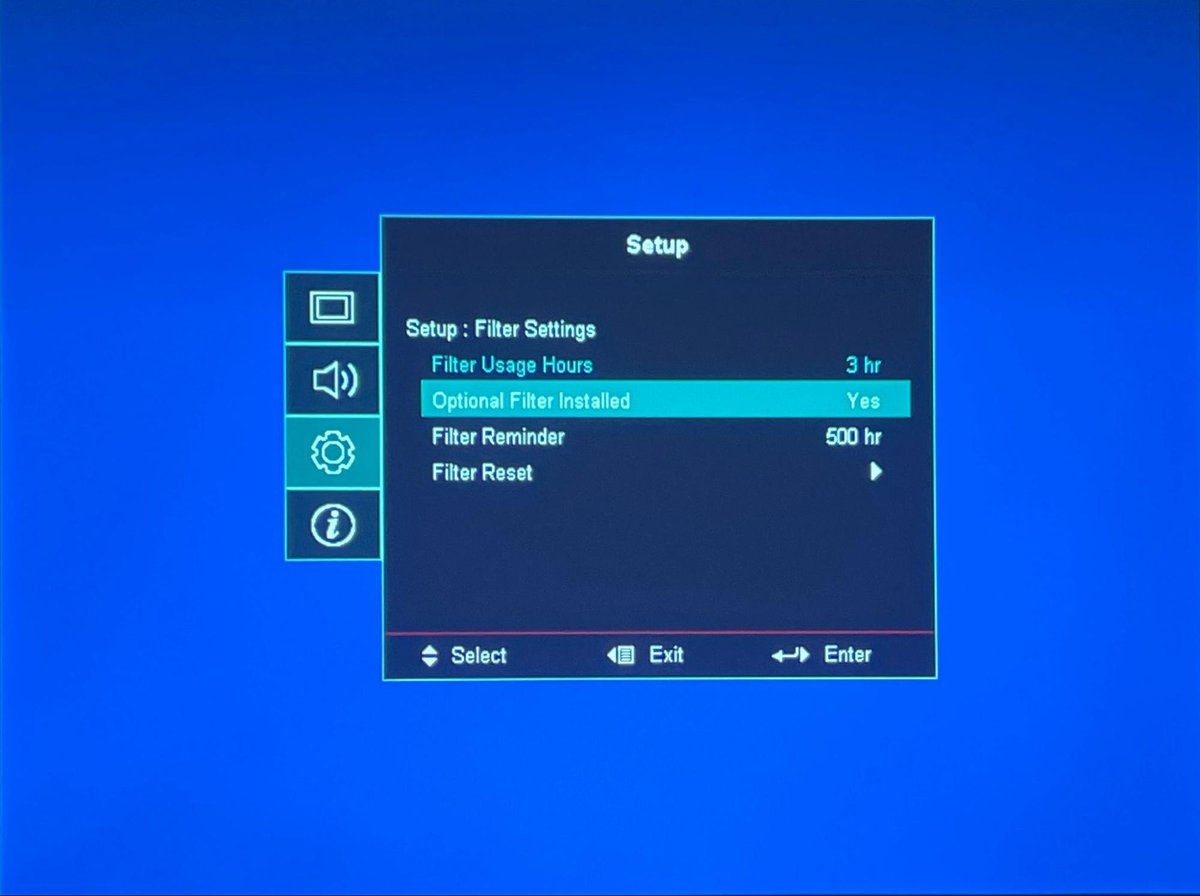
- Choose Filter Settings.
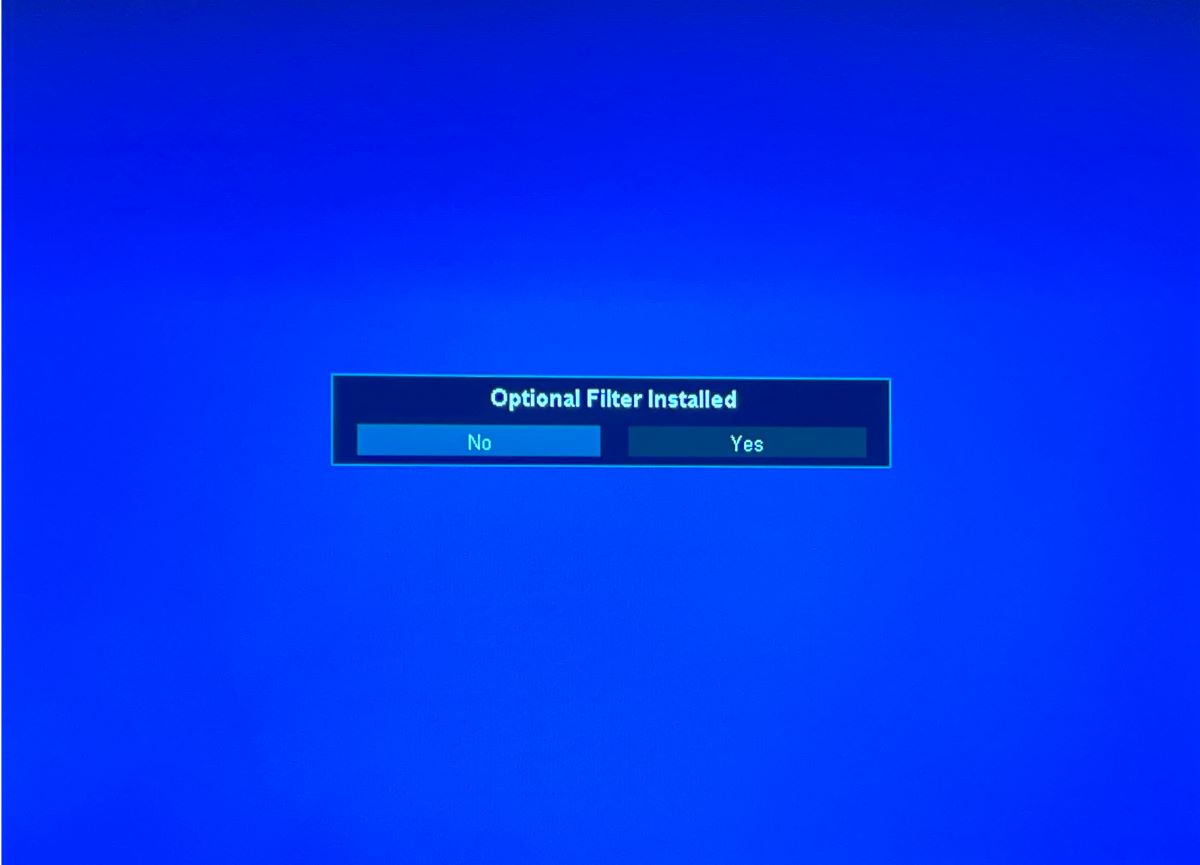
- Select Optional Filter Installed and change the status to No.
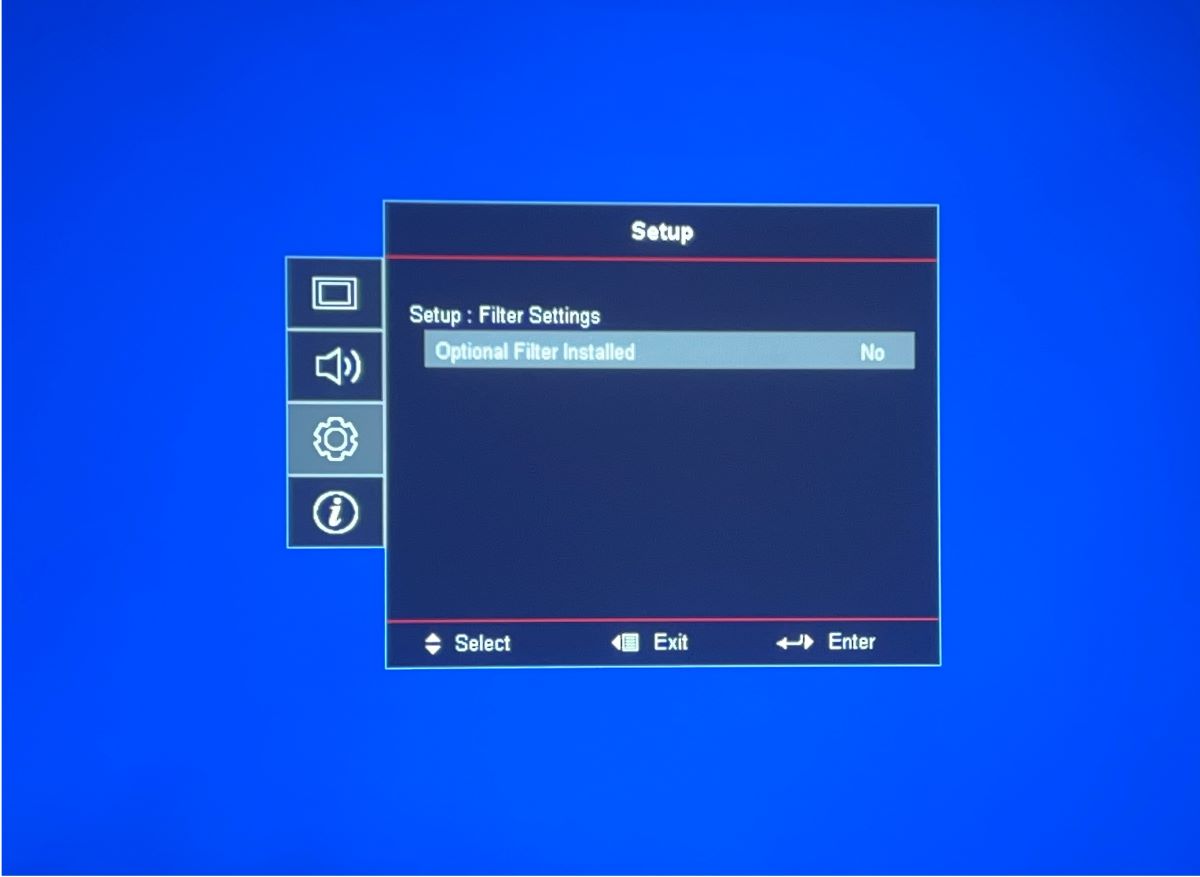
The result at the end should look like this
How To Clean Optoma Projector Dust/Air Filter
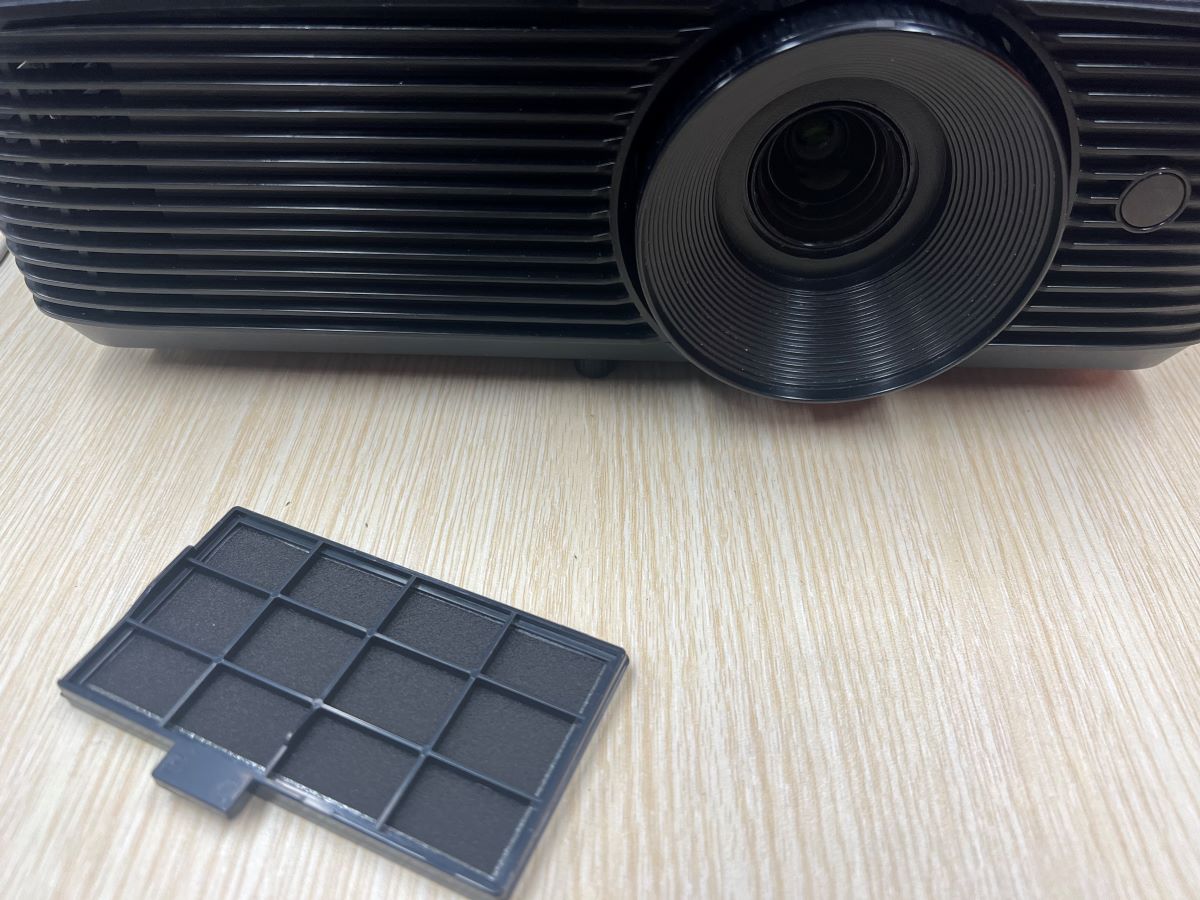
Learn how to properly clean and replace the dust filter of your Optoma projector by referring to the included manual.
Whether you own an Optoma HD143X or a similar model like the Optoma HD146x, this invaluable resource offers detailed instructions to ensure an optimal projection experience, free from dust and debris
This comprehensive guide provides detailed step-by-step instructions for maintaining an optimal dust-free projection experience.

Tai “Ty” Luu, an Electronics Engineering graduate from Sheridan College, is a passionate technical editor with a deep love for technology and gaming. He constantly seeks new challenges to expand his expertise in the tech and gaming fields.