
A Step-by-Step Guide: How to Project onto Ceiling
- Using a lightweight projector on a tripod is recommended for ceiling projections. To ensure the image is displayed correctly, adjustments using keystone correction are essential.
- For optimal viewing, it’s essential to prepare the ceiling by ensuring it’s smooth and using specific “screen paint” that enhances projection quality.
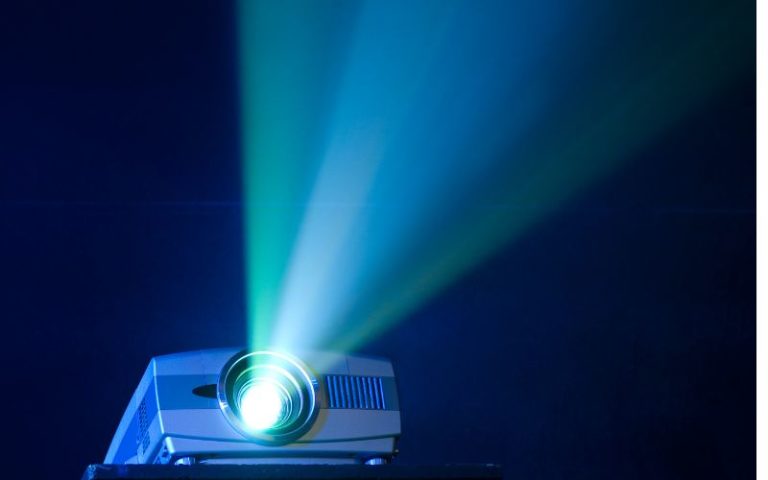
Considering a ceiling movie night or showcasing art in an unconventional space? Can a projector display on a ceiling? Absolutely!
Discover the essentials for optimum ceiling projections and how to get the best visuals.
Dive in to learn more!
Quick Navigation
How Do I Get My Projector to Project on a Ceiling?
Follow the steps below to get your projector to projector on a ceiling.
Let’s go over what materials you’ll need to have and which steps you must take to make your projector project on any ceiling!
Materials Needed:
- Sandpaper

- Swivel pole sander (optional)
- Spackle (optional)
- Putty knife (optional)
- Screen Paint
- Paint roller
- Paint tray
- Projector Tripod
- Lightweight projector
Step 1: Prep Your Ceiling
For your projector to have the brightest and clearest image possible, your ceiling must be smooth and free of any imperfections.
Remember to cover your bed and furniture with plastic sheets to avoid getting plaster on them.
Scrape and sand away lumps or ridges to create a smooth surface for your projector to project onto. You wouldn’t project onto a wrinkled projector screen, so why would you project onto a bumpy ceiling?
If you spot any holes or dents, spackle over them and use sandpaper to even out the surface.
If you have especially tall ceilings, you may need to use a swivel pole sander , which allows you to reach all corners of a tall ceiling without climbing onto furniture.

The video below demonstrates how to sand ceilings using a swivel pole sander.

Once your ceiling is completely smooth, it’s time to get painting!
Step 2: Paint Your Ceiling

Paint your ceiling with screen paint.
Screen paint is different from your standard white paint as it is specifically designed to reflect the perfect amount of light for home theaters.
If you’re planning on projecting onto your ceiling often and enjoy a high-resolution picture quality, you’ll be glad you took the time to properly prep and paint your screen.
If you’re planning on projecting content during daylight, consider using an ambient light rejecting (ALR) screen paint.
Depending on the screen paint, you’ll usually need to give it a good stir to get rid of any clumps.
Once smooth, apply one or two even layers according to the paint’s instructions, letting it dry between layers.
Once dry, you’re ready to set up your projector!
Step 3: Set up Your Projector on a Tripod

Using a tripod is a great way to point your projector towards the ceiling while allowing space for connecting all the necessary cables.
It’s best to use a lightweight, portable projector that can be easily tilted for the best viewing angle.
While some projector brands sell tripods designed specifically for their units, others do not.
Before purchasing a projector tripod, check that your projector has a screw-hole, allowing it to be screwed onto the tripod.
If it does, you’re in luck! Purchase a compatible tripod online, like the Amazon Basics Lightweight Mini Tripod .

It’s essential to ensure that the tripod has a 90-degree tilt, allowing the projector to be tilted back and point directly at the ceiling.
If your projector doesn’t have a screw-hole, you may need to prop it up on its side.
This process can be a little precarious, so be careful not to damage your projector. Projectors often overheat, so avoid covering your unit’s air vents to allow for proper ventilation.
Place your projector on a hard surface and tilt it at your ceiling. Feel free to experiment until you find the best viewing angle for you.
Okay, you have your ceiling prepped and painted, and your projector is set up and ready to go. Now it’s time to perfect the keystone correction.
Step 4: Adjust the Keystone Correction
If your projector’s image looks a little wonky on screen, don’t worry! Keystone correction is here to save the day!

A projector’s keystone correction adjusts the image to sit flush and straight against the wall.
While some projector models have an auto keystone feature, which automatically corrects the picture’s position as soon as you move the projector, other projectors require you to configure it manually.
Check if your projector’s control panel has a keystone dial or buttons.
If it doesn’t, it’s a good idea to head over to the Settings and look under the Display tab, though every projector model will be different.
Are you having trouble finding your projector’s keystone correction settings? Check out our article How To Reset Keystone Correction? (Epson, Optoma, XGIMI, BenQ, Sony, JVC).
If you’re struggling to perfect the keystone correction, try using a test pattern. This solid grid allows you to calibrate your unit’s keystone by ensuring each box is the same size and that all the lines are straight.
There are also test patterns with circles. When using this type of test pattern, you must ensure the circles are perfectly round and symmetrical.
Your projector may already have a built-in test pattern found in its settings, but if it doesn’t, feel free to find one online.
See the video below for a free test pattern perfect for calibrating your projector’s keystone correction.


Yesenia Achlim is a technical copywriter and editor with a focus on AV equipment. She aims to break down complicated topics and make technology accessible, no matter your technical expertise. When she’s not teaching you how to replace a projector lamp, you can find her reading and baking.