
XGIMI Remote Not Working: Here’s How To Fix It – A Comprehensive Guide
What To Know
- Removing the batteries from your XGIMI remote for an extended period can reset its internal circuits and resolve non-responsiveness issues.
- Ensure your remote is properly charged according to its type (metal or plastic), try the reset button on the remote if available.
- For alternative control, use your phone with the Google Home app to operate the projector, ensuring both devices are on the same Wi-Fi network.
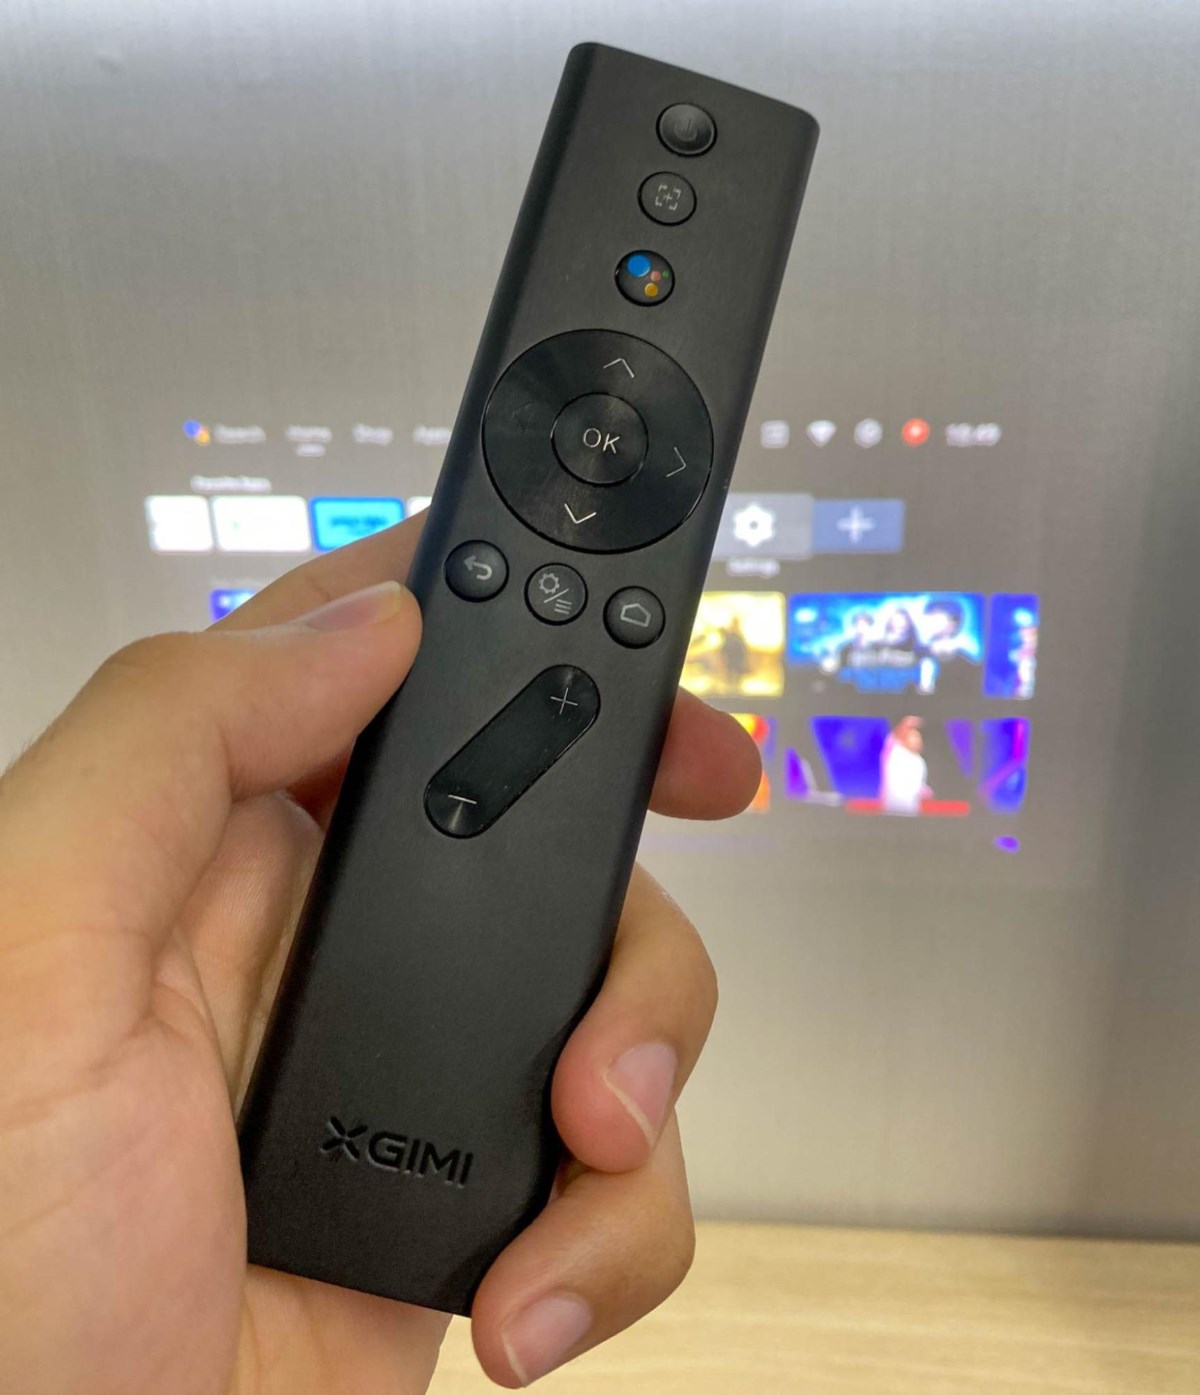
In this guide, I’ll teach you how to fix the issue of your XGIMI remote not working or responding, with tested images for easy following.
Let’s get started!
Quick Navigation
Remove the Battery for a While Before Re-pairing the Remote with the Projector
If you find that your XGIMI remote isn’t responding the way it should, there’s a straightforward solution you might want to try, which has worked for others.
Start by removing the batteries from your remote for an hour or even longer.
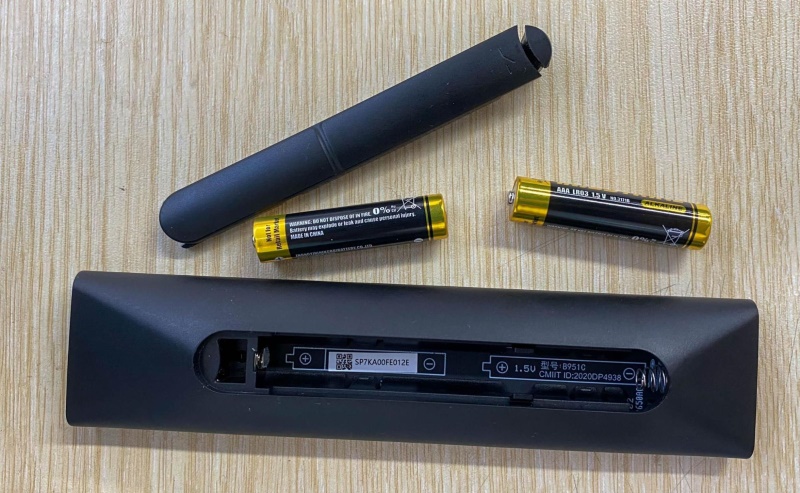
This step is crucial because it allows the internal circuits of the remote to discharge, which can often fix any glitches or problems the remote is experiencing.
After you’ve waited, put the batteries back into the remote and get ready to connect it to your projector again.
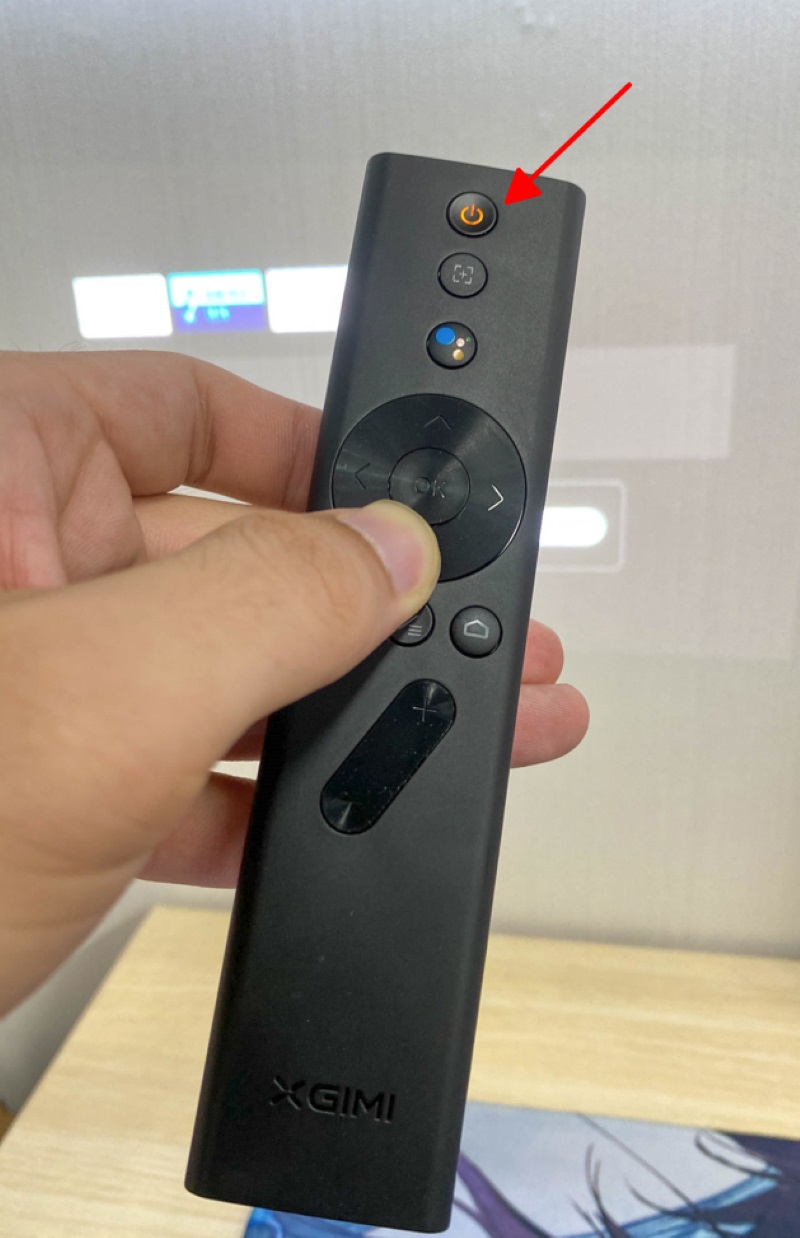
To re-pair your remote with the projector, you should press the Back and Home buttons on the remote simultaneously.
Keep holding them until you see the indicator light start to flash.
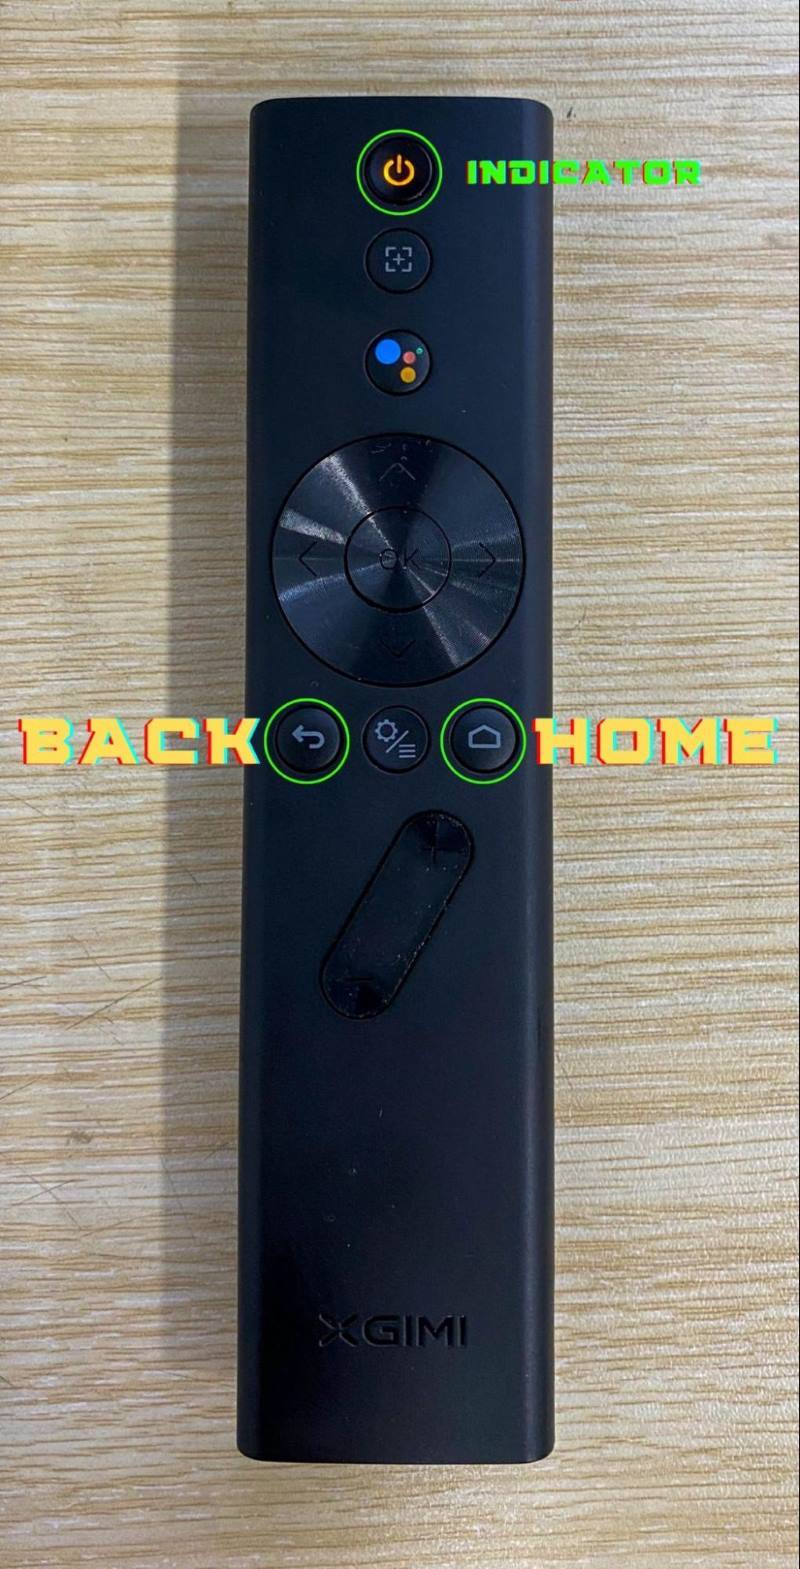
This light is your signal that the remote is ready to connect.
You’ll know the pairing has been successful when a message pops up on the remote confirming the setup is complete.
Note: Remember, for the best results when trying to pair the remote with the projector, keep the remote about 10 centimeters (or roughly 4 inches) away from the projector.
Check the Battery Status Inside the Remote
Make sure your XGIMI remote is charged if it uses a rechargeable battery, or ensure the batteries are not dead if the remote uses alkaline batteries.
The process of ensuring your XGIMIi remote is fully charged varies depending on whether you’re using a metal or plastic remote.
Identify which type of remote you have and follow our suggestions to ensure it is properly charged.
Metal XGIMI Remote
Metal XGIMI remotes have internal batteries that must be regularly recharged.
You can check the remote’s charging status by observing the LED light on the top of the device.
The color of the light, when any button is clicked, will guide you on the next steps:
- Blue Light: The remote is fully charged. Proceed with other troubleshooting steps as necessary.
- Green Light: The remote is charged but not paired. So, you just need to re-pair the remote with the projector.
- Red Light: The remote needs to be charged. Use the appropriate charging cable and allow it to fully charge until the LED light turns green.
Although XGIMI remotes can be charged using the projector as a power source, we recommend charging via a wall socket if you’re experiencing technical issues.
This ensures the remote is connected to a stable power source.
Check if the remote is working properly once it is fully charged.
Plastic XGIMI Remote
Unlike metal XGIMI remotes, plastic XGIMI remotes cannot be recharged.
This means that once the batteries are depleted, they must be replaced.
If the indicator light is orange when you press any button on the remote, it means the remote’s battery is functioning normally.
However, if there is no indicator light, this indicates the battery is dead and needs to be replaced with a new one.
Open the battery compartment and replace the batteries, ensuring they are correctly placed and of the appropriate size.
If the old batteries are corroded, be careful not to touch them directly and ensure they are disposed of safely according to local regulations.
Press the Reset Button on the Remote
Resetting your remote control can be a simple solution to any issues you’re having, much like you might reset a projector.
However, this feature is available only on the metal XGIMI remote controls.
So, if you find your remote is made of plastic, you’ll want to check out some other tips we have for troubleshooting.
To reset your XGIMI metal remote, first, find the reset button located at the bottom.
Then, using a long, thin object, like a needle, gently press the button.
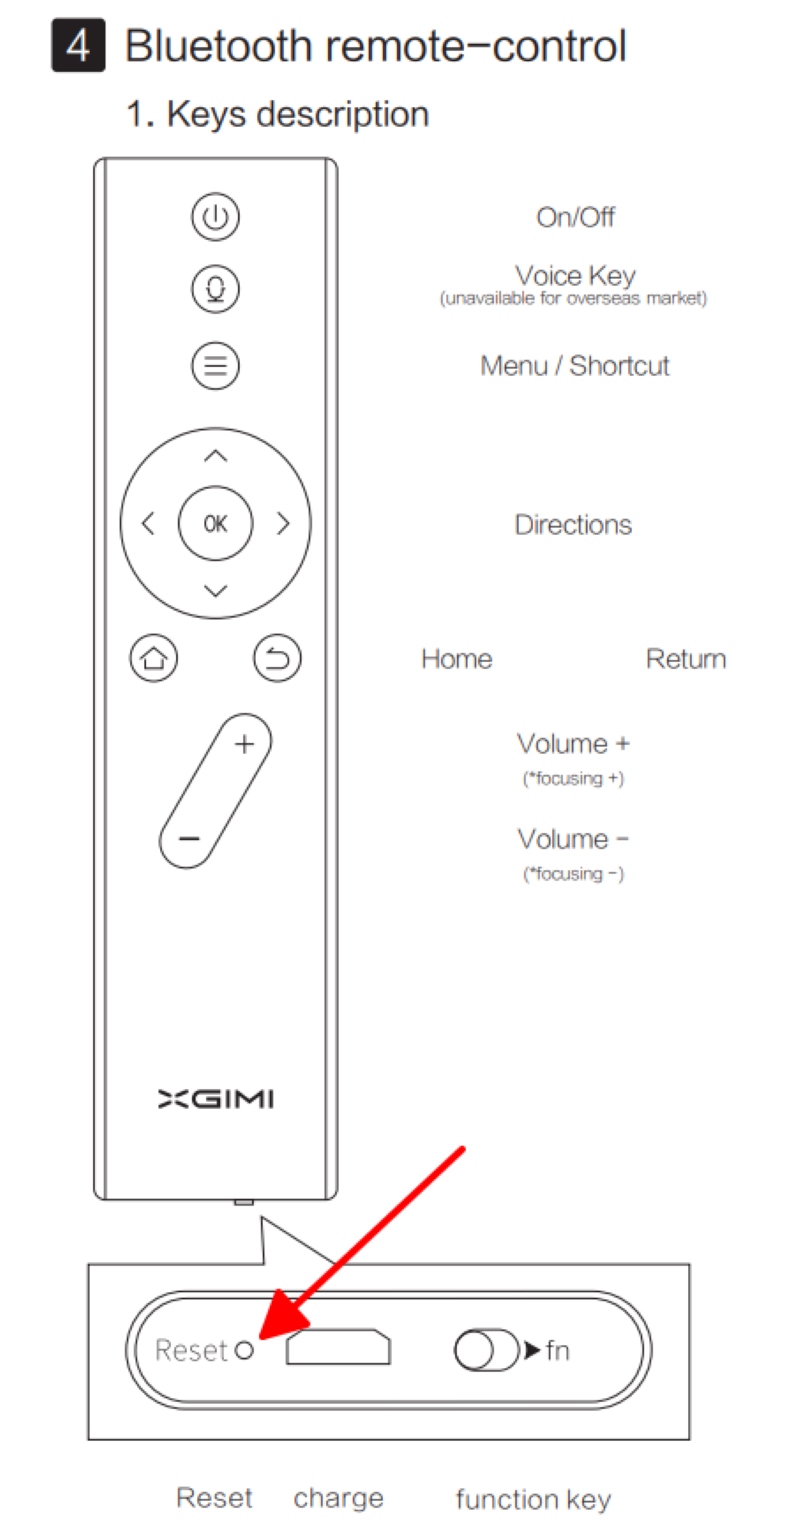
It’s important to choose something strong for this task to avoid any chance of it breaking and getting stuck inside.
Once you’ve successfully pressed the button, you’ll notice the light indicator on the remote flash red three times, signaling that the reset is complete.
Remember, after resetting, you may need to reconnect your remote to the projector, which you can refer to the steps mentioned above.
Move the Remote Closer to the Projector
To get the most out of your XGIMI projector, it’s important to position the remote control correctly.
If you find that the projector isn’t responding to the remote, you might be sitting too far away.
Bringing the remote closer to the projector can greatly improve its responsiveness.
Additionally, make sure there aren’t any items blocking the path between the remote and the projector.
This could interfere with the signal.
Keeping a clear line of sight and staying within the ideal range will ensure that the remote pairs with and controls the projector effectively, making your viewing experience much smoother.
Alternative Control: Use Your Phone Instead of the Remote
Imagine being able to control your projector with just your phone, making it easier and more convenient than ever before.
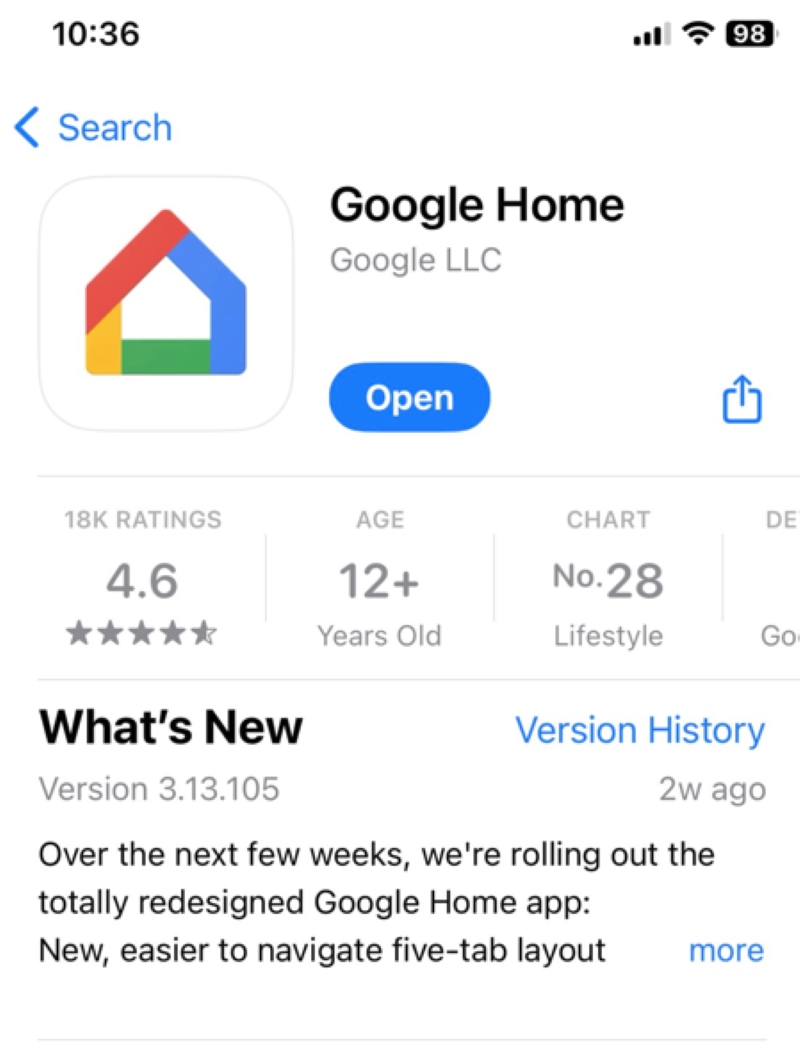
This is possible by using the Google Home app available on both iPhone and Android devices.
Let me show you how I can control my XGIMI MOGO 2 projector using my iPhone 11 as an example.
Follow these steps:
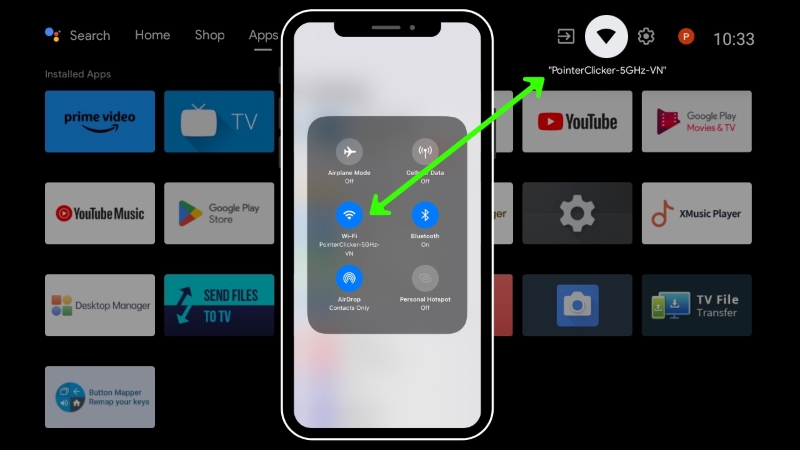
Step 1: First, you need to make sure that your phone and the projector are connected to the same Wi-Fi network.
Step 2: Open the Google Home app on your phone.
Look for the Devices section within the app and select your XGIMI projector from the device list to connect.
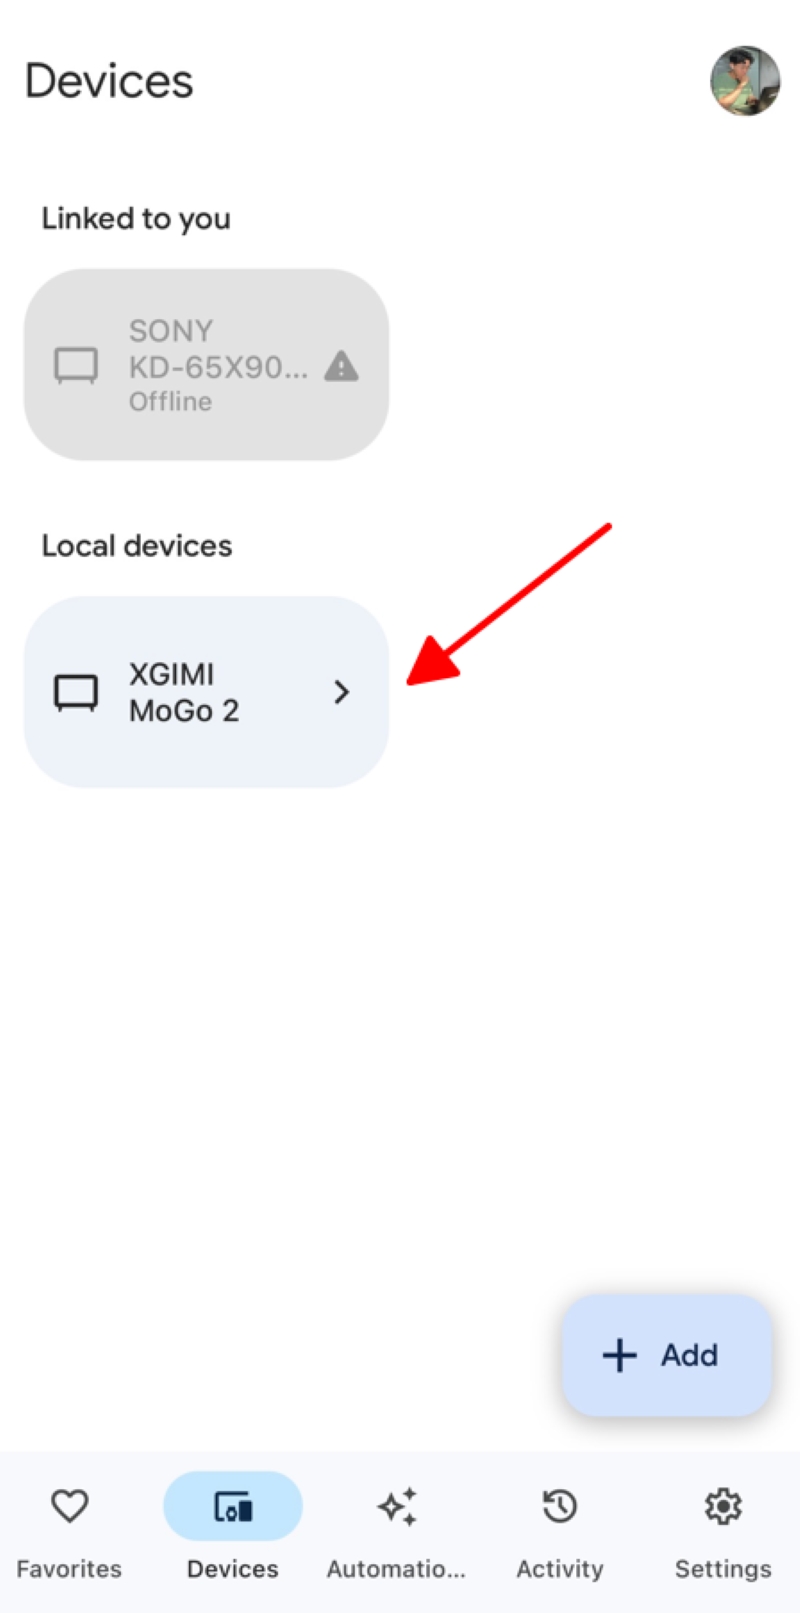
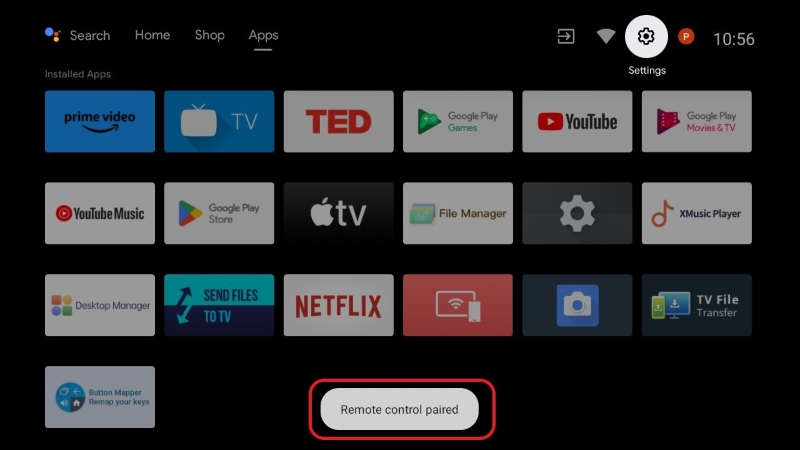
Step 3: After the projector is connected, you’ll notice a Remote icon in the app.
By tapping on this icon, you can start using your phone as a remote control for your projector.
![]()
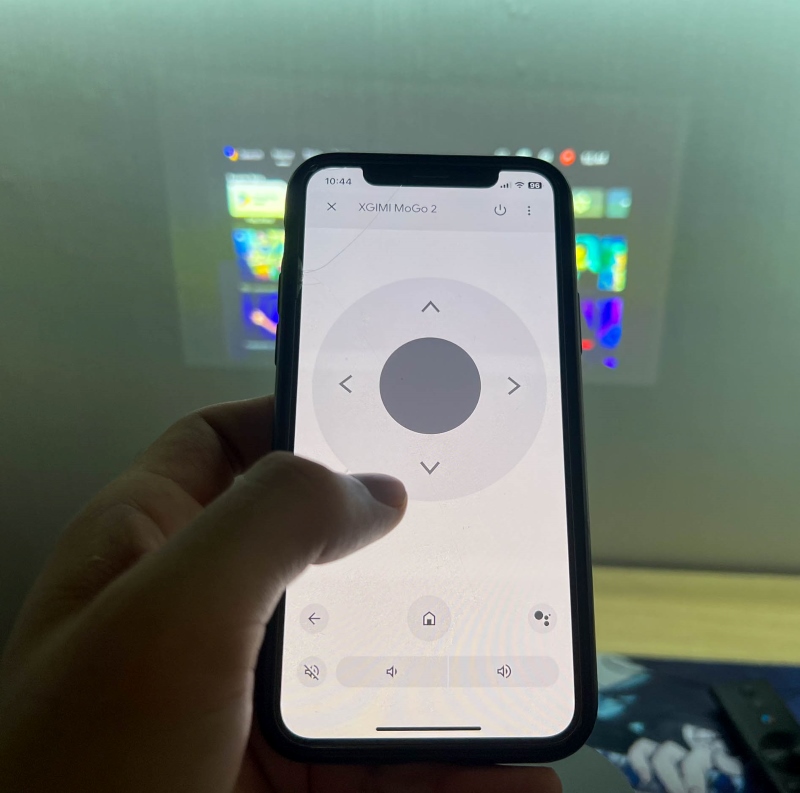
This method not only eliminates the need for a physical remote but also adds a level of convenience and modernity to your viewing experience.
Contact XGIMI Customer Support
If you’ve tried all our tips and tricks to get your XGIMI remote working and it’s still malfunctioning, it may be time to reach out to XGIMI customer support.
You can contact them through live chat, email support, or the official XGIMI website.
If your product is still under warranty, they will provide you with a replacement remote.

Meet Vance. He’s a proud dad, a seasoned Electronics Engineer, and an avid tech lover. His proficiency in electronics and troubleshooting skills were instrumental in crafting Pointer Clicker. Vance is passionate about simplifying tech for those who aren’t well-versed in it.