
7 Practical Ring Doorbell Mount Ideas
Looking to enhance your smart doorbell setup? Here are seven creative ring doorbell mount ideas that will elevate your entryway.
Whether you’re mounting your Ring doorbell on brick, siding, wood, or even on a door, we’ve got you covered.
These DIY options are perfect for apartments and homes alike, providing solutions for vinyl siding and angle mount needs.
Dive in to find the perfect mounting idea that suits your style and security needs.
Mounting on Vinyl Siding

Anytime you install a Ring Doorbell on your home you will need either a siding mount or a wedge kit.
The first step in mounting your doorbell on siding is confirming the size of panel you are working with. You will need to measure from the overlap of one panel, to the bottom of the next.
The majority of siding is going to measure either 4 or 4.5 inches. You will then need to figure out the model of your Ring Doorbell and purchase the coinciding mounting kit.
Once you have both your doorbell and mounting kit, you are ready for installation.

Start by sliding the backing off your Ring Doorbell, for the time being you will only be working with the backing piece and the mounting plate.
If you are using a siding mount, you will want to have the leg of the mount positioned to the bottom. This leg serves to hook below the overlap of the panel you are mounting on, as well as tilt the camera into a better position.
You will now want to center your mount on the panel and use two appropriately sized screws to secure it to the wall, using either the top and bottom holes or the side holes.
If you purchased the wired version of the bell, you will now need to attach your wires to the back plate. If you have the wireless version, you would obviously skip this step.
Now that the mount is secured to your house, you will want to fasten the back mount of the doorbell to the mounting bracket using the four provided screws(the shortest ones).
You are all finished! Simply slide the Ring Doorbell back onto the back mount and you have successfully installed your new doorbell!
Quick Navigation
Finding the Perfect Angle Using Wedges
Sometimes, depending on where and what you are screwing into, you might not have quite the right angle to view everything you were hoping for.
Luckily, Ring has you covered. They include angled shim wedges with the majority of their wedge kits.
This is simply a wedge you include between the mounting bracket and back mount during installation which tips your camera down 5°. Usually, there will be three of these angled wedges, giving you the capacity to angle the camera downwards 5°, 10°, or 15°.
Wedge Kits

The installation of a wedge kit is quick and easy. It follows the exact same steps as explained above in the siding installation instructions, right down to the angled wedges.
Most doorbells are installed at a standard height of 64”(163 cm), but due to the wide-angle lens it uses, the Ring Doorbell works more efficiently when mounted at a height of 48”(121 cm).
At this height, it can still catch everything you want to see in your entranceway, even if your visitor is extremely close to the camera.
It is important to keep in mind that if you ever have to mount your Ring Doorbell lower than 48” for any reason, you can always flip the angled wedges upside down to help achieve the perfect angle from any location.
Mounting on a Brick Wall

To mount your Ring Doorbell on a brick wall will take a few more steps, but it is just as simple as mounting on vinyl or wood.
First, you will want to decide where you will be mounting the doorbell. Take the wedge kit and using a pencil, mark out the four mounting holes directly onto the brick.
If you are inexperienced using a drill and drill bit, you can take a hammer and nail and make a small indentation on your four marks to help hold the drill bit steady when you first begin to drill.
Once you have done this you are ready to drill into the brick, you will want to use a ¼” masonry drill bit. Make four holes where you made your marks, you will want to drill about one and a half inches into the brick.
From the provided hardware, take the anchors and place them in the four holes you just created. Now secure the wedge kit to the brick using the appropriately sized screws.
You will now go ahead and finish the installation just as we did for the vinyl siding, attach any angled wedges, back mounts, and the doorbell itself to your secured wedge kit.

Mounting on Wood

If you need to mount your new doorbell on wood, you are in luck. Wood is the simplest place to mount your Ring Doorbell as you usually don’t have to worry about pesky angles or pre-drilling any holes.
You simply choose where you want to mount the bell, level your wedge kit and drive home two screws to secure it in place.
Then you simply slide the back mount along with the doorbell onto the bracket and viola! You hung your new doorbell in mere minutes.
Renter-Friendly Methods and Mounts

Often, you will find that you can’t simply drill holes into your building or door due to numerous different circumstances. Or, maybe you don’t have a straight shot from your building to the entranceway and need the camera mounted at an angle.
Here are a few solutions to these common problems.
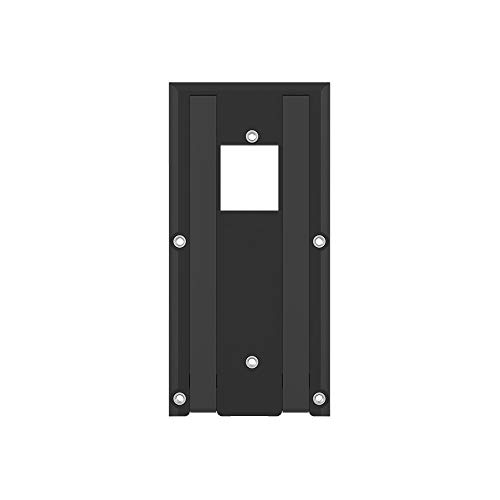
Adhesive Mounts
If you aren’t able to drill holes when mounting your Ring Doorbell, the next best option is to use an adhesive mount.
The installation is nearly identical to that of a regular wedge kit, but instead of screwing into the material you are mounting on, you simply clean the surface and mount the kit using the provided adhesive patch.
- No-drill mount that lets you attach Ring Video Doorbell 3, Video Doorbell 3 Plus, Video Doorbell 4,...
- Weather-proof, durable mount that uses strong, non-damaging adhesive to keep your doorbell securely...
- Easily setup by adhering No-Drill Mount to your wall, and then attaching your compatible Ring...
Last update on 2024-07-24 / Paid Link.
Once you have the kit stuck to the wall, you simply slide your doorbell onto the bracket and you are done.
Double-Sided Tape
While this method is fairly self-explanatory, there are still some things to keep in mind when securing your Ring Doorbell to the wall using double-sided tape.
Be sure to purchase tape of a decent quality, as there is a chance your bell could be exposed to the elements, the last thing you want is for it to end up falling off the wall.
It is advised to still use a wedge kit and not place the tape directly on the back bracket as this piece contains electronic components and you don’t necessarily want to compromise this section of your unit.
Anti-Theft Doorbell Mounts
Oftentimes, doorbell cameras are installed to ward off intruders or deter someone from stealing a package off your doorstep.
But what if your doorbell camera itself is at risk of thievery? No need to worry, DoorbellBoa has you covered below!

They have created a mount which secures directly to your door and prevents the doorbell camera from being removed from the outside.
The mount fastens to either side of your door and is held in place using removable adhesive pads.
Simply place the mount on your door, mark its position, and attach it to the door using the adhesives and you are done.
Your camera will also have a clip it will sit in, which attaches to the one hung on your door. After you clip this into the mount on your door, you now have a theft-proof and no-drill/renter-friendly doorbell mount.
Other Mountings
There will be certain entranceway layouts that will make it so a straight shot from the doorway doesn’t serve the intended purpose of the doorbell.
This issue has also been rectified by the angled mount. The purpose of this mount is to allow you to install your doorbell on an adjacent wall and then swing your camera into the most effective position.
Luckily, the installation of these mounts is identical to the standard wedge mounts we covered multiple times throughout the article.


Jon Huber is an editor and technical writer who has been a freelancer since 2020. Since the beginning of his writing career, he has consistently written online articles in the tech, sports, and recreation genres. Recently, he has concentrated on scriptwriting for cartoons and puppet shows.