
How to Easily Pause and Record Live TV on Your Smart TV

What To Know
- Utilize a Roku streaming device with the OBS app on your computer to record live TV channels without a subscription.
- Use the Timeshift feature on compatible Samsung, LG, Hisense, and TCL TVs to pause and record live TV.
- Roku TV supports Cloud DVR with live TV streaming services like Hulu, YouTube TV, and others, allowing you to record directly to the cloud without needing external storage devices.
In this article, I guarantee to show you how to pause and record live TV without any cost.
I’ve thoroughly tested these methods and ensured that even those who aren’t tech-savvy can easily follow my guidelines, which include helpful images.
Additionally, for those who still prefer the traditional route, I’ll touch upon subscription-based recording options too. So, let’s get started!
Quick Navigation
Using the Computer to Record Anything (Cost-Free)
Recording live TV doesn’t have to be an expensive endeavor. With a Roku streaming device and OBS (Open Broadcaster Software) setup on your computer, you can capture local channels and more, without any subscription fees.
For instance, using Roku Ultra, you can access a variety of local TV channels, including free streams with live channels from services like Sling TV.
This method offers significant advantages over traditional TV recording.
Here’s a quick comparison:
| Using OBS + Roku (or any tuner box) | Traditional Record (DVR) |
|
|
Key Requirements
- An HDMI capture card , the one I’m using for this tutorial.
- An HDMI cable.
- A tuner box, or any device you use to watch live channels, is essential. In my case, I’m using the Roku Ultra.
The setup process is generally the same regardless of the source device. The only difference lies in the specific type of device you choose for watching and recording live channels.
Here’s how the setup works:
Step 1: Download and install the OBS application on your computer.
Step 2: Plug the capture card into your computer’s USB port.

Then connect one end of the HDMI cable to the capture card and the other end to your Roku or tuner box.

Step 3: Open OBS, and you’ll see the app’s interface as shown in the image below.
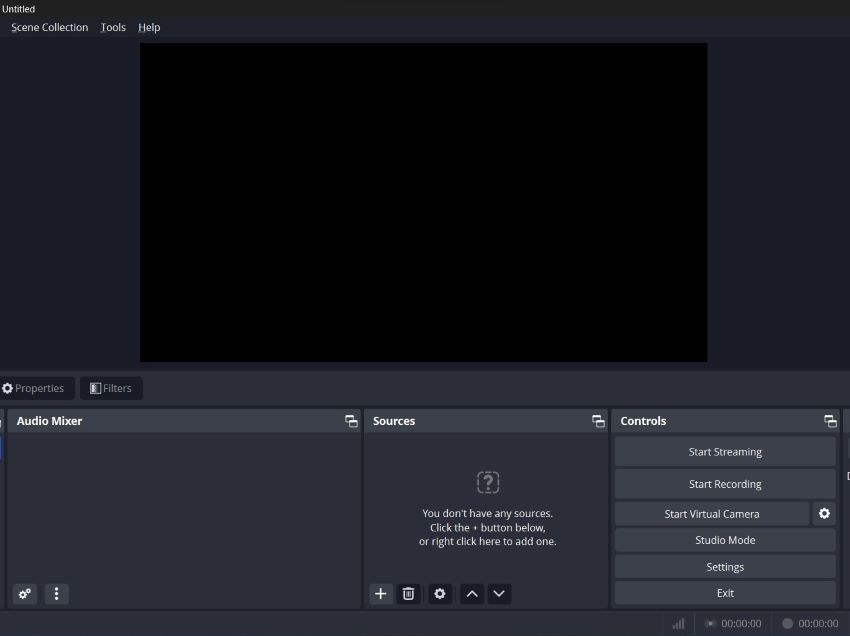
Step 4: In the Sources tab, click the plus (+) icon located in the bottom left corner and then select Video Capture Device.

A new window will pop up. Here, you can name the profile as you prefer and then click OK.

Step 5: After completing Step 4, a different setup window will appear. Here, under Device, select USB Video and then click OK.

Step 6: Once everything is connected, your laptop’s screen will display the content from the Roku or tuner box.
To record the content from the screen using OBS, find the Start Recording button in the Control tab.

Step 7: After you start recording, choose the TV channels you wish to record.
For example, I chose Sling TV for my demonstration.

As I don’t have a subscription, I opted for the free streaming option.


Step 8: To stop recording, simply click the Stop Recording button in the Control tab.

The file will automatically be saved in the Videos folder.

Record TV with a Subscription (Cloud DVR)
Roku provides a gateway to several Live TV streaming services that offer Cloud DVR functionality.
These Live TV streaming services enable you to effortlessly record live TV straight to the cloud, bypassing the need for external storage.
Here’s an overview of live TV services you can access via Roku, each offering its own Cloud DVR capabilities:
| Live TV Service | Subscription Price | DVR Limit |
| Hulu with Live TV |
|
|
| YouTube TV |
|
|
| fuboTV |
|
|
| DirecTV Stream |
|
|
| Sling TV |
|
|
Using the DVR feature is quite straightforward. Simply select the channel you wish to watch, then navigate to the options menu and choose record.
For a more detailed walkthrough, check out the guide video below on how to use Cloud DVR with Hulu.

Using a Tuner Box Includes with Recording Feature
Selecting a tuner box equipped with a recording feature offers a practical and cost-effective alternative to regular live TV subscriptions.
These third-party tuner boxes stand out for their ability to record live TV without the need for additional subscription fees.
While there’s an initial investment in purchasing the box, this one-time expense generally proves to be more economical in the long run, especially when compared to the ongoing costs associated with official Live TV options.
Tablo 4th Gen 2

- WATCH, PAUSE, RECORD, & REPLAY LIVE TV: Enjoy live TV from major networks, including ABC, CBS, FOX,...
- WHOLE-HOME ACCESS: 1 DVR pairs with any TV antenna to let you watch TV on multiple compatible...
- NO SUBSCRIPTIONS OR HIDDEN FEES: Pay once for the Tablo device and watch and record your favorite...
Last update on 2024-07-10 / Paid Link.
The Tablo 4th Gen 2 provides the capacity to watch and record over 50 hours of content with its 128GB of internal storage.
You can also expand storage by adding an external USB hard drive (note: USB flash drives are not supported).
A major plus is that there are no subscription fees for its recording capabilities.
However, some users have reported connectivity issues, particularly with Wi-Fi or Ethernet connections.
SiliconDust HDHomeRun
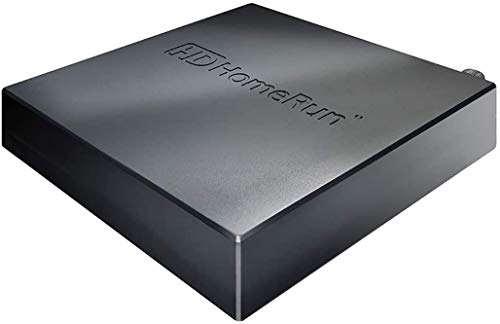
- FLEX - the next generation HDHomeRun CONNECT 4K
- Watch live TV on multiple devices simultaneously throughout your home with our Multi room Multi user...
- All the features of the HDHomeRun CONNECT QUATRO & 4K models plus optional DVR by connecting a USB...
Last update on 2024-07-10 / Paid Link.
The HDHomeRun Connect 4K enables DVR recording, but accessing this feature requires a subscription, priced at $35/year.
The device boasts ATSC 1.0 and ATSC 3.0 technologies, ensuring compatibility with various platforms like Xbox, Roku Ultra, and Apple TV.
A downside noted by users is its struggle with DRM-encrypted channels, which can lead to black screens instead of the expected broadcast.
If you’re unfamiliar with how DRM (Digital Rights Management) affects TV viewing, I’ve covered this topic in another article, which provides a detailed explanation and additional information about DRM.
Using Timeshift
Timeshift, available in many Smart TVs, lets you pause, rewind, and record live TV using an external hard drive for storage.
The Timeshift feature enhances your TV viewing experience by offering easy control over live broadcasts, without the need for additional subscriptions, just an external hard drive.
Installation and Setup
Let’s learn how to use Timeshift on compatible Samsung, LG, Hisense, and TCL TVs.
Samsung
Several Samsung TV models have a Timeshift setting with a maximum recording time of 90 minutes, which is just long enough to record a soccer game or feature-length film.
TV models that support this feature will have a Record button on their original remote. Some universal remotes also have Record buttons.
Let’s learn how to use Timeshift on your compatible Samsung smart TV!
Step 1: Plug your external storage device (e.g. hard drive, flash drive, or SSD) into your TV. USB-compatible storage devices must be plugged into one of your TV’s available USB ports.
Step 2: Head to the streaming app you want to play content from or go to your TV’s live TV section. Then, play the video you want to record.
Next, press your remote’s Record button to activate Timeshift. Your TV will not start recording yet.
Step 3: A pop-up message will appear on-screen with a Performance Test which will ensure that your external storage device is compatible. If it’s not compatible, you must make sure there’s enough space on your storage device or use another compatible device.
Step 4: Once you’ve completed the Performance Test and confirmed that your external storage is compatible, a taskbar with all of the available recording options should appear.
Once the taskbar appears, your TV will automatically begin recording the content on-screen.
Step 5: To record and pause the live TV program, use the buttons in the taskbar or on your TV remote.
Step 6: When you’re ready to stop recording, press your remote’s Stop button, represented by a solid square.
You can then access the recording you’ve just made by clicking your remote’s Source button and going to Storage Device. Select Contents and click on the recording you want to watch.
Watch the video below demonstrating how to use Timeshift on a Samsung smart TV.
LG
Timeshift on LG TVs is labeled Time Machine and is found by accessing its Q.Menu.
While you can save the recording directly to your LG TV’s storage, we advise against this as you will quickly consume your TV’s memory. This may prevent you from downloading new apps and software updates, and may even cause your TV to lag.
Instead, we recommend connecting an external storage device to your LG TV.
Step 1: Attach your external storage device of choice to your LG TV’s USB port. Ensure it’s securely fastened in place and has enough free storage space to hold your recordings.
Step 2: Next, turn your attention to your LG TV remote. Find and press the Q.Menu(123) button, which will display a remote on your TV.
Step 3: Use your TV remote to select Clock (represented by an icon of a clock) from the on-screen remote. A progress bar will then appear on-screen.
Step 4: Click on Option from the progress bar to reveal the setup menu for your TV’s Time Machine function.
Step 5: Click on USB Device Initialization, followed by Initialize.
Step 6: When asked if you want to format the storage device and set up the Time Machine, select Yes using your remote’s Enter/OK button.
Step 7: Now you can navigate to the live TV program you want to watch. Then, press your remote’s Record and Pause buttons on your remote to record and pause the video on-screen.
When you want to stop recording, press Stop Recording, found in the progress bar.
Step 8: Now that you’ve recorded the live TV program, you can access the recordings through your TV’s SmartShare section.
Tip: You can also use your TV’s Time Machine feature to schedule recordings.
To learn how to access your LG TV’s recordings, watch the video below.
Hisense
A Hisense smart TV’s Timeshift feature can be found by navigating its settings. Hisense units cannot store recordings in their built-in storage, so you will need to connect an external storage device to them instead.
Let’s learn how!
Step 1: Connect your preferred storage device to your Hisense TV via its USB port.
Step 2: Then, find and press the Quick Menu button on your TV remote.
Step 3: Navigate to Settings.
Step 4: Click on System.
Step 5: Then go to Advanced Settings.
Step 6: Head to PVR & Timeshift Setting.
Step 7: Select Timeshift Setup.
Step 8: Finally, click on Data Drive.
Step 9: Once you’ve completed the setup process, press your remote’s Down Arrow button.
Step 10: Select Timeshift to activate your TV’s Timeshift feature and reveal the taskbar. Now, you can Pause, Play, Rewind, Fast Forward, Stop, and Record using the on-screen taskbar or your remote’s buttons.
Press the Stop button to stop recording. Then, you can access the recording by changing your TV’s Input to your external storage device.

Tai “Ty” Luu, an Electronics Engineering graduate from Sheridan College, is a passionate technical editor with a deep love for technology and gaming. He constantly seeks new challenges to expand his expertise in the tech and gaming fields.