
9 Effective Fixes for a TV That Won’t Change Channels
What To Know
- To resolve TV glitches, power cycle the TV or perform a software update specific to the TV brand.
- For remote-related issues, ensure you’re using the correct remote, replace dead batteries, check for obstructions, and re-pair the remote.
- If channel problems persist, re-scan TV channels, use physical buttons on the TV, factory reset the digital box or TV, and consider repairing or replacing hardware if necessary.
Why is your TV stuck on one channel? And how can you finally change your TV channel once and for all?
Keep reading to find out!
Quick Navigation
1. Problem With the TV Itself
Your TV Is Glitching
All TVs, smart and non-smart alike, are prone to bugs, glitches, and lags. These minor technological hiccups may cause some of your TV’s functions, like its channels, to freeze. While some of these lags will go away on their own after a few minutes of patience, others will require some interference.
If your TV is glitching, try power cycling it or installing a software update, if it’s a smart unit.
Power Cycle Your TV and Equipment
Turn off your TV and all attached equipment, such as your cable box if you’re using one. Then, wait for a minute or so to connect them all to power and turn them on.
Software Update
Depending on your TV brand, you must follow different instructions to update its software. Not only will this ensure your TV runs smoothly, but it will also give you access to your smart TV’s newest features.
Samsung TV
Step 1: Open the Menu.
Step 2: Click on Settings.
Step 3: Head to Support.
Step 4: Go to Software Update.
Step 5: Click Update Now.
TCL TV
Step 1: Go to Settings on the Home page.
Step 2: Open More Settings.
Step 3: Click on Device Preferences.
Step 4: Go to About.
Step 5: Click on System Update, followed by Network Update.
Step 6: Finally, click OK.
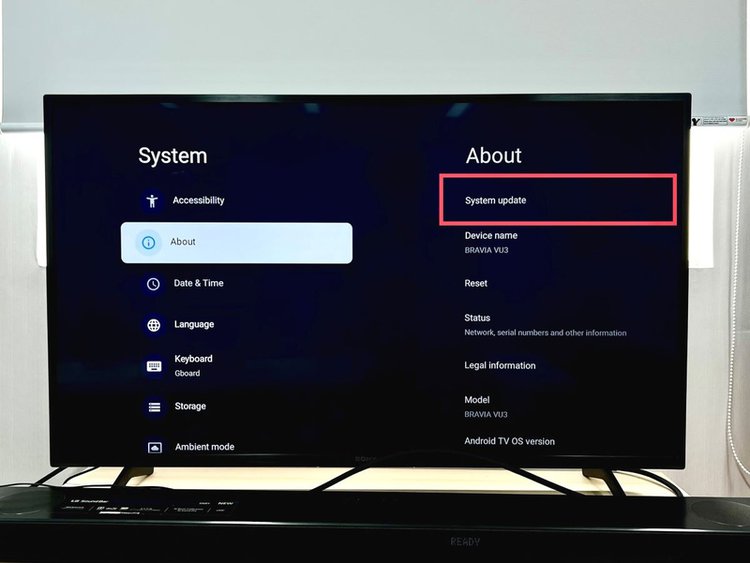
Sony TV
Step 1: Hit the Quick Settings key on your remote, before using its arrow keys to open the Settings on-screen.
Step 2: Open System/Device Preferences.
Step 3: Go to About.
Step 4: Click on System Update.
Note: If your TV’s settings don’t match the ones listed above, head to the Sony website for alternate instructions.
LG TV
Step 1: Launch the Settings menu.
Step 2: Head to All Settings.
Step 3: Open Support or General.
Step 4: Go to Software Update or About this TV.
Step 5: Click Check for Updates.
Step 6: Click on Download and Install.

It’s Set to the Wrong Input Source
You will not be able to change your TV’s channel if it’s set to an input source that doesn’t offer this function. So, it’s a good idea to double-check which input source your TV is displaying and adjust it if needed.
You can do this using your TV remote.
If your TV is connected to a cable/digital box via an HDMI cable, adjust your TV’s input source to HDMI 1/2/3, depending on which HDMI port it is plugged into.
If you’re using a direct antenna/cable connected to your TV via a coaxial cable, change your TV’s input source to Coaxial/Live TV/Antenna TV/TV.
How to Change Your TV’s Input Source
If your TV remote does not have the option to change its input by repeatedly pressing the Input button, follow the instructions below for your TV brand.
Samsung TV
Step 1: Open the Menu on the Home screen.
Step 2: Head to Connected Devices, marked by three circles.
Step 3: Click on your desired Input.
TCL TV
Step 1: Find and click on Input, marked by an arrow going through a rectangle.
Step 2: Locate and click on the input you’d like to display on your TV.
Sony TV
Step 1: Hit your TV remote’s Input key.
Step 2: Select the input you want to display from the list of options on-screen.
LG TV
Step 1: Head to the Home screen by pressing your remote’s Home button. If your remote does not have a Home button, press its Quick Settings button instead.
Step 2: Go to Input and choose the input your external device is connected to.
2. Problem with the Remote
In certain cases, there may be something wrong with your remote preventing your TV from receiving the correct commands.
Let’s go over a few possible problems there could be with your remote, and most importantly, how to resolve them.
You’re Using the Wrong Remote
Depending on which external devices are connected to your TV, there could be several remotes laying around your living room. This means that you may be trying to adjust your TV’s channel with the wrong remote.
If you’re using a digital box or cable, you may need to use a different remote to adjust the channel.
Digital/cable boxes connected to your TV with an HDMI cable must be controlled with the digital box remote. Meanwhile, a direct antenna/cable connected via a coaxial cable can be adjusted with the TV remote.
If you’re not sure which is which, try pressing the Channel button on both remotes to see which one affects your TV.
The Batteries Are Dead
Your remote may be perfectly functional but in need of new batteries. So, open the battery mount, and remove and recycle the old batteries, before replacing them with new ones.
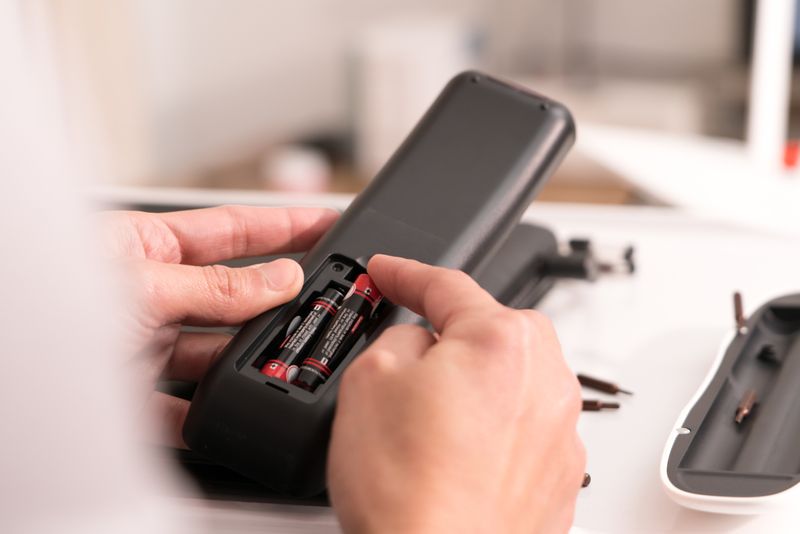
Double-check that you’re using the correct batteries for your remote and that their polarities (positive and negative) are correctly oriented. Refer to the battery mount’s plus and minus symbols if you’re not sure which way the battery should be facing.
Obstruction and Interference
Infrared (IR) remotes require a clear path from the remote to the TV’s IR sensor. If the path is obstructed, the TV will be unable to receive the remote’s commands.
Ensure your TV’s IR sensor, usually found beside its LED indicator light is uncovered and clean. Then remove any objects between you and the TV that could block the signal.
If your couch is several yards away from your TV, you may be too far away for the TV to receive the signal. So, try moving closer to your TV.
The Remote IR Sensor Is Not Working
If your remote still isn’t working after replacing the batteries, there may be something wrong with its IR sensor. You can test the IR sensor’s functionality using any digital camera, including one on your smartphone or tablet.
Step 1: Open your phone’s Camera app.
Step 2: Point it at your remote’s IR sensor so you have a clear view of your phone’s screen.
Step 3: Press any one of your remote’s buttons and observe if a red light appears in your camera app when you do so.

If you do see a red light in your phone’s camera, then your remote’s IR sensor is working normally and you should proceed to the next solution.
If you do not see a red light, your remote’s IR sensor may be malfunctioning and you should contact your TV manufacturer about having it repaired or replaced. You can also purchase a universal remote, like the Philips Universal Remote , to use with your TV instead.
The Remote Is Not Paired or Configured Properly
Your remote may no longer be paired to your TV or be incorrectly configured. To fix this, you must pair/re-pair your TV remote properly.
Pair/Re-Pair TV Remote
Samsung TV
Step 1: Press your remote’s Return (marked by a U-shaped arrow) and Play/Pause keys for about three seconds.
Step 2: Wait to see a message on-screen informing you that the pairing is complete before using your remote as normal.
TCL TV
Step 1: Simultaneously hold down your remote’s Home and OK keys.
Step 2: You’ll know your remote is properly paired to your TV when “Success” or a checkmark appears on-screen.
Sony TV
The process of pairing a remote to your Sony TV varies depending on your TV’s menu options. For a full list of possible settings options and instructions, check out Sony’s article How do I pair the voice command remote control to my TV?
LG TV
Step 1: Hold down your remote’s Settings and Home buttons for around five seconds or until you see your remote’s LED light blink three times before staying illuminated.
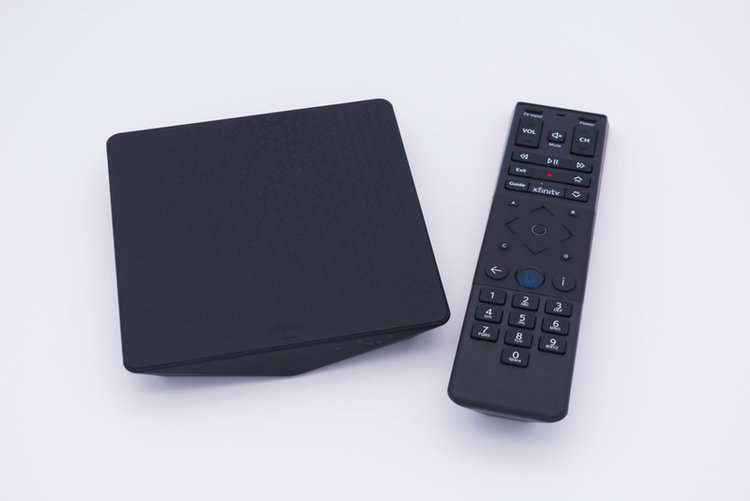
Pair/Re-Pair Cable/Digital Box Remote
Pairing cable/digital box remotes is a slightly more involved process than pairing TV remotes. Additionally, this process may vary widely depending on which remote model you own.
Here are the instructions for pairing/re-pairing your Xfinity, DirecTV, and Spectrum remotes. There Are Limited Channels or There Is a Problem With the Scanned Channels
There may be a problem with your TV channels, leading to few, if any, of them appearing. Something may have gone wrong when you automatically or manually scanned for channels, resulting in there being no channels on your TV to browse.
Re-Scan Your TV Channels
Ensure all of your TV’s hardware (e.g. antenna, cable box, digital box) is correctly installed before following the instructions below.
Samsung TV
Step 1: Ensure TV is selected from the Input/Source menu.
Step 2: Launch the Settings or All Settings menu.
Step 3: Open Broadcasting.
Step 4: Click on Auto Program.
Step 5: Click Start.
Step 6: Choose Air if you’ve connected an antenna to your TV or Cable if you’re using a cable/digital box. If you’re using both, choose Both
Step 7: Once your TV has finished scanning for channels, click Done.
TCL TV
Step 1: Check that your TV’s input is set to Antenna TV.
Step 2: When presented when a message informing you that no channels have been found, press your remote’s OK button to begin the scan.
Step 3: When another pop-up message appears on-screen, select OK.
Step 4: Ensure the Channel Scan settings are set to your correct Country/Region. Under Automatic Search, set the Tuner Mode to Antenna and the Channel Type to Digital.
Step 5: When the scan is complete, select Finish.
Sony TV
Step 1: Head to the Home page by clicking the remote’s Home or Menu button.
Step 2: Go to Settings or Set Up.
Step 3: Open Channels or System. Then, select Channel Setup (if any).
Step 4: Depending on your TV’s settings, click on Program channels, Digital scan, Digital Auto Tuning or Auto program, followed by Enter/OK.

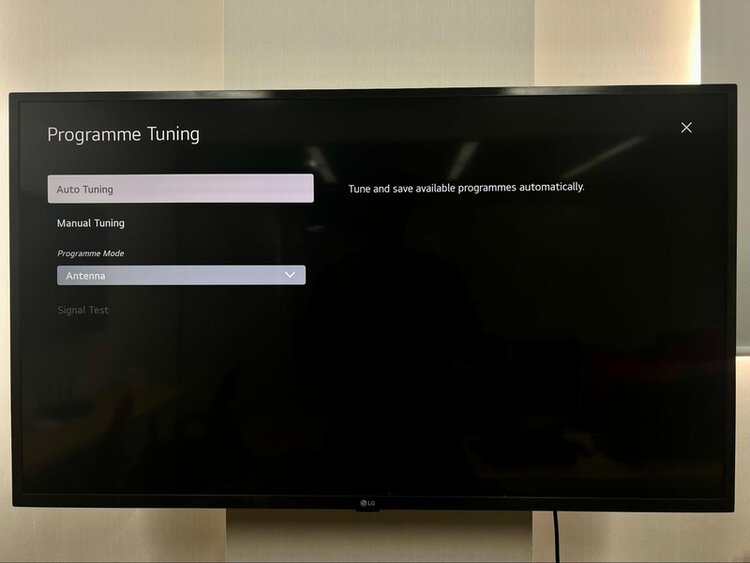
LG TV
Step 1: Open the Settings.
Step 2: Go to All Settings
Step 3: Navigate to Programmes.
Step 4: Head to Programme Tuning.
Step 5: Click on Auto Tuning.
Your Remote Isn’t Working
If your remote’s channels buttons are still not working, there may be something wrong with your remote.
Use the Physical Buttons
Your cable/digital box should feature Channel buttons that can be used to adjust your TV’s channel. While inconvenient, these buttons are useful if your remote isn’t working.
Check your cable/digital box (connected to your TV via HDMI) for any channel buttons and press them to see if they change the channel. If they do not adjust the channel, proceed to the next solution.
If you’re using a direct antenna/cable (connected via a coaxial cable), press the Channel buttons on your TV’s control panel. If this does not change the channel, proceed to the section Factory Reset Your TV.
Factory Reset the Digital Box
If your digital box’s buttons are not working, it’s best to factory reset it.
Note: Depending on your digital box brand, factory resetting it may delete its settings and data.
Xfinity
Step 1: Ensure your digital box is turned on before pressing the WPS button for 10 to 15 seconds.
Step 2: Allow the LED light to turn amber before waiting for your digital box to reset and install any new firmware updates.
Step 1: Press the DirecTV button for about 20 seconds.
Step 1: Ensure your TV is powered on before pressing the Reset button for five seconds.
Step 2: Check that your digital box is turned on should a No Signal message appear on-screen. Then, wait for your digital box to reset.
Note: These instructions are only applicable to Spectrum digital box models 101, 201, 110, and 210. If you have another model, head to the official Spectrum website for specific factory reset instructions.
If your digital box still doesn’t work after factory resetting it, contact your cable provider since there may be a problem with the signal or hardware.
Factory Reset the TV
Note: Performing a factory reset on your TV will delete all of its data and settings. You will have to reinstall all of your TV apps and set it up again.
Samsung TV
Step 1: Launch the Settings.
Step 2: Click on General.
Step 3: Go to Reset.
Step 4: Type your PIN into your TV before clicking Reset. If you don’t have a PIN, enter 0000.
Step 5: Then, click OK.

TCL TV
Step 1: Click your remote’s Settings button before going to More Settings.
Step 2: Open Device Preferences.
Step 3: Go to Reset.
Step 4: Click on Factory Data Reset followed by Erase Everything.
Step 5: When prompted, enter your PIN (shown on-screen) before pressing OK.
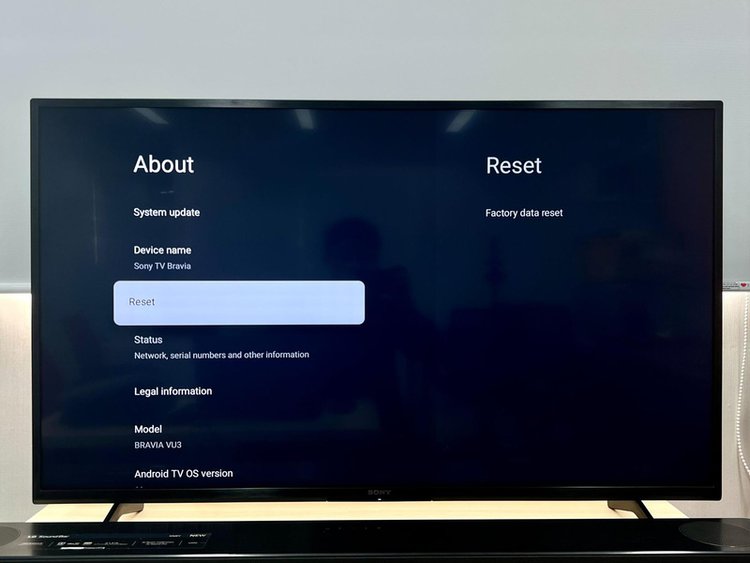
Sony TV
Step 1: Click your remote’s Home, Quick Settings, or Action Menu key.
Step 2: Open the Settings, marked either by an arrow or gear icon.
Step 3: Go to System, followed by About. Alternatively, you may need to click Device Preferences or Storage & Reset.
Step 4: Head to Reset. (If this option is unavailable, proceed to the next step.)
Step 5: Open Factory Data Reset.
Step 6: Click on Erase Everything, followed by Yes.
LG TV
Step 1: Click your remote’s Smart key.
Step 2: Go to the Settings.
Step 3: Open General.
Step 4: Click on Reset to Initial Settings
3. Consider Repairing or Replacing Your Hardware
If you’ve tried all of the solutions listed in this article but still cannot change your TV channel, there may be something wrong with your cable/antenna or TV.
First, contact your cable/antenna provider’s customer support and inquire about any network issues they may be experiencing or ask if they have limited channels.
If they inform you that their network is working normally, it’s best to ask that they replace your antenna. If your warranty policy is still valid, they may replace it for free.
If this problem persists after you’ve correctly replaced and set up the new antenna, there may be something wrong with your TV. Contact your TV brand’s customer support to inform them of your problem and inquire about the necessary repairs. Again, these repairs may be done for free if your warranty policy is valid. Otherwise, you may have to pay for them out of pocket.
We suggest comparing the price of repairs to the cost of a new TV. In certain cases, replacing the unit altogether may be more cost-efficient than repairing its individual components.
Good luck!

Yesenia Achlim is a technical copywriter and editor with a focus on AV equipment. She aims to break down complicated topics and make technology accessible, no matter your technical expertise. When she’s not teaching you how to replace a projector lamp, you can find her reading and baking.