
Apple TV Blinking Light? 4 Fixes for the Flashing Woes

What To Know
- Your Apple TV’s blinking white or blue light signifies it’s receiving remote signals, starting up, or performing a software update.
- To restore your Apple TV HD or earlier: Disconnect it from power > Use a USB-C/Micro-USB cable to connect it to a computer & power > In Finder or iTunes app, click Restore Apple TV.
- Other solutions include connecting your Apple TV to a smart TV, checking power supplies, or contacting Apple Support for a potential free replacement.
Stumped by a blinking light on your Apple TV?
Whether it’s a normal flashing white or not responding as expected, this concise guide offers solutions.
In this article, our tech team’s insights and user-verified fixes will address common issues without the fluff, from flashing lights to startup glitches.
Quick Navigation
Why Is My Apple TV Light Blinking?
Like most streaming devices, an Apple TV’s LED light can help you decipher the device’s status, whether it’s working normally, updating, or off.
Refer to the table below to see what your Apple TV’s LED light means. Bear in mind that these light statuses apply to every Apple TV model, 4K or otherwise.
| Light Status | Apple TV Status |
| No light shows up | Apple TV is off or not working |
| Light white/blue glows consistently | Apple TV is working normally |
| Light white/blue blinks once | Apple TV receives a signal from the remote (when you press any button) |
| Light white/blue is blinking slowly | Apple TV is starting up |
| Light white/blue is blinking quickly | Apple TV is updating |
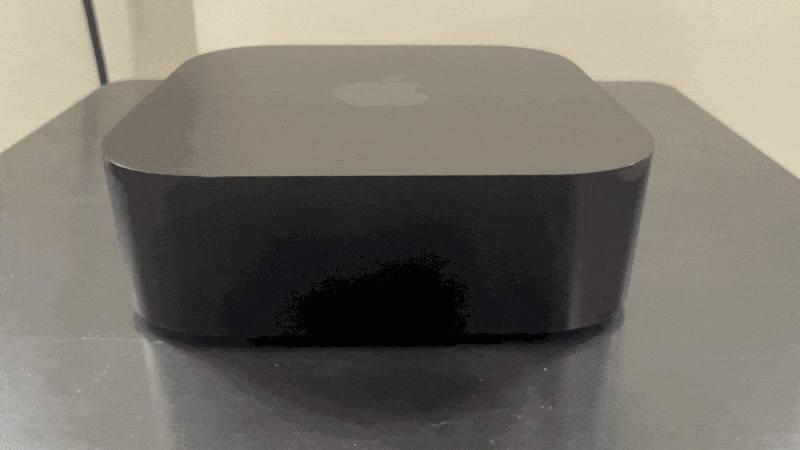
Most users whose Apple TVs are completely black will also notice that the LED light is illuminated white or blue and is continuously blinking. As we can see from the above table, this light status indicated that your Apple TV is installing a software update.
- If your Apple TV looks like the one above, you may just need to wait a few minutes for any updates to finish installing before soft resetting it. To soft reset your Apple TV, unplug it from the wall outlet for 30 seconds before plugging it back in. If this problem is only the result of a software update or a small glitch, your Apple TV should begin working normally.
- In the case that your Apple TV still does not work correctly after being soft reset once, you may need to repeat the process two or three times, as this one user found. Another user even found that soft resetting their Apple TV five or six times did the trick.
If soft resetting your Apple TV doesn’t resolve the issue, try some common troubleshooting methods, like the first two mentioned in our article “8+ Ways to Fix Apple TV No Signal Message (Black Screen).”
While most users find these basic methods fix this Apple TV issue, others will spend what seems like an eternity troubleshooting their device. This is likely due to the Apple TV crashing while updating, preventing it from starting up and operating normally.
Most software updates promise bug fixes and a sleeker user experience, but glitches in the software can actually install new bugs on your device, causing it to malfunction. Unfortunately, this isn’t an uncommon problem among electronic manufacturers.
If your Apple TV’s update had indeed failed, you won’t be able to fix it using these basic troubleshooting solutions.
However, don’t start budgeting for a new Apple TV just yet. We have a few high-effective solutions that fix your crashed Apple TV device without breaking the bank.
4 Ways to Fix Apple TV’s Blinking Light with Black Screen
Fixing a crashed Apple TV requires specific solutions to restore and reboot your device without accessing its settings. Some of these methods are more complex than others, but they’re all tried and true ways to restore your Apple TV to its original condition.
1. Restore Your Apple TV
Restoring your Apple TV is an effective way to reboot its software, allowing it to turn on and work as intended.
The instructions to do so will depend on which Apple TV model you have.
Apple TV 4K
Unfortunately, you can not restore an Apple TV 4K at home.
Instead, you must make an appointment with customer support to bring your Apple TV to an Apple store so a professional technician can perform the restoration process for you.
For Apple TV HD or Earlier
Follow the instructions below to restore your Apple TV HD or earlier.
Materials Needed
- USB-C cable (Apple TV HD) or Micro-USB cable (Apple TV 3rd Generation)
- MacBook or PC with up-to-date iTunes
- Strong and stable internet connection
Instructions
Step 1: Disconnect your Apple TV from its HDMI cable and power cord.
Step 2: Connect one end of the USB-C or Micro-USB cable (depending on the model) to the port on the back of your Apple TV.
Step 3: Plug the other end of your USB-C/Micro-USB cable into your laptop’s USB port. Then, connect your Apple TV to power with its power cord.
Step 4: Now, you need to “find” your Apple TV on your laptop. For Mac users, head to the Finder app. PC users should launch their updated iTunes app.
Step 5: When you see your Apple TV in either the Finder or iTunes app, click on it.
Step 6: Find and select the Restore Apple TV button to start the restoration process. Do not unplug or turn off your computer or Apple TV until this process is complete. This process will take longer for users with slower internet connections.
Step 7: Once you see a confirmation message on-screen saying the restoration process is complete, disconnect your Apple TV from your computer and remove its USB-C/Micro-USB and power cable.
Step 8: Now, simply connect your Apple TV to your TV, ensuring its HDMI cable and power cord are securely attached.
2. Plug It Into a Smart TV
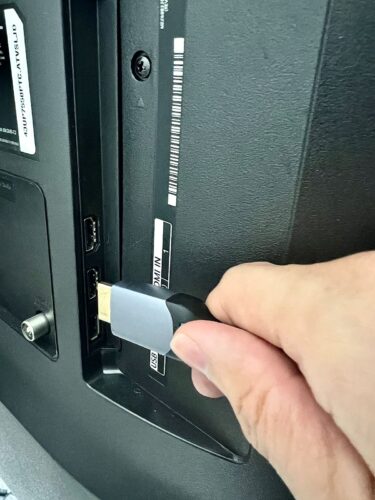
While Apple TVs can work with monitors, this setup may cause the software update to crash. So, disconnect your Apple TV from the monitor and connect it to a smart TV instead.
Make sure the HDMI port you’re connecting the Apple TV to is functioning correctly and that both devices are properly powered. Then, adjust the TV’s input to HDMI and wait a few minutes to see if the Apple TV successfully updates.
3. Try Another Power Outlet/Cord

Apple TV’s LED lights frequently blink when first starting up. However, if your device never moves past this sequence, there may be something wrong with its power supply. The device could be insufficiently powered, allowing it to only illuminate the LED light without actually turning on.
Power outlets and chords are especially prone to wear and tear, so examine both for any signs of damage. If you have another compatible power laying around the house, try using it to power your Apple TV and see the results.
Then, connect your Apple TV directly to another wall outlet. Do not use a surge protector or power strip, as these can contribute to power supply issues.
4. Contact Apple Support
Since this issue is usually caused by a failed or buggy update, Apple will likely replace your Apple TV for free. Yes, even if your warranty expired some time ago.
If Apple does not agree to send you a free replacement, they may offer you a new Apple TV model for a fraction of the original price.
Contact Apple customer support to inquire about getting your free Apple TV replacement.
Wrapping Things Up
Most of the time, you should be able to fix your Apple TV with a few basic troubleshooting tips, especially if the issue results from a simple software bug.
However, if none of these methods resolve your problem, the Apple TV’s update may have crashed.
In this case, the best course of action is to restore your Apple TV, connect it to a smart TV, try a different power outlet or cable, or reach out to Apple customer support who may supply you with a free replacement.
Has your Apple TV’s software update ever failed? What’s your experience getting a free replacement Apple TV?
Let us know in the comments below!

Yesenia Achlim is a technical copywriter and editor with a focus on AV equipment. She aims to break down complicated topics and make technology accessible, no matter your technical expertise. When she’s not teaching you how to replace a projector lamp, you can find her reading and baking.

Duy Anh is a seasoned technical editor specializing in helping readers troubleshoot TV, projector, and Wi-Fi issues. He’s always been drawn to logical problem-solving. His ability to approach matters from various angles with a neutral mindset enhances his technical expertise.