
5 Tested Ways To Connect an Optoma Projector to a Laptop (MacBook) Flawlessly
 Flawlessly")
- For a wired connection between an Optoma projector and a MacBook, identify compatible ports (like HDMI, VGA, or DVI) and use corresponding cables or adapters for connectivity.
- Wireless options like HDMI Wireless Transmitter and Receiver or streaming devices (Apple TV, Roku) allow for clutter-free, mobile connections using features like Airplay.
- Before initiating a connection, select the appropriate input source on the Optoma projector and, if necessary, perform additional steps like pairing devices or entering Airplay codes for wireless setups.
In this article, I will share with you five verified solutions to help you properly connect your Optoma projector to a MacBook or any laptop type.
Let’s dive in!
Quick Navigation
Find the Right Cable or Adapter for the Connection
If you want a wired connection between your Optoma projector and MacBook, you must choose an appropriate cable or adapter based on the video connection ports available on the two devices.
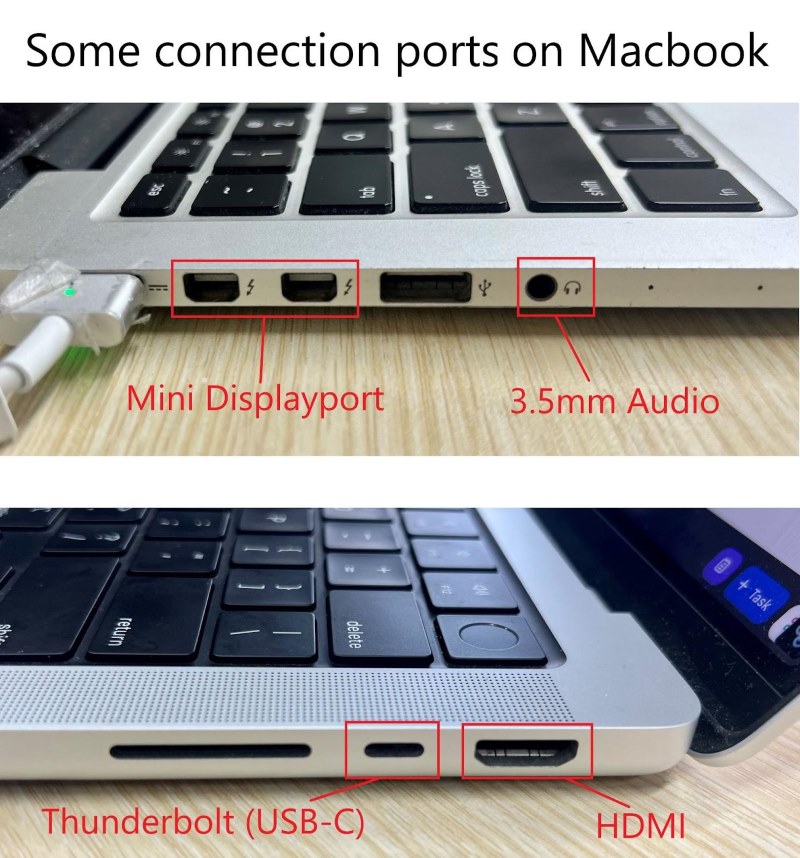
The display connectivity options on MacBooks are HDMI, Mini DisplayPort, and Thunderbolt (USB-C).
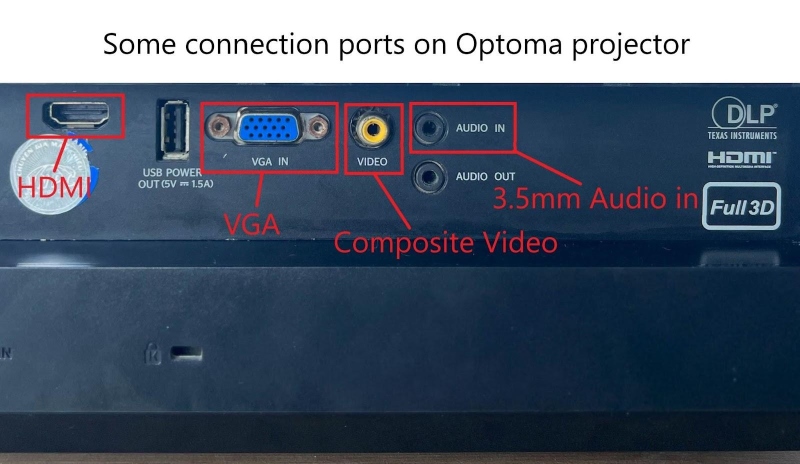
On the other hand, for video input, most Optoma projectors have HDMI, VGA, DVI, component video, composite video, and/or S-video ports.
It’s best to choose a connector that is available on both devices. For instance, if your MacBook has an HDMI output and your Optoma projector has an HDMI input port, connect both with an HDMI cable.
If the connectors on both devices don’t match, you can use an adapter to create your connection.
The table below shows cables and adapters to use depending on the video ports available on both devices. Check it out to save time.
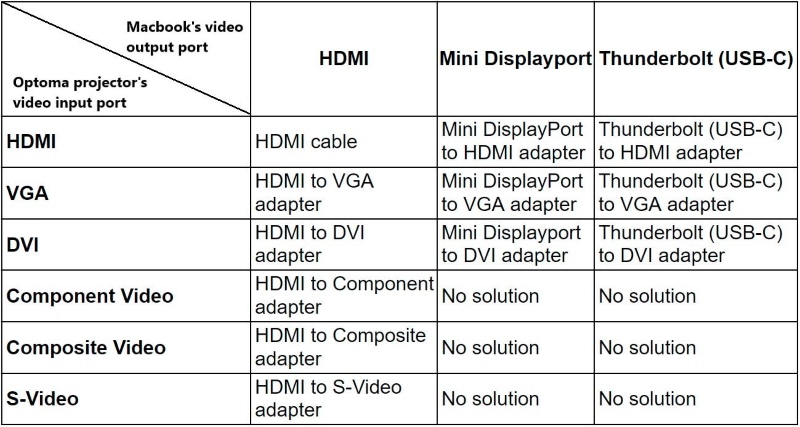
Once you have determined the appropriate cable or adapter, you can proceed with the solutions in the next section.
Wired Solutions
For wired connections, we recommend HDMI. HDMI is the most common interface on modern media devices and is the current standard for transmitting high-quality signals.
Where HDMI is not available on one or both devices, you can use adapters or a different connector.
Ensure you turn on your projector and MacBook before establishing any of the wired connections below.
1. Optoma Projector Has an HDMI Input Port
If your Optoma projector has an HDMI input port, you can use one of the following:
Below is a demo for the HDMI cable solution:
Step 1: Plug one end of the HDMI cable into the HDMI output port on your MacBook.
Step 2: Plug the other end of the HDMI cable into the HDMI input port on your Optoma projector.
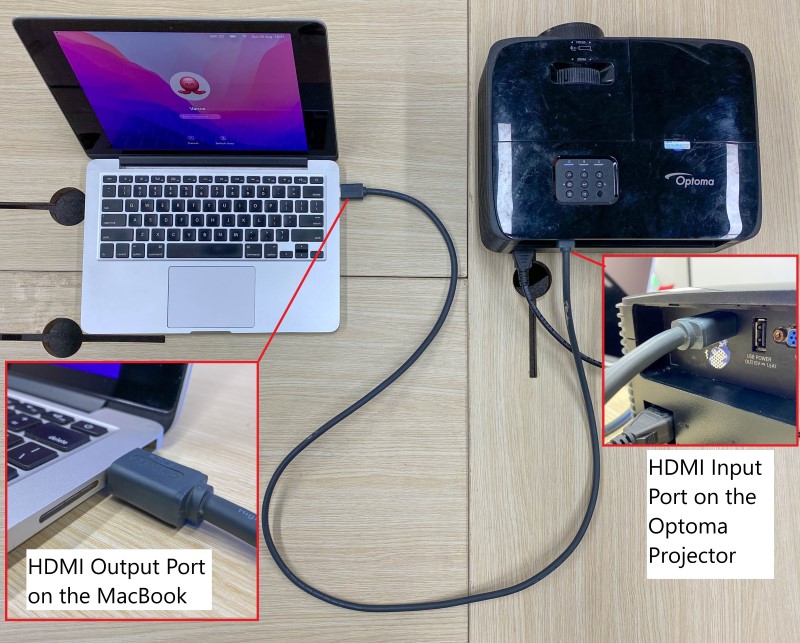
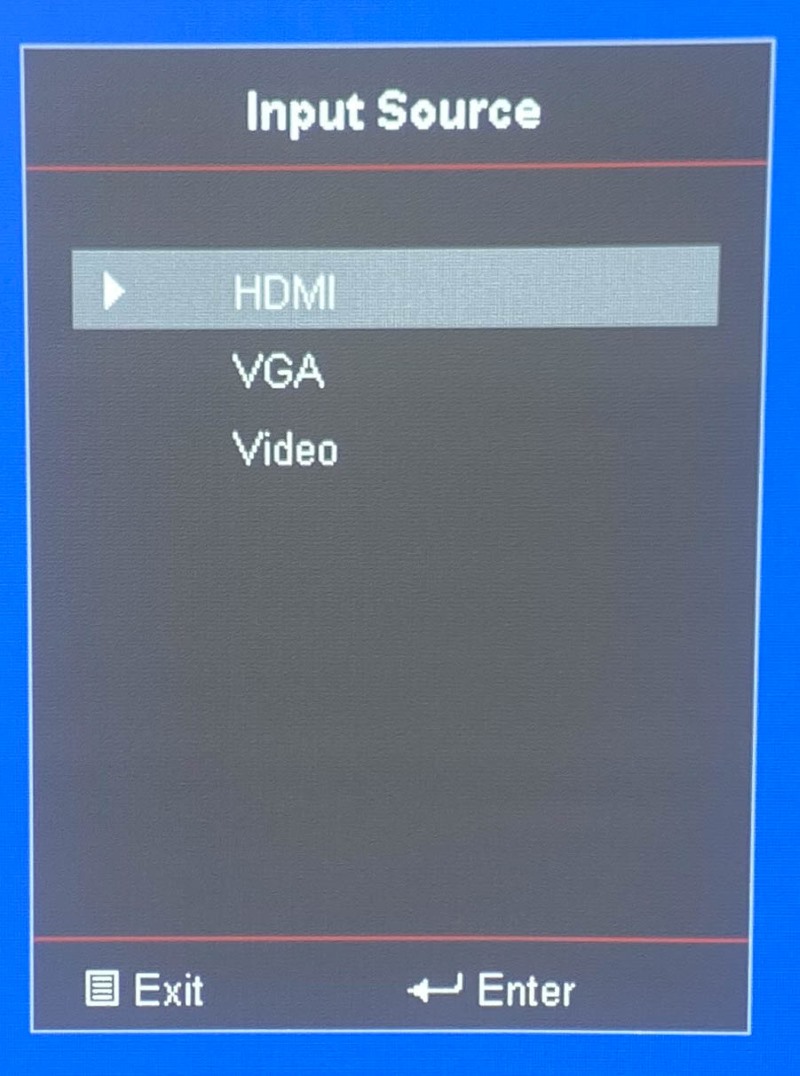
Step 3: Switch the Input settings on the projector to HDMI.
2. Optoma Projector Has a VGA Input Port
No HDMI? No problem.
If your projector only has a VGA input port, you can use any of the adapters below:
Note: If you’re using the HDMI to VGA Adapter, you may need an HDMI Splitter to bypass HDCP (High-Bandwidth Digital Content Protection) on your MacBook, similar to this user’s situation.
We already have a comprehensive article titled “How to Disable HDCP on Your Mac Step-by-Step” that discusses the HDCP matter. Click here to learn more.
Here’s a demonstration of the HDMI to VGA Adapter and HDMI Splitter solution:
Step 1: Power on the HDMI to VGA Adapter and the HDMI Splitter.
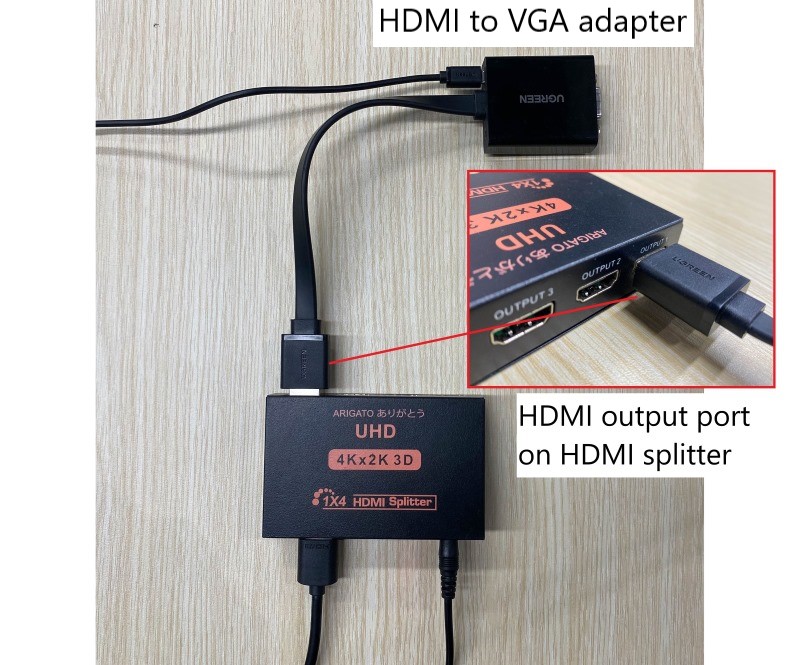
Step 2: Connect one end of an HDMI cable to the HDMI output port on your MacBook, and the other end to the HDMI input port on the HDMI Splitter.

Step 3: Connect the HDMI end of the HDMI to VGA adapter to the HDMI output port on the HDMI Splitter.
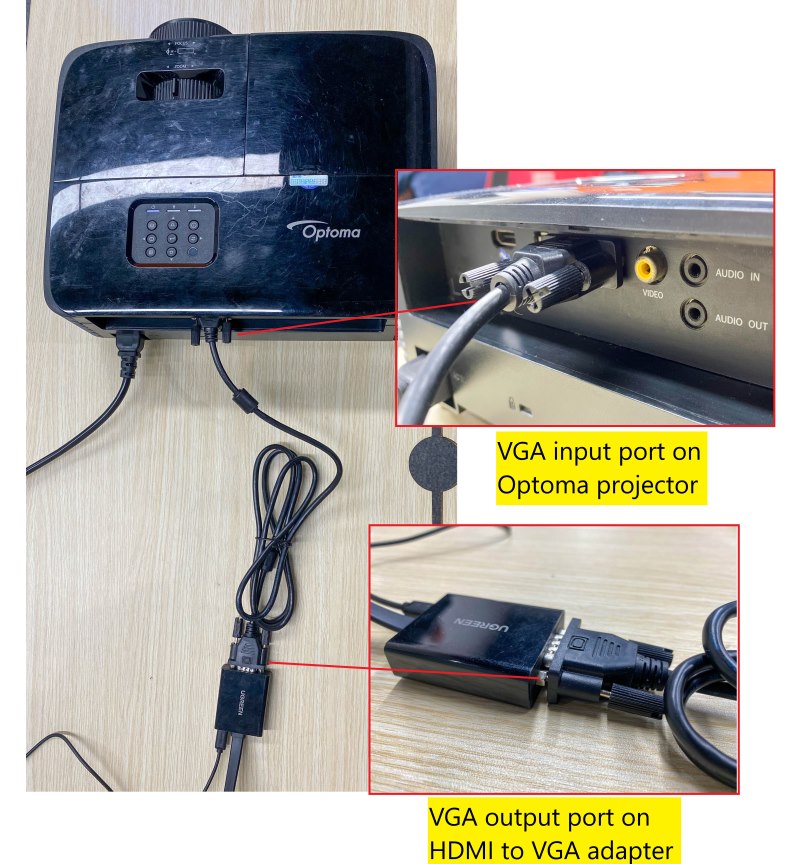
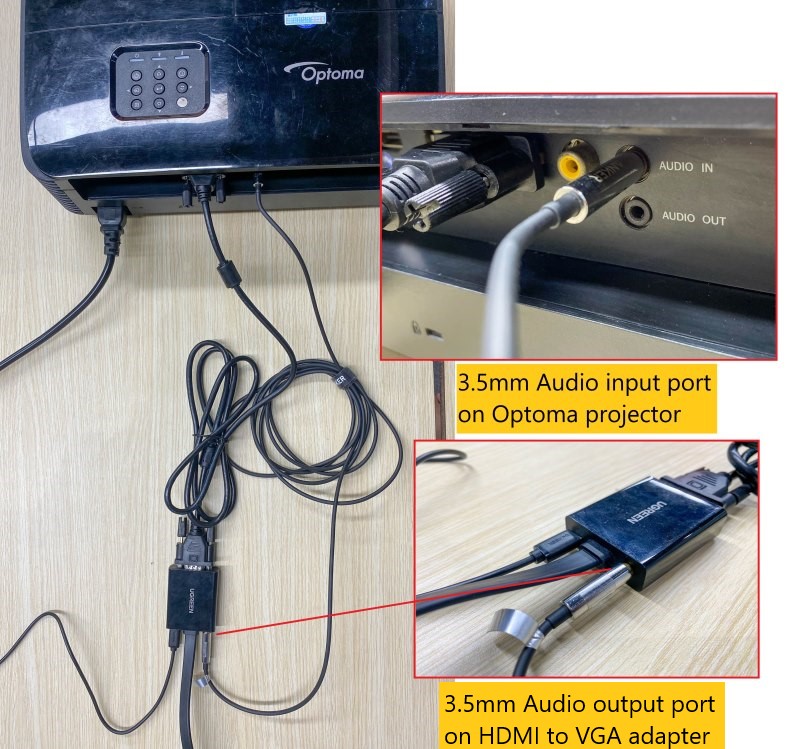
Step 4: Connect one end of a VGA cable to the VGA output port on the HDMI to VGA Adapter, and the other end to the VGA input port on your Optoma projector.
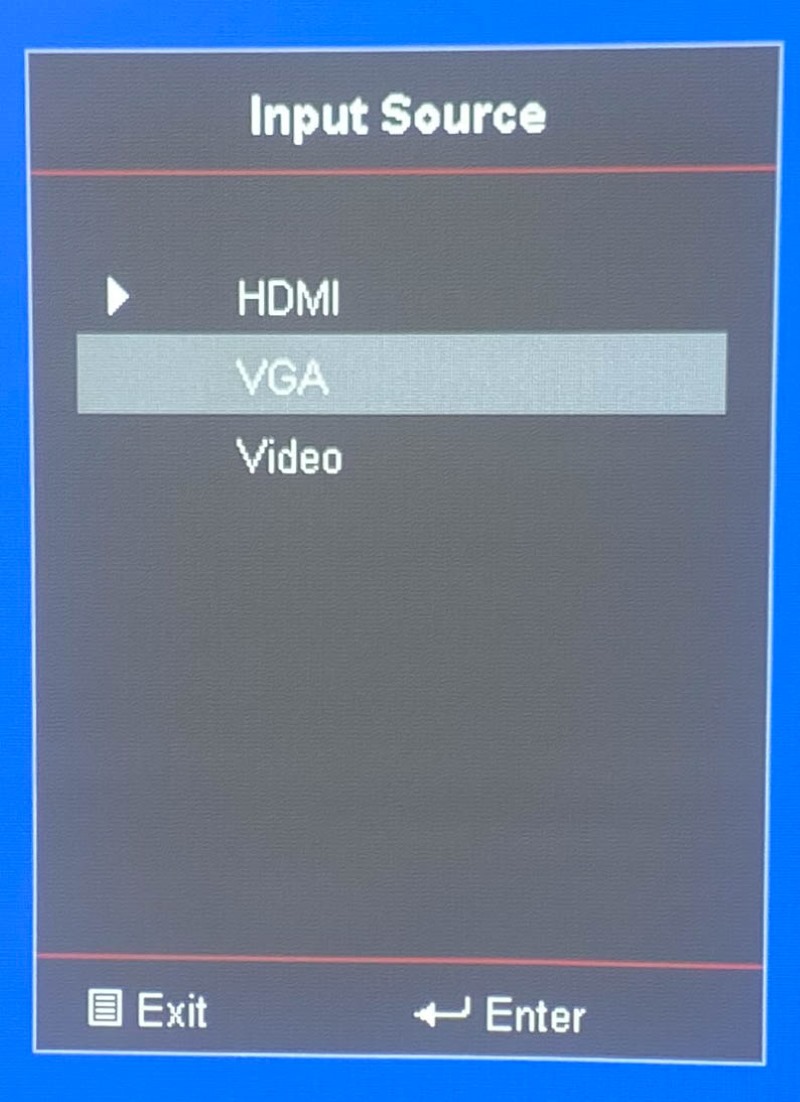
Step 5: Switch the Input Source settings on the projector to VGA if necessary.
Step 6: Use an AUX 3.5mm cable to plug one end into the 3.5mm Audio output port on the HDMI to VGA adapter and the other end into the 3.5mm Audio input port on your Optoma projector.
3. Optoma Projector Has DVI, Component Video, Composite Video, or S-Video Input Port
If you have to use other input ports on your Optoma projector (such as DVI, component video, composite video, or S-video) to create the connection, you can use one of the following adapters:
- HDMI to Component adapter
- HDMI to Composite (RCA) adapter
- HDMI to S-Video adapter
- HDMI to DVI adapter
- Mini Displayport to DVI adapter
- Thunderbolt (USB-C) to DVI adapter
Below is a demo with my HDMI to Composite (RCA) adapter. You can follow the same steps to use other adapters.
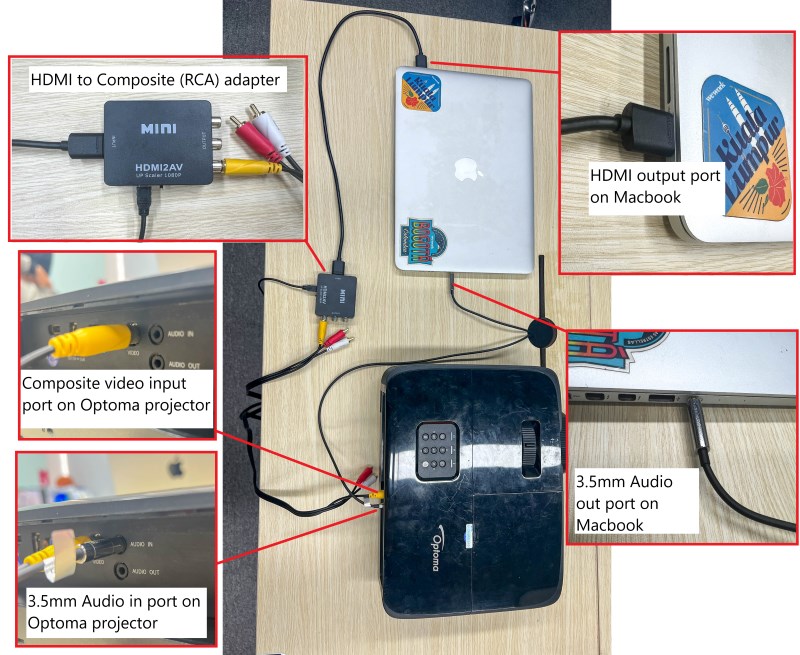
Step 1: Power on the HDMI to Composite (RCA) adapter.
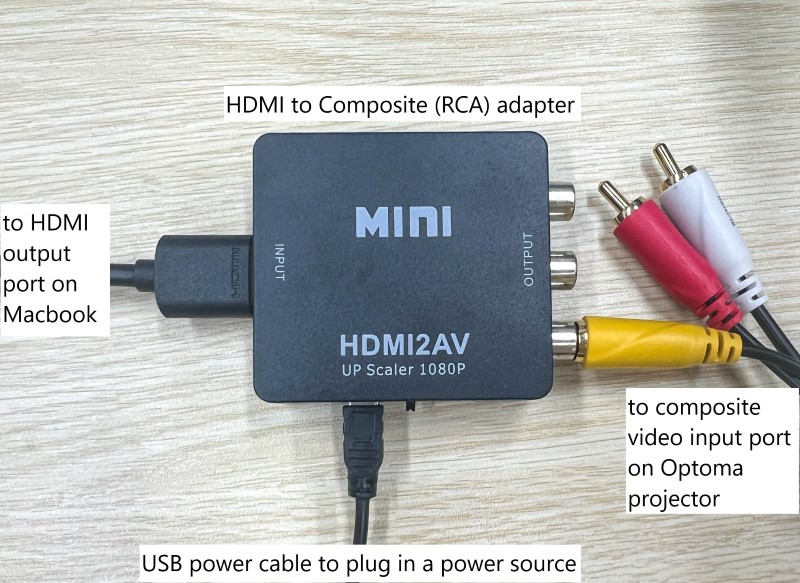
Step 2: Plug one end of an HDMI cable to the HDMI input port on the adapter and the other end to the HDMI output port on the MacBook.
Step 3: Plug one end of an RCA cable to the composite video output port (yellow port) on the adapter and the other end to the composite video input port (yellow port) on your Optoma projector.
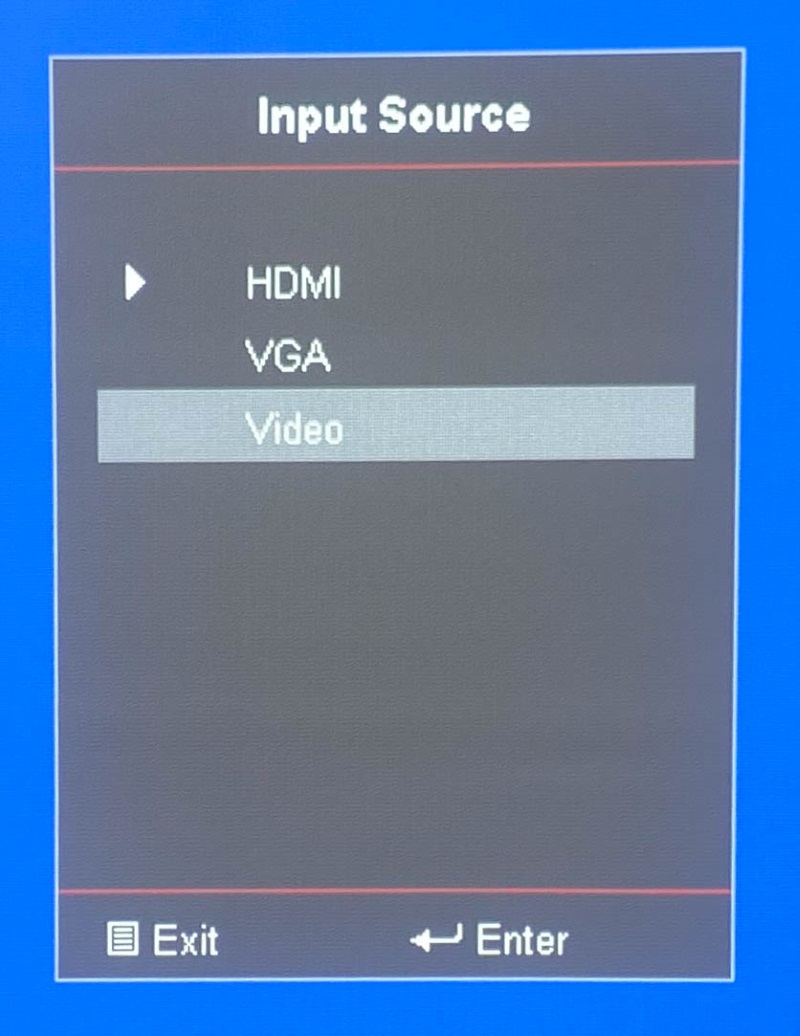
Step 4: Switch the Input Source settings on the projector to Video.
Step 5: Use an AUX 3.5mm cable to get audio from the MacBook to the projector.
Wireless Solutions
Wireless connections provide more mobility for devices and get rid of cable clutter.
If you prefer to connect your Optoma projector to a MacBook wirelessly, you can use an HDMI Wireless Transmitter and Receiver. You can also use streaming devices to receive media from your MacBook without cable connections.
In this section, we’ll walk you through the processes for using the HDMI Wireless Transmitter and Receiver, Apple TV, and Roku player.
1. HDMI Wireless Transmitter and Receiver
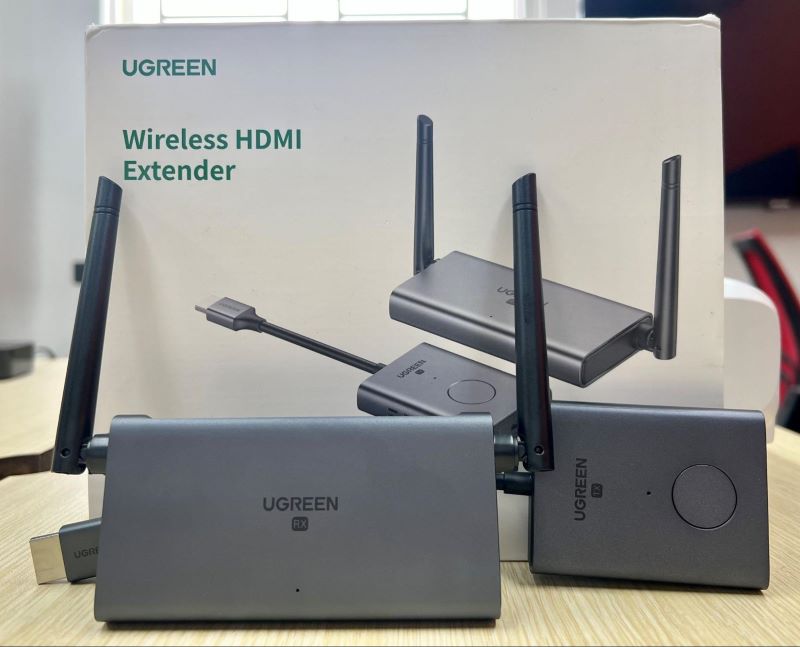
HDMI Wireless Transmitter and Receiver send AV (audio/video) signals from source to display without cables. They come as a pair; transmitter and receiver.
The transmitter (connected to your source device) sends out AV signals, which the receiver (connected to your display device) receives and decodes. Some transmitters send signals across a room, while others send signals through walls; into other rooms.
If you have HDMI ports on both devices, follow the steps below to use an HDMI wireless transmitter and receiver:
Step 1: Plug both transmitter and receiver into power (they come with USB power cables). Also power on your projector and MacBook.
Step 2: Use a toothpick to press the Reset button on the HDMI Receiver to initiate a reset (skip this step if your HDMI Receiver does not have the Reset button).

Step 3: Connect the HDMI end on the HDMI Transmitter to your MacBook’s HDMI output port.
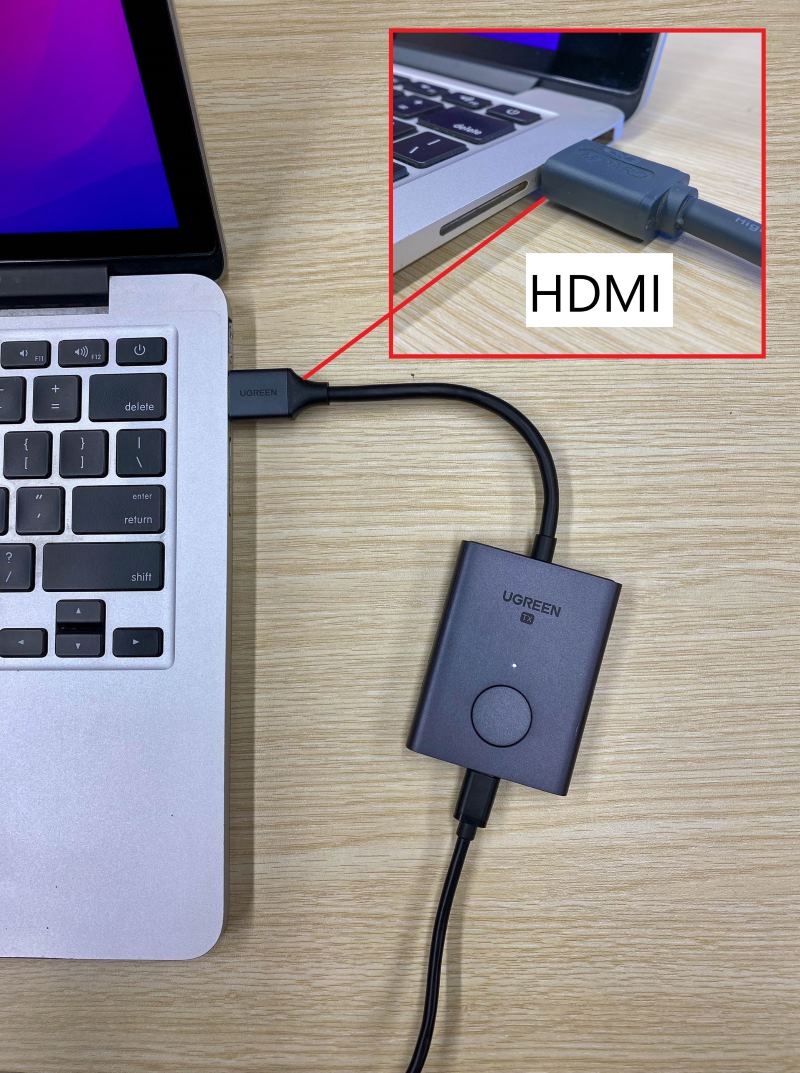
Step 4: Use an HDMI cable to connect the projector’s HDMI input port to the HDMI receiver (output).
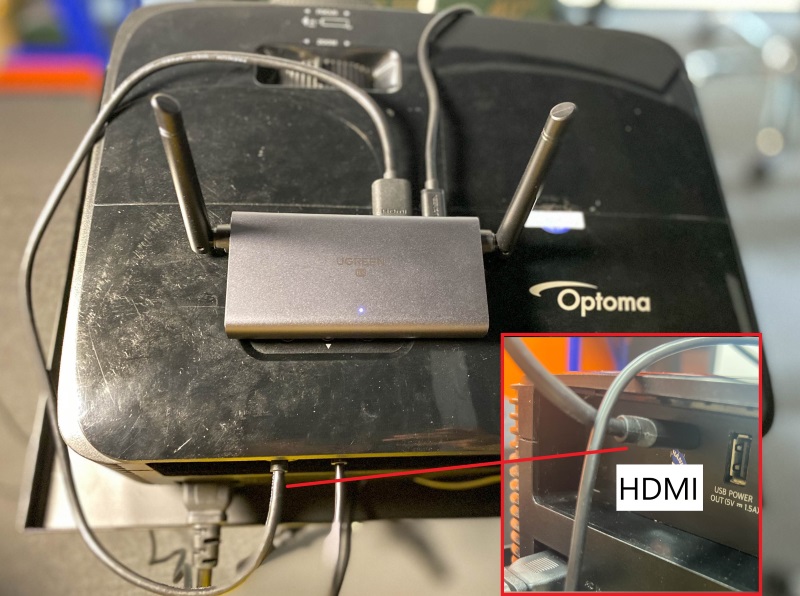
Step 5: Ensure your projector’s Input Source is set to HDMI.
Step 6: Wait for the “Please tap the button to cast the screen” message to appear on the projector screen.
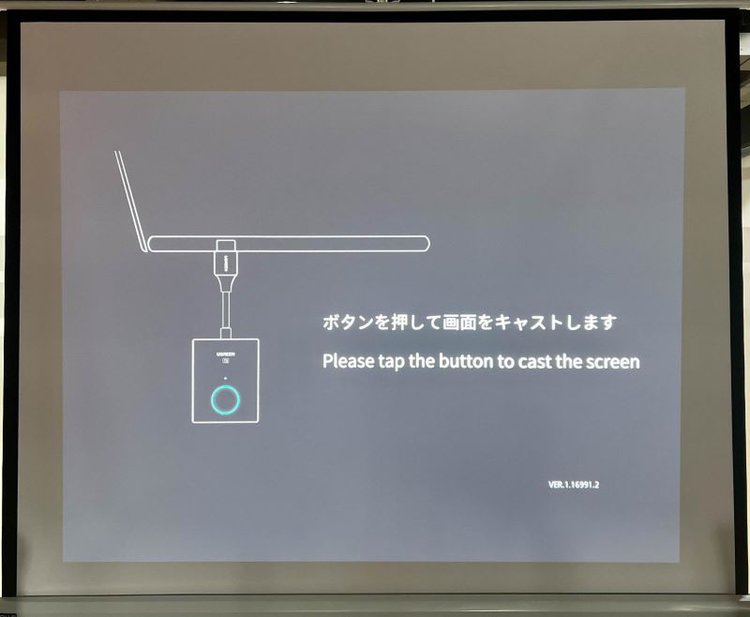
Step 7: Press the pairing button on the HDMI Transmitter to link Transmitter to Receiver and start casting.
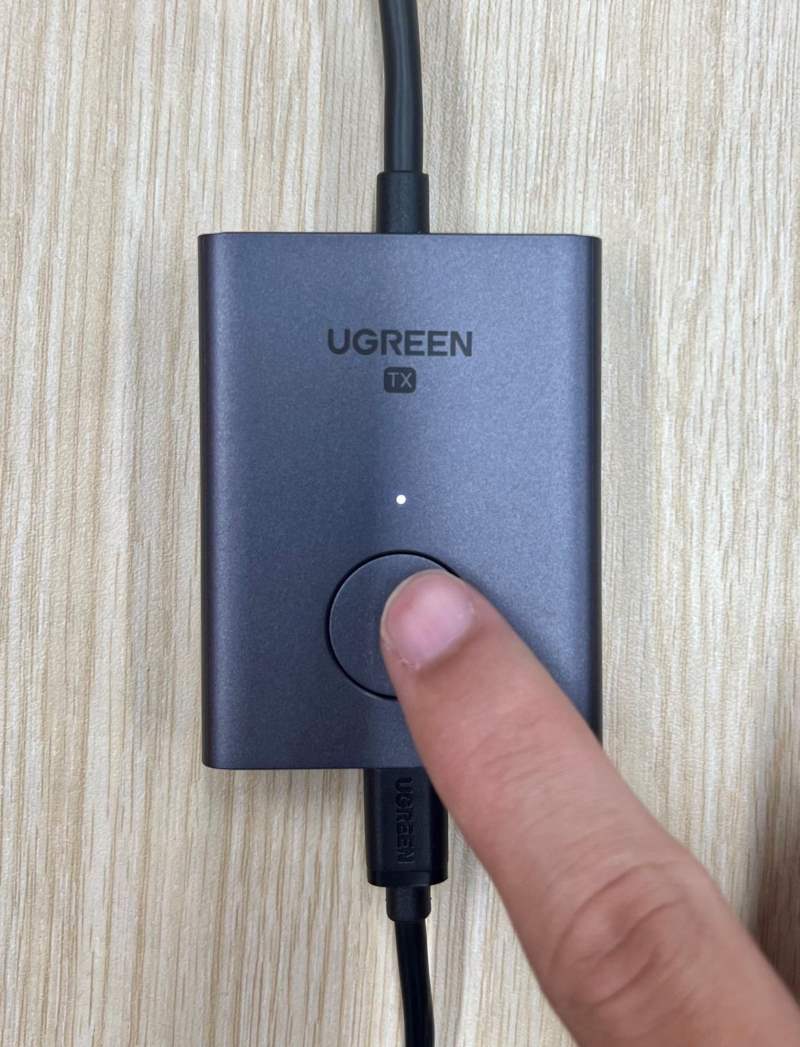
2. Airplay-Enabled Streaming Device
Streaming devices connect to your projector via HDMI. You can cast content to these devices from other sources connected on the same Wi-Fi network.
For instance, you can connect Apple TV to the Optoma projector, then cast your MacBook to the Apple TV via Airplay.
We’ve outlined the processes for using Apple TV and Roku player below.
1. Apple TV
Step 1: Turn on your MacBook and projector.
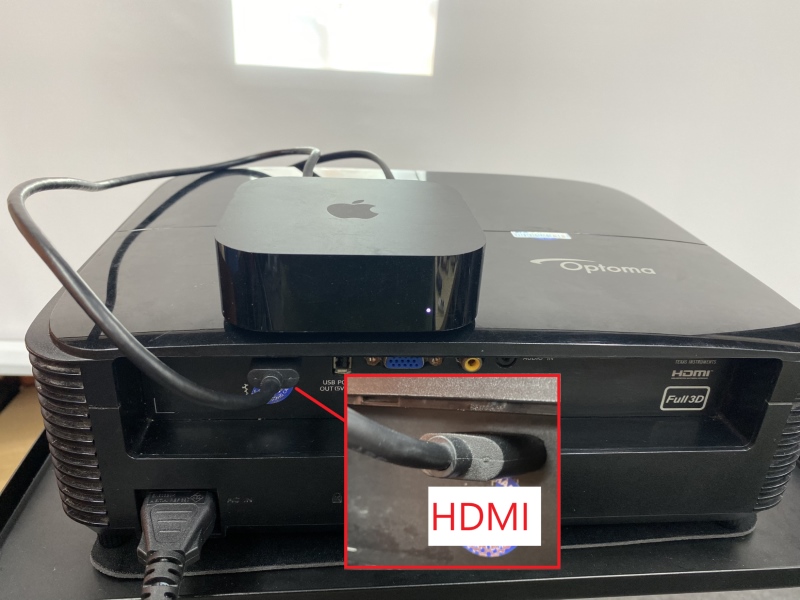
Step 2: Connect the Apple TV to your Optoma projector with an HDMI cable and switch the Input on projector to HDMI if necessary.
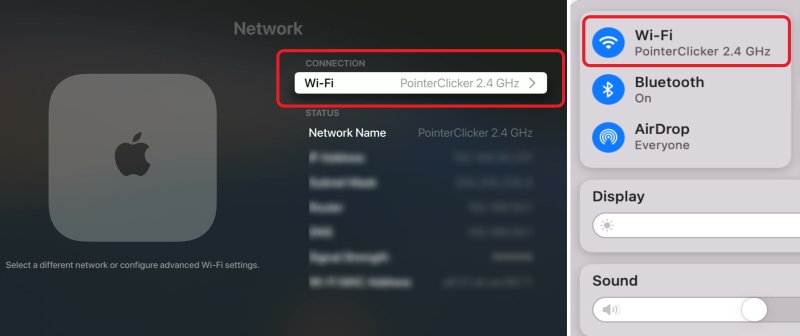
Step 3: Connect the Apple TV and MacBook to the same Wi-Fi network.
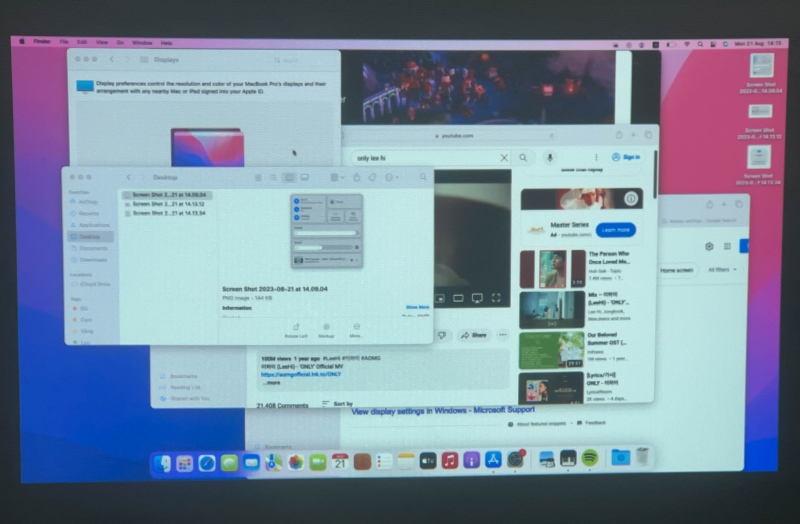
Step 4: On your MacBook, click the Control Center icon in the menu bar.
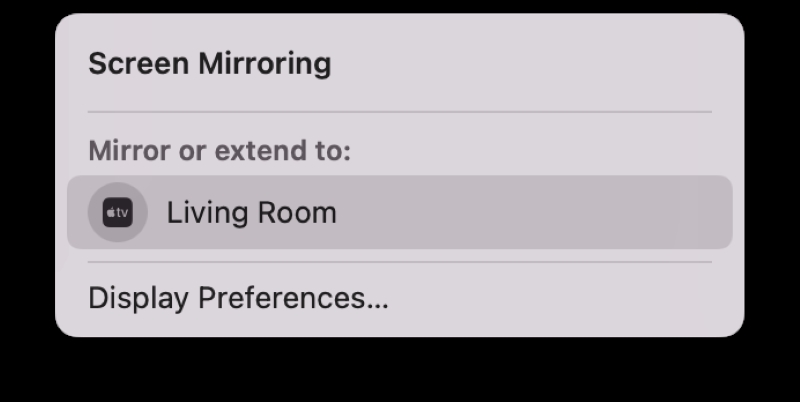
Step 5: Next, click Screen Mirroring.
![]()
Step 6: Choose your Apple TV from the list of devices.
Step 7: A four-digit Airplay code will appear on the Apple TV home screen. Input this code on your MacBook when you receive a prompt to.
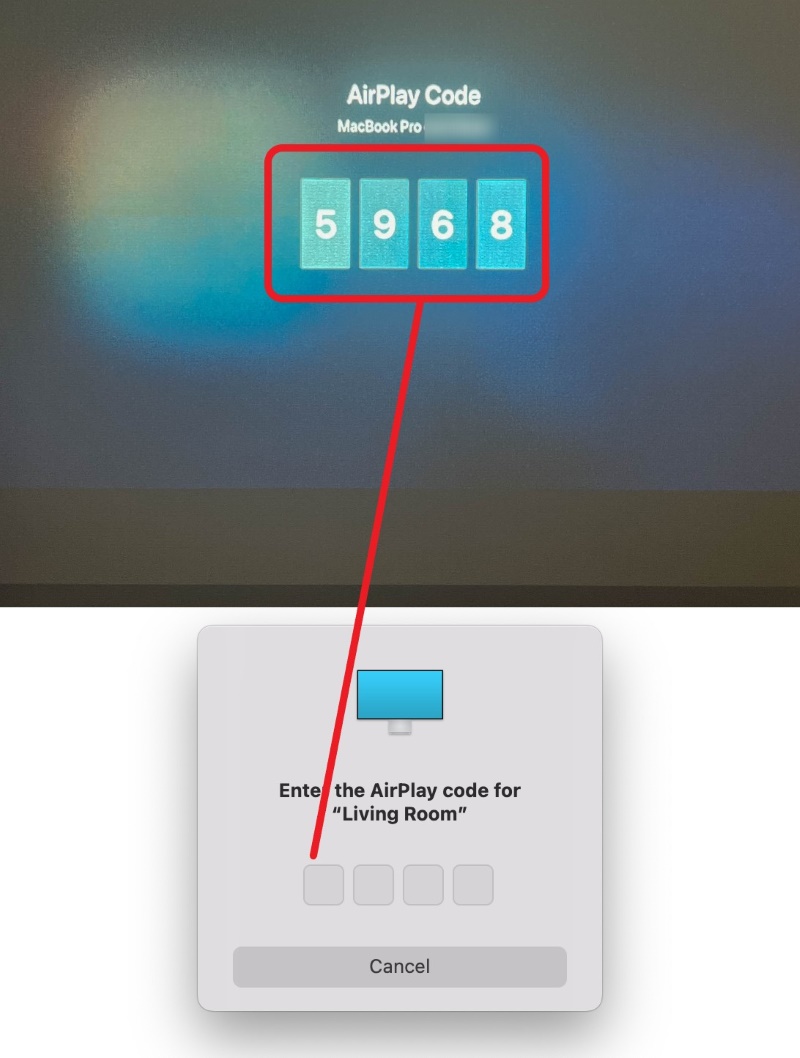
Now you have successfully cast your MacBook on the Apple TV.
2. Roku Player
To get started, you need a Roku device, an HDMI cable, and a wireless network.
Step 1: Use an HDMI cable to connect the Roku player and projector. If you’re using stick devices, plug the stick directly into the projector’s HDMI port.
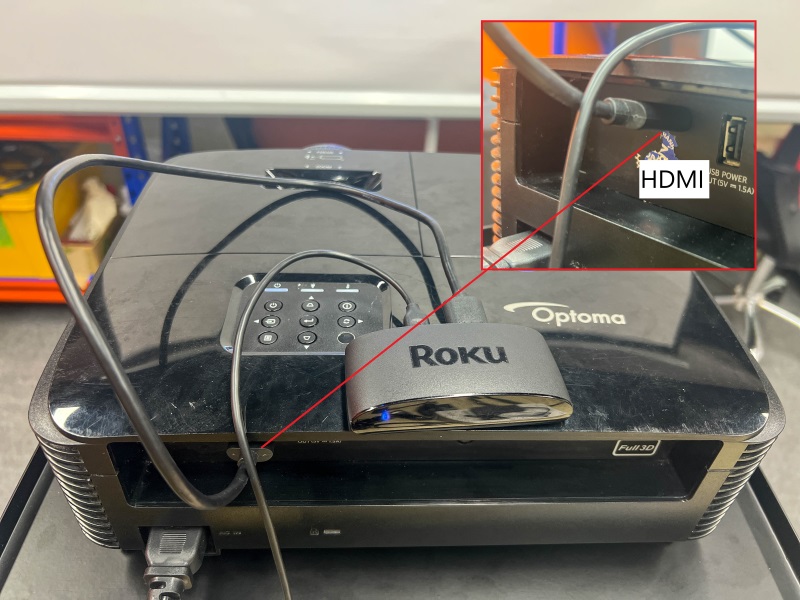
Step 2: Power up your Roku player and switch to HDMI input source on your projector.
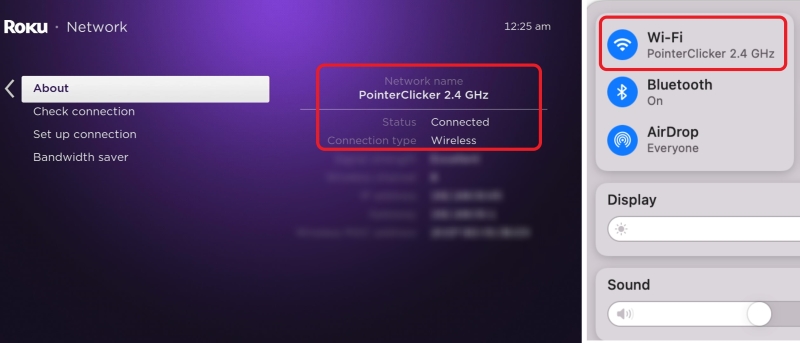
Step 3: Connect the Roku player and MacBook to a same Wi-Fi network.
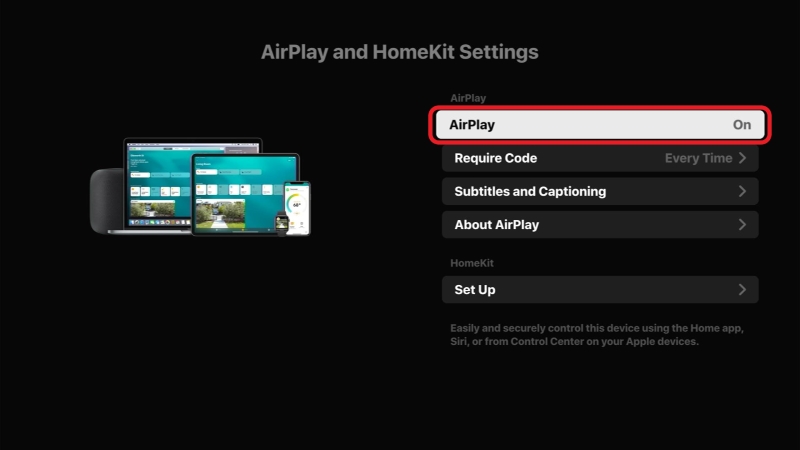
Step 4: Enable Airplay on your Roku device.
From the Roku home screen, go to Settings > Apple Airplay and HomeKit. Set the Airplay option to ON.
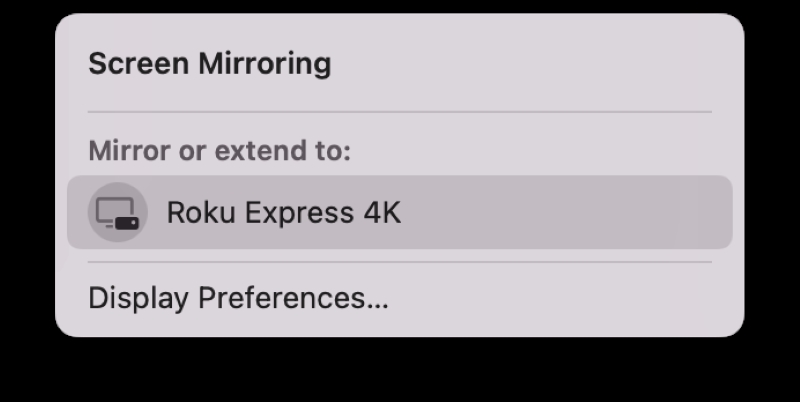
Step 5: Open Airplay on your MacBook, and go to “Control Center”.
Step 6: Click on “Screen Mirroring” from the drop-down menu.
Step 7: Select your Roku player from the list of available devices.
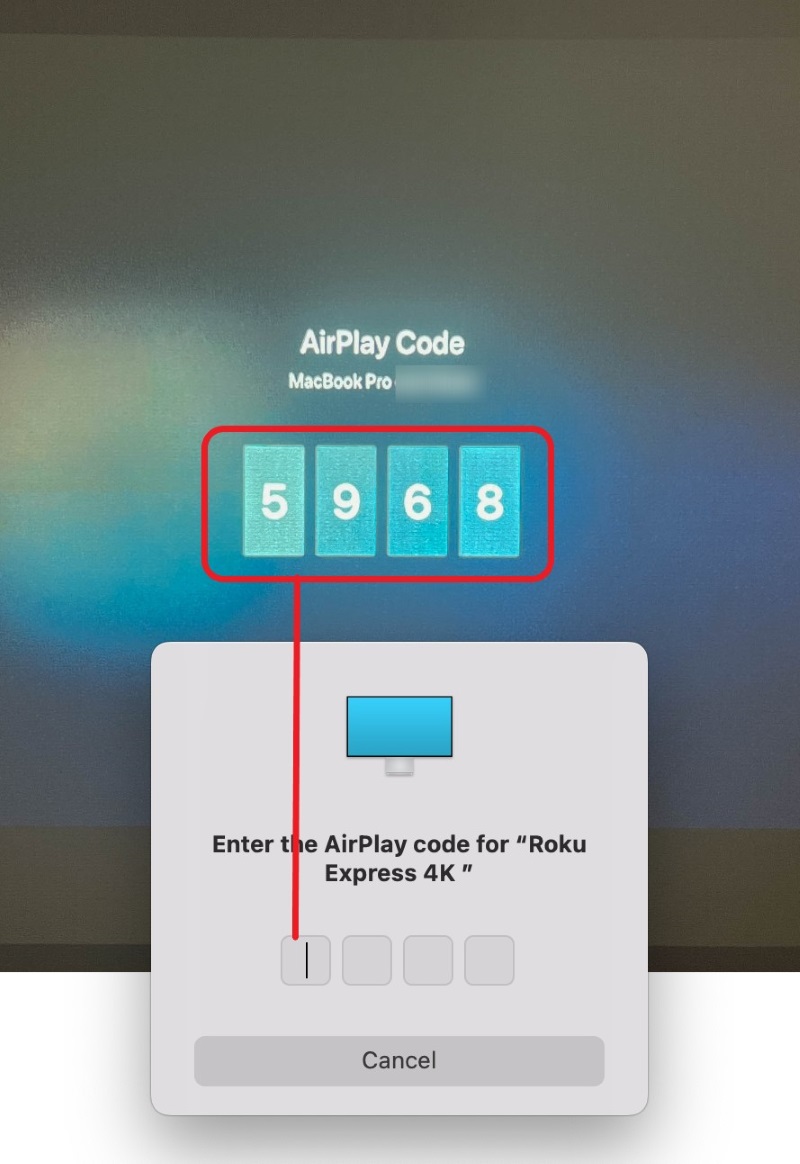
Step 8: If your MacBook requests a passcode, input the Airplay passcode displayed on the Roku’s screen.
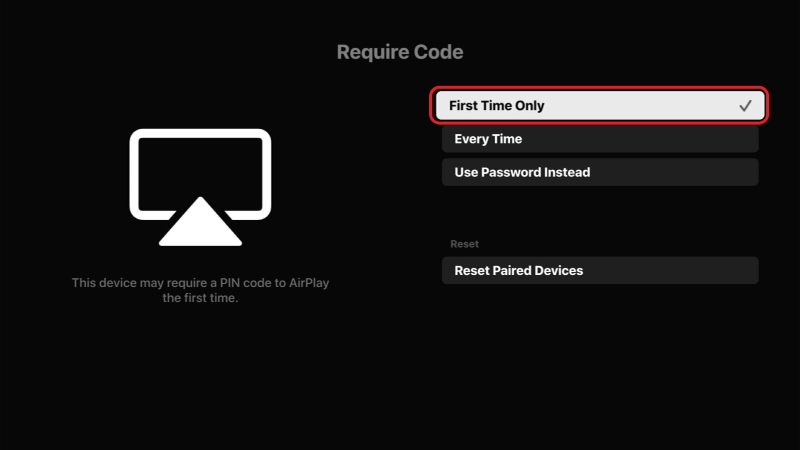
NOTE: Having to input a passcode every time you use Airplay can be inconvenient, so you can set the “Require Code” field (in the Apple Airplay and HomeKit menu) to “First Time Only”.
Conclusion
Connecting your MacBook to your Optoma projector is a convenient way to enjoy your desired content on a larger screen. You can choose between wired and wireless connectivity options.
With wired connections, we recommend HDMI for high-quality and convenient transmission. However, where HDMI is absent, you can use adapters to connect both devices over different connector ports.
You can also connect both devices wirelessly; use HDMI wireless transmitters or cast from your MacBook to a secondary media device that connects to the projector (i.e., Airplay enabled streaming devices).

Gabriella ‘Diogo is a technical writer with a vested interest in tech hardware and equipment. She shares her knowledge and processes in an easy-to-grasp, lighthearted style. When she’s not testing or researching device performance, you’ll find her writing short stories or rewatching episodes of her favorite sitcoms.