
3 Tested Methods to Connect Your Apple TV to a Projector Effortlessly

What To Know
- Method 1: Use an HDMI cable by plugging it into both the Apple TV’s HDMI OUT port and the projector’s HDMI IN port.
- Method 2: For projectors without HDMI, use the appropriate HDMI converter (VGA, RCA, DVI-D, or S-Video) and possibly an AUX cable for audio.
- Method 3: A Wireless HDMI Transmitter and Receiver offers a cable-free connection between the Apple TV and the projector.
In this guide, I show you three proven solutions to help you connect your Apple TV to a projector, including wired and wireless ways.
Let’s get started!
Quick Navigation
1. Use an HDMI Cable
This is the simplest solution where you only need to use an HDMI cable to connect the Apple TV to your projector.
Materials Needed
Step-by-Step Instructions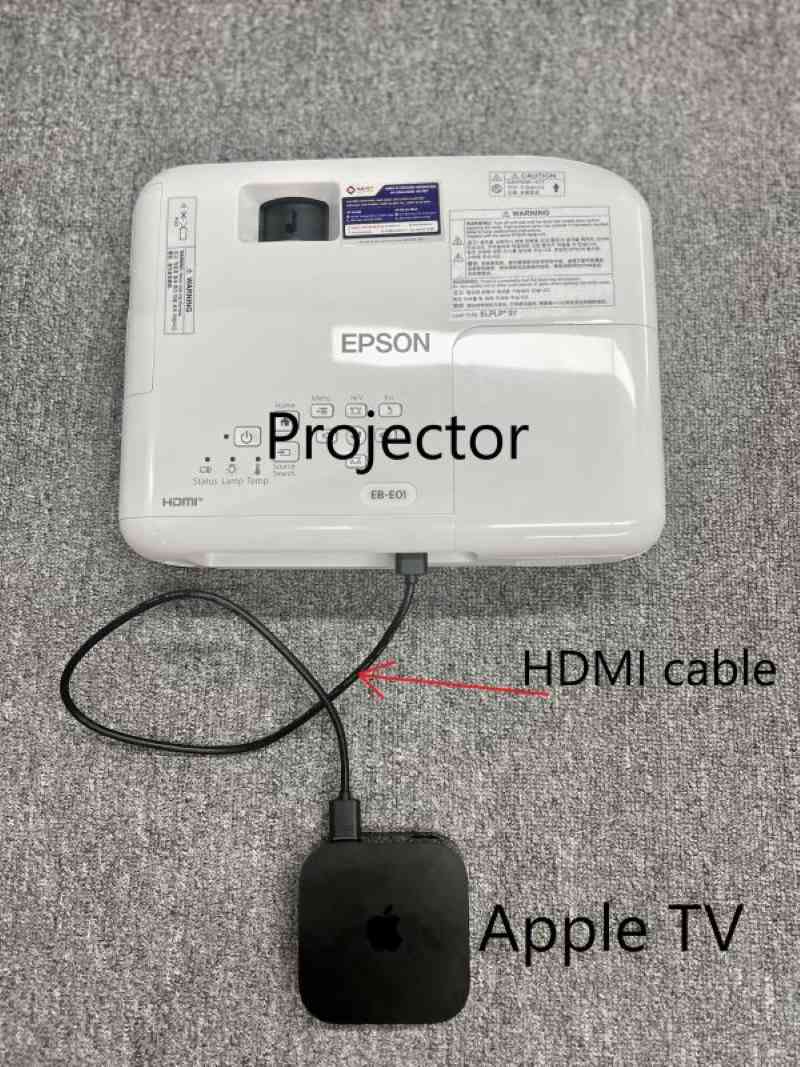
Step 1: Use an HDMI cable to connect one end to the HDMI OUT port on the Apple TV and the other end to the HDMI IN port on the projector.
Step 2: If needed, adjust the Input settings on the projector to HDMI.
2. Use an HDMI Converter
In case your projector lacks an HDMI input port and instead has VGA, RCA, DVI-D, or S-Video ports, you can use one of the converters listed below to connect your Apple TV to the projector:
Below is my demonstration example for the HDMI-VGA converter. You can apply in a similar way for the other converters.
Materials Needed
Step-by-Step Instructions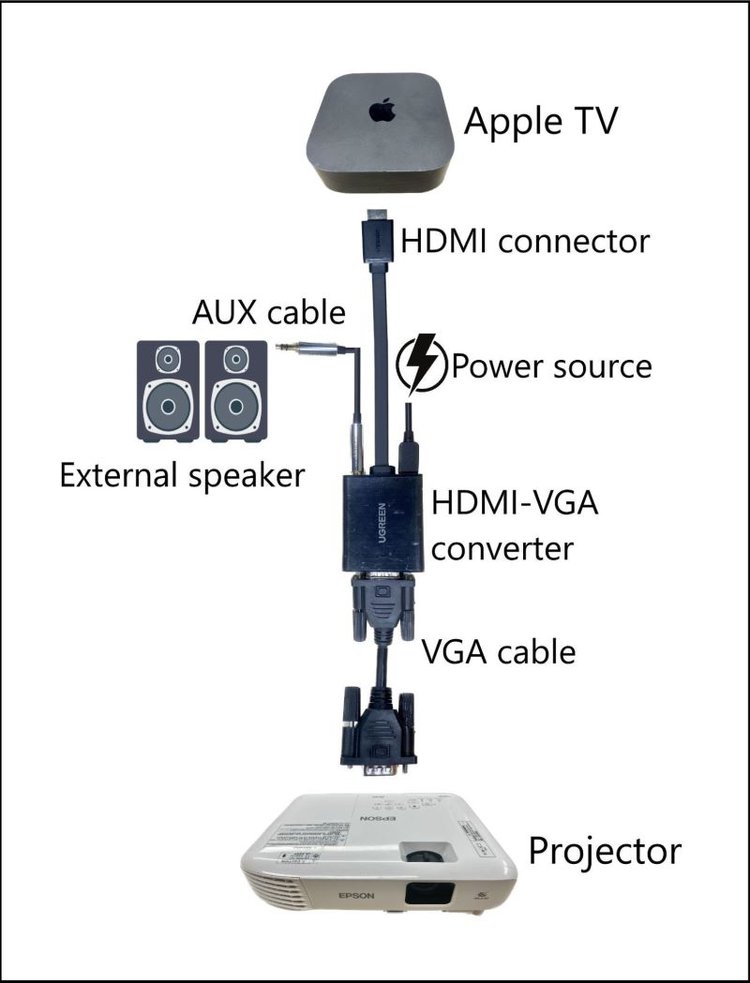
Step 1: Power the HDMI – VGA converter.
Step 2: Connect the HDMI connector on the converter to the HDMI OUT port on the Apple TV.
Step 3: Use a VGA cable to connect one end to the VGA OUT port on the converter and the other end to the VGA IN port on the projector.
Step 4: On the projector, change the Input setting to VGA if needed.
Step 5: Use an AUX cable to connect one end to the AUDIO OUT port on the converter and the other end to an external speaker.
3. Use the Wireless HDMI Transmitter and Receiver
If you’re looking for a more convenient option, I have a wireless solution that eliminates the need for cables.
By using an HDMI Transmitter and Receiver, you can easily connect your Apple TV to the projector without dealing with physical connections.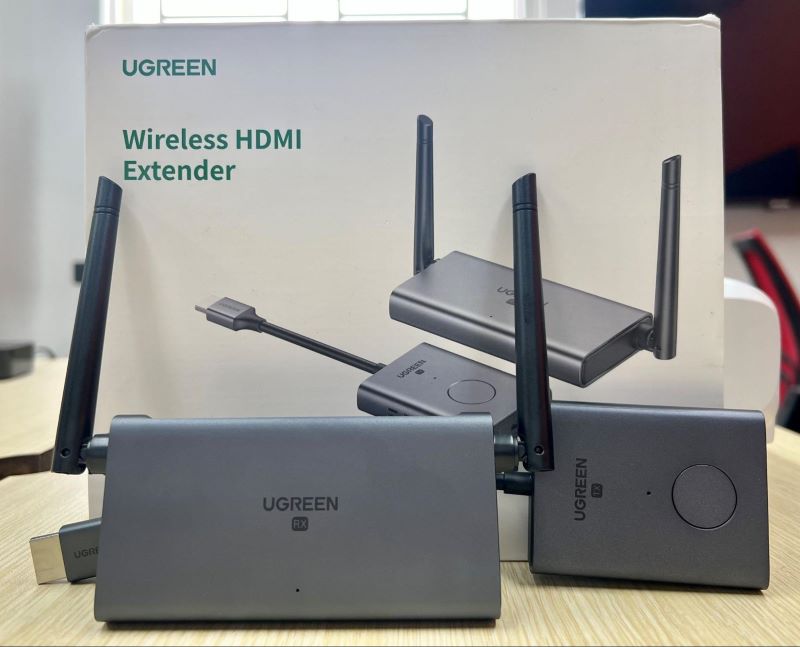
However, it’s important to note that this solution does come with a few drawbacks.
The HDMI Transmitter and Receiver tend to heat up quickly after a short period of operation.
Additionally, I have observed some input lag when using the HDMI Transmitter and Receiver to connect my PS4 to the projector for gaming purposes.
Nevertheless, when using the HDMI Transmitter and Receiver to connect my Apple TV to the projector, the movie experience remains acceptable.
Materials Needed
Step-by-Step Instructions
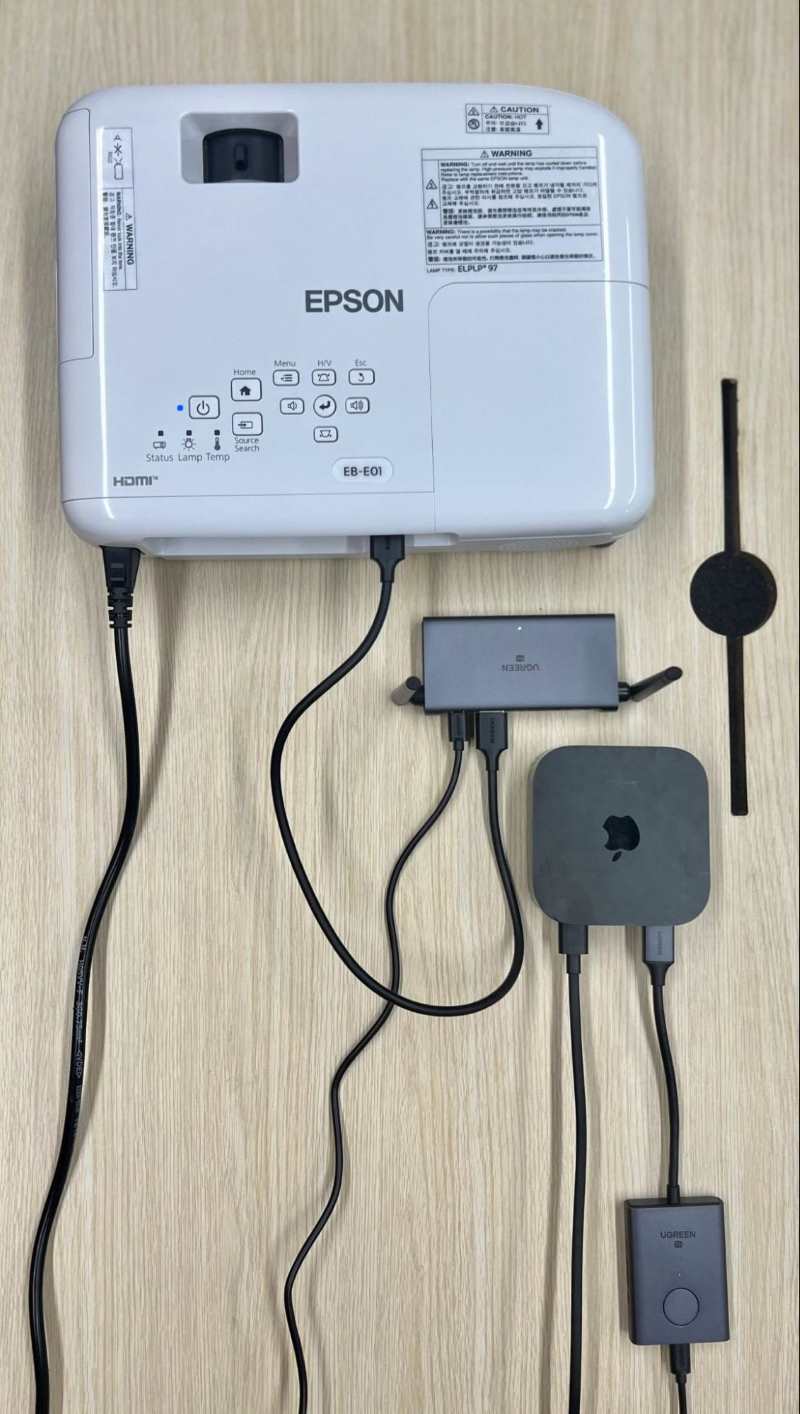
Please refer to the connection diagram below to use the HDMI Transmitter and Receiver to connect your Apple TV to the projector.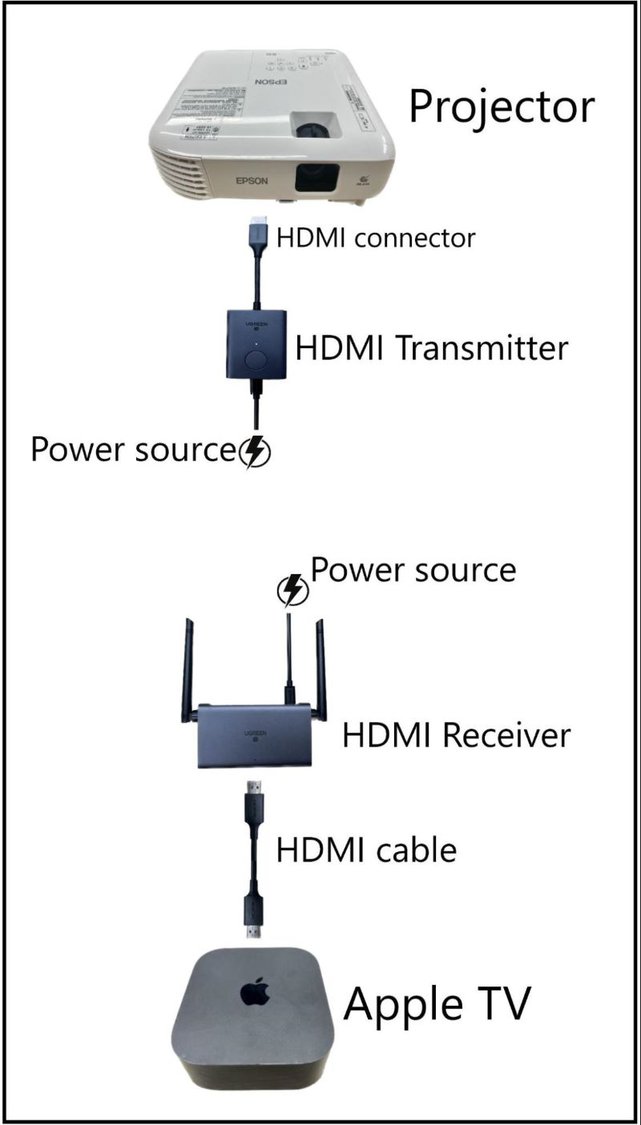
The final setup will look like this picture:
Step 1: Power on the HDMI Transmitter and Receiver, projector, and Apple TV.
Step 2: Use a toothpick to press the Reset button on the HDMI Receiver to initiate a reset. Skip this step if your HDMI Receiver does not have the Reset button.

Step 3: Connect the HDMI connector on the HDMI Transmitter to the HDMI OUT port on the Apple TV.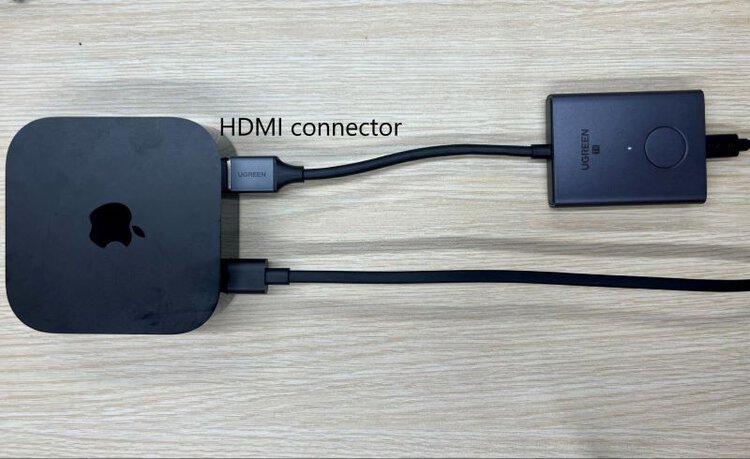
Step 4: Use an HDMI cable to connect one end to the HDMI port on the HDMI Receiver and the other end to the HDMI IN port on the projector.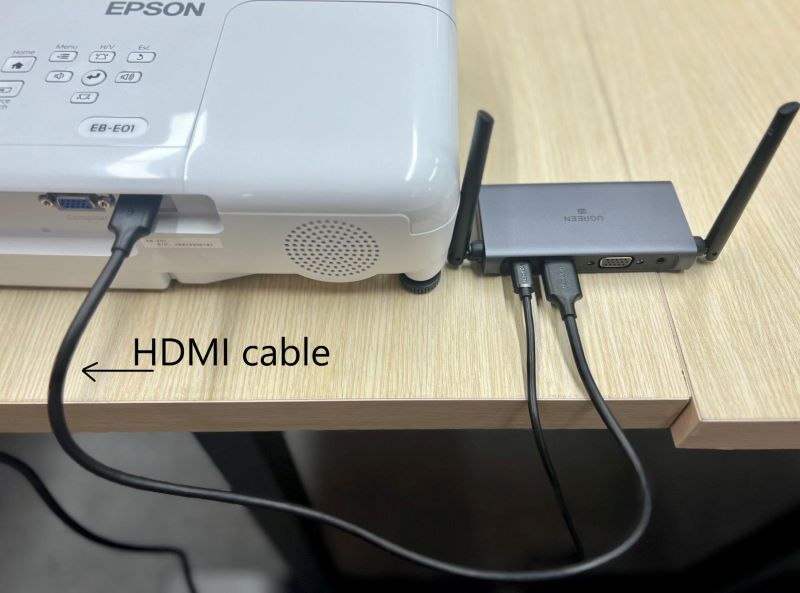
Step 5: If needed, adjust the Input settings on the projector to HDMI.
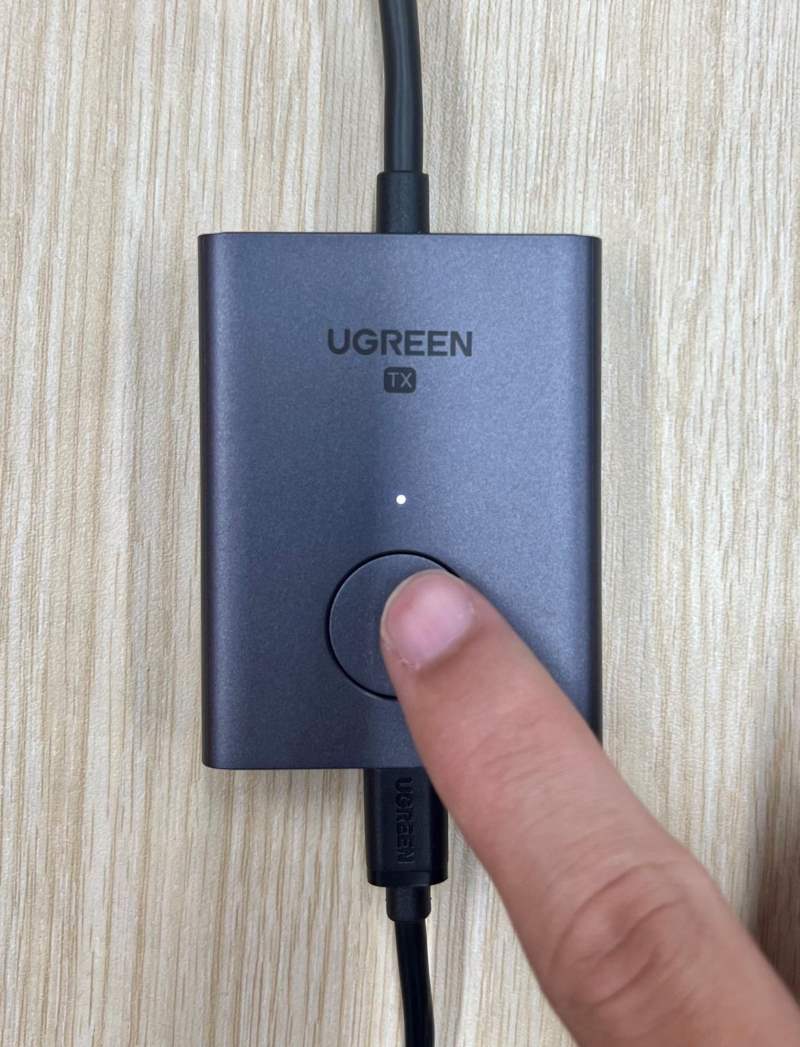
Step 6: Wait for the “Please tap the button to cast the screen” message to appear on the projector screen.
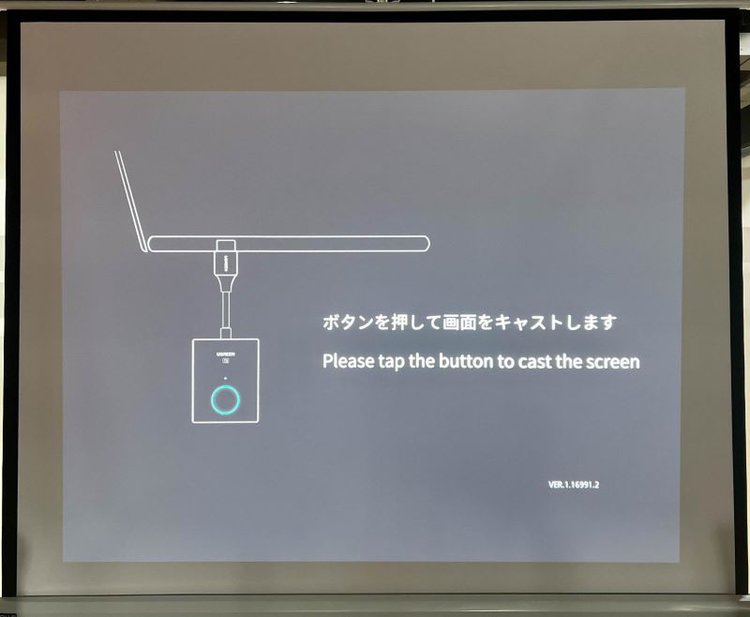
Step 7: Press the pairing button on the HDMI Transmitter to link the HDMI Transmitter to Receiver and start casting.
Now you can view the Apple TV home screen on the projector screen.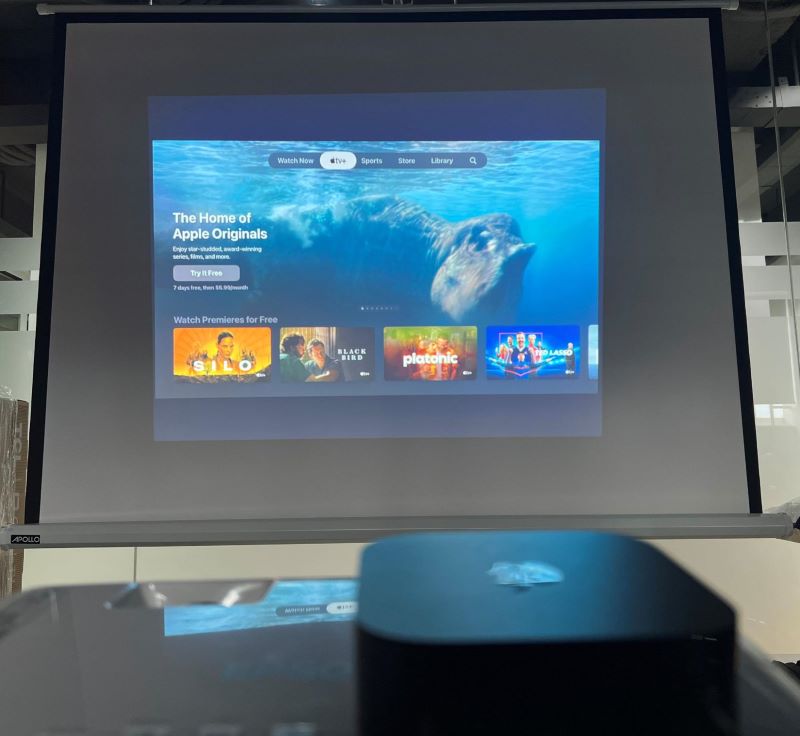
Bonus: First-generation Apple TV
The old Apple TV model, such as the first-generation Apple TV, will have two options for output video: HDMI or component ports.
You can utilize any of the aforementioned methods to connect your first-generation Apple TV to your projector using HDMI.
If you prefer to connect your old Apple TV to the projector using component ports, you will need a dedicated converter like Portta Component to HDMI Converter.
Watch the below video to learn more about the converter and how to use it.


Meet Vance. He’s a proud dad, a seasoned Electronics Engineer, and an avid tech lover. His proficiency in electronics and troubleshooting skills were instrumental in crafting Pointer Clicker. Vance is passionate about simplifying tech for those who aren’t well-versed in it.