
How To Connect an HDMI Monitor to a Laptop USB Port Step By Step

What To Know
- Computers can connect to HDMI monitors using a USB port, but the USB port must support the specific specs for the connection and require a compatible USB to HDMI adapter.
- For connection: Connect monitor and PC to power > Plug HDMI cable into monitor and adapter > Connect adapter to the PC’s USB port.
- Checking USB specifications on a laptop/PC is crucial before purchasing the adapter, and it can be done through device settings for both Windows and macOS.
Looking to bridge the gap between your HDMI monitor and a USB port?
This guide decodes the intricate world of USB to HDMI connections.
From adapter choices to compatibility checks, I’ve got your concerns covered.
Dive in to make the right connection effortlessly.
Quick Navigation
- How to Connect the Monitor’s HDMI Port to the Laptop’s USB-A Port
- How to Connect the Monitor’s HDMI Port to the Laptop’s USB-C Port
- How to Check Your USB’s Specification on Your Laptop?
- USB Specs Summary Table
- Is USB-A/B/C the Same as USB 2.0/3.0/4.0?
- Is USB Better than HDMI at Transfering Visual Content?
- Wrapping Things Up
How to Connect the Monitor’s HDMI Port to the Laptop’s USB-A Port
Almost all modern laptops/PCs have a USB-A port, which can be used to connect it to a monitor.
However, your laptop/PC’s USB-A port must meet the required specifications for high-resolution transmission purposes.
Skip to the following section How to Check Your USB’s Specification on your Laptop? to learn how to verify your USB port version.
Once you’ve confirmed that your USB-A port is compatible with your setup, you’re ready to connect your laptop/PC to your monitor by following the instructions below.
Materials Needed
Instructions
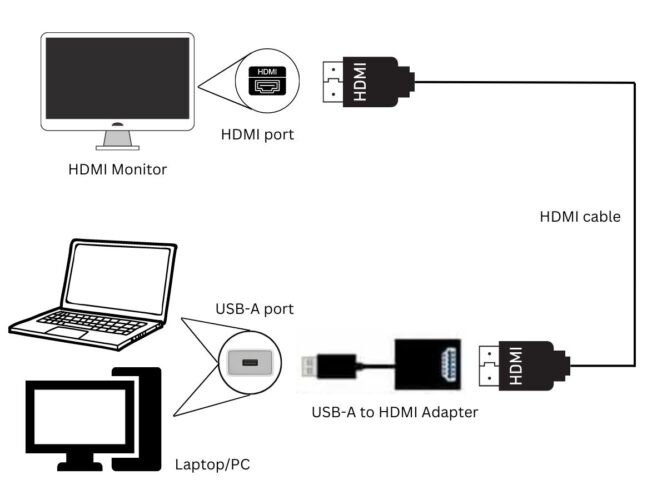
Step 1: Connect your monitor and PC to the power. If you’re using a laptop with a built-in battery, ensure it’s sufficiently charged and connected to its charging cable if needed.
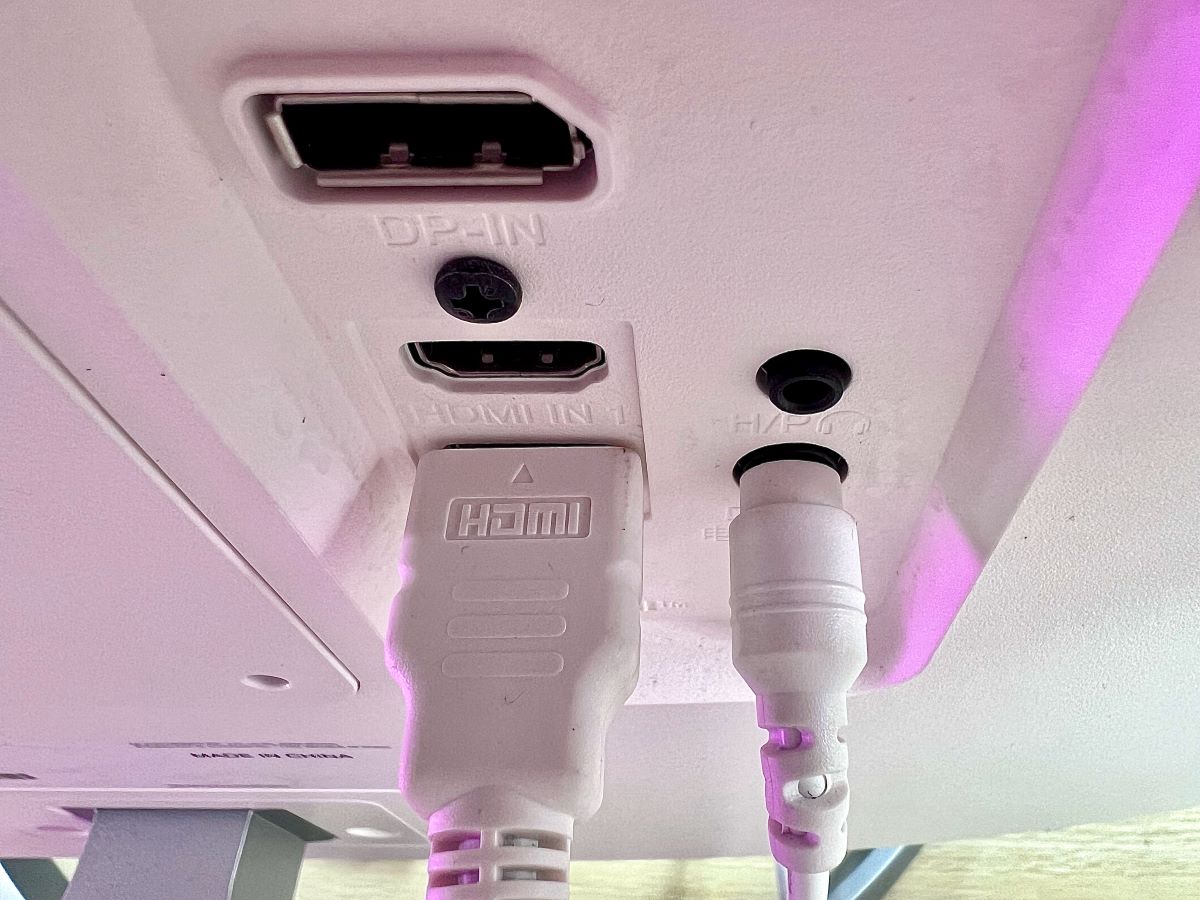
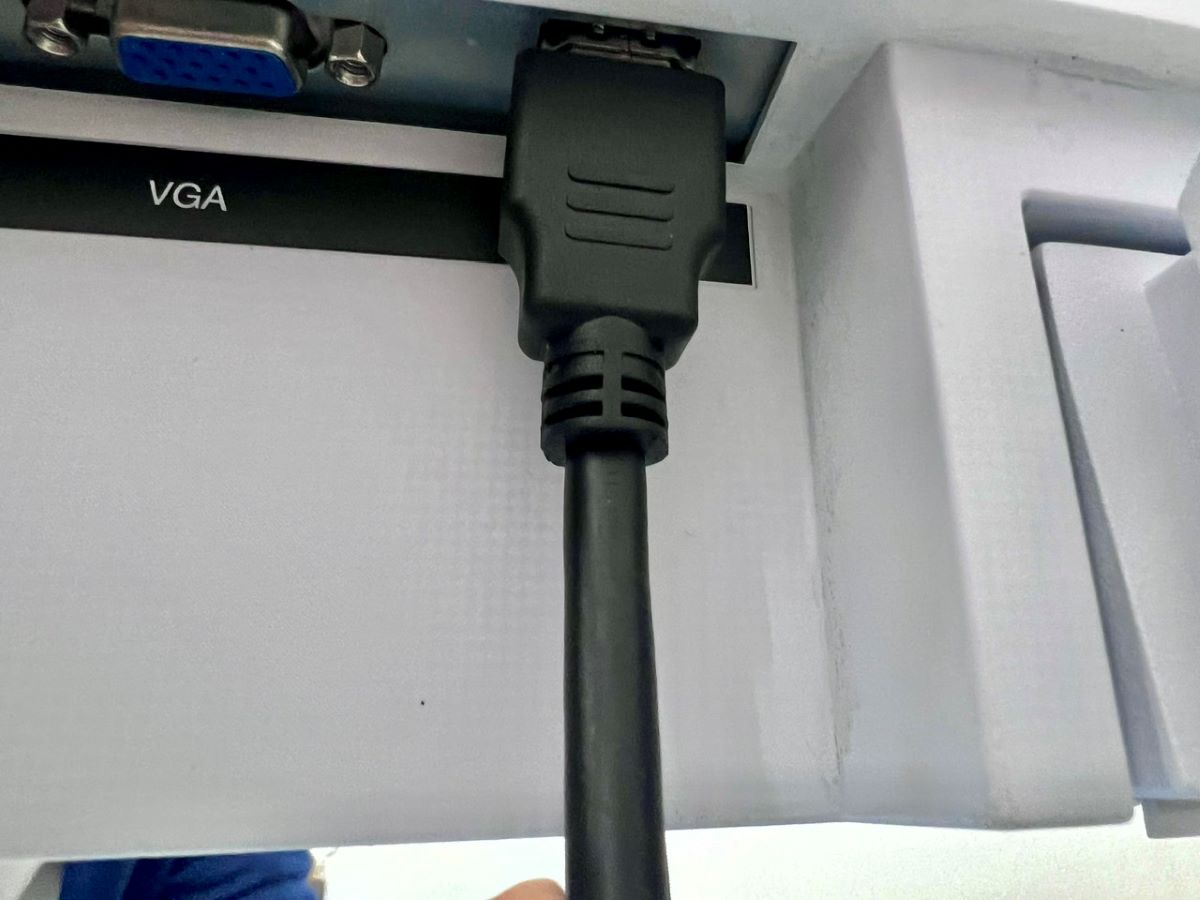
Step 2: Plug the HDMI cable into the HDMI ports of your monitor and adapter.
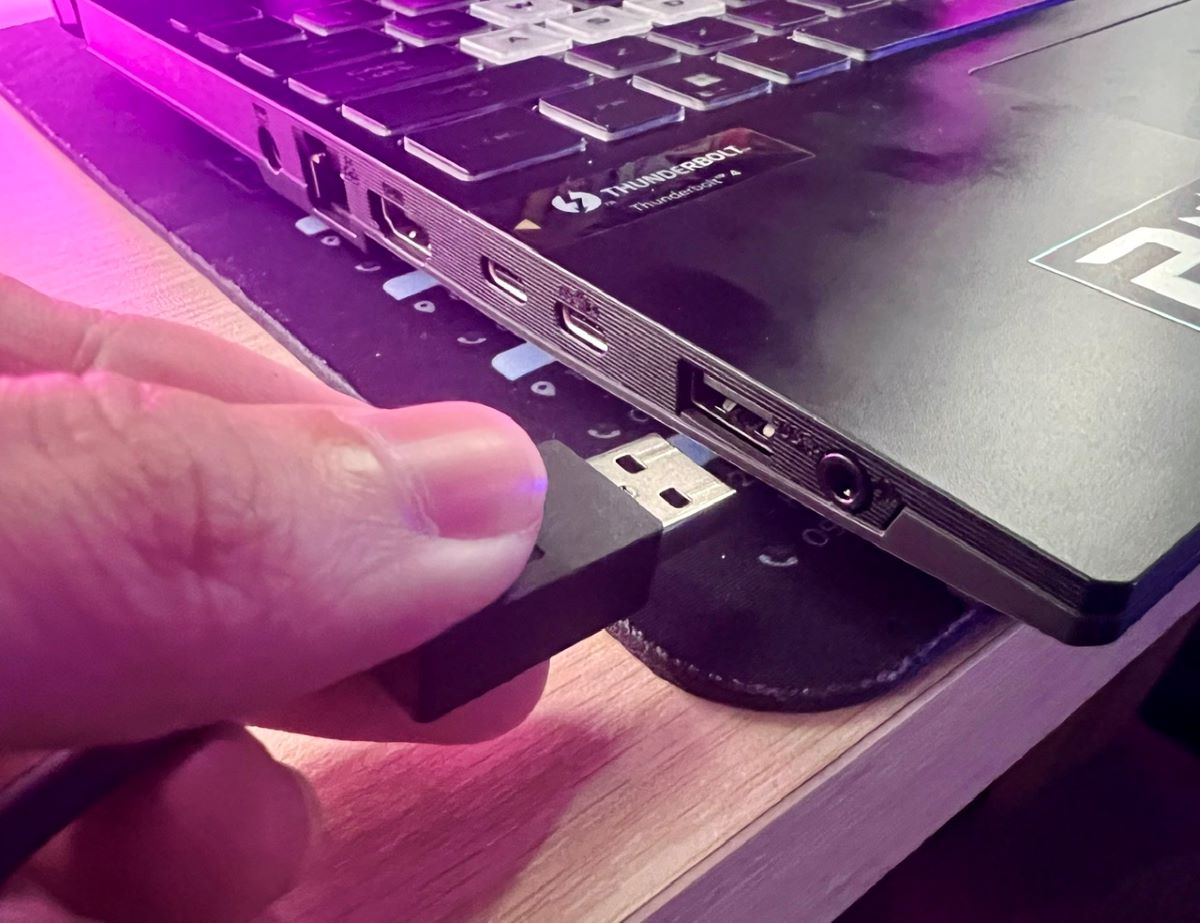
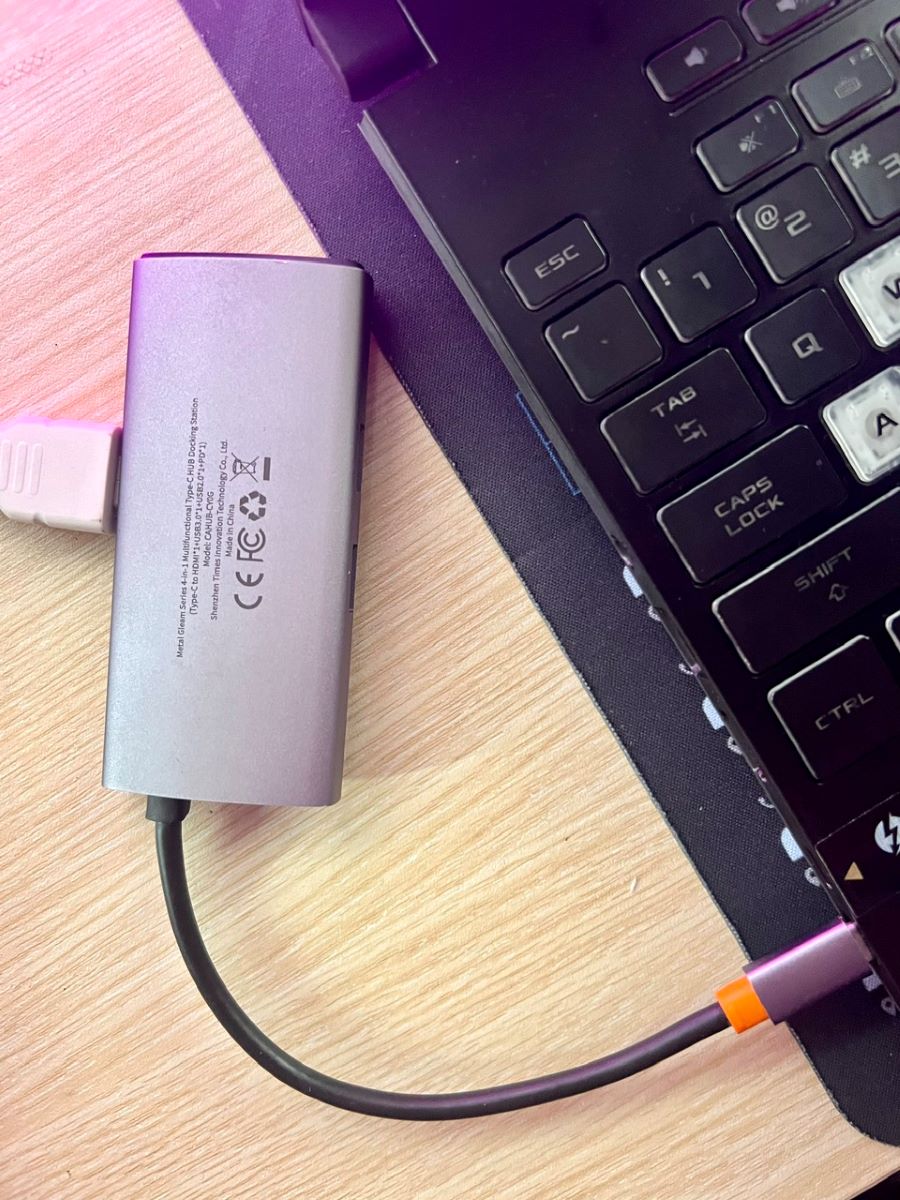
Step 3: Next, connect the adapter’s attached USB-A cable to your laptop/PC’s USB-A port. Double-check that all cables are secure.
How to Connect the Monitor’s HDMI Port to the Laptop’s USB-C Port
If all of your laptop’s USB-A ports are occupied, consider using its USB-C port instead. While USB-C ports are marginally less common than USB-A ports, they can still be found on countless laptops/PCs.
As always, your laptop/PC’s USB-C port must meet the required specifications.
You can connect your USB-C-compatible laptop/PC to an HDMI-compatible monitor using a USB-C to HDMI adapter.
Let’s learn how!
Materials Needed
Instructions
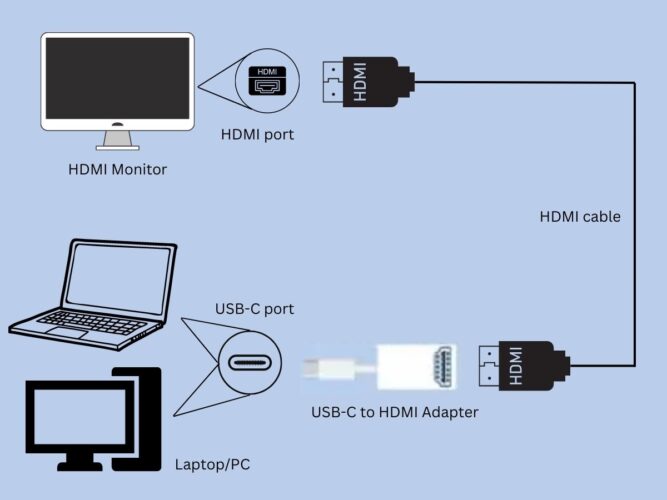
Step 1: Ensure your HDMI monitor and laptop/PC are both connected to power or sufficiently charged.
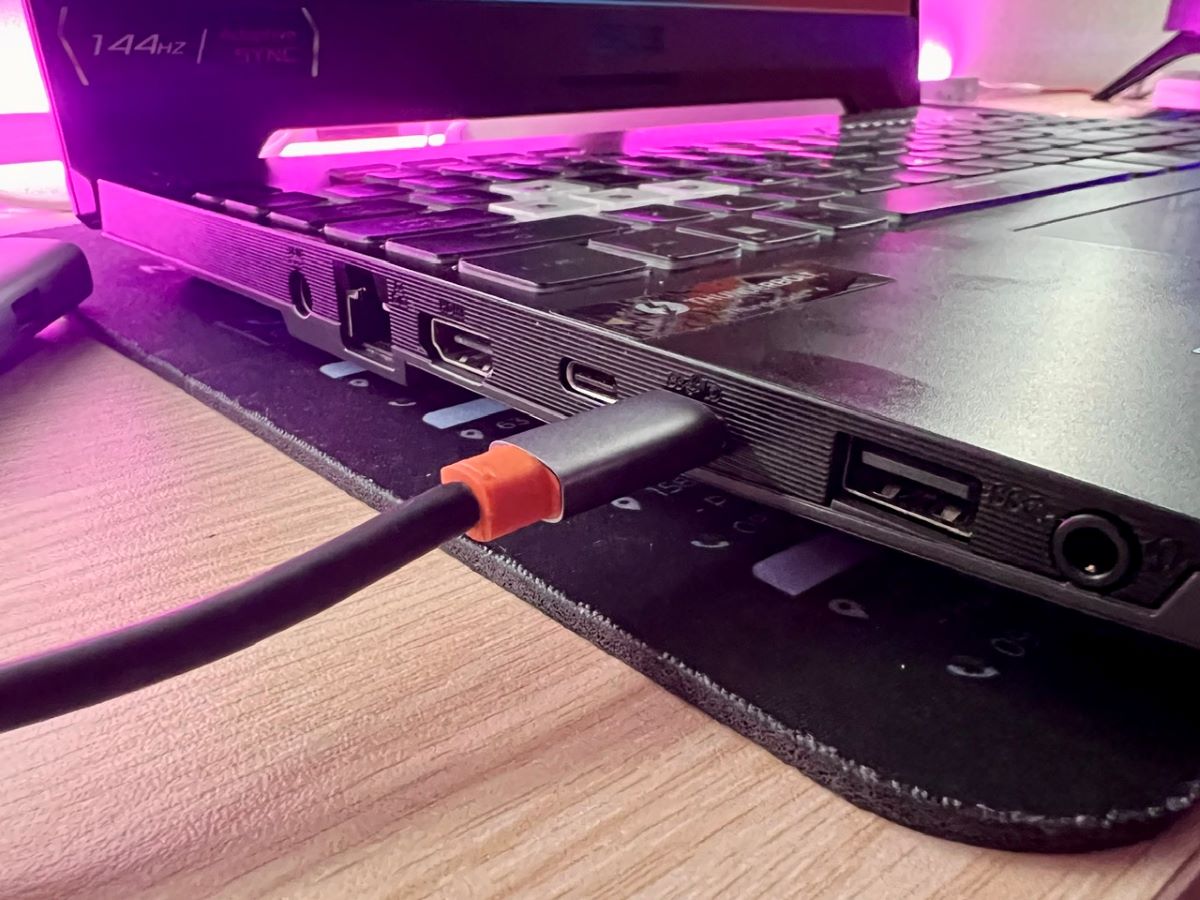
Step 2: Plug the adapter’s attached USB-C connector into your laptop/PC’s USB-C port.
Step 3: Plug the HDMI cable into the HDMI ports of your monitor and adapter.
How to Check Your USB’s Specification on Your Laptop?
You know that your laptop/PC has a USB-A or USB-C port, but you’re not sure if it’s the correct specification to be connected to a monitor via an adapter.
Sometimes, the older laptop/PC will only support the connection if it’s fitted with the correct USB specification, so it’s crucial to verify this information before purchasing the necessary adapter.
Follow the steps below to check your Windows or Mac OS laptop’s USB port specifications.
Windows OS
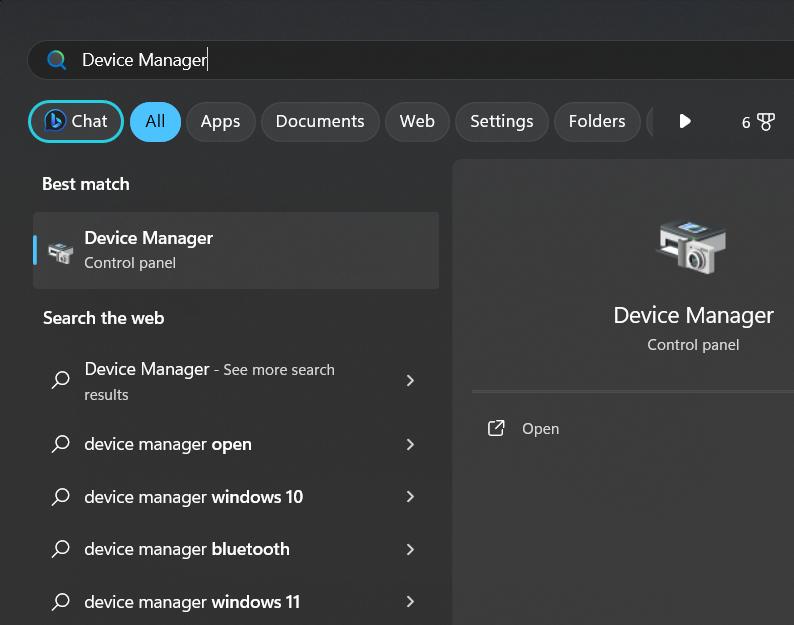
Step 1: Press the Windows button, and type “Device Manager” into the search bar and select it from the results.
Step 2: Scroll down and find the Universal Serial Bus controllers section.
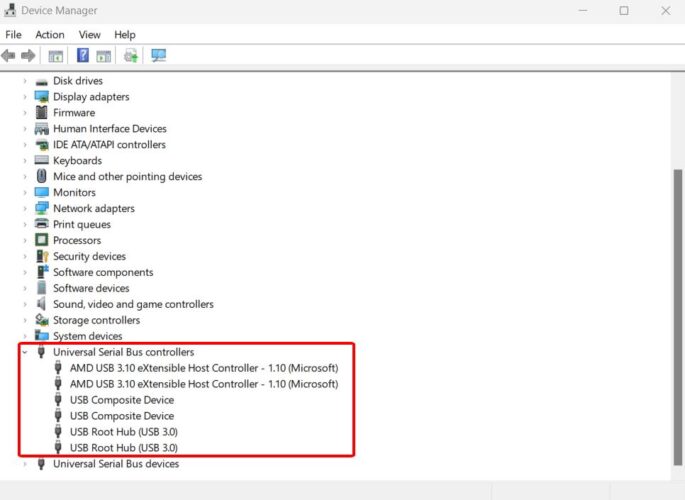
Step 3: Look for the following specifications to see if your laptop/PC’s USB ports support them:
- USB 2.0
- USB 3.0
- USB 3.1
- USB 3.2
- USB 4.0
macOS
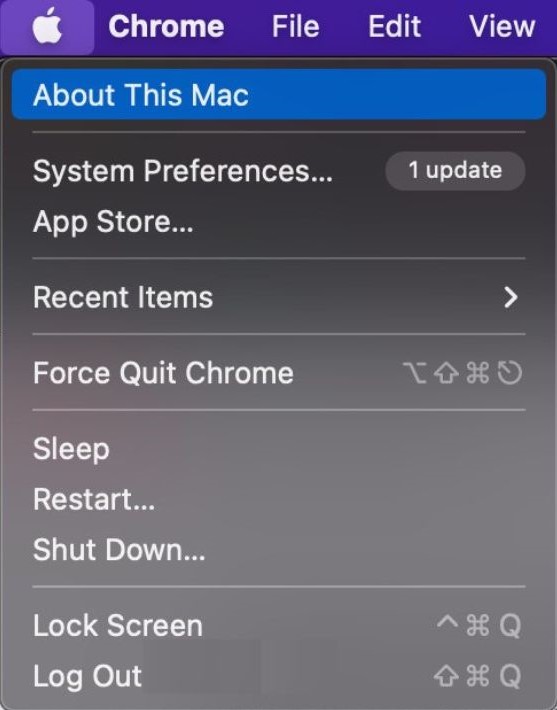
Step 1: Launch the Apple Menu, and go to About This Mac.
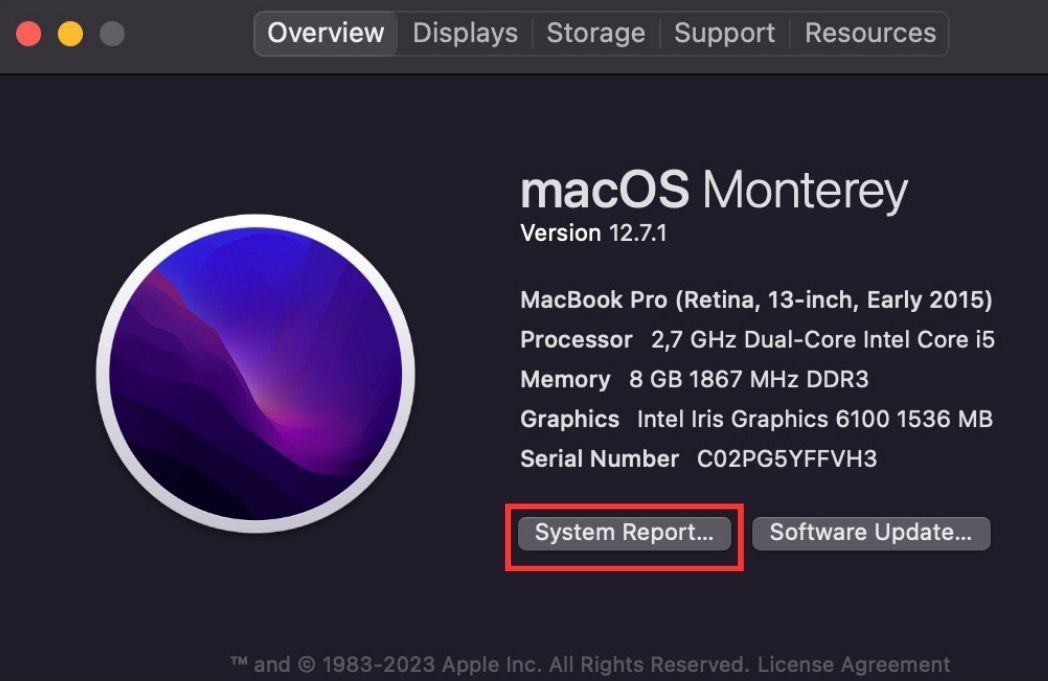
Step 2: Head to System Report.
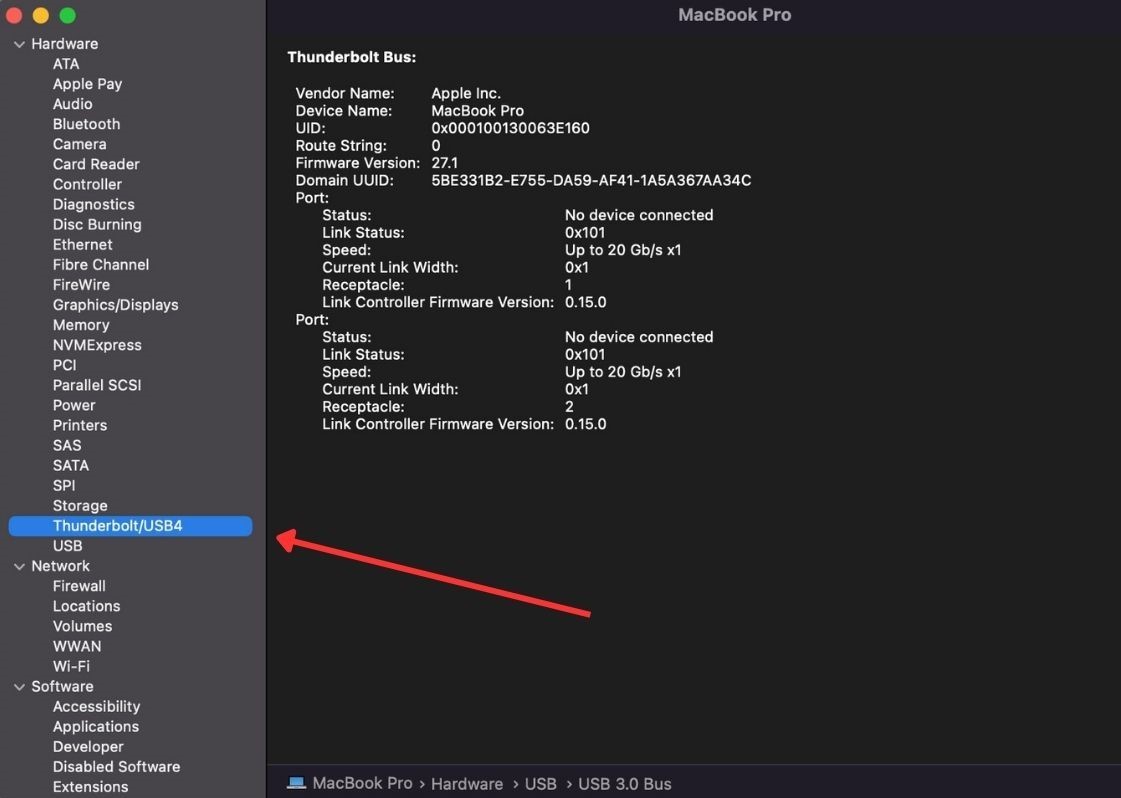
Step 3: Under Hardware, go to USB.
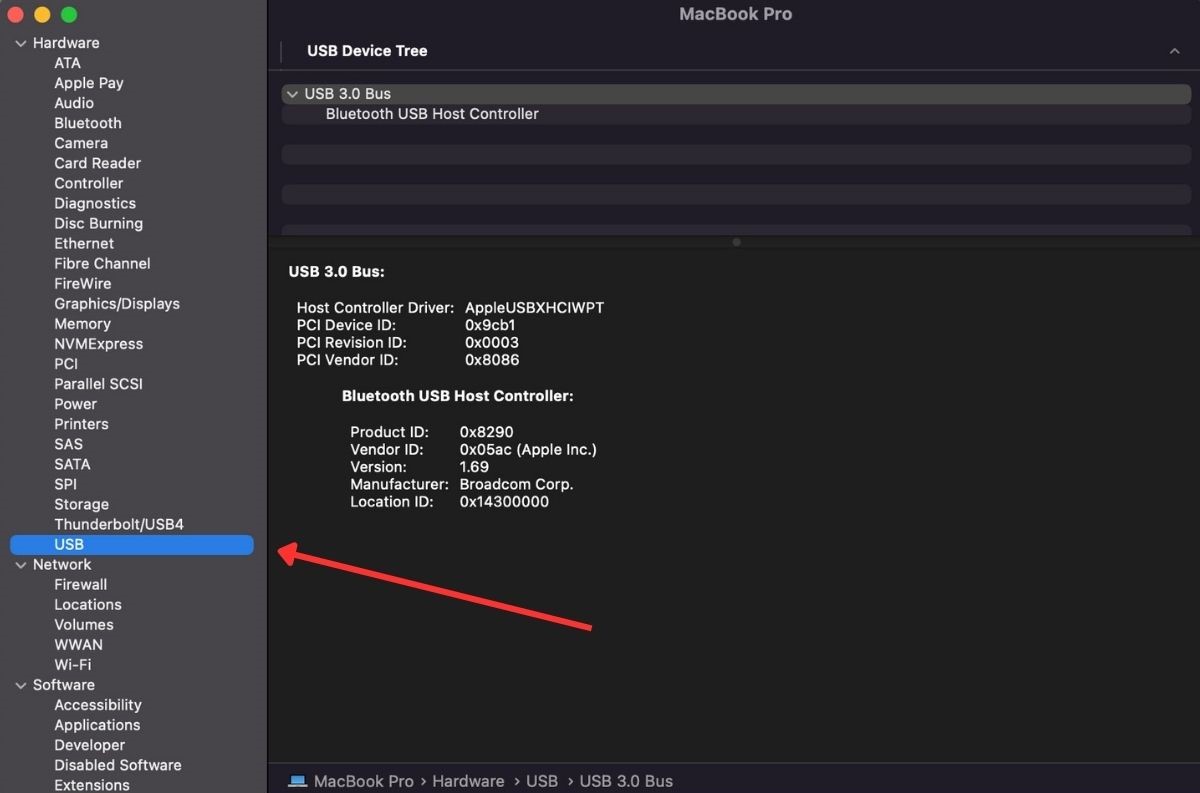
Step 4: Look for one of the following USB specifications:
- USB 2.0
- USB 3.0
- USB 3.1
- USB 3.2
- USB 4.0
You can also check for Thunderbolt/USB4 (if any).
USB Specs Summary Table
| Name | Data Rate | Maximum Resolution & Refresh Rate |
| USB 1.0 | 1.5 Mbit/s | Video output unsupported |
| USB 1.1 | 12 Mbit/s | Video output unsupported |
| USB 2.0 | 480 Mbit/s | 480p @ 50 Hz |
| USB 3.0 | 5 Gbit/s | 2k @ 50 Hz |
| USB 3.1 | 10 Gbit/s | 4K @ 30 Hz |
| USB 3.2 | 20 Gbit/s | 5K @ 30 Hz |
| USB4 | 40 Gbit/s | 4K @ 144 Hz |
| USB4 2.0 | 120 Gbit/s | 10K @ 100 Hz |
(Color Depth of the above table is 8-bit, and the number is calculated using Bandwidth Calculator)
Note: your laptop’s USB port needs to be 2.0 or above to support video output.
Is USB-A/B/C the Same as USB 2.0/3.0/4.0?
No, they are not the same.
USB-A, B, and C are all different USB connector types, meaning they vary physically and are compatible with different ports. You cannot, for instance, plug a USB-A plug into a USB-C port, and vice versa.
On the other hand, USB 2.0, 3.0, and 4.0 have different specifications for the connector type. You cannot tell which USB specification your laptop/PC has by looking at it.
USB-A and USB-C ports are usually found on computers.
Meanwhile, USB-B ports are rarely featured on laptops or PCs. However, they are usually found on printers, scanners, docking stations, and hubs as input ports.
Is USB Better than HDMI at Transfering Visual Content?
Yes, USB can be better at transferring visual content than HDMI.
HDMI was specifically designed to transfer AV content and has been the standard for audio and visual transmission, finding its way onto every TV and projector and most monitors.
It’s also fast, delivers high-quality video, and made AV setups with several different cables a thing of the past.
However, the invention and popularity of USB 4.0/Thunderbolt 4 have made HDMI the inferior AV cable/port.
While HDMI 2.1a only supports a maximum resolution of 10K, USB 4.0 can output a maximum resolution of 16K. This makes the USB 4.0 the obvious choice for anyone trying to facilitate an ultra-high resolution setup.
If it’s the speed you’re looking for, the USB 4.0 also has a clear advantage over HDMI. USB 4.0 supports a maximum bandwidth of 120 Gbps. On the other hand, HDMI 2.1a only supports a maximum bandwidth of 48 Gbps.
Additionally, as laptops become slimmer and sleeker, USB-C is the obvious choice for most manufacturers since it’s thinner than HDMI. This allows manufacturers to continuously design leaner computers while still ensuring they can be connected to monitors via a USB-C port.
Wrapping Things Up
You can absolutely connect your laptop/PC to an HDMI monitor via its USB port. However, the USB port should have a compatible specification. Luckily, you can verify this information in your laptop/PC’s settings.
To connect your laptop/PC to a monitor, you’ll need to use a USB-A/USB-C to HDMI adapter, depending on which port your device has.
While HDMI used to be the end-all-be-all of AV transmission, USB 4.0’s abilities have far surpassed them. USB-C has also become the obvious choice for most manufacturers since it can fit on thin, modern laptops.
What’s your experience connecting an HDMI monitor to your laptop/PC’s USB port?
Let us know in the comments below!

Yesenia Achlim is a technical copywriter and editor with a focus on AV equipment. She aims to break down complicated topics and make technology accessible, no matter your technical expertise. When she’s not teaching you how to replace a projector lamp, you can find her reading and baking.

Duy Anh is a seasoned technical editor specializing in helping readers troubleshoot TV, projector, and Wi-Fi issues. He’s always been drawn to logical problem-solving. His ability to approach matters from various angles with a neutral mindset enhances his technical expertise.