
How To Use MacBook HDMI Port as an Input?

What to Know
- MacBooks are designed with HDMI output only, not input. To use your MacBook as a monitor display, you’ll need a capture card.
- Specific MacBook models, particularly those without a standard HDMI port, require USB-C hubs to connect capture cards.
In this guide, I’ll show you how to transform your MacBook into a display screen, perfect for gaming or enjoying content from devices like Roku or Apple TV.
Let’s dive in!
Quick Navigation
How To Use a MacBook as a Display Screen
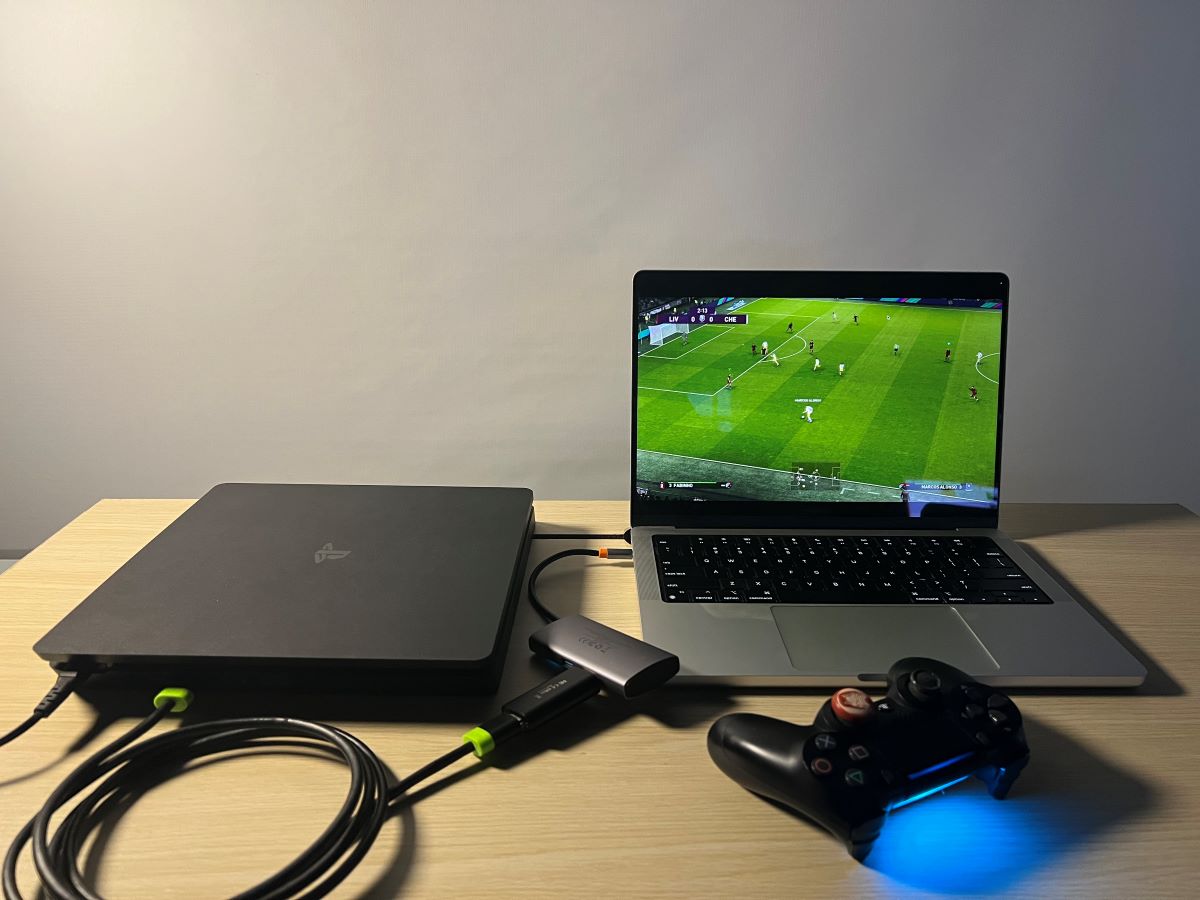
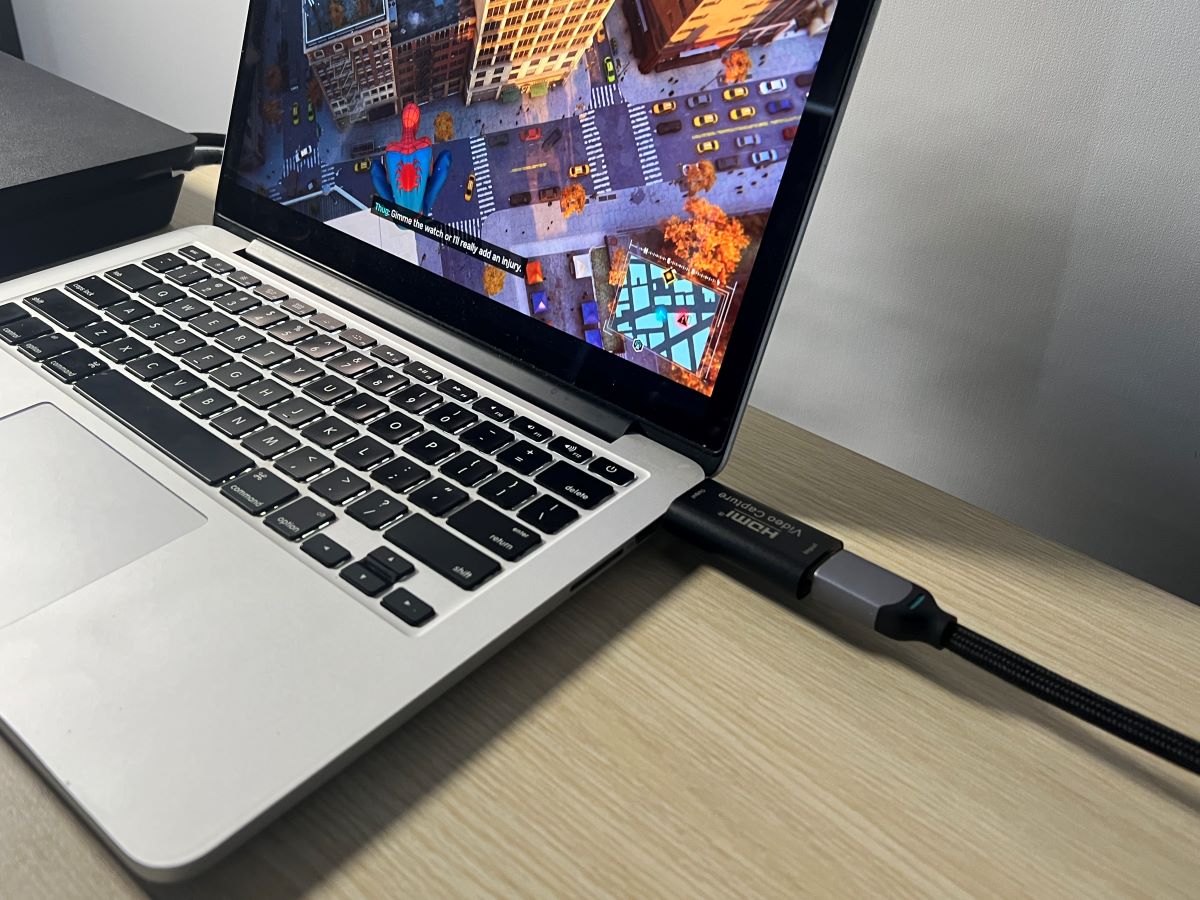
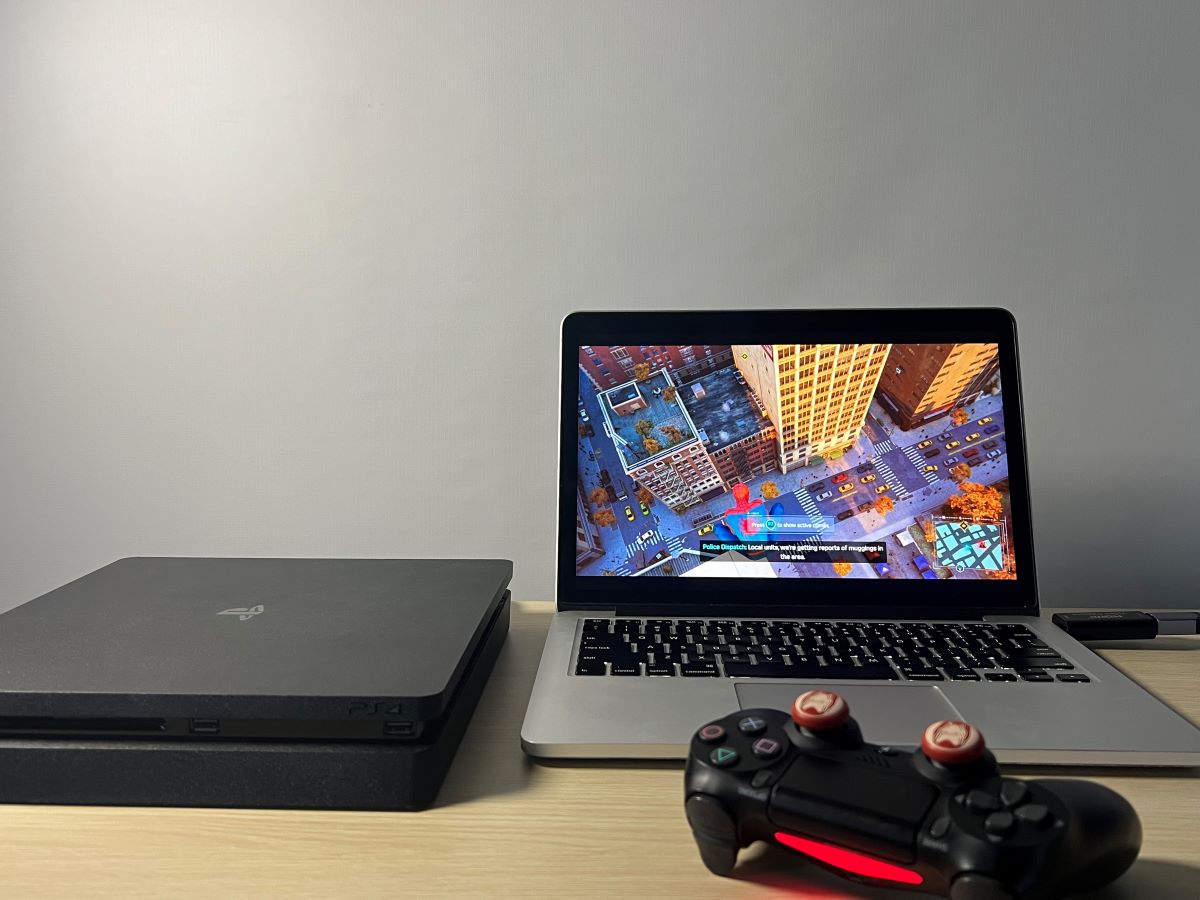
In this tutorial, I’ll demonstrate how to use a MacBook as a display screen using a MacBook M1 Pro and a PS4 gaming console.
I’ll also be using OBS Studio, a free capture software, which you can download from this link.
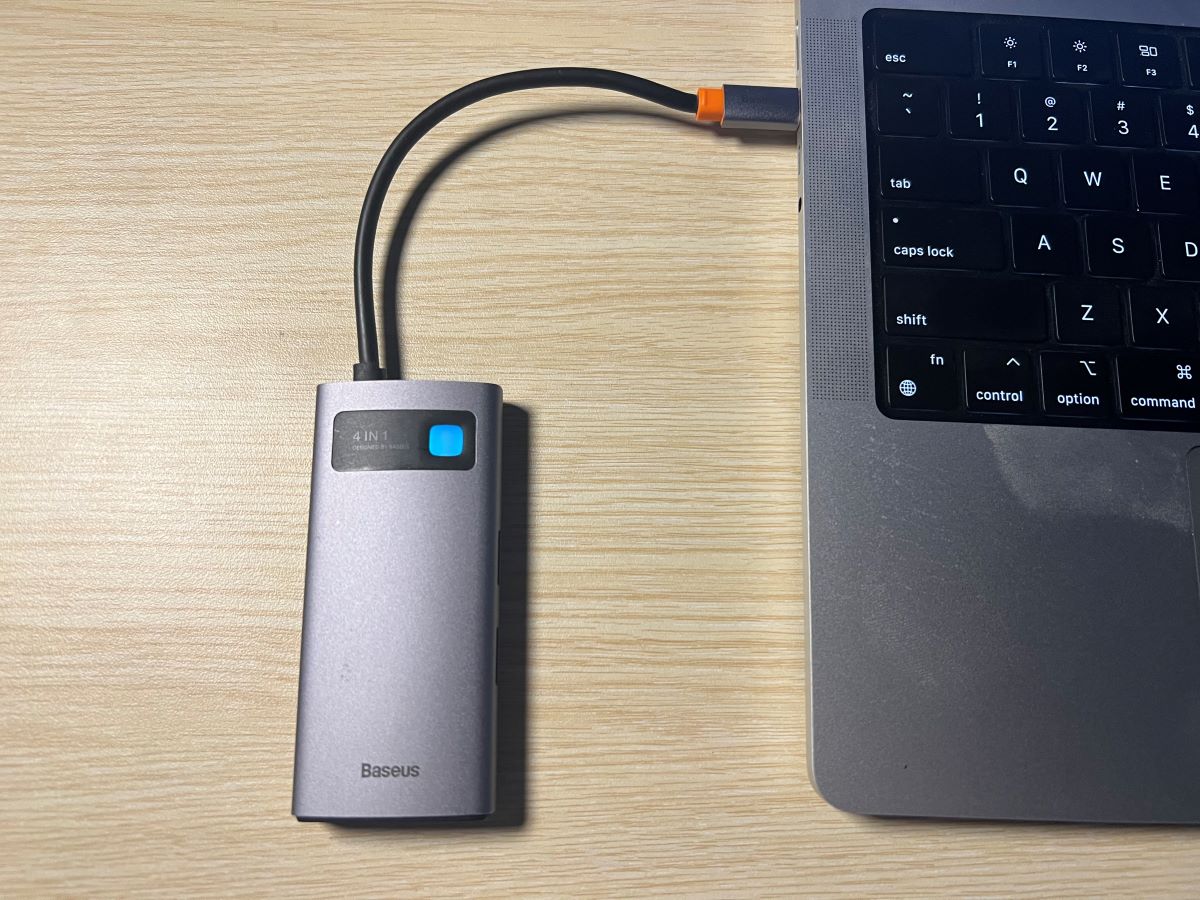
Since my MacBook M1 Pro lacks native USB support, I’m using the Baesus USB-C extender to enable USB connectivity.

Alternatively, you can find a USB-C to USB adapter at the Apple Store.
Here’s the step-by-step process:
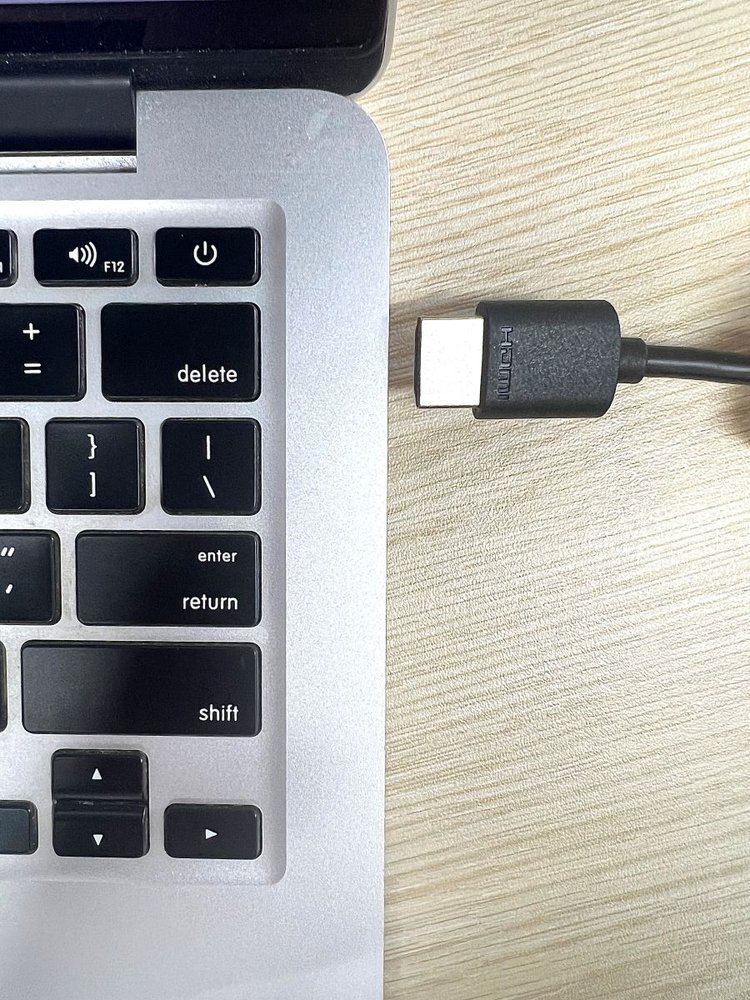
Step 1: Attach the USB-C hub to your MacBook using the USB-C port.
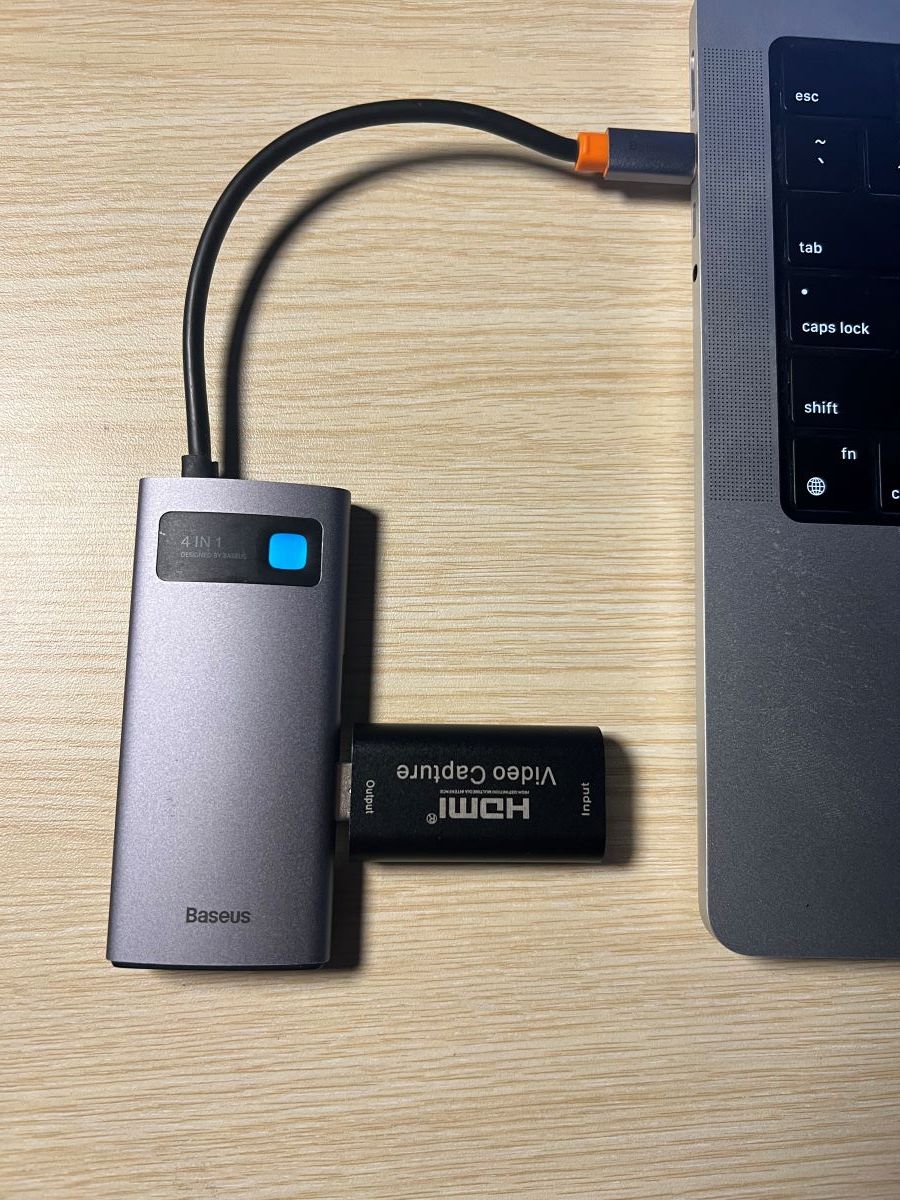
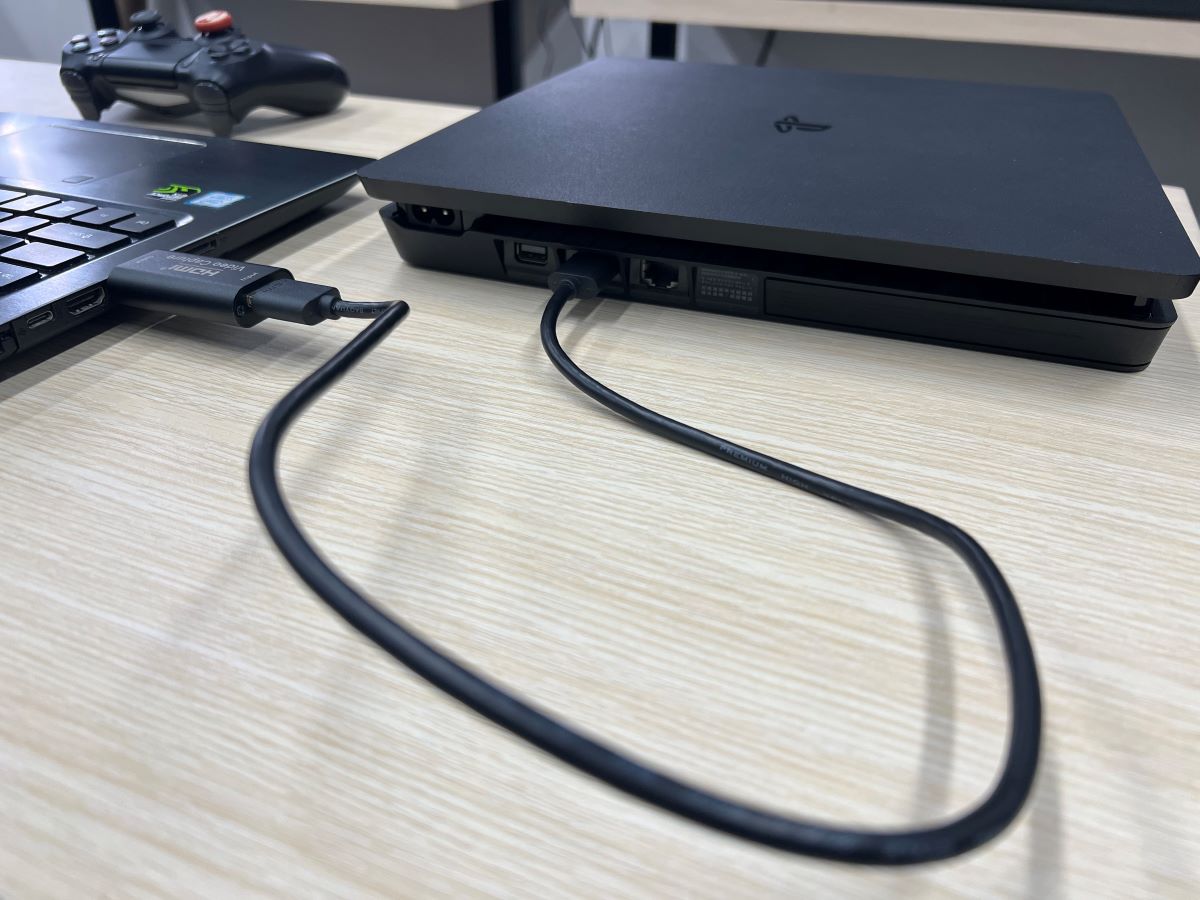
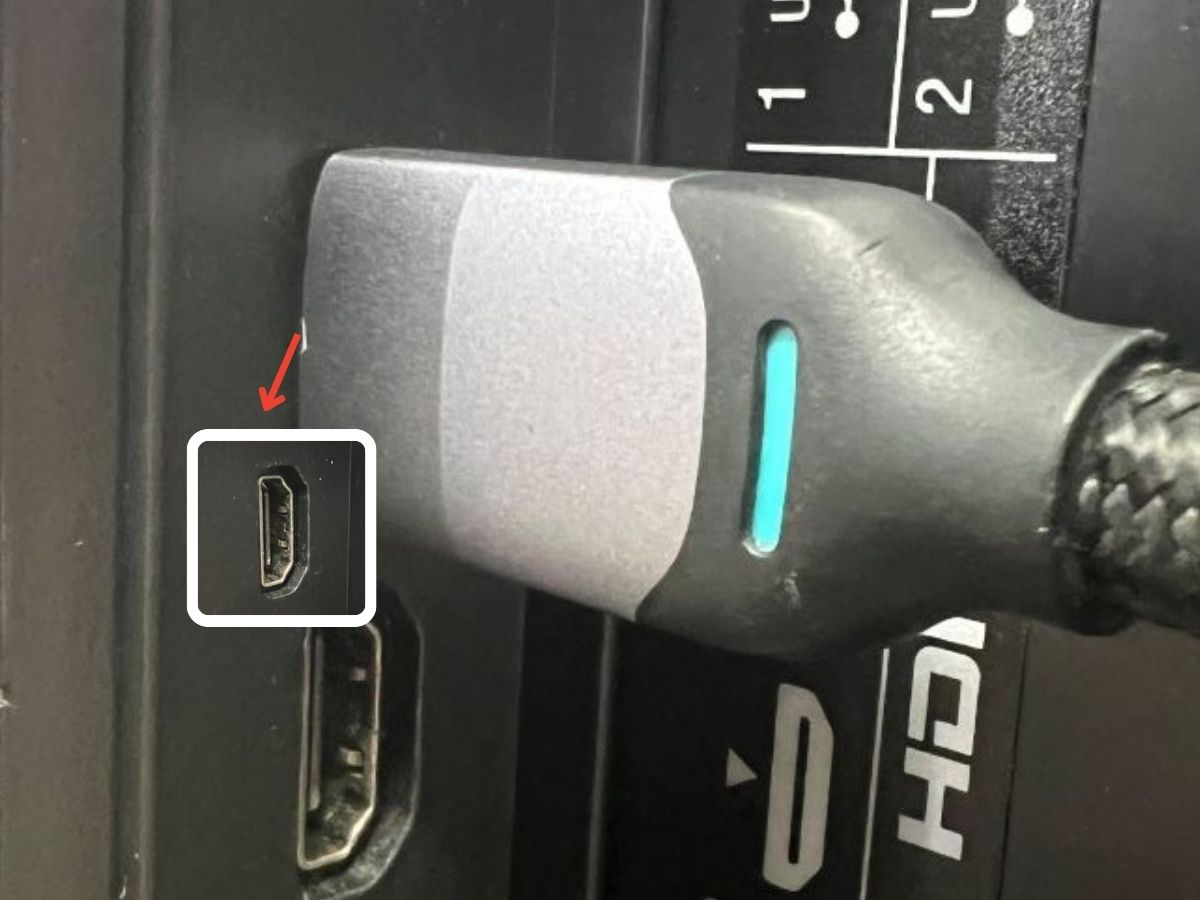
Step 2: Insert the capture card into the USB-C hub’s USB port. Then, connect an HDMI cable between the capture card and your PS4.
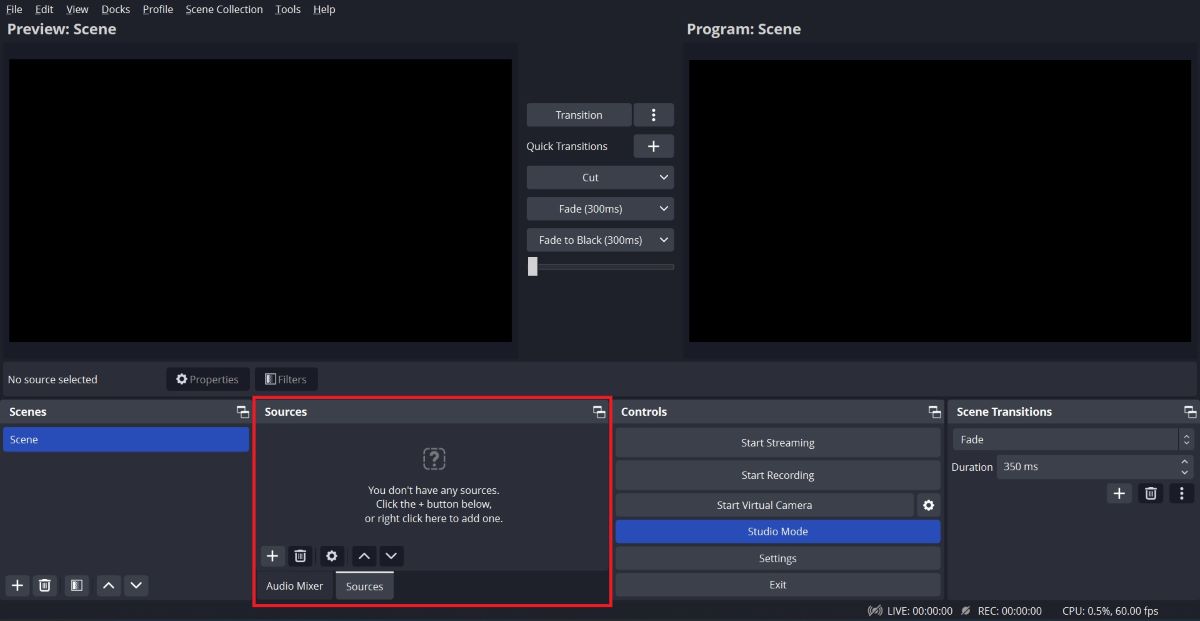
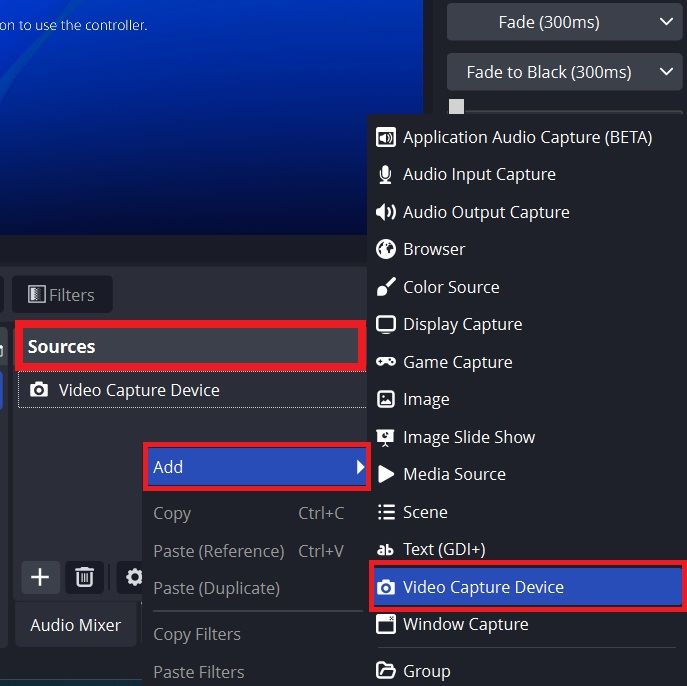
Step 3: Open OBS if it’s already installed. You should see a screen like the one below. Right-click in the Sources tab, and select Add → Video Capture Device.
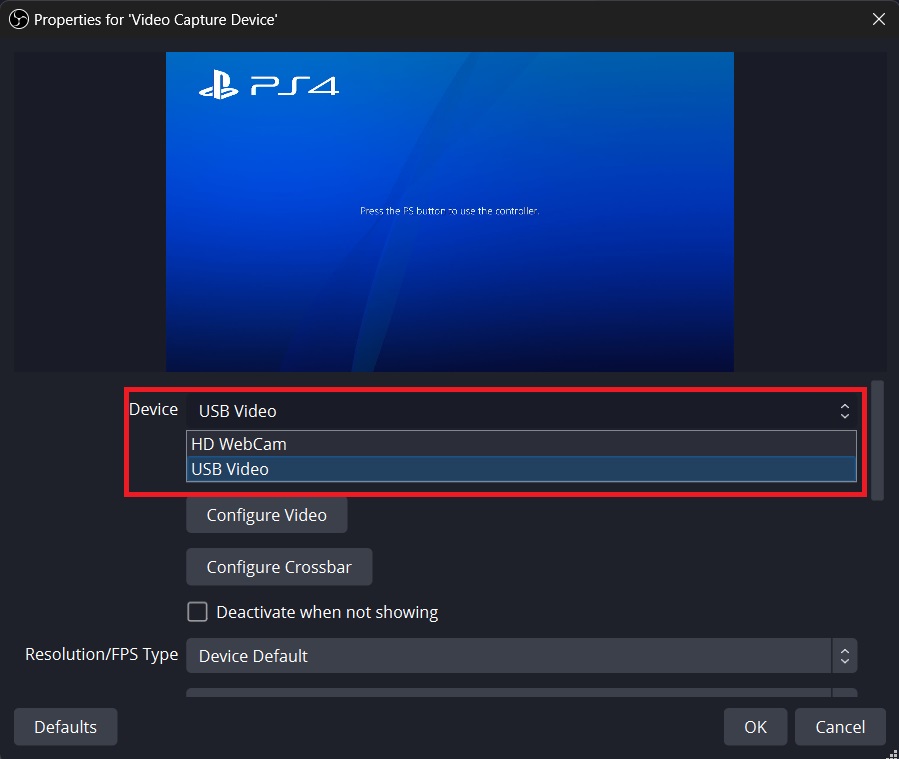
Step 4: In the new dialog box, switch the Device to USB Video, then click OK.
Step 5: To use your MacBook full screen as a display, right-click on Preview: Scene or Program: Scene, then choose Full Screen Projector → Display.
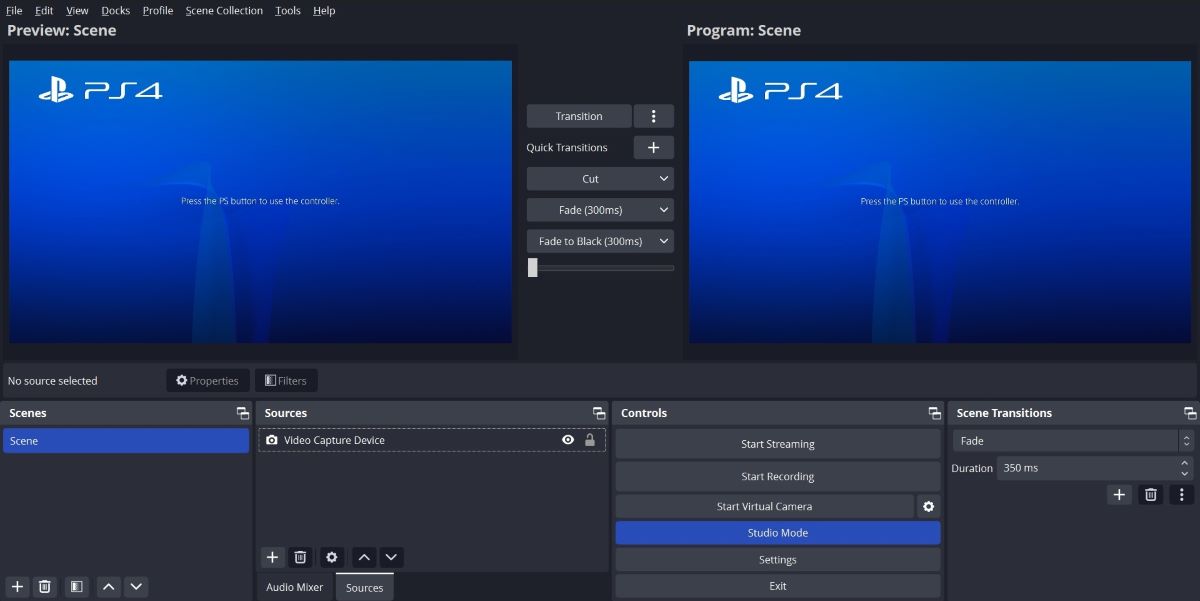
Here is the result with MacBook M1:
However, for the MacBook Pro 2013 model, which comes with a standard USB port, the setup is slightly different.
I directly connected the HDMI capture card and followed the same OBS setup steps.
If you’d like to use your MacBook as a display for your PS4, we offer a concise tutorial on how to establish a wireless connection between your MacBook and PS4 using the PS Remote Play app.
We’ve also discussed the variety of capture cards available in the market.
While high-end capture cards reduce input lag, the one I’m using in this tutorial is a more affordable, low-end option.
Consequently, playing games can be laggy due to the input lag. However, when watching movies using streaming devices, this lag is virtually unnoticeable.
Does the MacBook Air Have an HDMI Port?
No, MacBook Air models, including the 13-inch and 15-inch versions, do not come with HDMI ports.
Instead, these laptops are equipped with two Thunderbolt (USB-C) ports.
To use your MacBook Air as a monitor, a USB-C hub is necessary.
A good example is the Baesus USB-C Hub, which provides additional USB ports and an HDMI port, enhancing the MacBook Air’s connectivity.
For those in search of MacBooks with HDMI output ports, suitable for connecting to a TV, consider the following models:
- 14-inch MacBook Pro
- 16-inch MacBook Pro
- 13-inch MacBook Pro
- 15-inch MacBook Pro
- Mac Mini
- Mac Pro
Bonus: How to Connect a MacBook to a TV With & Without HDMI
Connecting a MacBook to a TV Without HDMI

Whether your MacBook has an HDMI port or not, you can easily connect it to a TV using the built-in AirPlay feature.
This method is ideal if your TV doesn’t natively support AirPlay, as you can alternatively use streaming devices like Roku or Apple TV to bridge the gap.
Here’s how to get started with AirPlay:
Step 1: First, make sure both your MacBook and TV are connected to the same Wi-Fi network.
Step 2: Turn on AirPlay on both your MacBook and your TV.
Step 3: Once your MacBook detects the TV, select it from the list of available devices to start casting.
For those looking for more detailed instructions, we’ve got you covered. Check out our comprehensive guide on connecting a MacBook to a TV using AirPlay.
Click on the link for a step-by-step walkthrough of the entire process.
Connecting a MacBook to a TV With HDMI
Connecting your MacBook to a TV using an HDMI cable is a straightforward process that enhances your viewing experience.
Here is how to do so:
Step 1: Connect the HDMI cable. Plug one end of the HDMI cable into the HDMI port on your MacBook. Attach the other end of the HDMI cable to the HDMI port on your TV.
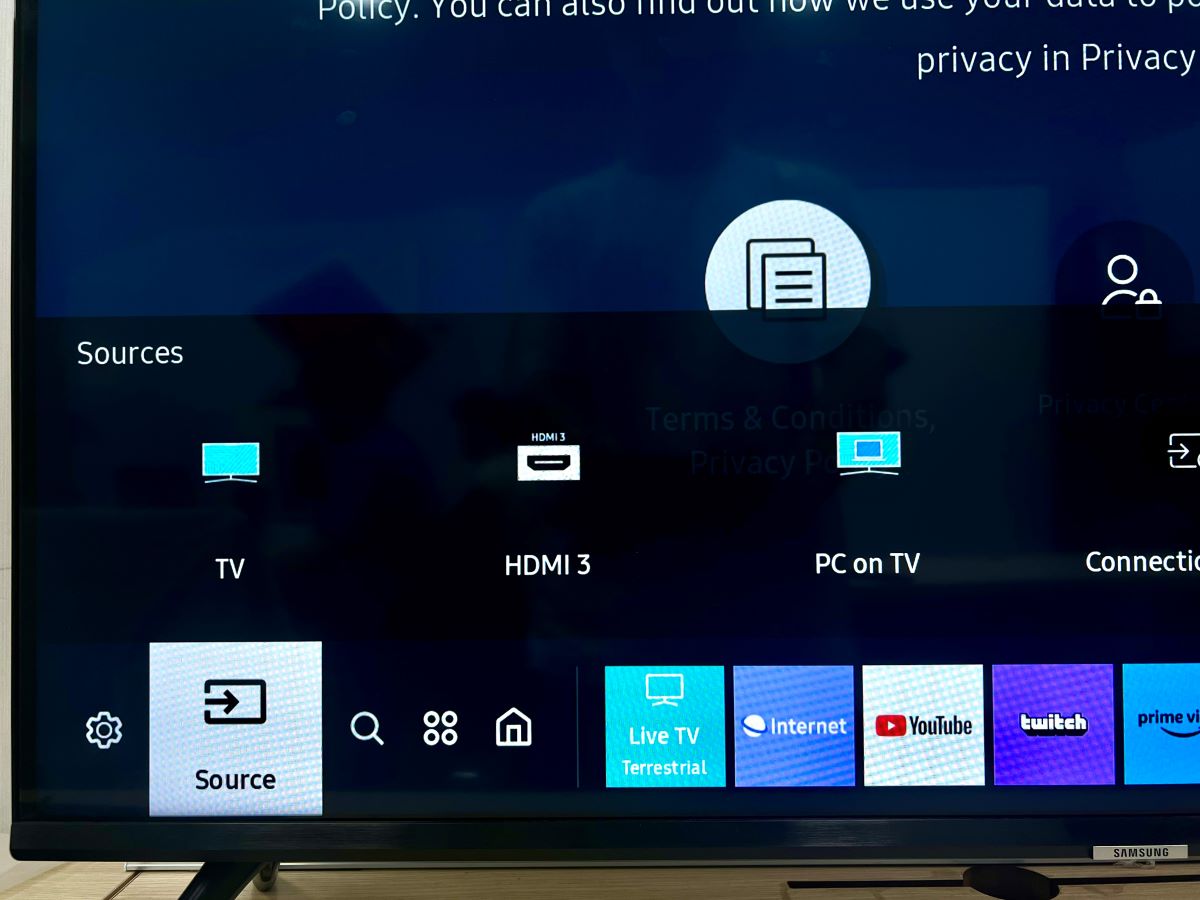
Step 2: Turn on your TV and use the remote to switch to the correct HDMI input channel.
Step 3: Power on your MacBook. It should automatically detect the TV and mirror your screen. If it doesn’t, proceed to the next step.
Step 4: Click on the Apple menu, go to System Preferences, select Displays, then Arrangement.
Here, you can choose to either mirror your MacBook’s screen on the TV or use the TV as an extended desktop.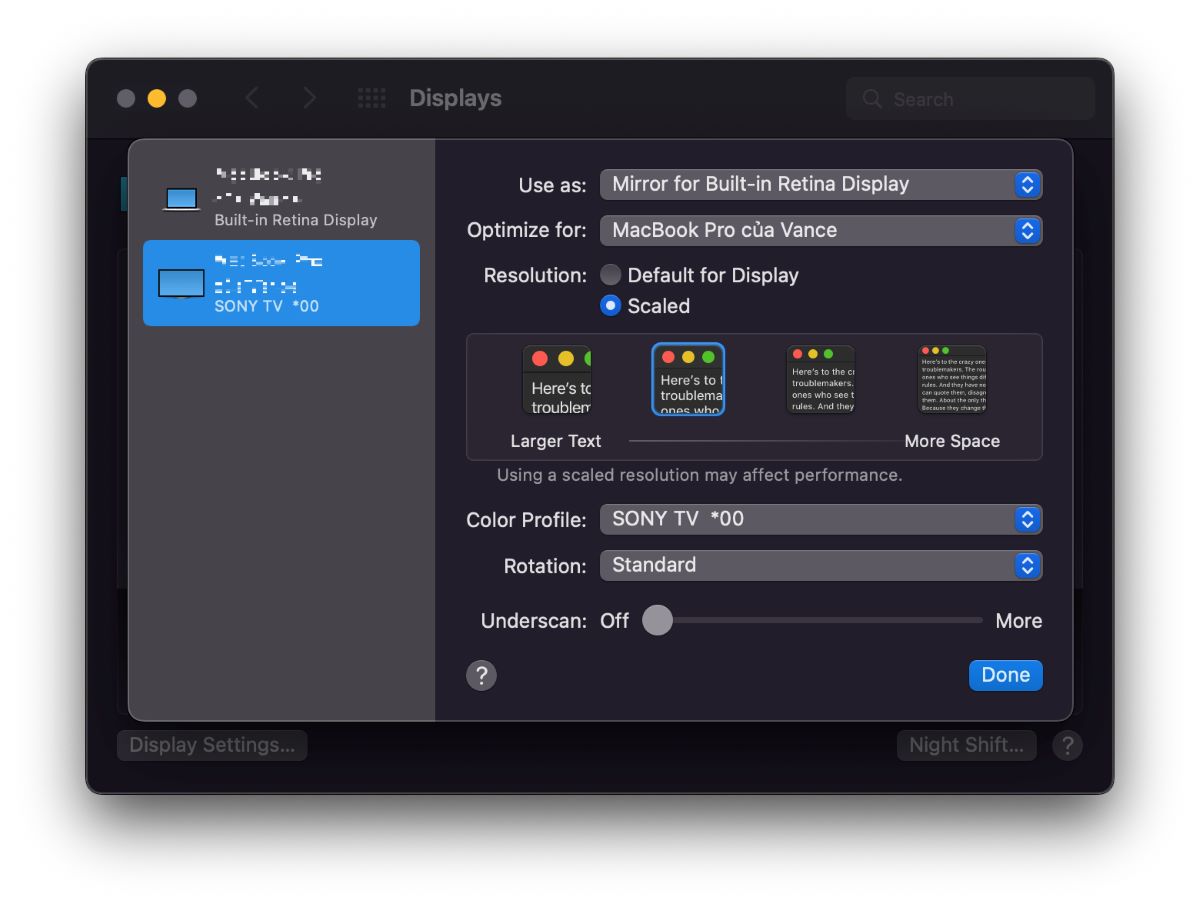
Conclusion
Transforming your MacBook into a versatile display for gaming consoles or streaming devices is simpler than you might think.
Whether you’re using a capture card setup for models like the MacBook M1 Pro or opting for a wireless connection via AirPlay, the possibilities are endless.
Remember, while some setups may introduce a bit of lag, especially in gaming, the overall experience of using your MacBook as a display is smooth and rewarding.
So go ahead, give it a try, and unlock a whole new way to enjoy your favorite games and movies!

Tai “Ty” Luu, an Electronics Engineering graduate from Sheridan College, is a passionate technical editor with a deep love for technology and gaming. He constantly seeks new challenges to expand his expertise in the tech and gaming fields.