
5 Ways to Make Projector Screen Smaller With/Without Moving It

- Adjust the projector’s position to change image size, but this works best for mobile setups.
- Use the projector’s zoom function for size adjustments, with optical zoom offering better quality.
- Altering the aspect ratio can make the screen appear larger, changing the perceived image size.
Are your projector’s images too big for your screen? We’ve got the solutions you need.
In this article, we’ll guide you through simple methods to adjust your projector screen’s size with or without moving it physically.
Let’s dive into these instructions to make your projector screen the size you desire, enhancing your viewing or presentation experience effortlessly.
Quick Navigation
1. Adjust the Position of the Projector
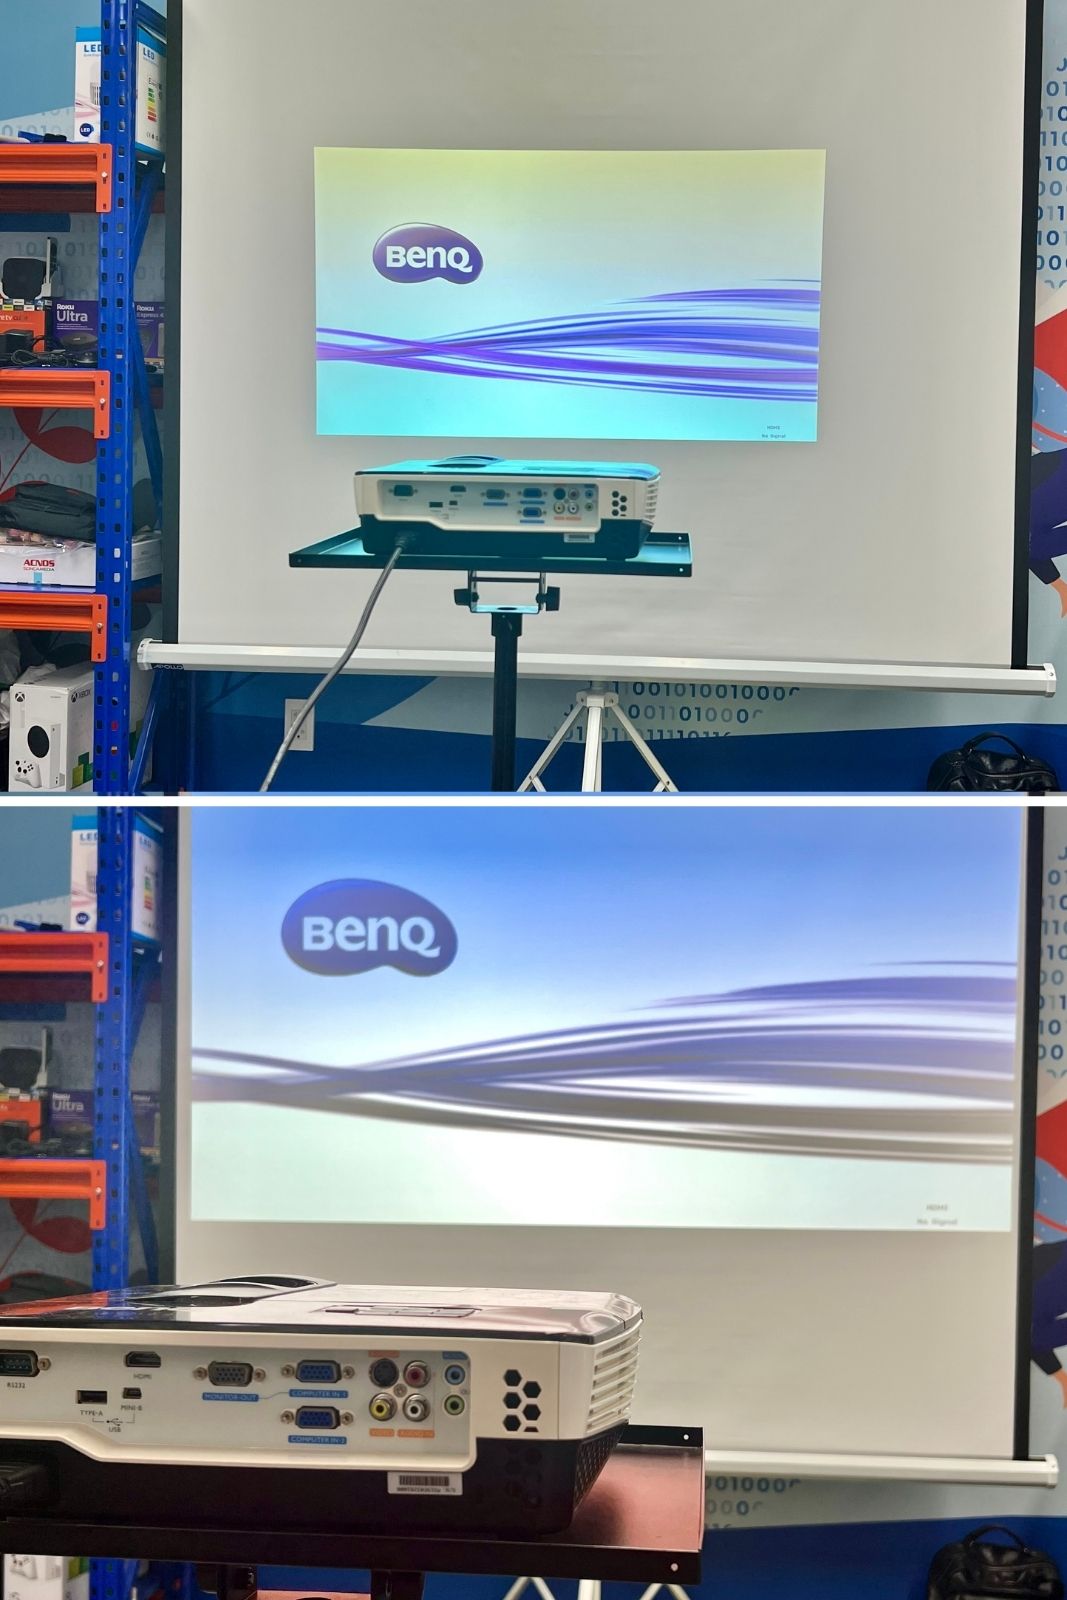
It is essential to consider the distance between the projector and the screen while setting up your projector.
A great distance between the projector and the projector screen makes the image larger.
Likewise, the image is smaller if there’s only a short distance between the projector and the projector screen.
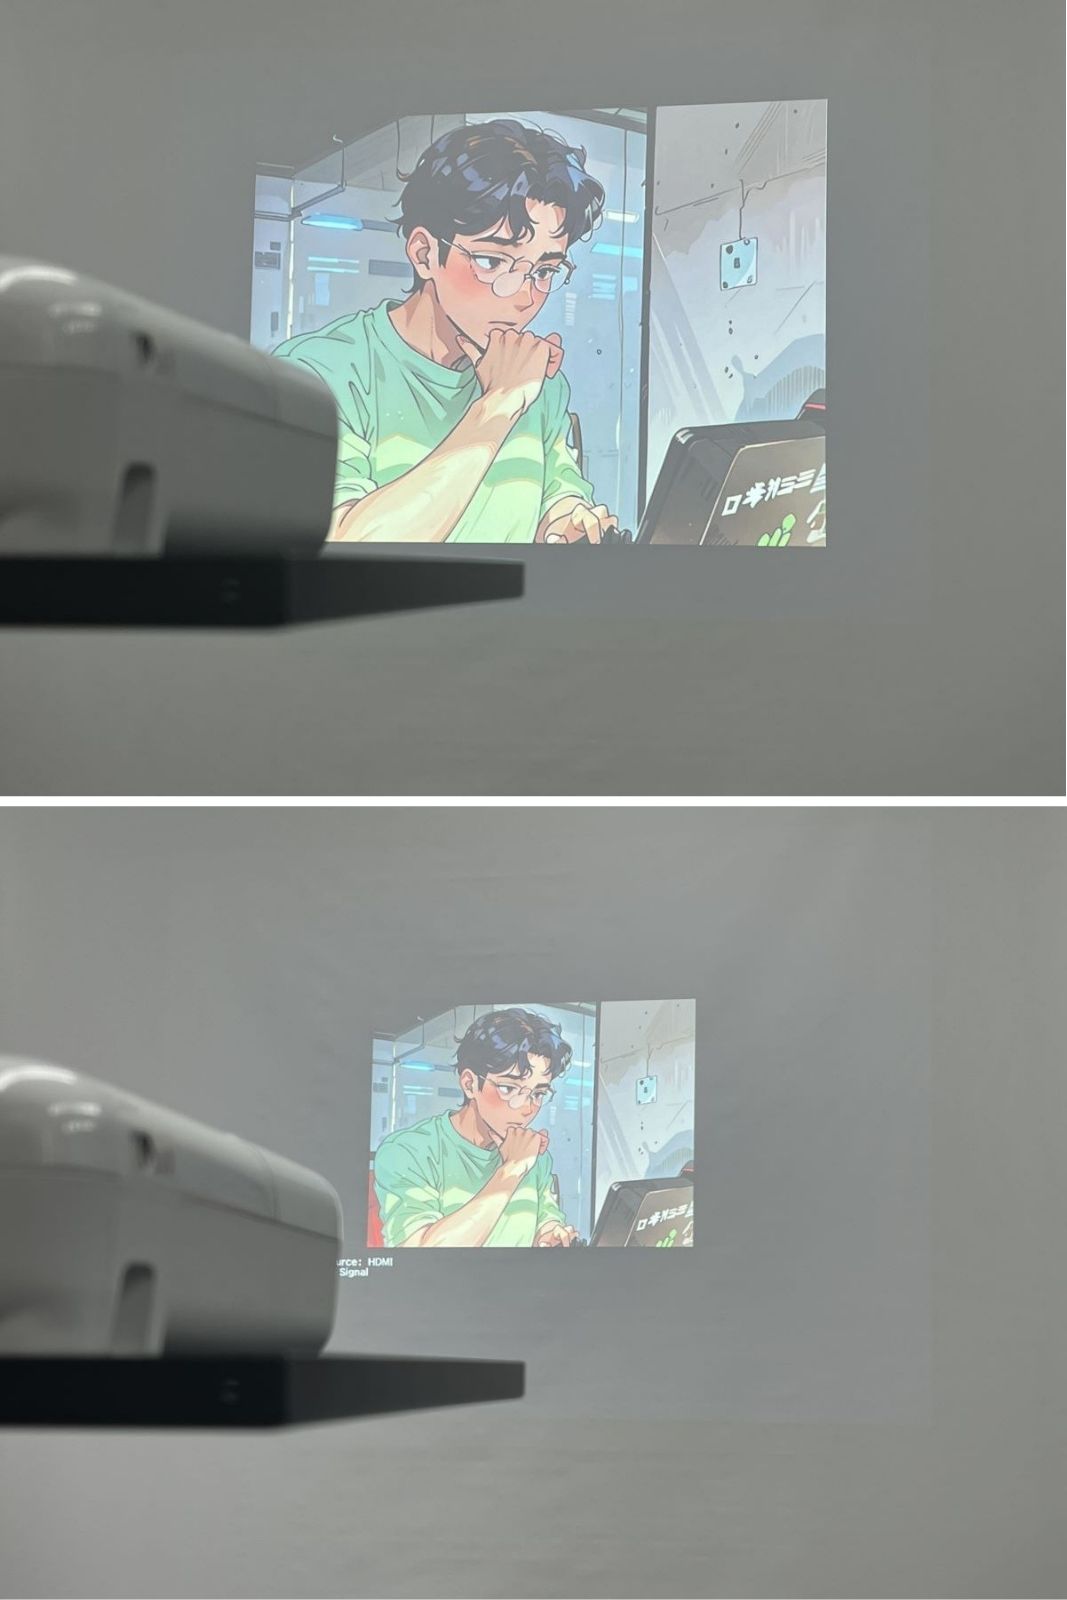
If you want a larger image on your screen, move the projector farther away from the screen to increase the image size.
If you want a smaller image, move the projector closer to the screen to reduce the projection distance.
Note: The projected image may look blurry after you have adjusted the position of the projector. You can modify the projector’s focus to improve the sharpness.
Find the focus knob, switch, or ring on your projector. Manually adjust the focus of the lens till the image is sharp enough.
There is one significant downside to this method of resizing images. You can only use it for mobile projectors and tripod setups.
It is hard to move the positions of semi-permanent setups like ceiling or wall projector installations.
2. Adjust the Projector’s Zoom Lens
Recent projector models come with zoom lenses. A zoom lens allows you to zoom in or out on the projected image.
Zoom lenses allow you to adjust the image size without changing the position of the projector. The projector zoom feature can be either digital or optical.
Optical Zoom
In optical zoom, you can reduce or increase the image size by lengthening or shortening the focal point of the projector lens.
It involves a manual adjustment of the zoom lens. You have to first locate the zoom ring on the projector, then twist or turn it till you are satisfied with the image size.

Digital Zoom
Digital zoom projectors are convenient. You can use a remote to adjust their zoom settings, and this function allows for flexible projector placement.

However, digital zoom manipulates the image’s source code, which often reduces the image quality and results in pixelation.
In comparing digital vs. optical zoom in projectors, we found that optical zoom has more significant advantages.
It does not interfere with image quality, and it allows higher levels of adjustment than digital zoom.
For most recent projectors, you can use the digital zoom feature via the following steps:
- Power on the projector and wait till it is warmed up.
- Check the projector’s remote and press the Zoom + button to zoom in.
- Press the Zoom – button to zoom out.
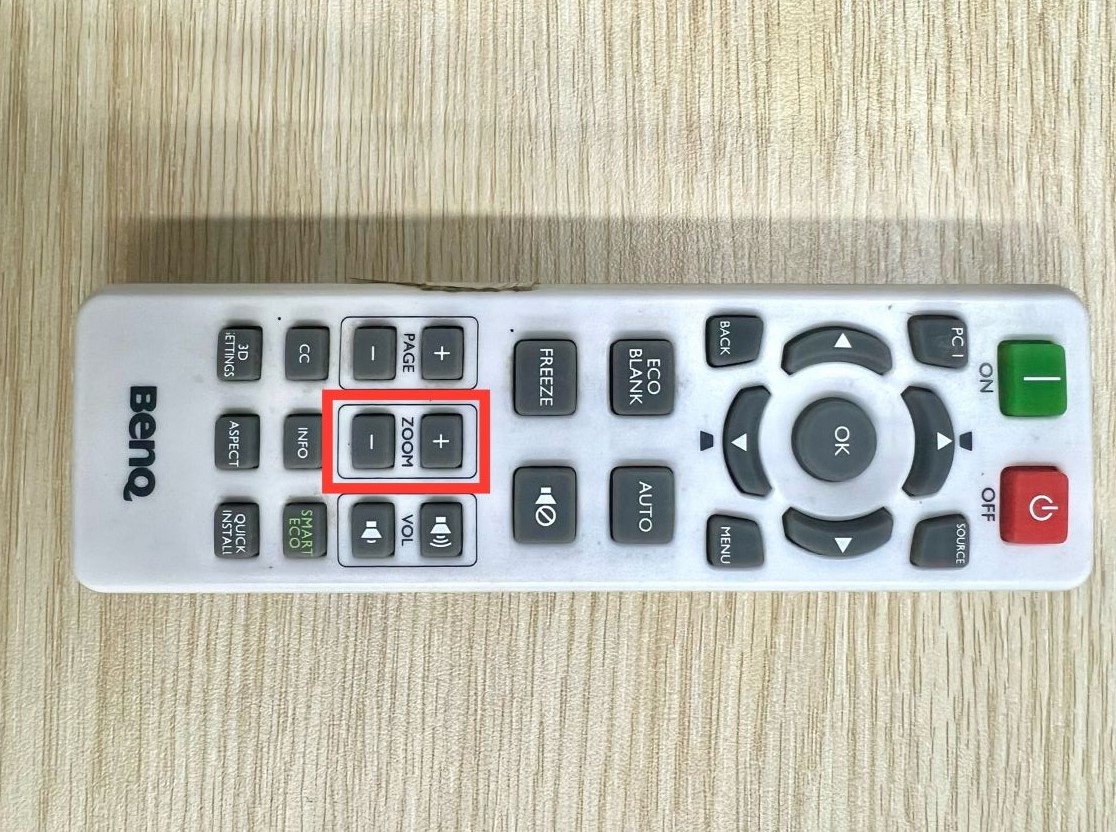
- Observe as the image changes in size and adjust till it is at your preferred size.
After adjusting the zoom to your preferred scale, adjust the projector’s focus to maintain image clarity.
3. Change the Aspect Ratio
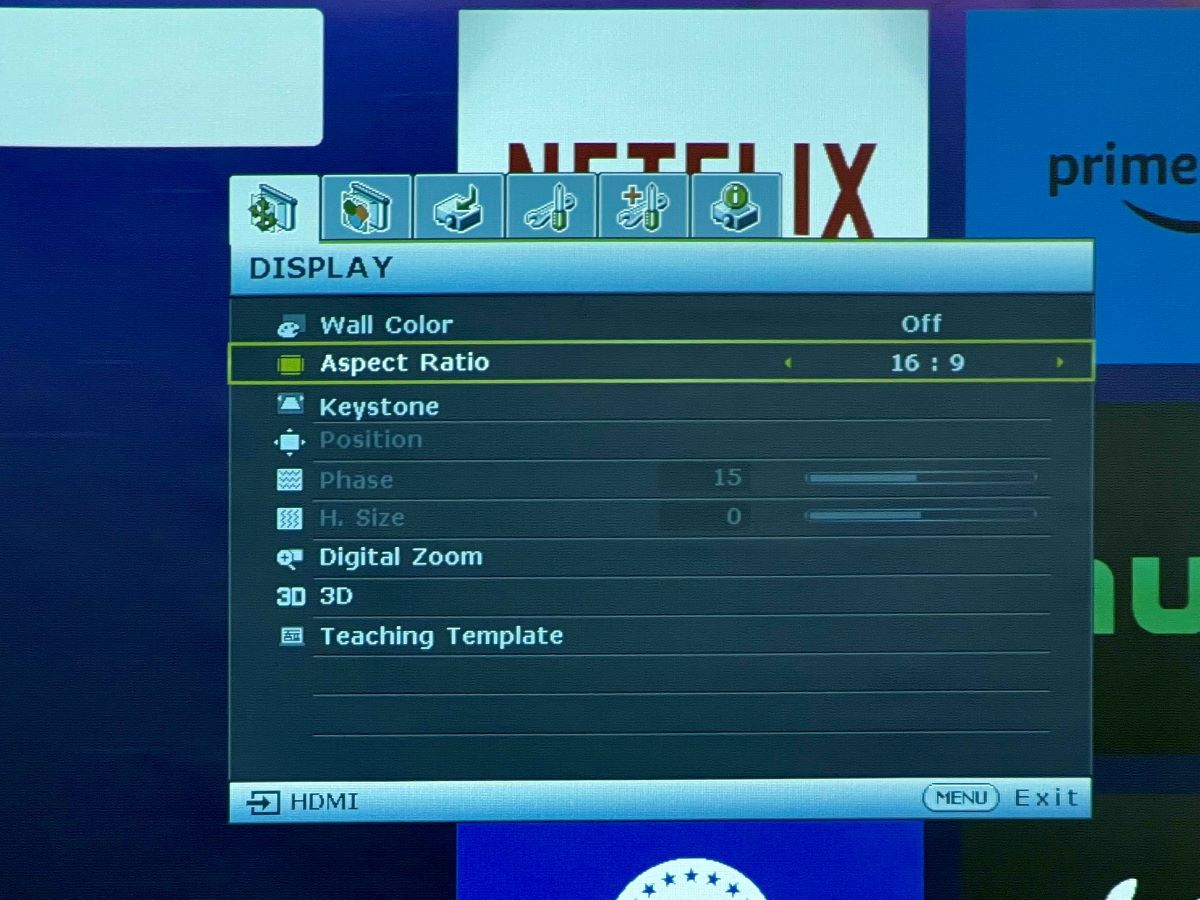
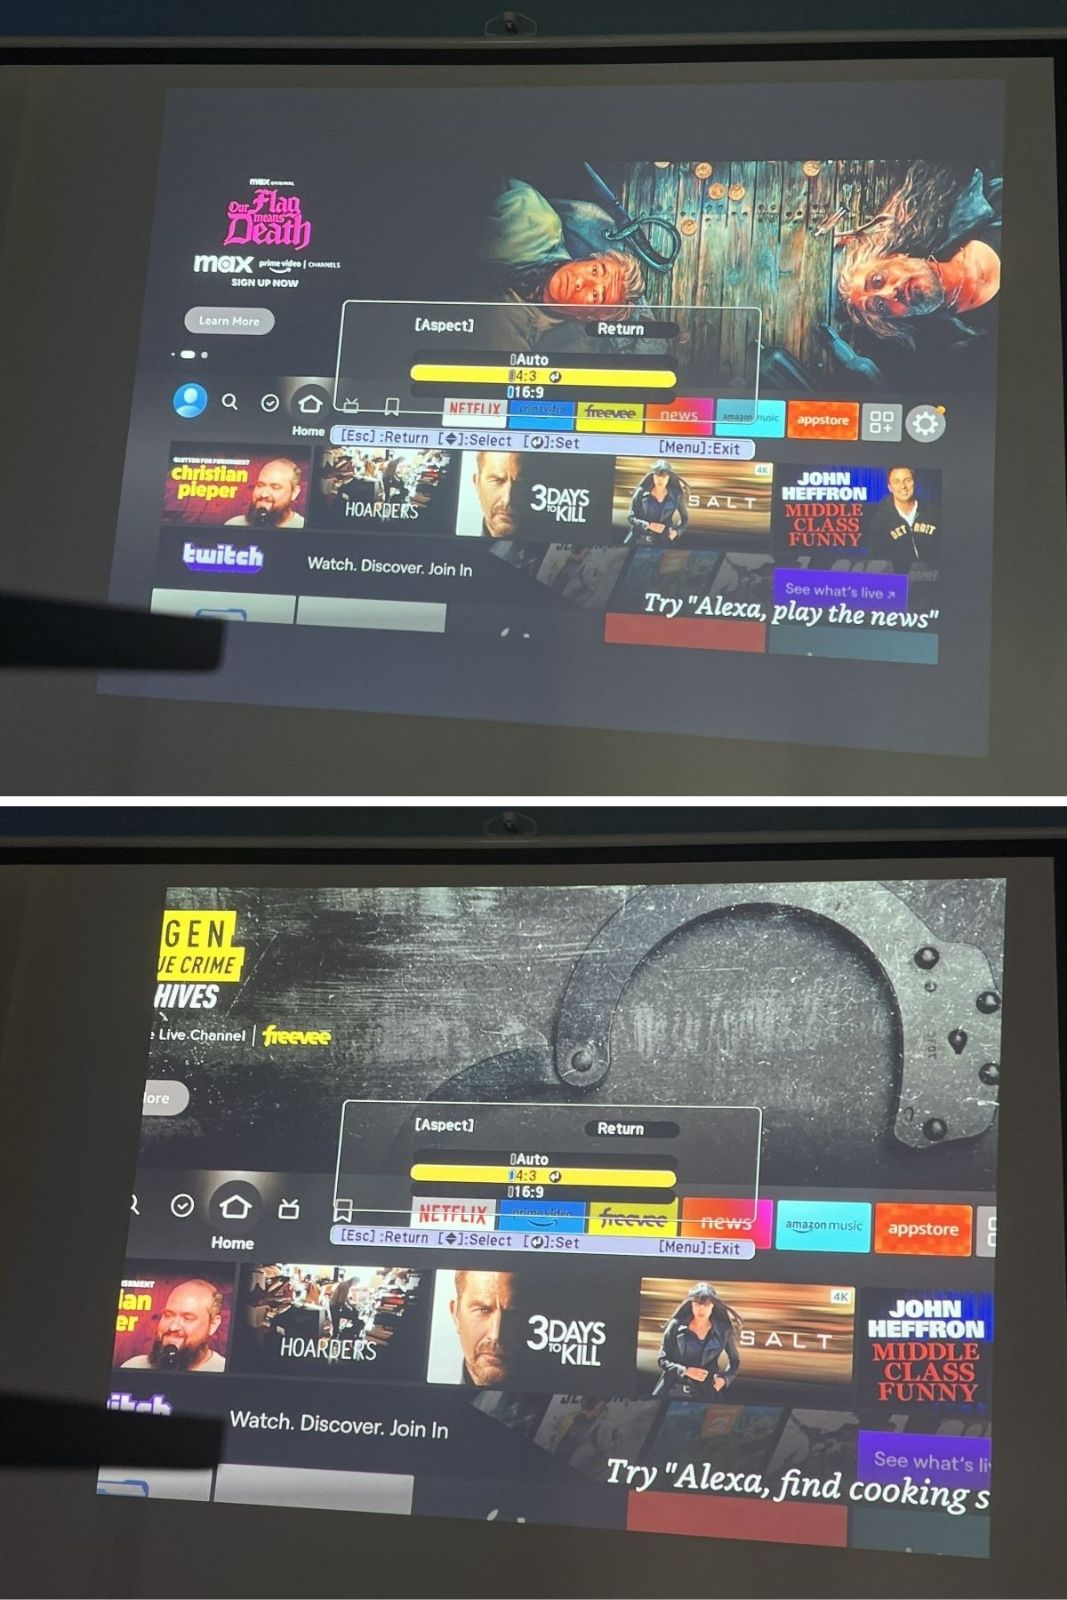
When you switch from a 4:3 ratio to a 16:9 ratio, your screen widens, creating a more cinematic experience.
The 4:3 aspect ratio tends to enhance certain aspects of movie characters, making them seem larger than life and heroic.
Modern projectors typically come with a default 16:9 aspect ratio, which fills the entire screen. However, if you switch to a 4:3 ratio, you’ll see black bars appear on the sides.
On the flip side, if you use a 16:9 aspect ratio on a 4:3 projector, you’ll notice black bars at the top and bottom of the screen.
All this means choosing the right aspect ratio for your projector will make its image appear larger, as shown below.
Each projector brand has its unique steps for changing the aspect ratio. For a detailed, step-by-step guide complete with demonstration images, please refer to our articles below.
- Why Can’t I Change Aspect Ratio on My Epson Projector? (Grayed-Out Settings)
- How to Change Aspect Ratio on a BenQ Projector?
4. Epson Projector: Use the Wide and Tele Buttons
Wide and Tele refer to two projector lens types: Wide-angle and Telephoto projector lenses.
A wide-angle lens has a short focal length and a wide field of view. It has an increased horizontal scope and causes close objects to appear far away.
A telephoto projector lens has a narrow field of view and a short focal length. It makes faraway objects appear closer in the projected image.
You can adjust the zoom lens remotely to operate in either Tele or Wide mode in some projectors.
Here’s how you can do this on an Epson projector:
Step 1: Turn on the projector and wait till it warms up.
Step 2: Project your preferred image and observe the projection size.
Step 3: Press the Wide button on your projector’s control panel to increase the projected image size.
Step 4: Press the Tele button if you want to reduce the size of the projected image.
Step 5: Adjust the projector’s focus to sharpen the image.
5. BenQ Projector: Use Digital Shrink
Certain BenQ projectors offer a feature known as “Digital Shrink,” enabling you to reduce the size of your projector screen.
By following these steps, you can proficiently utilize Digital Shrink & Shift to customize and resize the image on your TV screen according to your preferences.
Step 1: Press the Menu button on your remote control.
Step 2: Navigate to the Installation option in the menu.
Step 3: Within Installation, look for the Image Resizing submenu.
Step 4: Select Digital Shrink & Shift from the Image Resizing options.
Step 5: Once you’re in the Digital Shrink & Shift menu, use the Arrow Left and Right buttons on your remote to resize the image as desired.
Step 6: To shift the image horizontally and vertically, press the Back button on your remote control, then use the Arrow buttons to shift.
Conclusion
The distance between a projector and a projector screen determines the size of the image projected onto the screen.
There are three significant ways to reduce or enlarge the projected image. You can adjust the distance between the projector and the screen, change the settings of the projector lens, or switch to the appropriate aspect ratio.
Regardless of the method used, don’t forget to adjust the focus after resizing. Refocusing will preserve the clarity of your projected image.

Duy Anh is a seasoned technical editor specializing in helping readers troubleshoot TV, projector, and Wi-Fi issues. He’s always been drawn to logical problem-solving. His ability to approach matters from various angles with a neutral mindset enhances his technical expertise.