
How to Adjust Aspect Ratio on Your BenQ Projector for Perfect Screen Fit

What To Know
- Adjust your BenQ projector’s aspect ratio quickly using the remote’s Aspect button, cycling through options until the image matches your screen.
- Alternatively, tweak the aspect ratio in the projector’s menu under the Display tab, selecting the best fit for your content and display needs.
- BenQ projectors offer versatile aspect ratio options like Auto, Real, 4:3, 16:9, and 16:10, each suited for different content types and presentation settings.
In this guide, I will teach you two simple methods to quickly adjust your BenQ projector’s aspect ratio for optimal screen fit during your projection sessions.
Let’s get started!
Quick Navigation
Method 1: Utilize the Aspect Ratio Button on the Projector’s Remote Control
The most common way to set your BenQ projector’s aspect ratio is by using the dedicated button. Here are the steps to use it:
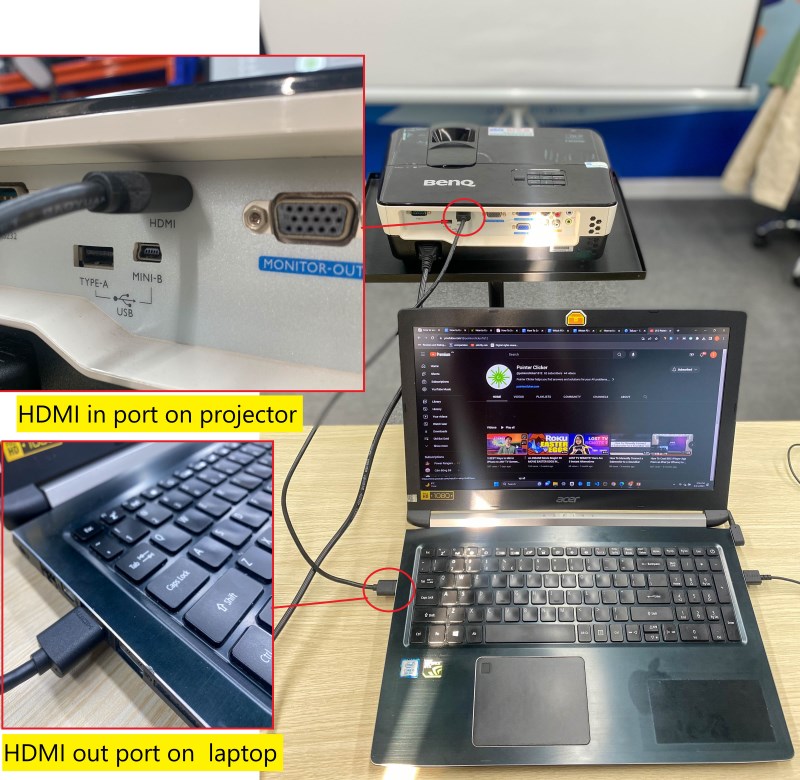
Step 1: Turn on your projector and connect it to a laptop, phone, or any source device. For the best picture quality, use HDMI.
Step 2: Hit the Aspect key on the projector’s remote control to bring up the Aspect Ratio settings on the screen.
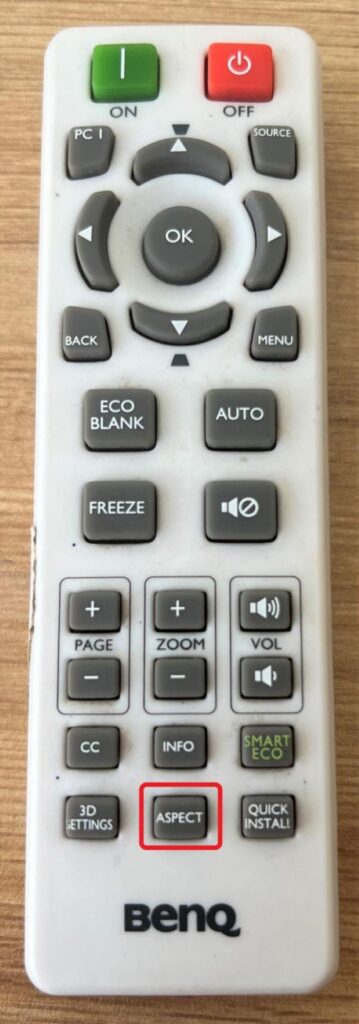
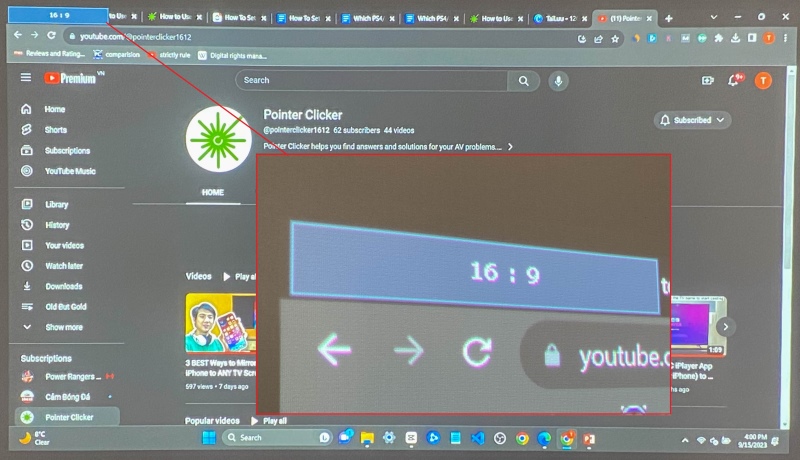
Step 3: Press the Aspect key repeatedly to choose the preferred aspect ratio matching the video signal format based on the display. For example, if you’re using your phone or laptop as the input source, the 16:9 aspect ratio will be ideal.
Method 2: Utilize the Aspect Ratio Option in the Menu Configuration Settings
You may also directly fiddle with the aspect ratio in the projector’s menu configuration system. Here are the steps:
Step 1: Turn on and link a laptop, phone, or any input device to your projector. Again, use HDMI because it offers the best picture quality.
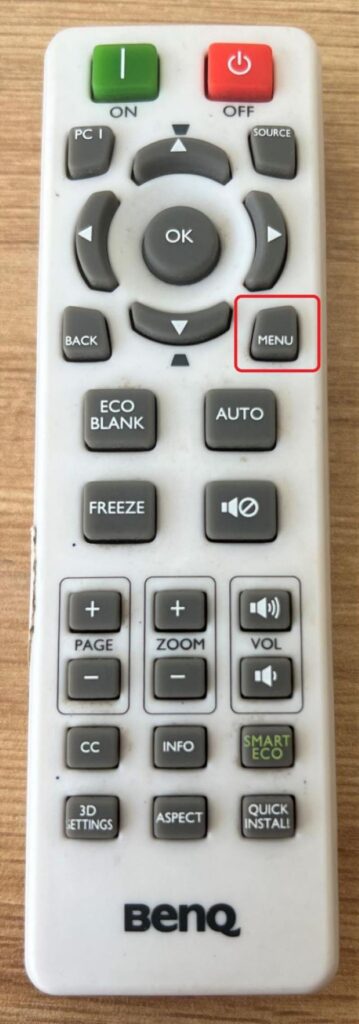
Step 2: Hit the Menu key on the projector control panel or remote.
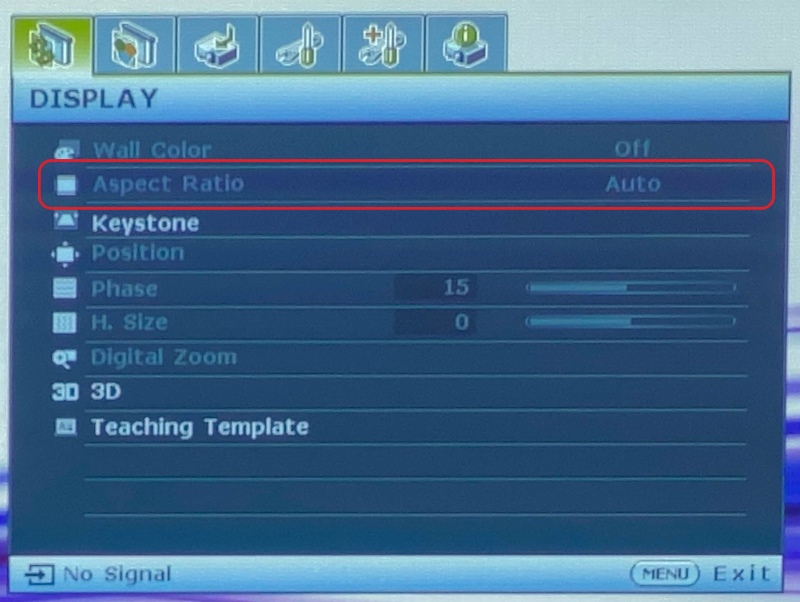
Step 3: Head to the Display tab on the screen and choose Aspect Ratio.
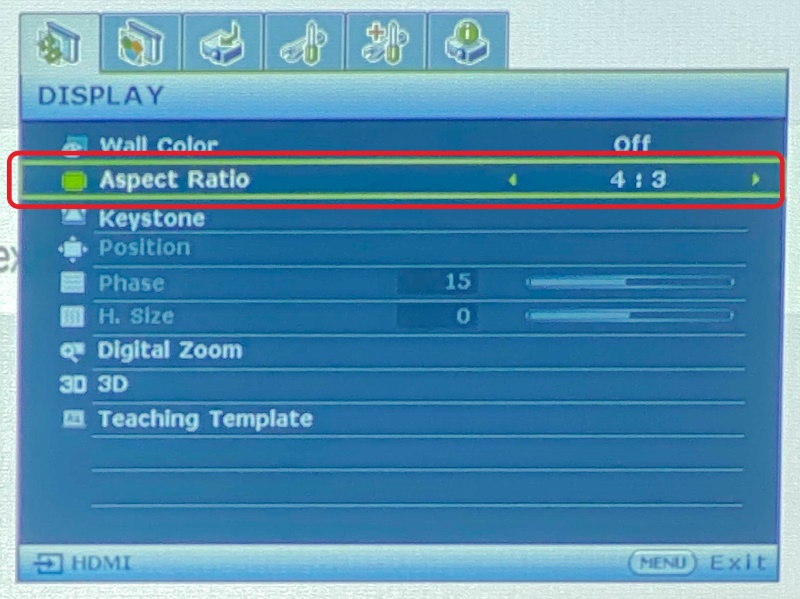
Step 4: Use your projector remote’s Right or Left navigation keys to choose an aspect ratio appropriate to your display requirements and video signal format.
BenQ Projector’s Aspect Ratio Options, Explained
Your BenQ projector’s various aspect ratio choices help manage the projected image’s shape and proportions.
Based on the content displayed, BenQ offers different aspect ratio choices to negate or minimize the likelihood of cropping, stretching, and distortion and present the image in the best dimensions possible.
The following represent the primary aspect ratio classifications with your BenQ projector:
Auto
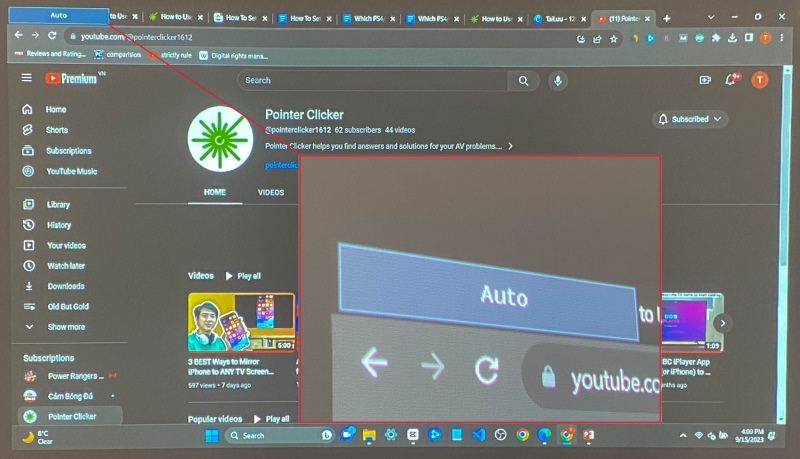
“Auto,” as the name suggests, is your BenQ projector choosing the aspect ratio on your behalf based on the content displayed.
When turned on, the “Auto Aspect Ratio” lets your projector automatically detect the video signal’s aspect ratio and modifies the projection accordingly. It scales the picture to fit the device’s native resolution horizontally and vertically.
The convenient feature helps people switch between different kinds of content that have varying aspect ratios, eliminating the requirement for manual adjustments.
If the projected image is not 4:3, 16:9, or doesn’t fit any conventions, the auto aspect ratio feature takes it upon itself to ensure the screen is used optimally while trying not to hurt the integrity of the image as much as possible.
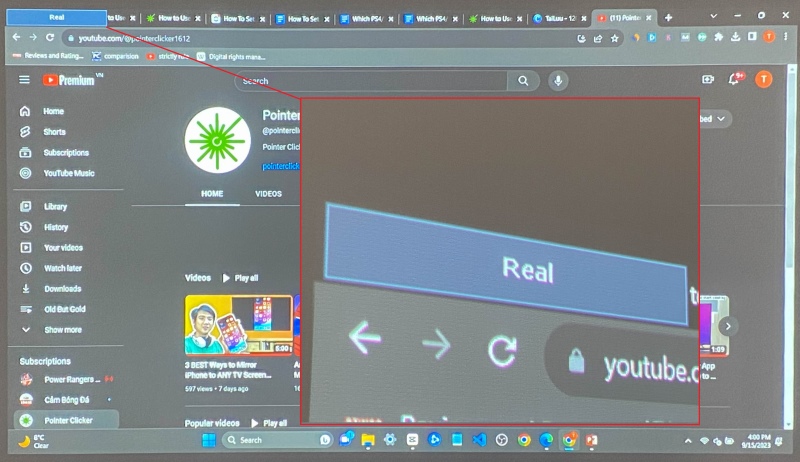
Real
The picture is displayed in its original avatar. There’s no stretching or resizing done to fit the display region. Lower-res images will be projected smaller instead of resized to fit the screen.
However, you can always manually alter the picture dimensions or make the image larger by adjusting the zoom function or physically taking the projector closer to the screen. After making the necessary adjustments, remember to refocus the projector.
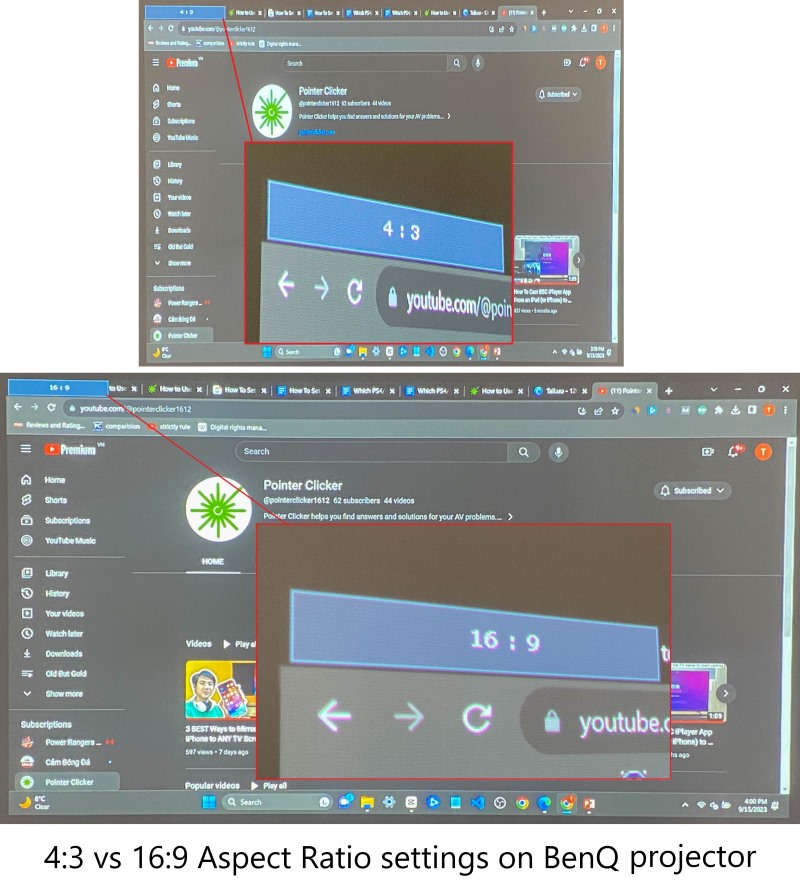
4:3

The projector scales the picture to assume the 4:3 visual layout. Also referred to as “standard,” the 4:3 aspect ratio is more boxy and square-like. Before widescreen became mainstream, 4:3 was the most prevalent aspect ratio.
This aspect ratio best suits 4:3 pictures such as older computer monitors, DVD movies in 4:3, standard definition television (SDTV), certain video games, etc.
The 4:3 aspect ratio is handy in business settings where presentations and documents are displayed. If 16:9 content is projected on a 4:3 canvas, black blocks will appear on both sides of the image to maintain the correct aspect ratio.
16:9
The 16:9 aspect ratio is broader and more rectangular than the 4:3 layout. It unofficially augmented the widescreen era and is fittingly called the “widescreen” layout.
16:9 succeeded the 4:3 aspect ratio as the standard and is the default for most modern projectors and displays.
High-definition TV (HDTV) content is a popular 16:9 content example. Other types of content in the layout include Blu-ray discs, several modern video games, etc.
The 16:9 layout is more versatile since it accommodates a wide range of content, from modern widescreen content to archaic 4:3 material.
It is particularly suitable for multimedia presentations and home theaters wherein a widescreen or cinematic experience is fancied.
The rise of 4K and HD (high definition) content has made 16:9 more widespread to a great extent.
16:10
The 16:10 layout is similar to 16:9 but more square-like and slightly taller. The 16:10 aspect ratio is relatively standard with modern laptops, which could be used as your BenQ projector’s input source.
Since the aspect ratio offers a tad more vertical screen real estate than 16:9, it’s more suitable for tasks such as web browsing, document editing, presentations, etc.
The 16:10 aspect ratio is preferred for educational and business presentations since it can display content and slides in the 4:3 or 16:9 formats without wasted screen space or significant distortion.
It is an excellent balance between the two during gaming (of any kind) or when you’re generally perusing your BenQ projection.
Troubleshoot: BenQ Projector Aspect Ratio is Grayed Out
A BenQ projector’s grayed-out aspect ratio means no source device is connected to the projector.
This issue is not unique to BenQ devices. Even other brands of projectors, such as Epson projectors, face a similar problem when the source device is not connected or detected.
To learn more, click here.
The situation may also mean the aspect ratio set on the device is incompatible with the content’s native layout. Or, most likely, the projector’s aspect ratio is set to “Auto,” greying out the other manual options.
But because it’s mostly a source device-related concern, ensure the input device is connected correctly to your BenQ projector so that there are no issues affecting the aspect ratio, mitigating the grayed-out problem.
Conclusion
When you set up your BenQ projector, it will independently choose the aspect ratio based on the displayed content.
If you’re unhappy with the automatic selection, you may manually fix the orientation’s dimensions.
If you didn’t know how to change or set the aspect ratio by yourself, hopefully, you now have more than a clue.
If the options to manually select the aspect ratio are inactive, check if the input device is properly connected.
If you’re still having trouble changing your BenQ projector’s aspect ratio, refer to the product manual or the official website or contact BenQ.

Catherine Tramell has been covering technology as a freelance writer for over a decade. She has been writing for Pointer Clicker for over a year, further expanding her expertise as a tech columnist. Catherine likes spending time with her family and friends and her pastimes are reading books and news articles.