
How To Only Cast Video To My Chromecast But Play Audio Separately (With A Headphone)?
What To Know
- An audio extractor is needed to route audio from a Chromecast to headphones. This device connects between the TV’s HDMI port and the Chromecast, allowing users to plug headphones directly into the audio extractor’s output.
- Depending on the model, Chromecasts might need to be plugged into a wall socket, and most audio extractors require a wall outlet as well.
This guide will navigate you through the steps to seamlessly connect headphones—Bluetooth or otherwise—to your Chromecast setup, allowing for undisturbed late-night show binges.
Embrace the freedom of solitary audio without missing a scene.
Let’s get started.
Quick Navigation
- 1. Chromecast with Audio Extractor (Wired Audio)
- Materials Needed
- Diagram
- Step 1: Plug the Chromecast into the Audio Extractor
- Step 2: Connect the Audio Extractor to Your TV
- Step 3: Connect Your Audio Device to the Audio Extractor
- Step 4: Connect the Chromecast and Audio Extractor to Power
- Step 5: Adjust Your TV’s Input
- Step 6: Connect Your Chromecast and Personal Device to the Same Network
- Step 7: Cast Content to Your Chromecast
- 2. Chromecast with Audio Extractor (Wireless Audio)
- Materials Needed
- Diagram
- Step 1: Connect Your Chromecast to Your Audio Extractor
- Step 2: Plug the Audio Extractor into Your TV
- Step 3: Connect the Chromecast and Audio Extractor to a Power Source
- Step 4: Connect Your Bluetooth Device to Your Audio Extractor
- Step 5: Change Your TV’s Input
- Step 6: Connect Your Chromecast and Casting Device to the Same Internet Network
- Step 7: Cast Videos
- Wired Vs Wireless Audio
- Wrapping Things Up
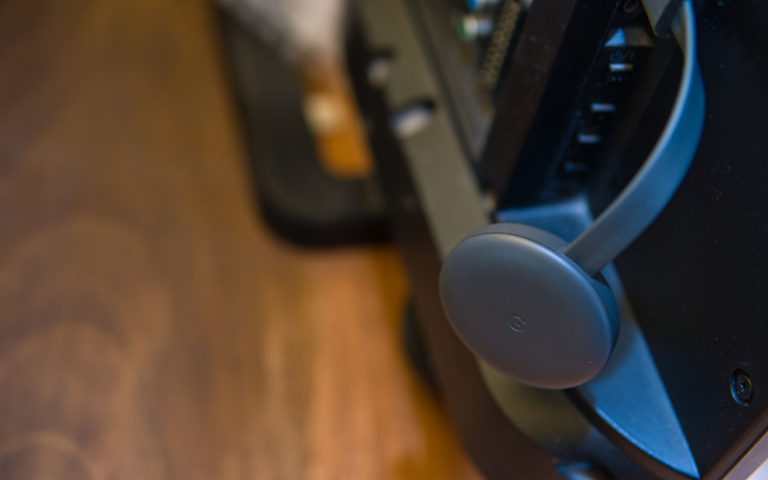
1. Chromecast with Audio Extractor (Wired Audio)
You can connect your wired headphones or earphones to your Chromecast using an audio extractor. They’re easy to use and compatible with any TV that has an HDMI port.
Though it may sound complicated, it’s very easy and only required a few simple steps and standard audio equipment.
Let’s learn about it!
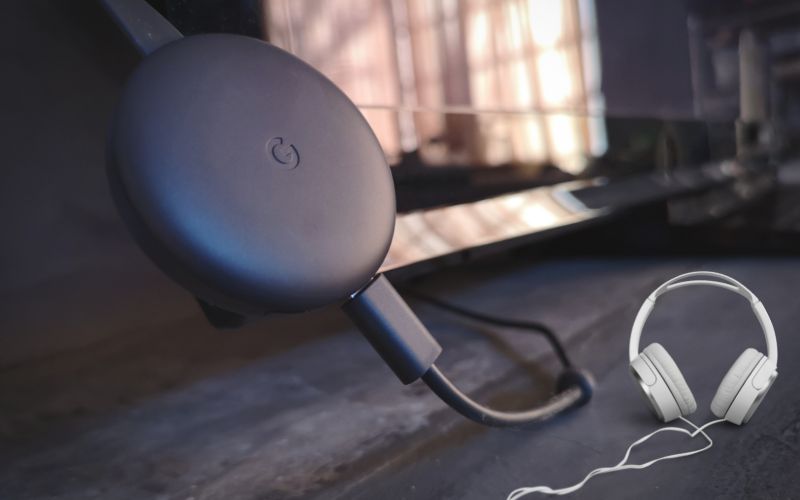
Materials Needed
- Chromecast Device
- Audio Extractor
- HDMI-Supported TV
- 3.5mm Audio Cable (for Headphones/Earphones below)
- Optical/SPDIF/Toslink Cable (for Amplifier/ Speakers below)
- Headphones/Earphones
- Amplifier/ Speakers
- Dual-port USB wall charger (optional)
Diagram

Step 1: Plug the Chromecast into the Audio Extractor
First, you need to connect your Chromecast to the audio extractor.
Plug the Chromecast’s attached HDMI cable into the audio extractor’s HDMI IN port, making sure it’s securely fastened in place.
Step 2: Connect the Audio Extractor to Your TV
Find your TV’s HDMI port.
Plug one end of an HDMI cable into your audio extractor’s HDMI OUT port. It’s important to plug the cable into the correct port, or else the audio extractor will not work properly.
Then, plug the other end of the HDMI cable into your TV.
Make sure all cables are secure before proceeding to the next step. You may also want to ensure your HDMI cable is in good condition if it’s a few years old.
Step 3: Connect Your Audio Device to the Audio Extractor
Now that your Chromecast and audio extractor are connected to your TV, you can connect your audio device to it.
This process will differ slightly depending if you’re using headphones or amplifiers/speakers.
-
Headphones
If you’re using headphones, plug its 3.5mm audio cable into the audio extractor’s Audio OUT port. If the cable isn’t attached to the headphones, make sure it’s firmly plugged into the headphone’s audio port.
-
Amplifiers/Speakers
To connect an amplifier or speaker to the audio extractor, you will need to use an optical cable. Plug one side of the optical cable into the speakers, ensuring they’re turned on and plugged in if needed.
Then find the audio extractor’s Audio OUT port and plug the other side of the optical cable into it.
Step 4: Connect the Chromecast and Audio Extractor to Power
Your Chromecast and audio extractor must be connected to a stable power source to work.
While you can connect Chromecast generations one to three to your TV’s USB port (if it can supply enough power), all other Chromecast models can only be plugged into a wall socket with a USB adapter.
Most audio extractors must be plugged into a wall outlet, though consult your model’s manual to see its specific power requirements.
If you must plug both devices into a wall outlet, consider using a dual-port USB adapter, like the Amazon Basics Dual-Port 24W USB Wall Charger.
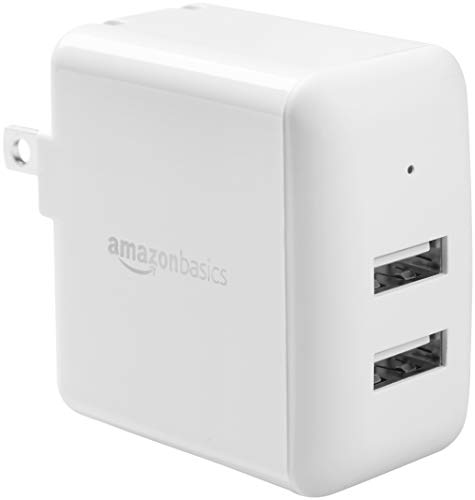
- Portable charger with two USB-A ports (12 watt each). Charges up to 2 devices at a time
- Compatible with iPhone 15/14/13/12/11/X/8/7/6/5/SE series, iPad Mini, AirPods, Apple Watch, iPod...
- Built-in device detection; provides up to 4.8 amps of power (each port 2.4 amps max); does not...
Last update on 2024-07-25 / Paid Link.
Ensure all devices are securely connected to electricity. You may notice their LED light is on, indicating it’s sufficiently powered.
The video below demonstrates how to plug wired speakers into a streaming stick, though we strongly recommend using an HDMI audio extractor as it offers more audio output ports and is better at extracting sound as it was specifically designed to do so.

Step 5: Adjust Your TV’s Input
If you haven’t already done so, change your TV’s input to the HDMI port your audio extractor is plugged into.
The port should be labeled, allowing you to press Input or Source on your remote until you see the right input on your TV screen.
Alternatively, you can flip through the inputs until you see your Chromecast on-screen.
Step 6: Connect Your Chromecast and Personal Device to the Same Network
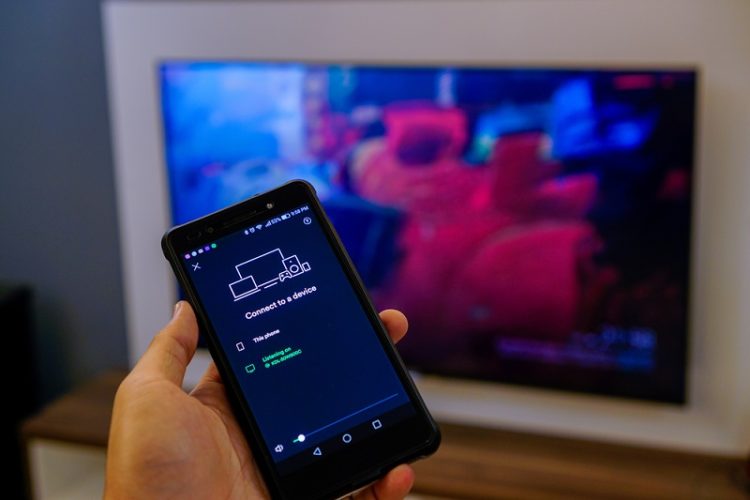
Check which network the device you’ll be casting from is connected to (e.g. laptop, phone, or tablet).
Now, connect your Chromecast to the same network in the Google Home app.
This will allow your device to connect to your Chromecast via Wi-Fi.
You may also connect your Chromecast and personal device to another phone’s mobile hotspot.
Step 7: Cast Content to Your Chromecast
Navigate to your streaming app of choice and play a video. Then, cast it to your Chromecast by clicking the casting icon and selecting your Chromecast’s assigned name.
Once it’s playing on your TV, check that you can hear the audio through your headphones, amplifiers, or speakers.
If you can’t, make sure the TV’s volume is turned up and adjust the speaker’s volume, if possible.
You may also want to double-check that everything is properly plugged in.
2. Chromecast with Audio Extractor (Wireless Audio)

Do you have a pair of Bluetooth headphones lying around or prefer wireless audio connections? If so, you can connect your wireless audio devices to your Chromecast using an audio extractor that supports Bluetooth.
The great thing about these types of audio extractors is that they can be used for wired and wireless audio connections, making them compatible with almost every type of wireless device.
The following steps can be done to connect Bluetooth headphones or speakers to your Chromecast.
Materials Needed
- Chromecast Device
- Audio Extractor with Bluetooth
- HDMI-supported TV
- Bluetooth Headphones/Earphones
- Bluetooth Amplifier/ Speakers
- Dual-port USB wall charger (optional)
Diagram

Step 1: Connect Your Chromecast to Your Audio Extractor
Find your audio extractor’s HDMI IN port. Then, plug your Chromecast device into it.
Make sure to not accidentally plug it into the HDMI OUT port, or else your audio setup will not work.
Step 2: Plug the Audio Extractor into Your TV
Now that you’ve connected your Chromecast to the audio extractor’s HDMI IN port, you can connect your TV to its HDMI OUT port.
Remember, it’s important to plug your devices into the correct ports during this process.
Plug an HDMI cable into the audio extractor’s HDMI OUT port and one of your TV’s available HDMI ports.
Check that all cables are secure.
Step 3: Connect the Chromecast and Audio Extractor to a Power Source
Now you must plug your Chromecast and audio extractor into power.
To ensure the most stable connection, we recommend plugging both of them into a wall outlet. Also, some Chromecasts (like Chromecast Ultra and Chromecast with Google TV) can not be plugged into a TV’s powered USB.
If you’re short on wall outlets, you can use a dual-port USB adapter. It will not compromise your device’s power supply.
Step 4: Connect Your Bluetooth Device to Your Audio Extractor
Depending on your Bluetooth device and audio extractor model, you may need to follow different steps to pair them.
Some Bluetooth headphones have a button that, when pressed, enables Bluetooth pairing. Others automatically enable pairing mode as soon as they’re turned on.
You should also check your audio extractor’s exact pairing instructions.
If you’re having difficulty pairing these devices, check that your Bluetooth headphones or speakers are charged, and plug them in, if necessary.
Step 5: Change Your TV’s Input

Change your TV’s input to the audio extractor’s source. Since you’ve plugged it into the HDMI port, the source should be labeled HDMI 1, 2, 3, etc.
Bear in mind that TV inputs can be labeled incorrectly, so check all over the sources if you’re having trouble finding the right one.
Step 6: Connect Your Chromecast and Casting Device to the Same Internet Network
When setting up your Chromecast on the Google Home app, check that it’s connected to the same network as your casting device (e.g. phone, tablet, or laptop).
You can also change your Chromecast’s network settings in the Google Home app. Go to Device Information, Wi-Fi, then Forget this network.
Alternatively, you can factory reset your Chromecast device, set it up from scratch, and connect it to the correct network.

Step 7: Cast Videos
Play a video on your device and cast it on your TV.
Ensure the audio is coming out of your Bluetooth headphones or speakers. If it’s not, go through the steps again, paying extra attention to your cables and Bluetooth settings.
If the problem persists, consider resetting your Bluetooth device.
Wired Vs Wireless Audio

Let’s discuss the differences between a wired and wireless audio connection.
Depending on your Bluetooth device and audio extractor, setting up a wired connection is much easier and there’s less room for error. This makes it the more reliable setup as the Bluetooth connection randomly cut out.
You also don’t have to worry about keeping your headphones charged, as many Bluetooth pods can not be used when charging.
Wired connections also tend to foster a louder and clearer sound quality, making them the perfect choice for your living room or home theater.
On the other hand, wireless audio connections allow you to keep your audio set up (mostly) wire-free. This means you can have a sleek and clean TV console, without worrying about hiding the wires in the wall or pinning them along the floor.
It’s also more flexible since you can move about your home without the wire limiting your movement. If you’re worried about your headphone’s short Bluetooth range, consider investing in a pair with a long range.
Wrapping Things Up
Playing your Chromecast’s audio separately couldn’t be easier.
You will just need to make sure you have an audio extractor and that it supports Bluetooth if you want to connect audio devices wirelessly.
The audio extractor plugs directly into your TV’s HDMI port, making it compatible with any TV with HDMI.
A wired connection is best for a more permanent set up while a wireless connection is great if you take your Chromecast to new places or want to move around while listening to TV.
If you encounter any problems, remember to check all of your cables (replacing them if needed) and reset your Bluetooth headphones or speakers.
What’s your experience playing a Chromecast’s audio separately? Do you prefer to use a wired or wireless connection for your audio devices?
Let us know in the comments below!

Yesenia Achlim is a technical copywriter and editor with a focus on AV equipment. She aims to break down complicated topics and make technology accessible, no matter your technical expertise. When she’s not teaching you how to replace a projector lamp, you can find her reading and baking.
How do you send audio to a Chromecast audio and the video to a video Chromecast?