
How To Fix ‘Not Working’ HDMI Ports on MacBooks For TV Outputs

What To Know
- Use the ‘Detect Displays‘ option in the MacBook’s Display settings to help the Mac recognize an external display when connected but not showing a signal.
- If HDMI issues persist, consider using a USB-C connection or a USB-C to HDMI adapter as an alternative for connecting to an external display.
In this guide, I’ll demonstrate how to resolve the ‘no HDMI signal’ issue when using an HDMI port for external displays on your Mac.
Ready to fix this? Let’s dive in.
Quick Navigation
Quick Fixes You Can Try First
Before delving into more complex solutions, there are several quick and simple fixes you can try to resolve HDMI connection issues between your MacBook and TV:
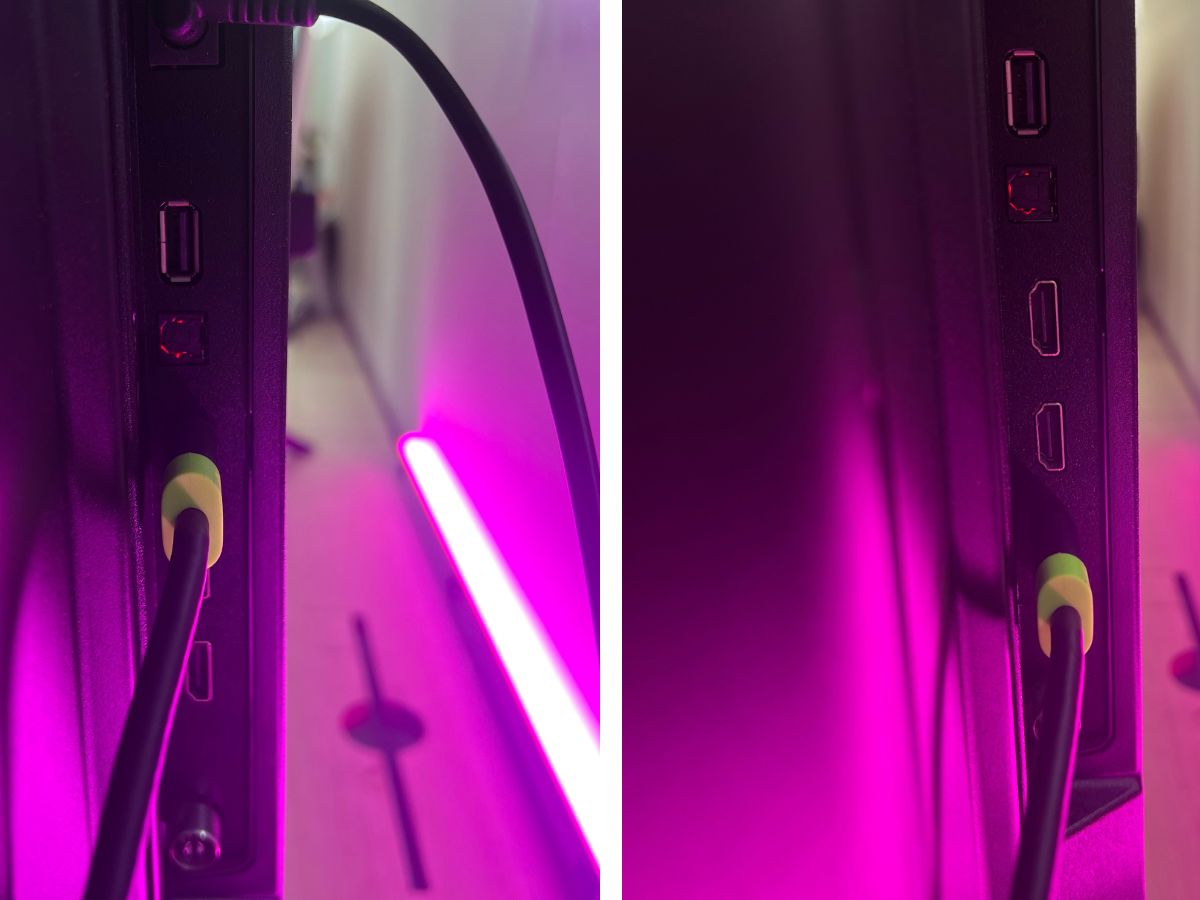
Re-plugging the HDMI Cable: Sometimes, the solution is as straightforward as disconnecting and then reconnecting the HDMI cable to your Mac. This can often reset the connection and solve the issue.
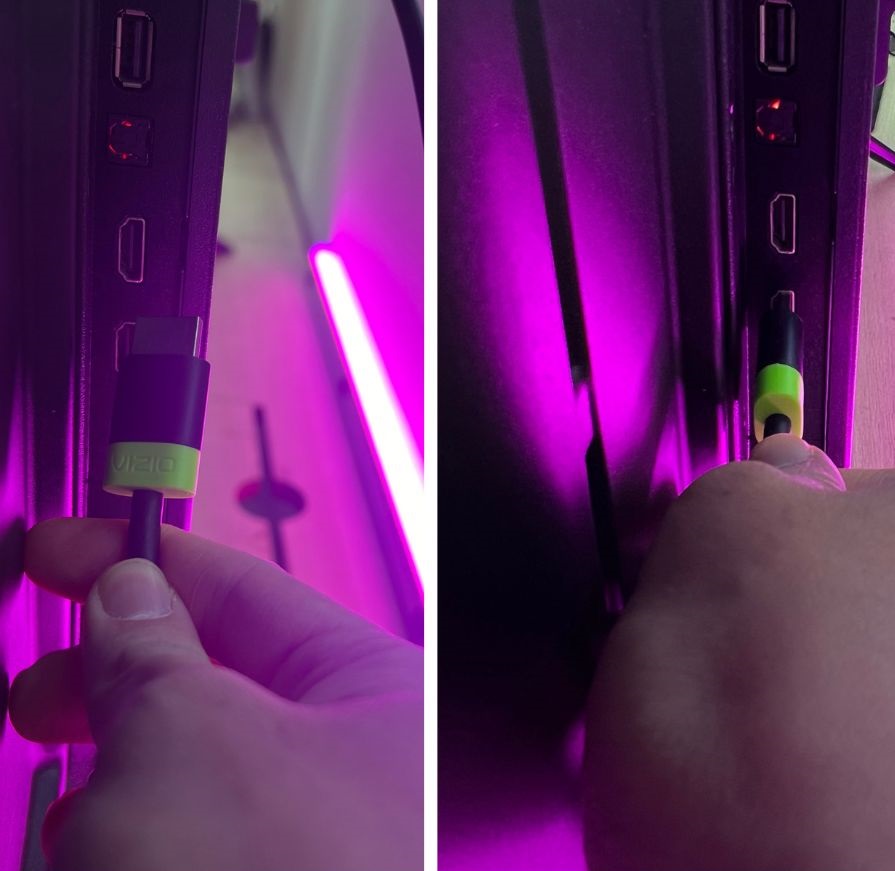
Try a Different HDMI Port or Cable: If the problem persists, it could be related to the HDMI port on your TV. Most TVs have multiple HDMI ports, so try using another one to see if the connection is restored.
Test with a Different TV or Monitor: Connect your MacBook to a different TV or monitor. This can help you determine whether the issue is with the original TV or your MacBook’s HDMI output.
Restart Your Devices: Often, a simple restart of both your MacBook and the TV can refresh the connection and resolve the issue.
Update macOS: Ensure that your Mac is running the latest version of MacOS. Outdated software can sometimes lead to compatibility problems with external displays.
Activating ‘Detect Displays’ on Your MacBook
If your MacBook is connected to an external display but doesn’t seem to recognize it, the ‘Detect Displays’ feature in your Display settings could be the solution you need. This feature prompts your MacBook to actively search for and recognize any connected external monitors.
Here’s how to activate it:
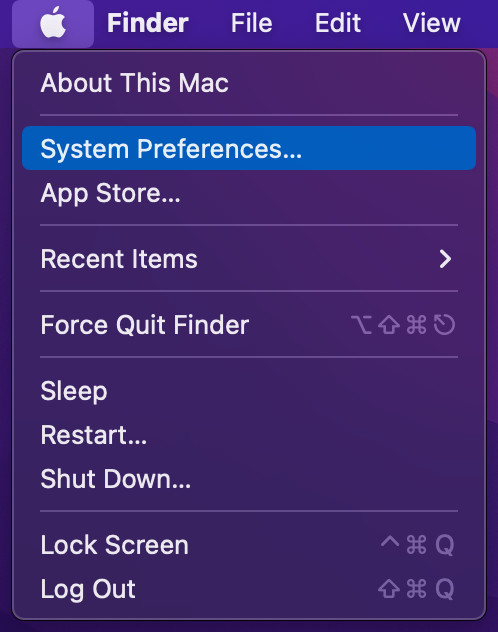
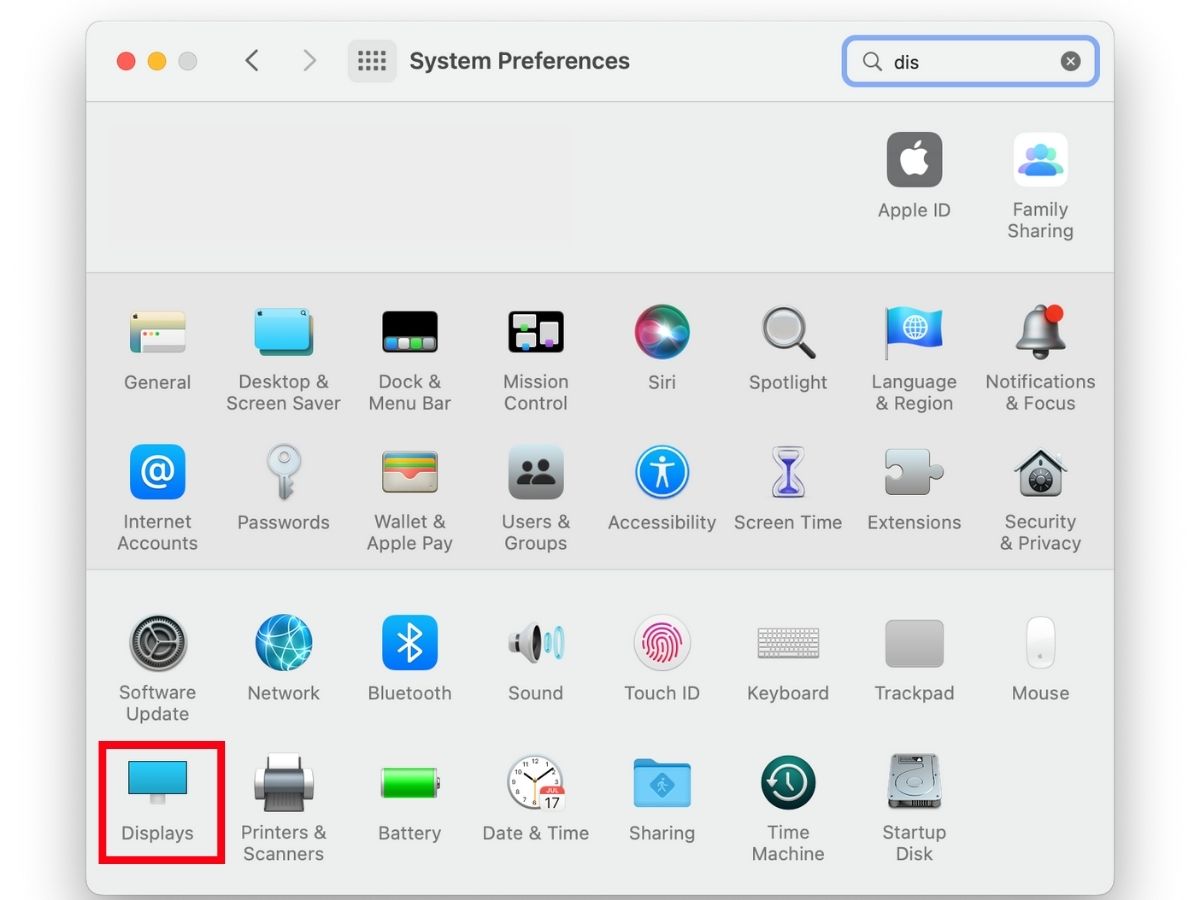
Step 1: Click on the Apple menu, select System Preferences, and then choose Displays.
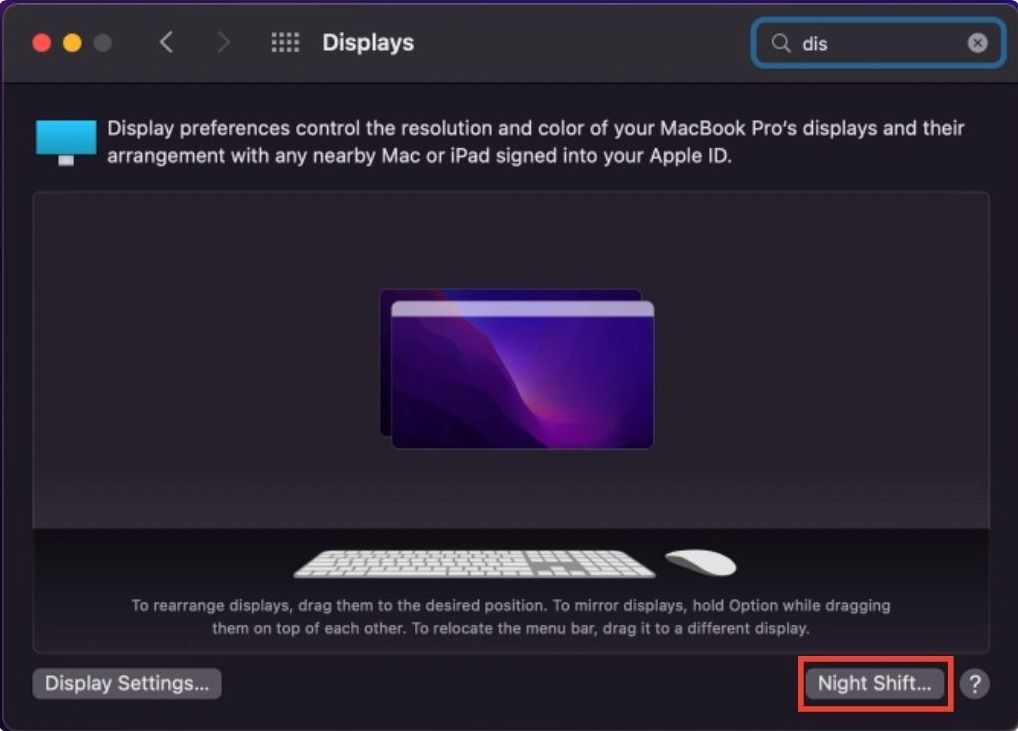
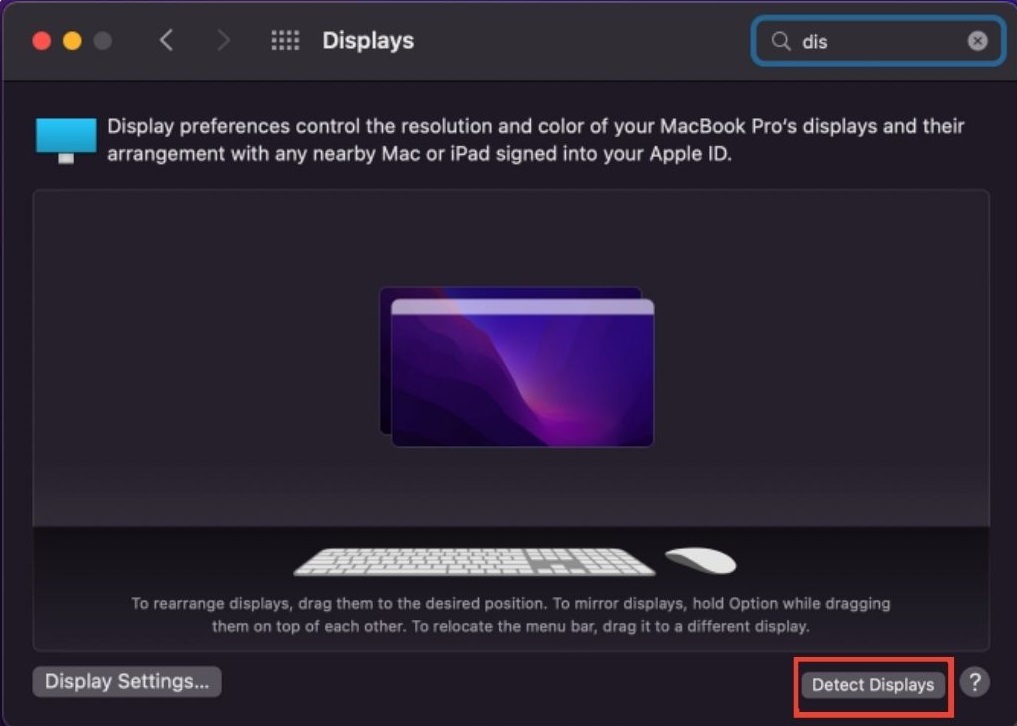
Step 2: While in the Display settings, press and hold the Option key on your keyboard. This action will transform the Night Shift button into a Detect Displays button. Click on Detect Displays to initiate a scan for any connected external monitors.
By following these steps, your MacBook will attempt to detect and connect to any external displays, potentially resolving any signal issues you were experiencing.
Workaround Solutions
Set the Scaled (Resolution) to Default
Sometimes, the ‘No Signal‘ issue when using an external display can be resolved by adjusting the resolution settings on your MacBook.
This solution is particularly effective if you’ve previously changed these settings. A user on Apple’s forum successfully resolved their connection problem by resetting the Resolution settings to their default.
If your settings are already at default, try switching to a different resolution and then reverting back.
Here’s how you can adjust these settings:
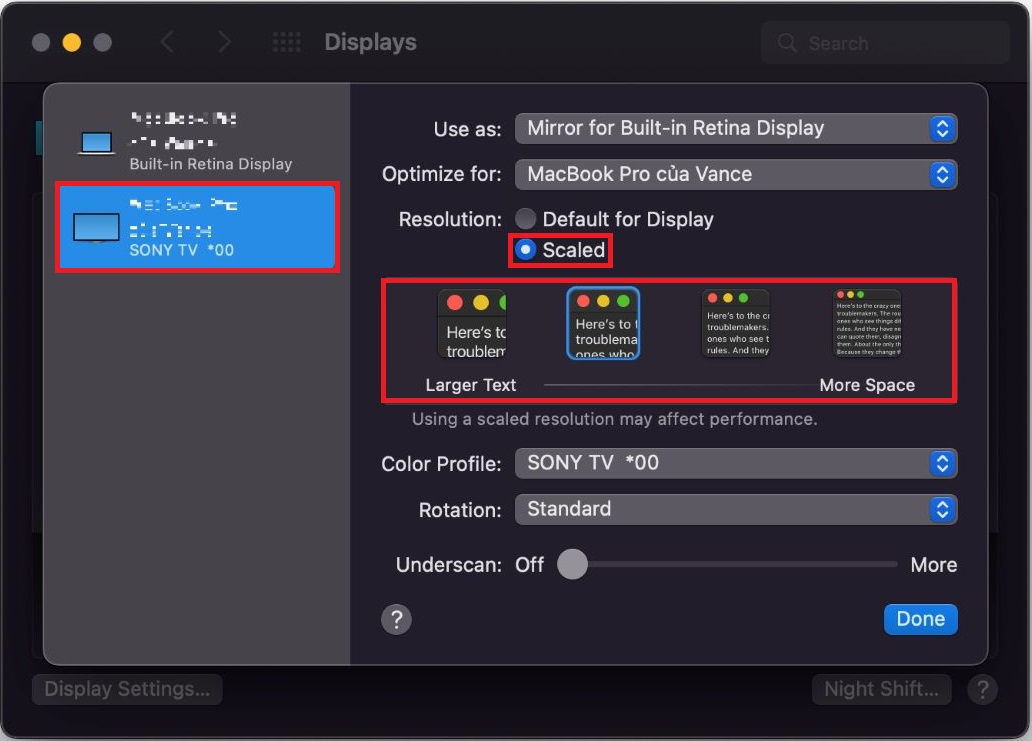
Step 1: Navigate to System Preferences, click on Displays, and then select Scaled beneath the Resolution options.
Step 2: Choose a different Scaled resolution option, then switch back to your preferred scaling. If your original choice was Default for display, simply re-select this option.
After completing these steps, your external display should start working. This method can refresh the connection and often resolves signal issues with external monitors.
Simultaneously Switch the HDMI Source and Turn On Your MacBook
A unique solution for fixing HDMI connection issues, particularly with the Mac Mini, was shared by a user on the MacRumors forum.
Despite the initial ‘no signal’ problem encountered when connecting their Mac to a TV, this method, which has been validated by other forum members, proved to be effective.
Follow these steps to replicate the workaround:
Step 1: Completely turn off both your MacBook and TV.
Step 2: Turn on the TV and switch to a different HDMI port that is currently not in use.
Step 3: With your TV remote in hand, hover over the Source button, ready to switch, but don’t press it yet.
Step 4: Simultaneously press the Enter button on your remote to select the HDMI source connected to your MacBook and turn on your MacBook.
Ensure these actions are performed simultaneously for the best results.
Wait for a few seconds, and then your TV should start receiving the signal from your MacBook.
Alternative
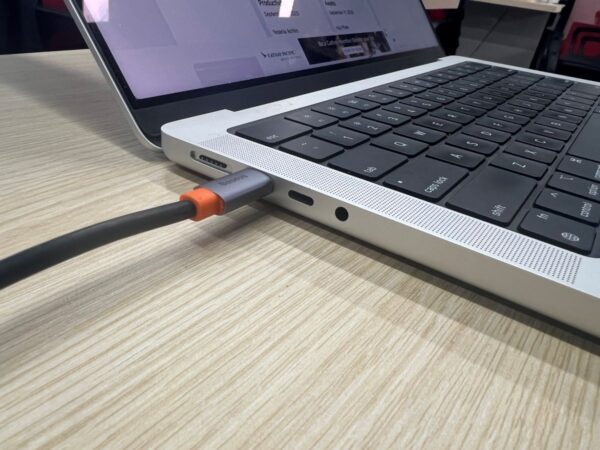
Using a USB-C cable to Replace the HDMI
When faced with HDMI connection issues, an effective alternative is to use a USB-C (Thunderbolt) port to connect your monitor. This solution worked well for me with my MacBook M1 and an LG portable monitor.
The process of using a USB-C cable is as straightforward as using an HDMI cable, offering a simple plug-and-play experience.
In my case, I tested all three USB-C ports on my MacBook and found that each one connected flawlessly to the portable monitor.
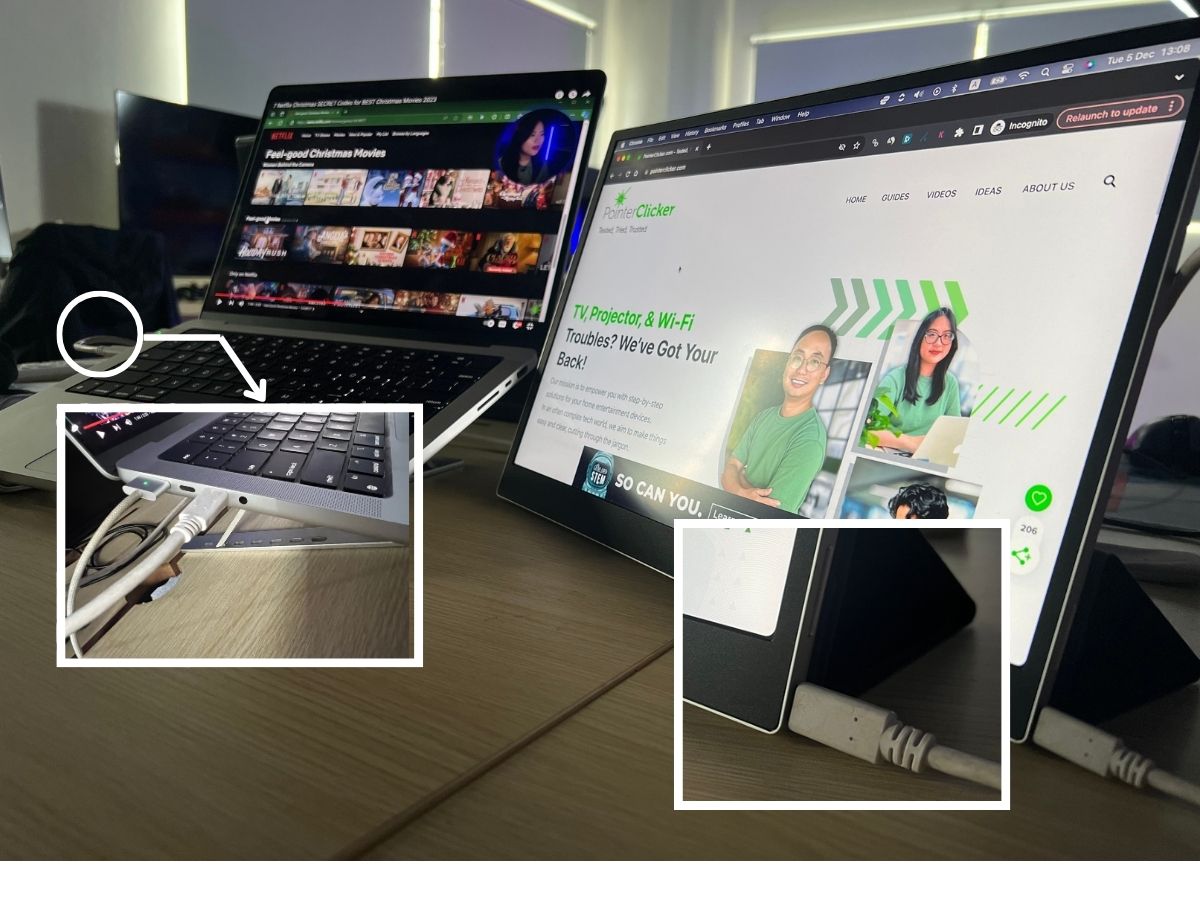
This confirms the versatility and reliability of USB-C ports for external display connections, especially when the HDMI options fall short.
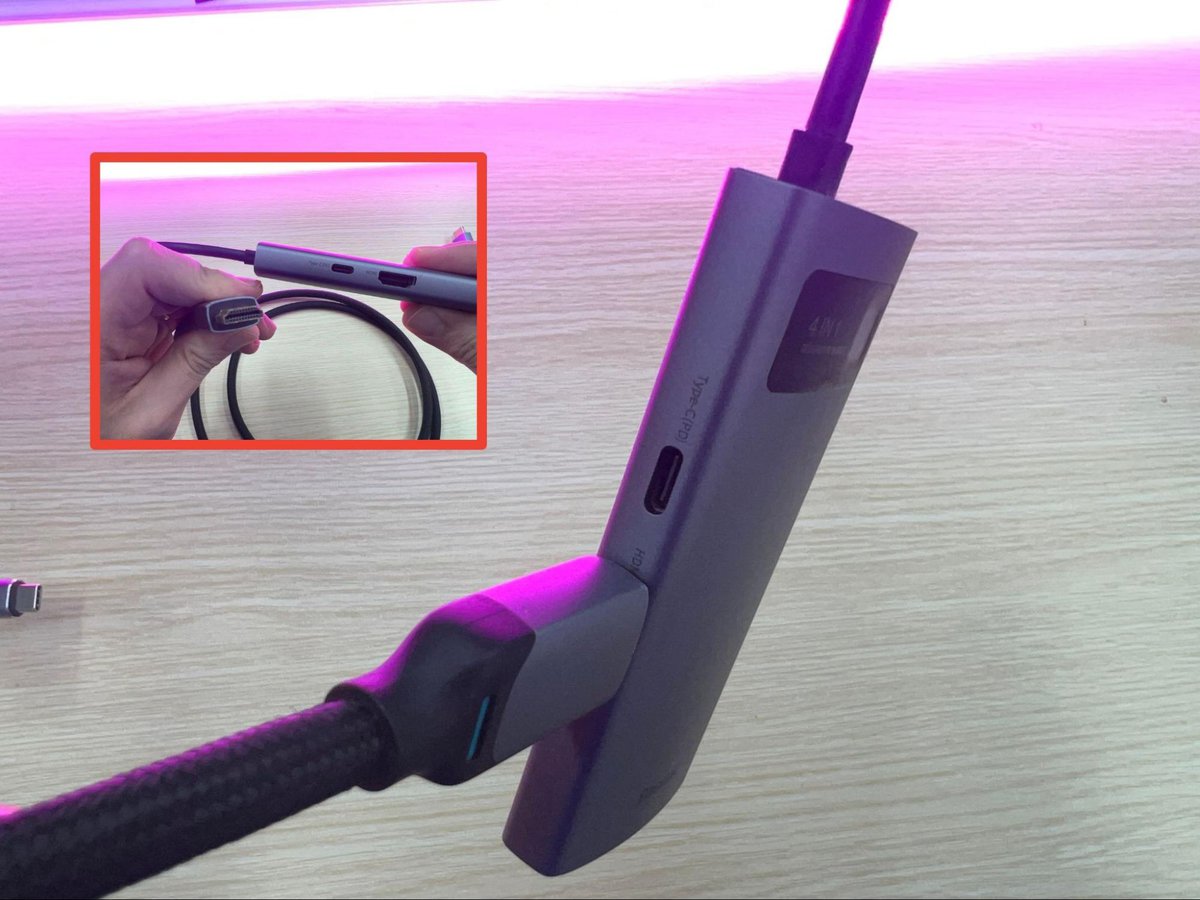
Using a USB-C to HDMI Adapter as an Alternative to HDMI Ports
When the HDMI port on your MacBook isn’t functioning properly, a USB-C to HDMI adapter can be a great workaround.
This adapter essentially transforms a USB-C port on your MacBook into a functional HDMI output.
My personal experience with the Baesus USB-C adapter confirms its compatibility and effectiveness when connecting my MacBook M1 to various external displays like TVs and projectors.
Setting Up the USB-C to HDMI Adapter:
Step 1: Plug the USB-C end of the adapter into your MacBook’s USB-C port.
Step 2: Connect one end of an HDMI cable to the adapter’s HDMI port. Then, connect the other end of the cable to your TV or projector.
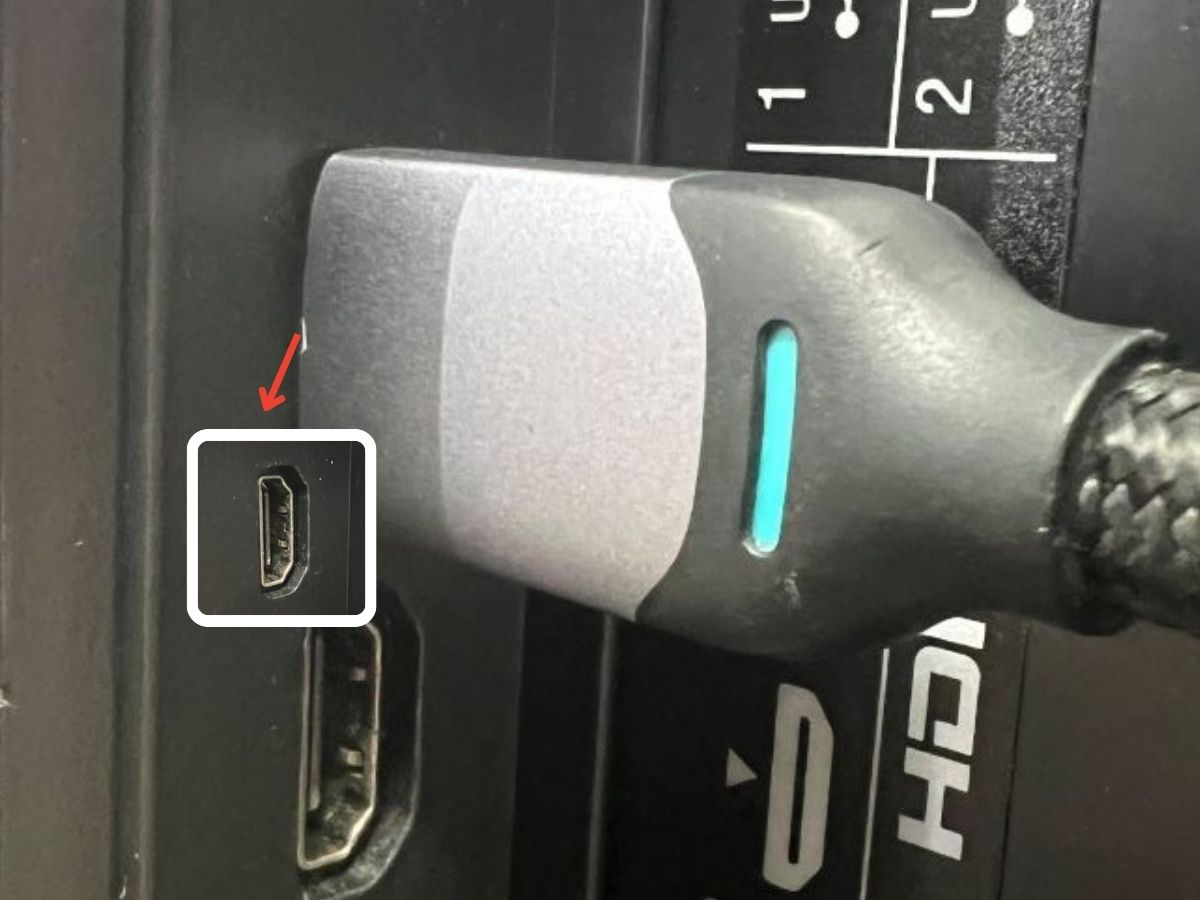
Step 3: Power on your TV and switch to the appropriate HDMI input source.
Your MacBook should now detect the connected TV. You can then adjust the external display settings on your MacBook, choosing either to mirror your screen or extend it, according to your preference.
Using a USB-C to HDMI adapter is a simple yet effective way to bypass issues with your MacBook’s HDMI port, ensuring you can still use external displays as needed.
See Also: How to Connect a MacBook Air to a Projector Step By Step With Images
Bonus: New MacOS Updates Often Lead to HDMI Connectivity Issues
A recurring theme on various forums is the emergence of ‘no signal’ HDMI issues following MacOS updates.
Notably, the transition from Catalina OS to Big Sur OS has been a point of trouble for several users. Despite efforts like changing HDMI cables or switching between monitors and TVs, finding a solution has often been challenging.
If you’re facing this problem post-update, trying out the solutions mentioned earlier in this guide may provide some relief.
However, it’s also worth considering holding off on immediate updates to new MacOS versions. New updates, while exciting, can sometimes introduce bugs affecting functionalities like HDMI connectivity.
My recommendation is to exercise a bit of patience with new OS updates. It’s often safer to wait for a few days or weeks, keep an eye on user feedback, and only proceed with the update after confirming that major issues have been resolved.
This approach helps you avoid running into common pitfalls associated with new software versions.

Tai “Ty” Luu, an Electronics Engineering graduate from Sheridan College, is a passionate technical editor with a deep love for technology and gaming. He constantly seeks new challenges to expand his expertise in the tech and gaming fields.
Vance, Thank you for the very thoughtful and thorough article.
I wonder if there are any updates from Catalina mentioned to now Big Sur? Apple makes more and more hurdles in the name of security.
May I suggest two more things to try?
For another restarting process, I have found it helpful to have monitor connected and powered up before powering up Mac. I think it helps the Mac to adjust itself to the new world it wakes up to.
Another would be to try another HDMI cable. So many variations and possibilities for faults with unknown cables.
Thanks again!
(Got here after searching for info on 1280×800 which was so helpful.)