
How To Easily Replace or Reassemble a Projector Lens

What To Know
- To remove the old lens, ensure the projector is powered off > Then disassemble the projector, photographing components for reference > Carefully unscrew and extract the old lens.
- For installing the new lens, clean the new lens if necessary> Fit the lens into the projector’s housing > Secure the lens and cross-reference with your photos before reassembling the projector.
In this guide, I will show you how to replace your projector lens and provide instructions for reassembling it in case your projector falls and the lens breaks into pieces.
Let’s dive in!
Quick Navigation
How to Replace the Projector Lens?
Since not all projectors are made the same, the process of replacing a projector lens will vary across makes and models.
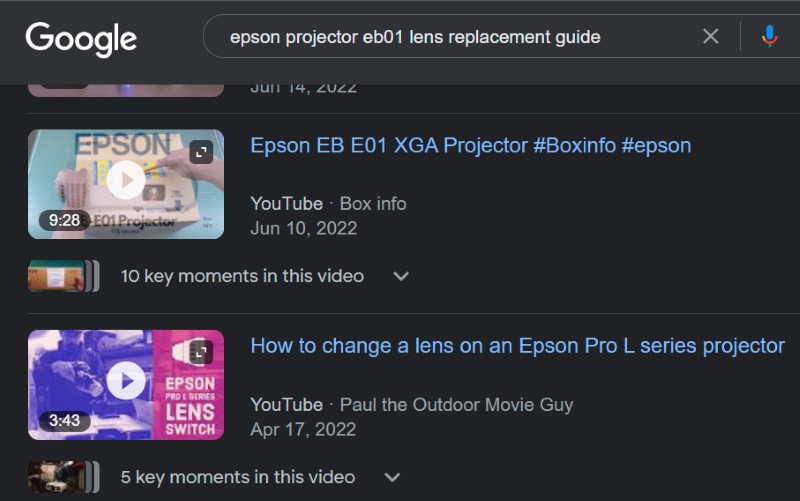
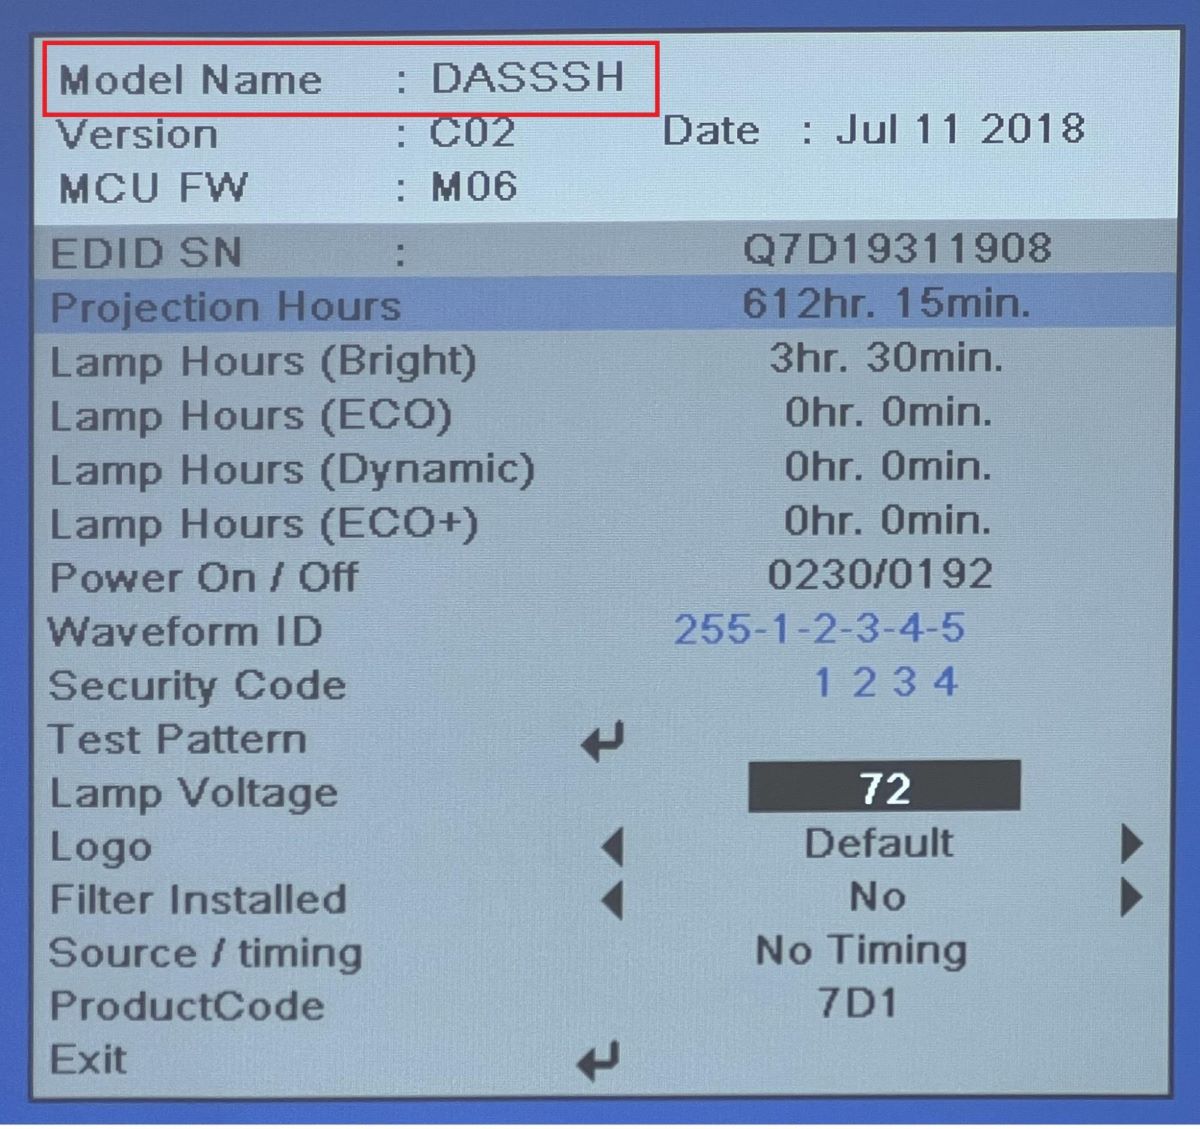
First, know your projector model name and number.
Look for the information on the label stuck underneath the device or head to the device’s software settings. The model name is usually mentioned in the Info tab of the Settings section.
The product’s user manual and original packaging will also divulge that information.
Once the model name is handy, look online for lens replacement assistance specific to your projector, as shown below.
The lens replacement process is fundamentally the same across brands. However, there could be a few unique kinks.
You need to know them before proceeding to replace the lens. Else, you risk doing a shoddy job or sabotaging the device.
A few other projectors, however, are devoid of specific steps and adopt a very generic approach to assembly and disassembly.
Replacing the lens on such projectors is, as a result, pretty straightforward. Epson projectors, for instance, don’t like to complicate things unnecessarily.
Removing an Epson projector lens entails opening the lens cover, sliding or pressing the lever locking the old lens, and removing the lens.
If you’d like to see how, watch this video:

Removing the lens on other projectors could entail more disassembling and effort. Sometimes, you must dismantle the entire projector to remove the lens.
Long story short, there’s no standard method to disassemble a projector lens.
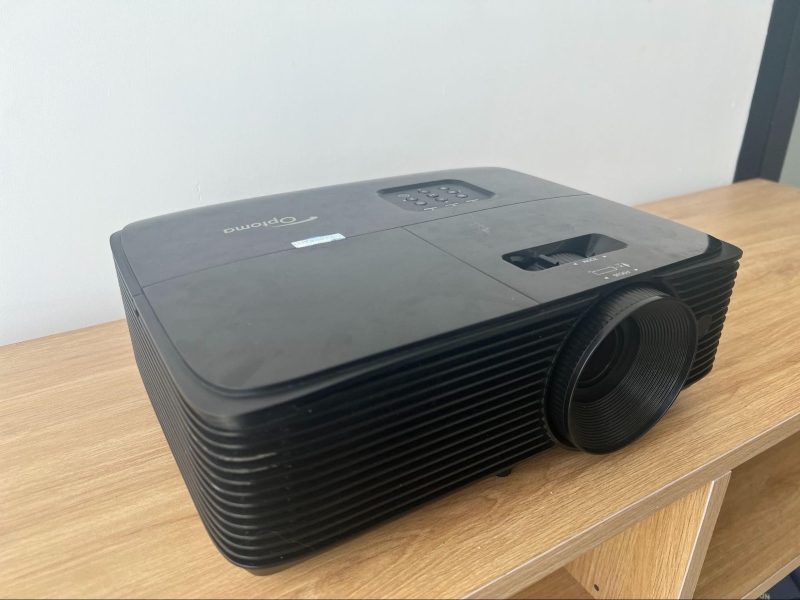
Regardless, I use an Optoma DASSSH projector.
I’ll list down the steps to take out its lens. Hopefully, it should provide you with a clue or serve as a starting point. And if you have the same projector, you’re in luck.
Section 1: Remove the Old Projector Lens
Step 1: Unplug and power off the projector.
Let the projector cool down if it was in use recently and is currently warm to the touch.
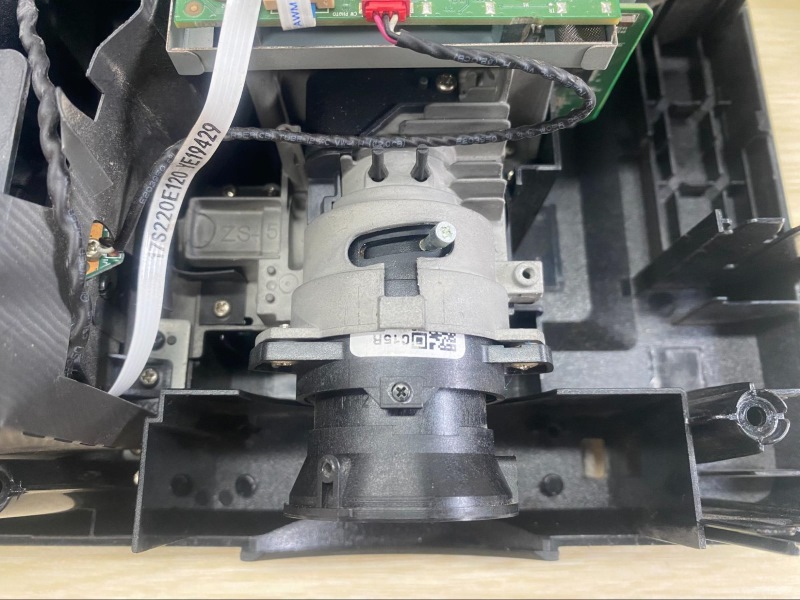
Step 2: Disassemble the device to access the lens.
Since we already have a guide detailing the Optoma projector disassembling process, we’ll not reiterate the disassembly process. Click on the link to learn more.
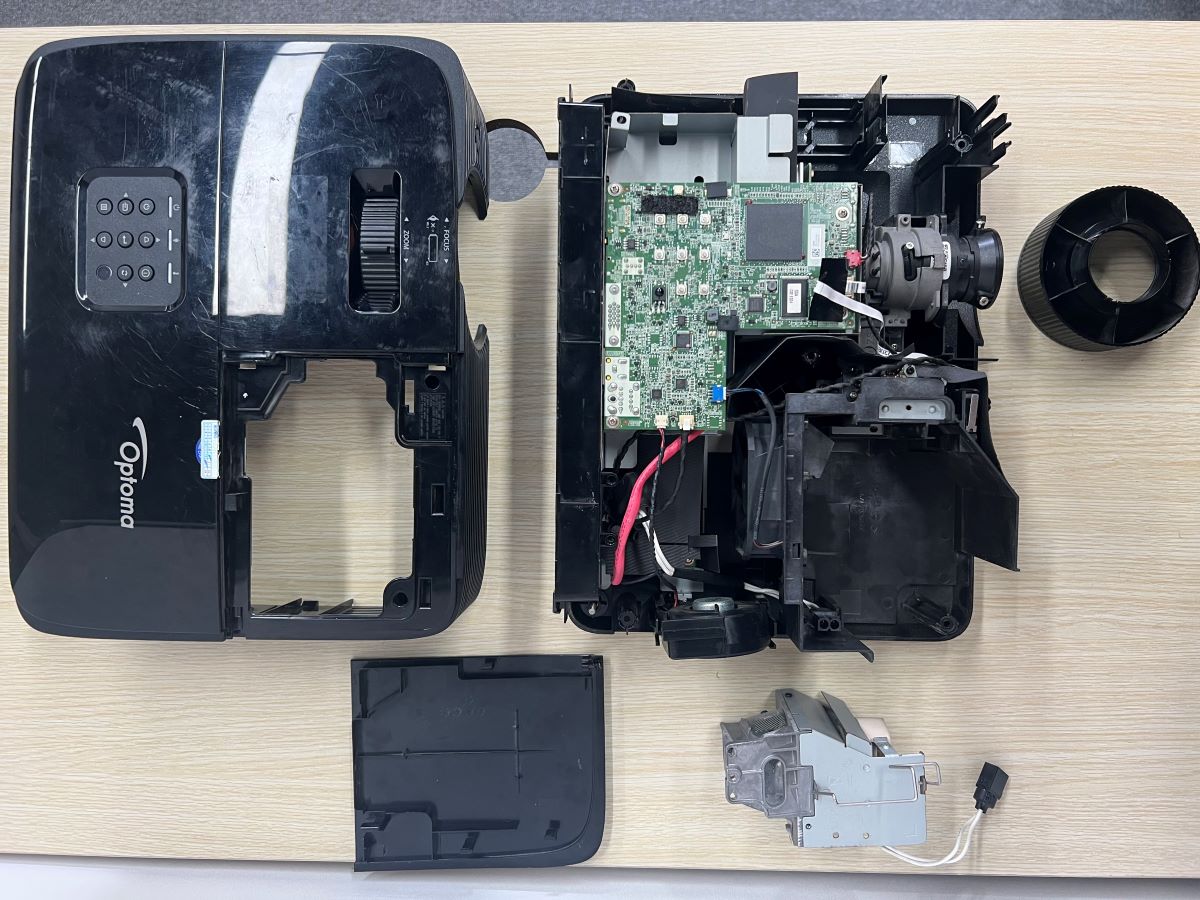
Step 3: After disassembling the projector, organize the various components for a photoshoot.
Click pictures of crucial components too. The images help not to get confused when putting the parts back together.
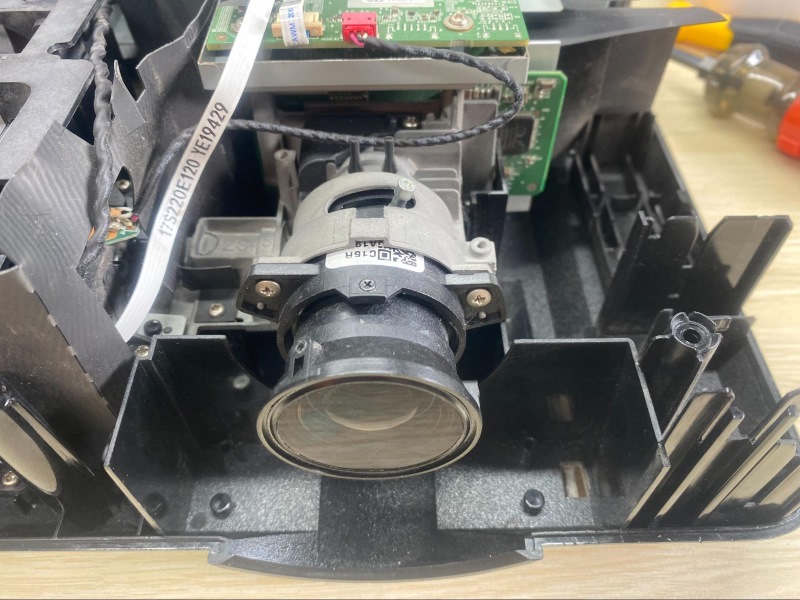
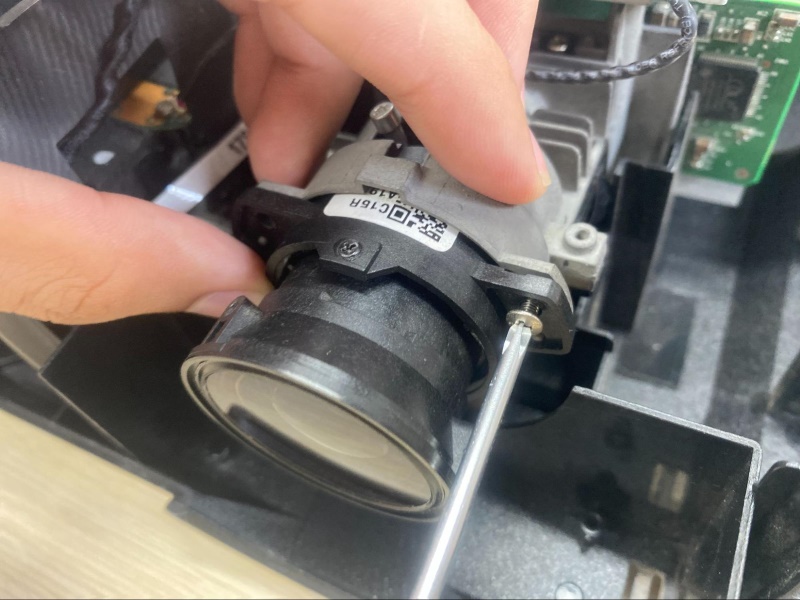
Step 4: Unscrew the screws using a screwdriver and remove the lens from the body.
Use the right screwdriver to easily unscrew and not damage the screws using the wrong tools.
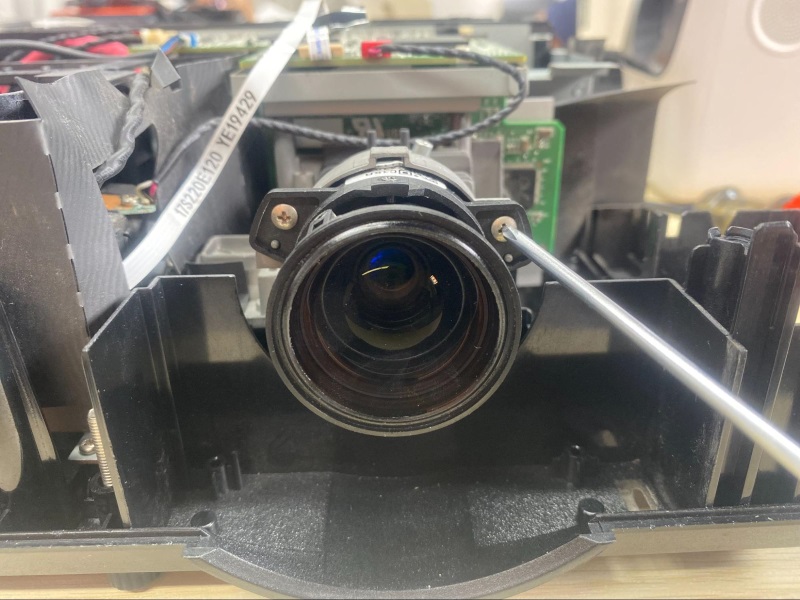
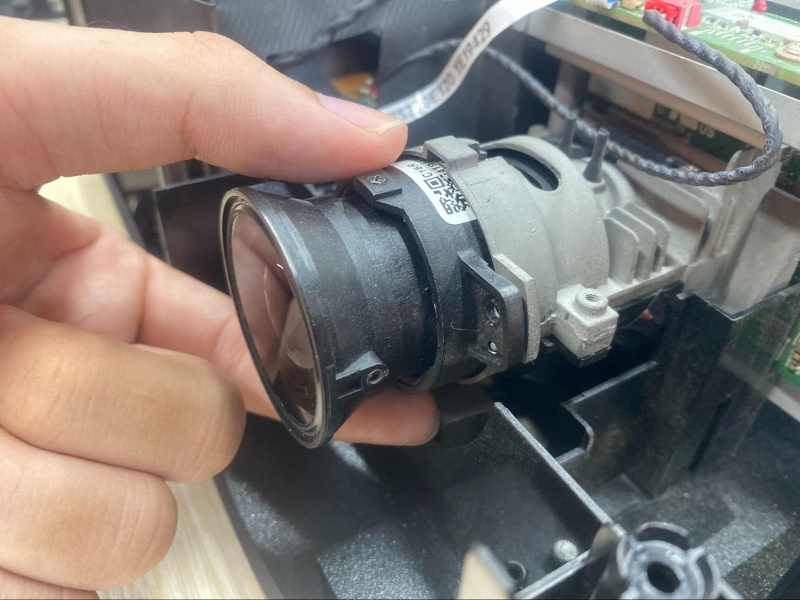
Step 5: Pull the old lens out ever so gently from the body.
Your hands need not be super clean as you’re dealing with an old lens. But taking it out slowly and carefully is critical to ensure other device components aren’t damaged when the lens is heading out.
Section 2: Install the New Projector Lens
After removing the old lens, it’s time to install the new lens.
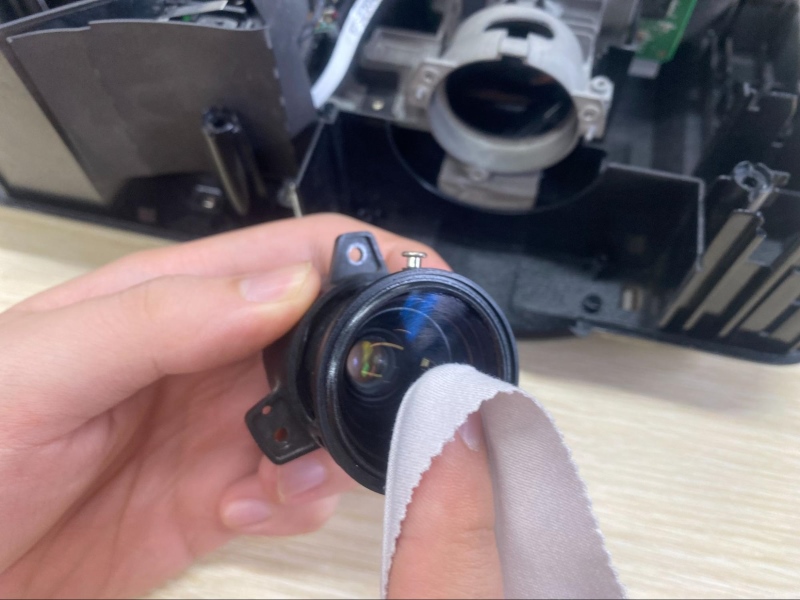
The new lens is speckless out of its package. But it doesn’t hurt to gently wipe it with a clean microfiber cloth, especially if the new lens was already out of its box and waiting to be installed.
Use a cleaning spray to moisturize the microfiber cloth and effect proper cleaning. Clean the lens in circular strokes, as I did below.
Now it’s time to install the new lens.
Step 1: Grab and insert the new lens into your projector’s lens housing.
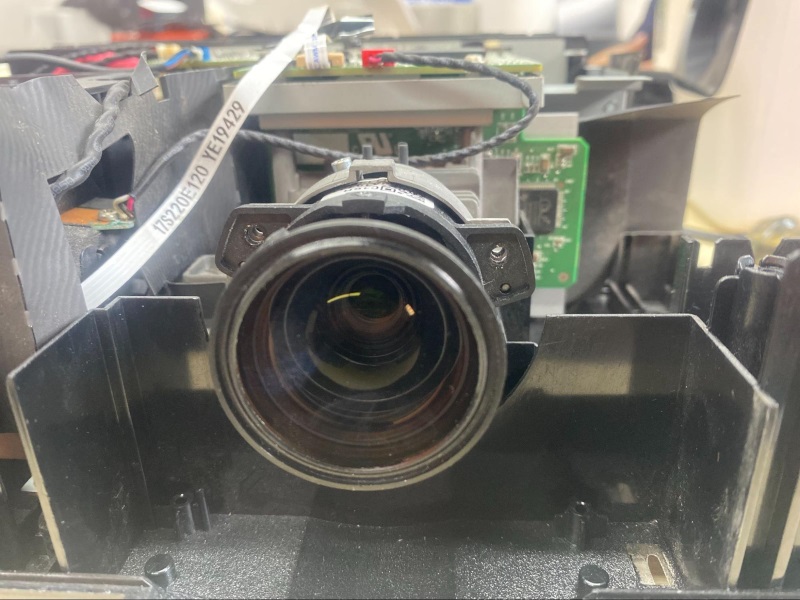
Step 2: Once inserted, screw the lens and use all locking mechanisms so the lens sits in the projector and firmly stays put.
Step 3: Once done, compare the assembly with the overview picture you took earlier. If things look identical, you’re good. If there’s a difference, you may want to try again.
Step 4: Start reassembling the projector if you’re on the right track. Just follow the disassembly process from the last step.
How To Put Projector Lens Back Together
In some rare cases, your projector might fall and the projector lens comes apart into different pieces like this user. If fortunately, all the lens pieces are not broken or damaged, then you can try to put all the lens pieces together.
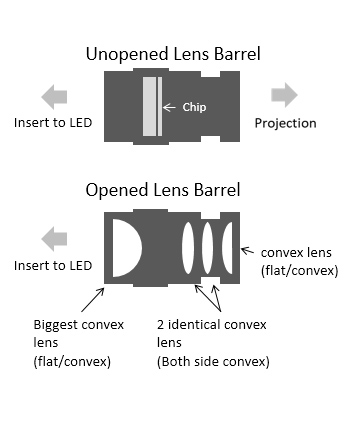
Normally, a projector lens might consist of 3 or 4 pieces:
1. A half-curved lens with the curve facing the light source. This is the largest lens.
2. One or two identical convex lens with both sides curved, placed in the middle.
3. A half-curved lens with the flat side facing outwards.
For a visual reference, you can consult this diagram to correctly position all the lens pieces back together if your projector lens consists of 3 pieces.
In case your projector has 4 pieces, please refer to this diagram instead. Otherwise, you can follow the steps below:
Note: I recommend wearing gloves to avoid damage while handling the lens as they are fragile.
Step 1: Take the largest half-curved lens and place it in the first slot. Ensure that the end with the curve faces the light source.
Step 2: Take the next one or two both-sides curved lens and place them in the second or third slots, with the two curved sides facing each other.
Step 3: Take the remaining half-curved lens and place it in the final slot. Remember to position the flat side facing outwards.
Should I Repair or Replace the Projector Lens?
The decision to repair or replace the projector lens hinges on multiple things.
First, how old is the projector? Is it still under warranty? Is the projector lens damaged, or has it run its time?
How badly wrecked is the lens if the projector is relatively new and damaged? The repair costs may be high when the damage is major.
If the repairs are minor and doable, go ahead. But when fixing the lens costs more than half the price of the projector lens, rethink.
In case the projector is several years old and repairing or replacing the lens costs a significant amount, buy a new projector instead. The same goes even when the projector is new and is not eligible for a free replacement under warranty.
While the device is still under warranty or only a year or two old, fixing the lens makes sense. But then again, find out how much it will cost to fix or replace the lens and the projector’s price.
You can trade in the old projector and get a discount on the new one.
Note that it’s not always about the money. At times, repairing the lens is not recommended, even if the costs are reasonable.
For example, if the lens is heavily cracked, no amount of repair will restore the lens to its original state. In case you fix the lens and continue to use it, the viewing experience may be impacted.
What Type of Lens Is Used in a Projector?
Projectors traditionally employ convex lens, also called converging lens. These lens do an excellent job of projecting visuals. They enlarge the image, replicating the movie theatre-like experience at home.
With time and advancements in tech, projectors have started to use other kinds of lens—namely, long-throw lens, short-throw lens, and microlens.
Projector lens can also be categorized based on their functioning mechanism (manual, motorized, etc.). But that’s a separate article in itself.
The lens a projector comes fitted in depends on the device’s shape, size, segment, and intended use. Basic, budget-friendly projectors use fixed lens.
Premium, more advanced projectors use more fancy lens. You get the picture!
By the way, you cannot change the lens type or retrofit a motorized lens into a fixed lens casing.
Conclusion
Knowing your projector lens, its claimed lifespan, the hours clocked on it, etc., helps you take critical actions relating to the vital projector component.
When the lens has run its course, you must either replace it or get a new projector altogether. If the lens is damaged, you must choose between fixing or replacing it. An old, exhausted lens cannot be restored.
If your projector falls and the lens falls apart into pieces, you may try to put them back together using the correct diagram mentioned above.
Hopefully, this article enlightened you enough on the path to take when you stumble upon a situation or a threshold with your projector lens.
Since projectors and their lens are not identical across models, it’s always recommended to refer to the device’s user manual or contact the brand before making any move relating to the lens.

Catherine Tramell has been covering technology as a freelance writer for over a decade. She has been writing for Pointer Clicker for over a year, further expanding her expertise as a tech columnist. Catherine likes spending time with her family and friends and her pastimes are reading books and news articles.