
How to Connect a Soundbar to a Smart TV With HDMI ARC?

- Connect a soundbar to a smart TV using HDMI ARC by plugging an HDMI cable into the TV’s and the soundbar’s HDMI ARC ports.
- Activate your TV’s HDMI ARC settings, which vary by brand, to enable sound output to the soundbar.
- If there’s no sound from the soundbar, ensure the correct HDMI ARC port and sound output settings are used, and re-check cable connections.
Enhancing your TV’s audio with a soundbar via HDMI ARC can be a game-changer for your home entertainment.
This guide will walk you through the simple steps to connect and activate your soundbar, ensuring crystal-clear sound in no time.
Quick Navigation
How to Know If Your Smart TV Has HDMI ARC?

Before connecting a soundbar to your TV via HDMI ARC, you must verify that your TV supports this feature.
Check out our article How Do I Know If My TV Has HDMI ARC/eARC for a complete guide on what HDMI ARC is, how to check if your TV supports it, and how to activate it.
How to Connect a Soundbar to a Smart TV With HDMI ARC?
Now that you’ve confirmed that your TV is HDMI ARC-compatible, you can begin setting up your soundbar!

Step 1: Connect one end of an HDMI cable (version 1.4 or higher) to your smart TV’s HDMI ARC port (2). Even if your TV does support HDMI ARC, not all of its HDMI ports will support this function. So, double-check that the port you’re using does before proceeding.
Step 2: Connect the other end of your HDMI cable to your soundbar’s HDMI ARC port (1).
Step 3: Check that your TV and soundbar are plugged into power and turned on.
Step 4: If your TV’s ARC function needs to be activated, do so now. (See the activation steps below.)
Step 5: Adjust your TV’s sound/audio output to the connected soundbar.
Note: While Steps 1 through 3 are applicable for all smart TV brands, Steps 4 and 5 may vary depending on the brands’ settings interface. For instance, Sony smart TVs may automatically activate HDMI ARC once you adjust the audio output to “soundbar.”
| TV Brand | Activation Steps |
| Samsung TVs | T/Q, R/Q, N/Q, and M/Q Series (from 2017): Hit the remote’s Home button → Settings → General → External Device Manager → Enable Anynet+ (HDMI-CEC)
K Series (2016): Click the remote’s Home button → Settings → System → Expert Settings → Enable Anynet+ (HDMI-CEC) Up to the J Series (2015): Press the remote’s Menu button → System → Enable Anynet+ (HDMI-CEC) |
| Sony TVs (some models from 2018 and older) | Press the remote’s Home/Menu key → Settings/Setup → HDMI → Enable Control for HDMI |
| LG TVs | Hit the remote’s Settings button → All Settings → Sound → Sound Out → Use Wired Speaker → Enable HDMI (ARC) Device |
| Hisense TVs | Click the remote’s Menu key → Sound → Set Audio Output to ARC |
Why Is There No Sound from My Soundbar?
You’ve followed all the setup and activation steps listed above, but your TV is still not playing its audio through the soundbar. You’ve checked that your soundbar is plugged in and turned on, but it’s still completely silent.
Don’t worry. We have a few troubleshooting tips to put your audio issues to rest.
Let’s get started!
Wrong HDMI Port
Only some HDMI ports on your TV will support HDMI ARC/eARC. If you’ve plugged your soundbar into another HDMI port, it will not play your TV’s audio.
So, double-check that the HDMI port you’re connecting your soundbar to is HDMI ARC/eARC-compatible.
You can learn more about what exactly HDMI ARC/eARC is and how it works by reading our article What Is HDMI ARC/eARC?
Incorrect Connection Method
Soundbars are versatile devices and can be connected to your TV via a variety of methods, such as:
- An optical port
- An HDMI port
- Bluetooth
- Wi-Fi
- USB
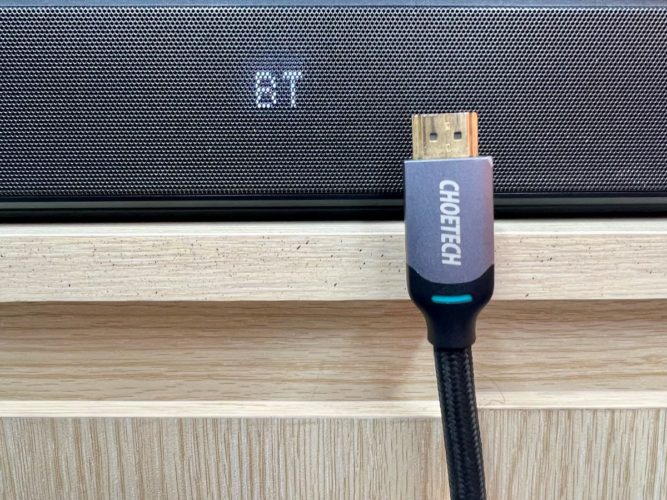
Setting your soundbar to transmit audio through another method other than the one currently in use will prevent it from playing your TV’s audio. For instance, if you connect your soundbar to your TV via HDMI, but have selected Bluetooth (abbreviated as BT) as the connection method, the soundbar will remain silent.
So, ensure you’ve correctly set your soundbar’s connection method.
Wrong Sound Output Setting
While select smart TVs, like Sony models, will automatically adjust the sound output when it detects the soundbar, others may not. Instead, you will have to manually adjust the sound output to the soundbar through the Sound menu.
Try Setting It Up Again
You’ve checked that your soundbar is plugged into the right port and ensured that all of the settings have been properly adjusted, but your soundbar is still silent. What’s going on?
As simple as it sounds, unplugging your soundbar’s HDMI/optical connector from your TV for a second before plugging it back in may just do the trick. The cable may not have established a proper connection with the port the first time, resulting in no sound playing from your soundbar.
You may also want to check that the cable you’re using is in good condition and that the connectors and ports aren’t clogged with dust. If you suspect your HDMI/optical cable may be faulty, try using another one.
Wrapping Things Up
Connecting your soundbar to a smart TV with HDMI ARC involves setting up the hardware before activating your TV’s ARC function.
If you plan on using the soundbar as your only sound output, you should only need to enable ARC once when setting it up for the first time.
Should your soundbar not work correctly, it’s a good idea to double-check that the ports are clean and that the HDMI cable is compatible and damage-free.
What are you waiting for? It’s time to set up your dream sound system!
What’s your experience using a soundbar with HDMI ARC?
Let us know in the comments below!

Yesenia Achlim is a technical copywriter and editor with a focus on AV equipment. She aims to break down complicated topics and make technology accessible, no matter your technical expertise. When she’s not teaching you how to replace a projector lamp, you can find her reading and baking.