
Why Your 4K TV Looks Washed Out, Explained
What To Know
- Washed-out images on 4K TVs can result from improperly calibrated picture settings, such as Brightness, Contrast, and Color saturation, in different picture modes.
- HDMI connections with external devices might limit color quality in 4K TVs, often requiring adjustments in TV settings and graphics card outputs to improve color reproduction.
- Activated Eco Mode or Power Saving features, as well as overly bright ambient room lighting, can significantly diminish a TV’s display quality, leading to a more washed-out appearance.
In this article, we’ll explore potential causes of why your 4K TV looks washed out, along with their solutions.
Let’s get started!
Quick Navigation
1. TV Picture Settings Not Aligned With Your Preferences
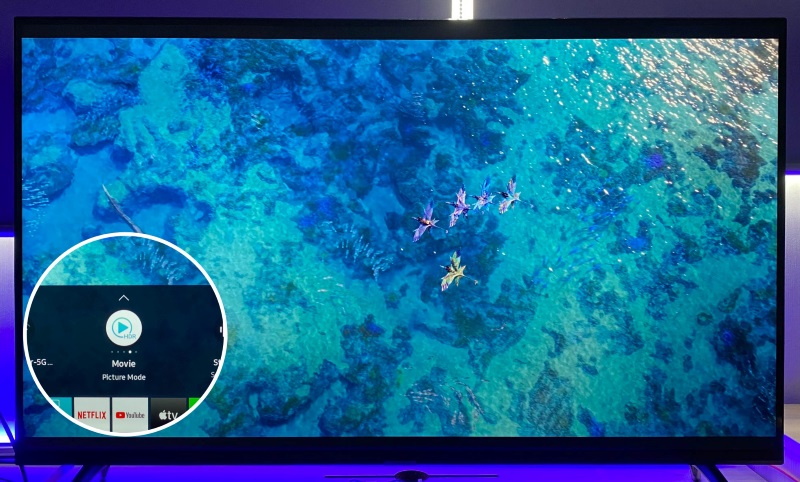
The movies on your 4K TV might not look as colorful and vibrant as you’d like, and this is often due to the TV’s picture settings not being perfectly aligned with your preferences.
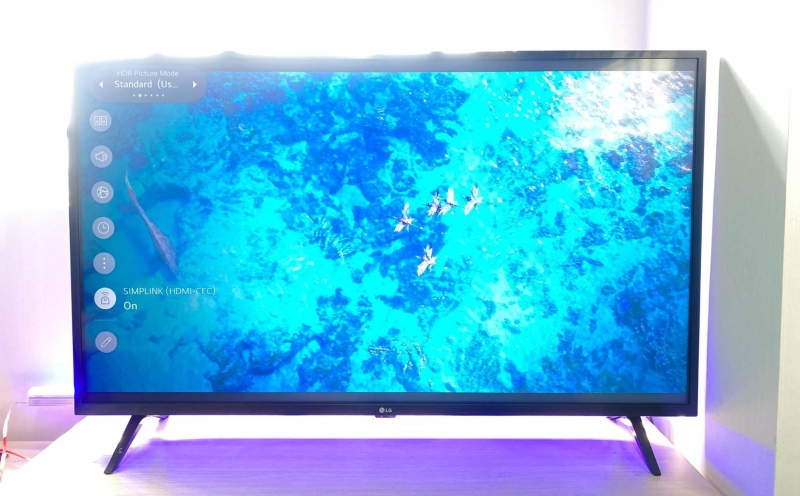
One of the primary reasons for a washed-out image is the selection of the picture mode, like Dynamic or Vivid, which generally enhances color saturation more than other modes such as Movie, Cinema, or Filmmaker.
These cinema-oriented modes aim to present colors in a more true-to-life manner, but they can appear less vivid and bright, contributing to a faded look on your screen.
Brightness levels also play a significant role in this. Compared to their Dynamic or Vivid counterparts, cinema modes typically have lower brightness, which can make the image seem more washed out.

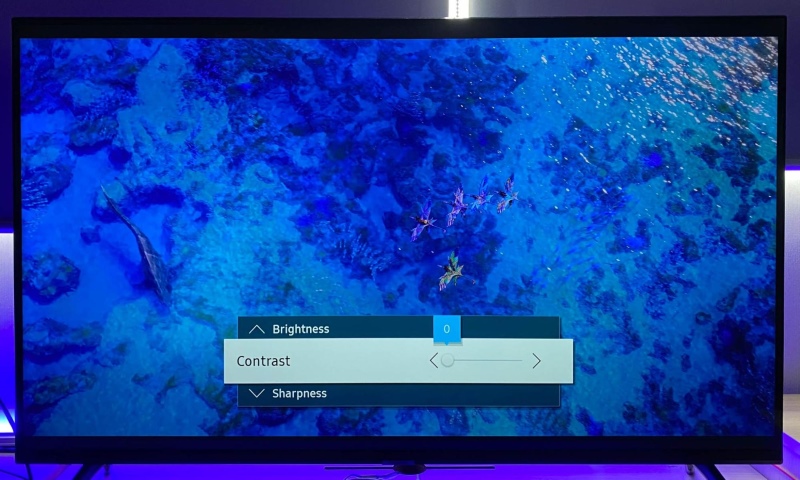
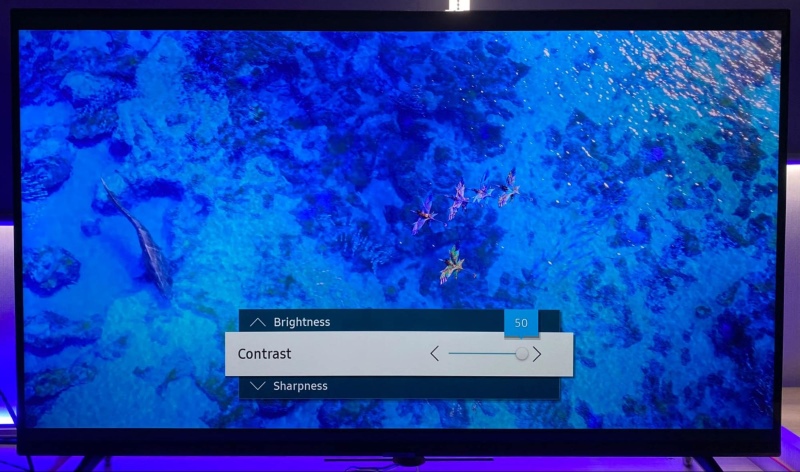
However, it’s not just about picking the right mode; the calibration of settings like Brightness, Contrast, and Color saturation is also crucial.
If these settings aren’t optimally adjusted to match your viewing environment and the type of content you’re watching, they can lead to a less vibrant and duller appearance, exacerbating the washed-out effect.
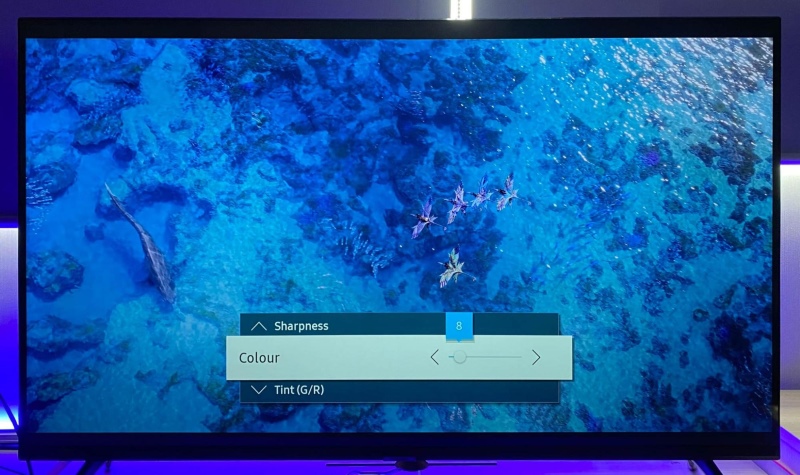
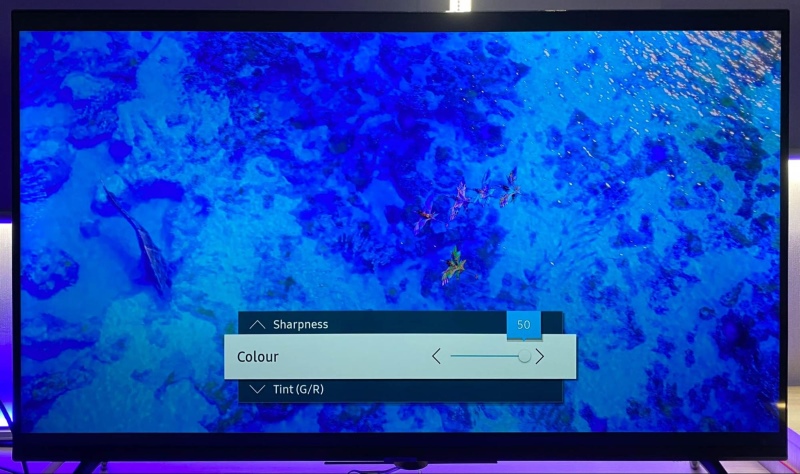
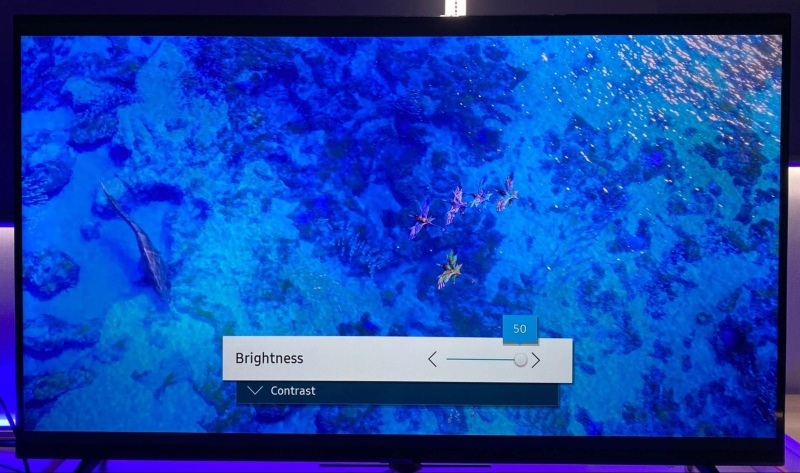
To achieve the best possible picture quality on your 4K TV, it’s a good idea to experiment with different modes to find the one that suits your needs.
Then, fine-tune the settings for Brightness, Contrast, and Color saturation to ensure optimal viewing in various scenarios, whether you’re watching a brightly animated show or a dimly lit drama.
2. HDMI Limitations in TV Hardware for External Devices
When you connect devices like PCs or streaming gadgets such as a Roku to your 4K TV using HDMI, sometimes the colors might seem less vibrant.
This is noticeable in TVs like the Samsung 48JU6400W, which can struggle to display crisp, rich colors in 4K at 60Hz.
The best color quality for 4K usually comes from the Chroma 4:4:4 format, known for its vivid and accurate colors.
However, this Samsung 48JU6400W TV model often switches to a lower quality Chroma 4:2:0 at 60Hz, leading to less vibrant colors.
But there’s a handy workaround. By changing your TV’s HDMI input to ‘PC mode‘, and adjusting your computer’s graphics settings to 4K with Chroma 4:4:4, you can significantly enhance the color quality.
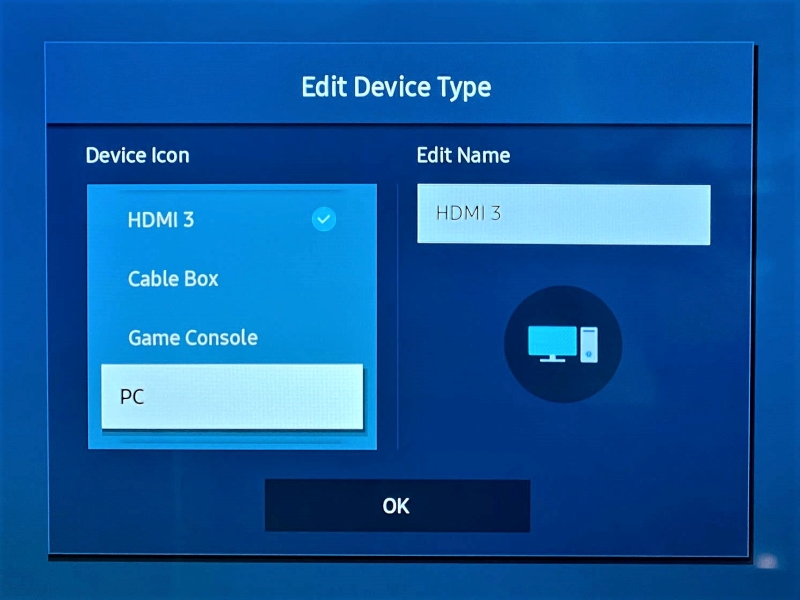
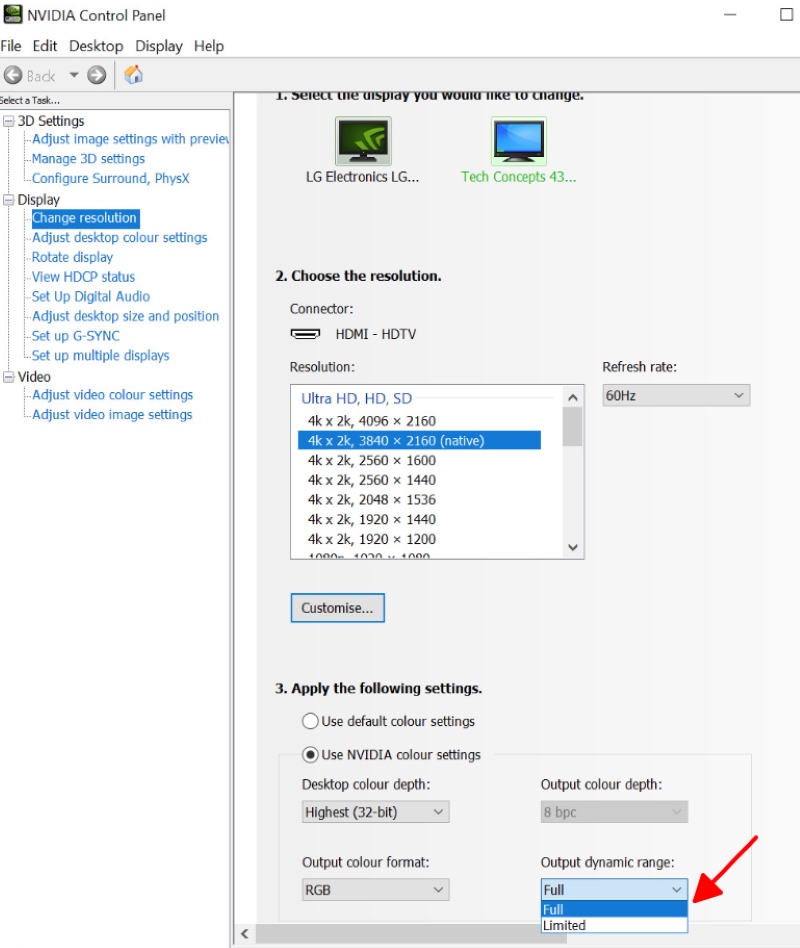
This approach optimizes the TV to function like a computer monitor, improving the overall color accuracy and display clarity.
3. Eco Mode or Power Saving Features Are Turned On
When your 4K TV appears washed out, one possible reason could be that the Eco Mode or Power Saving features are activated.
These features are designed to save electricity, which is beneficial for reducing your energy costs.
However, they can also impact the way movies are displayed on your screen.
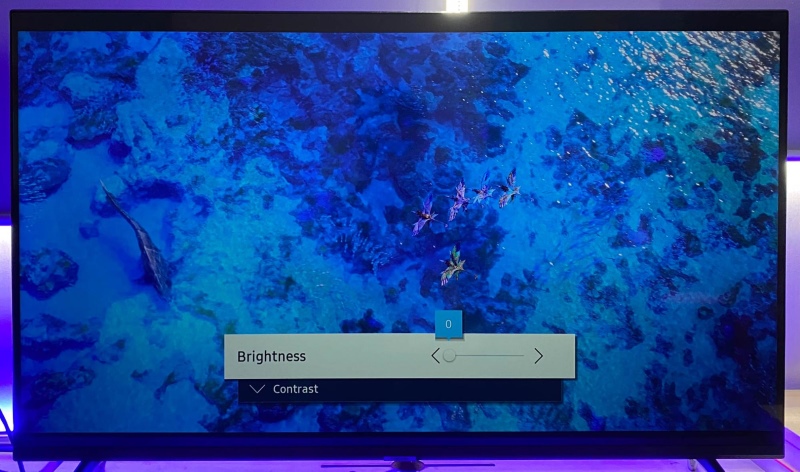
By lowering the brightness of your TV, these settings decrease its capacity to show deep, dark blacks and really bright whites.
This reduction in brightness affects the contrast, which is the difference between the darkest and the lightest parts of the picture.
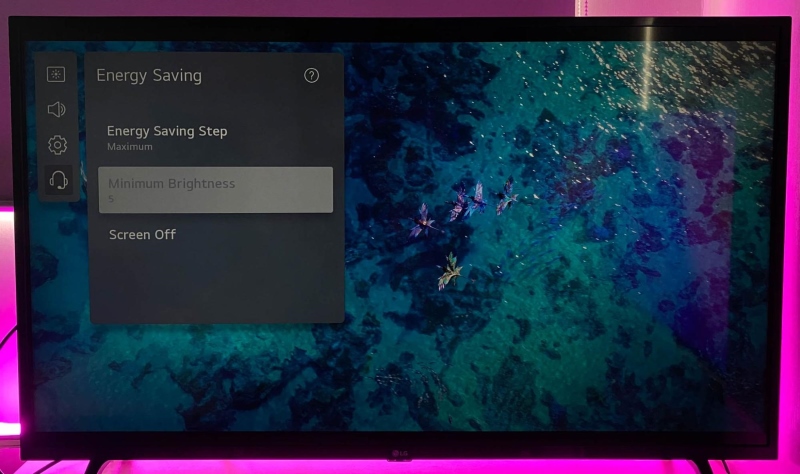
When the contrast is less pronounced, your movies might seem less vibrant and more washed out.
It’s like when a vibrant painting is seen under dim light; the colors don’t pop as much.
So, while these energy-saving settings are good for your bills, they might not be the best choice if you’re looking for a cinematic experience at home.
4. Overly Bright Ambient Room Lighting
The way a movie looks on your 4K TV can be greatly affected by the amount of light in your room.
If your room is too bright, particularly when light shines directly on the TV screen, it can make the darker scenes in a movie hard to see.
This happens because the bright light interferes with how our eyes perceive the colors and contrasts displayed on the TV, much like how it’s difficult to see your phone screen clearly when you’re outside on a sunny day.
Excessive room light can overpower the brightness and contrast settings of your TV, causing even the most vibrant 4K movies to appear dull and washed out.
Therefore, controlling the room lighting can enhance your viewing experience, making the colors and details in movies look just as they should on your 4K TV.
5. Your TV’s Display Isn’t Good Enough
One of the key reasons your 4K TV might not be showing movies as clearly and vibrantly as you’d like is because of its display quality.
Let’s look at some common issues you might encounter:
- Not Bright Enough: First, brightness is super important.
Your TV needs to be bright enough to show both the really dark and super bright scenes clearly.
If your TV isn’t shining bright enough, you might find the overall picture kind of dull and you could miss out on cool details.
A good 4K TV should have a brightness level of at least 400 nits, especially for awesome 4K HDR movies. - Weak Colors: Next, let’s talk about colors.
To really get into a movie, your TV should make the colors pop, looking vibrant and true to life.
If your TV isn’t doing this, the movie colors might look faded, giving everything a washed-out appearance. - Type of TV Screen: Lastly, the type of screen your TV uses matters a lot.
There are different kinds like LED, OLED, and QLED, and each type has its own special features.
For instance, OLED screens are amazing at showing really dark scenes, and QLED screens are fantastic at making colors super bright and lively.
If your TV has a lower-quality screen, it might not be the best at showing 4K movies the way they are meant to be seen.
6. Poor Quality 4K Movie or Video Source
Another reason your 4K TV might not be showing movies in their best light is due to the quality of the 4K movie or video source.
It’s important to make sure your 4K movies are in good shape before you start changing settings on your TV.
Imagine you’re watching a movie through a USB drive connected to your TV or streaming it from your laptop.
If this movie file is corrupted, it won’t look right.
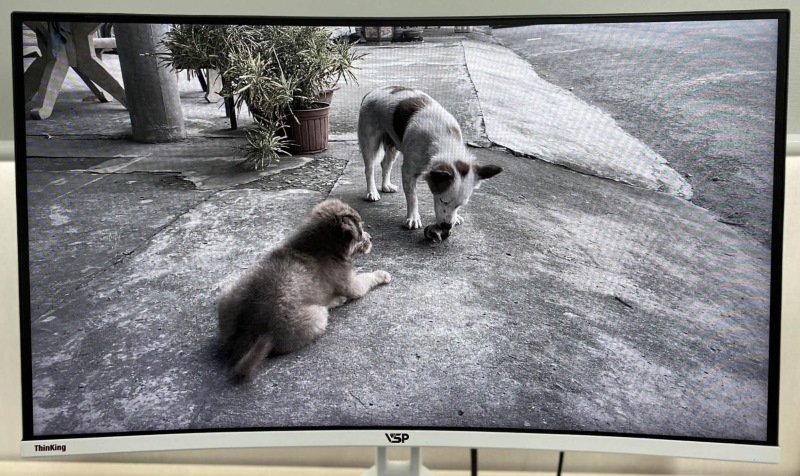
You might notice that the colors don’t pop as they should, and the picture seems faded or washed out.
This isn’t just about your TV; the same poor quality will show up if you play this file on any device, whether it’s another TV or a laptop.
To figure out if the problem is really with the movie file, try playing it on different screens.
If it looks bad on all of them, then the movie file itself is probably the issue.
In this case, you might need to get a new copy or fix the one you have.
For example, I once tested a 4K video on my PC and then streamed it to my TV.
Both screens showed the movie in dull, faded colors, which told me the video file was the problem, not my devices.

Meet Vance. He’s a proud dad, a seasoned Electronics Engineer, and an avid tech lover. His proficiency in electronics and troubleshooting skills were instrumental in crafting Pointer Clicker. Vance is passionate about simplifying tech for those who aren’t well-versed in it.