
How to Fix HDMI Not Supported on TV When Used with PC & Xbox Series X|S

What To Know
- Ensure the resolution and refresh rate on your PC or Xbox match your TV’s capabilities. Overly high settings can cause ‘HDMI not supported’ errors.
- Simple solutions like replugging the HDMI cable at both ends, using a different HDMI port on the TV, or replacing the HDMI cable can often fix connection issues.
- For PCs, refreshing the display driver by uninstalling and allowing automatic reinstallation can solve HDMI compatibility problems.
In this guide, I’ll show you how to fix the common ‘HDMI not supported’ issue you might encounter when connecting your PC or Xbox Series X|S to a TV.
I’ve put together the best solutions, complete with detailed explanations and images, to ensure you can follow along easily.
Let’s dive in to get your HDMI connection up and running smoothly again.
Quick Navigation
Things You Should Try First
Replug the HDMI Cable: Sometimes, the simplest solutions are the most effective. I’ve come across instances where my laptop seemed connected to the TV, but all I got was a frustrating ‘No HDMI Signal‘ message.
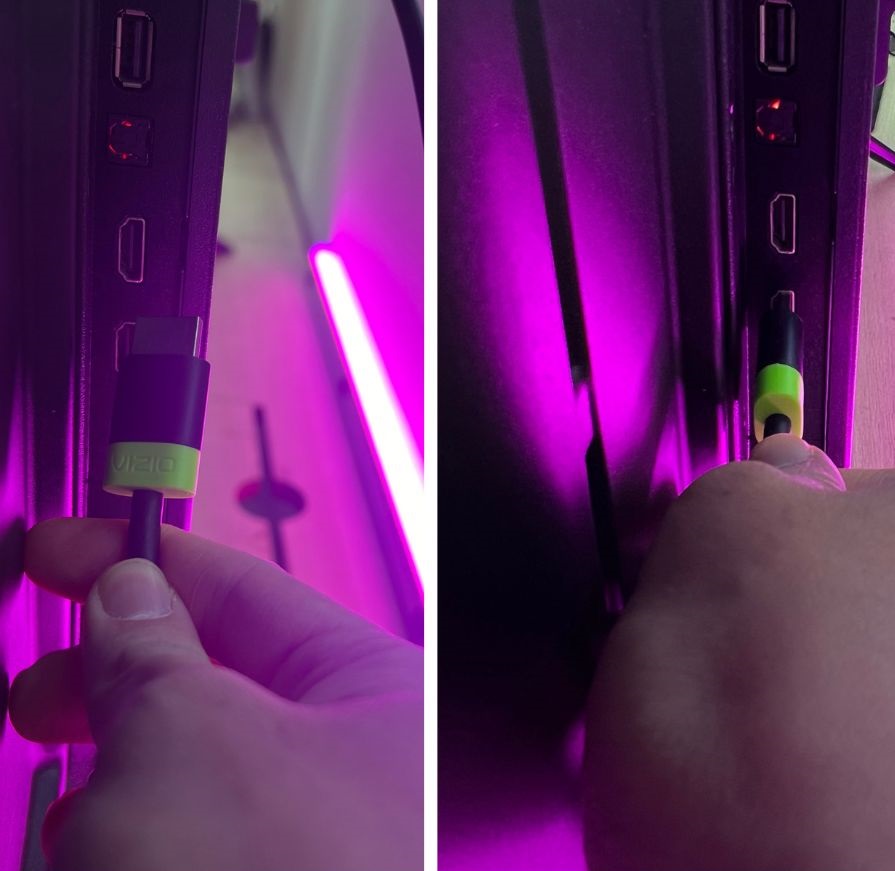
After some trial and error, I discovered that unplugging and then replugging the HDMI cable on both ends often does the trick. It’s a quick fix that’s worth a shot.
Switch HDMI Ports: It’s common for a particular HDMI port on your TV to be the culprit. If one port isn’t cooperating, try another. You might find that a different port doesn’t have the same issue.
Try a Different HDMI Cable: Cables can be finicky. An HDMI cable that’s either faulty or just not the right fit for your setup can cause no end of trouble. Swapping your current cable for a different one might be the answer to your connection woes.
Soft Reset Your Devices: It’s amazing what a simple power cycle can do. Turn off and unplug your devices for a couple of minutes. This little break can reset the connections and iron out any minor kinks that might be causing problems.
Update Your TV’s Firmware: Outdated firmware can lead to compatibility issues between your TV and the connected HDMI device. Updating your TV’s firmware is a smart move and could smooth out any communication issues between your devices.
‘HDMI Not Supported’ on TV When Connected to a PC
Connecting your PC to a TV via HDMI can occasionally run into snags. Let’s dive into some common issues and their solutions.
Mismatched Resolutions
A common issue users encounter when connecting their TV to a PC, resulting in an ‘HDMI not supported‘ message, is due to mismatched resolution settings.
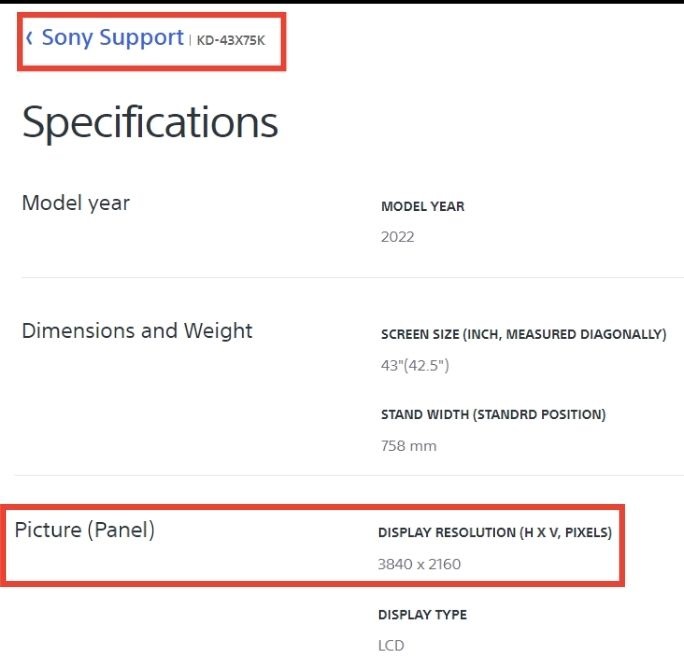
My PC and laptop work fine with my Sony KD-43X75K TV, but I can demonstrate how a mismatch in resolution can lead to the HDMI not supported issue.
Before I show you, let’s look at the specs of my Sony TV. The TV can handle resolutions up to 4K (3840 x 2160), meaning my TV can’t support anything above 4K.
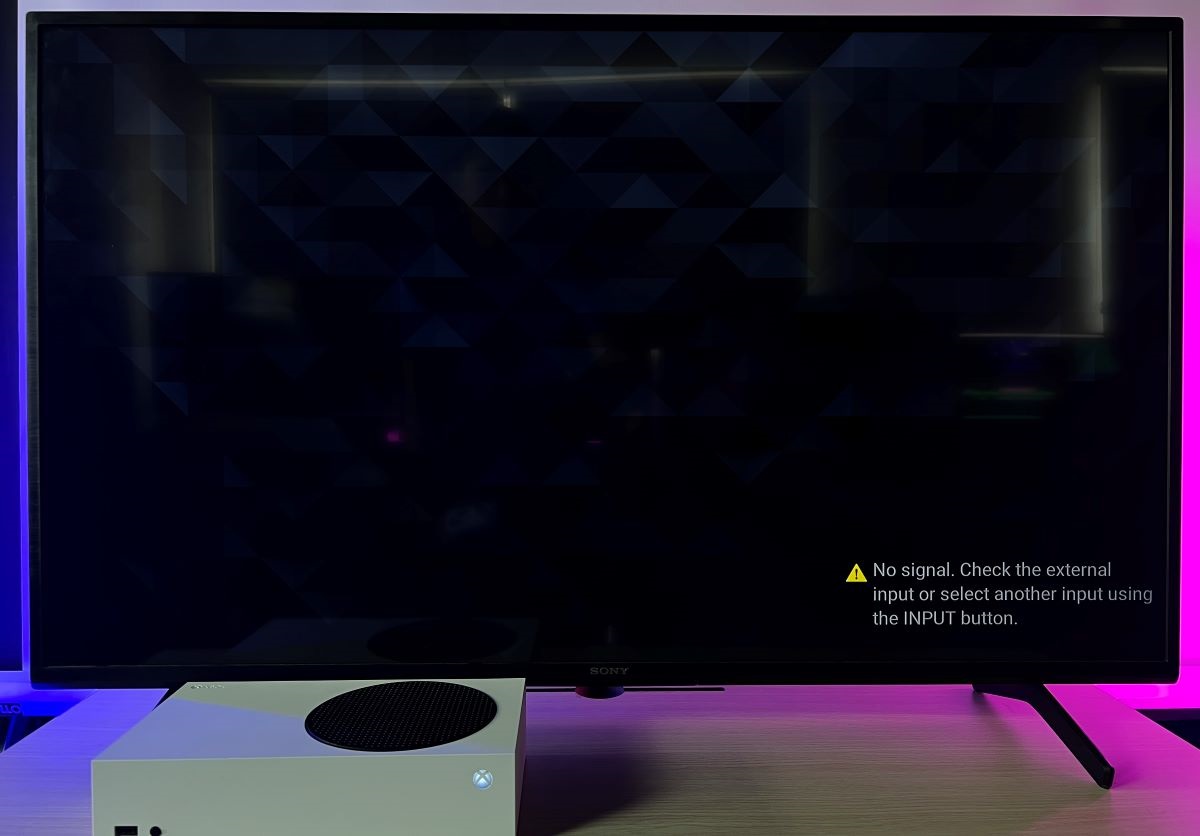
For this demonstration, I’m using a laptop with a GTX 1050 graphics card, and I’ve adjusted the resolution up to 5K at 10Hz. As a result, my TV displays no HDMI input signal similar to HDMI not supported.
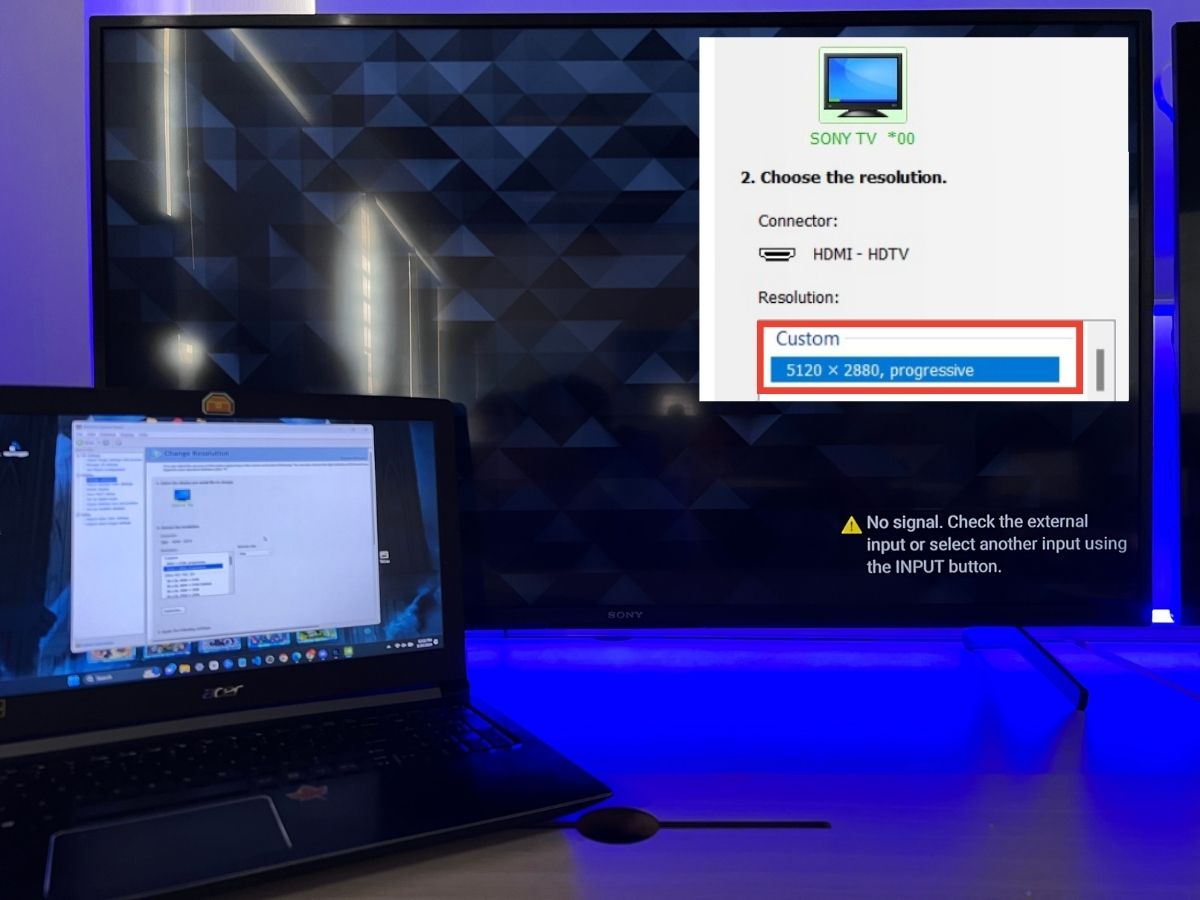
However, when I set the resolution to below 4K, my Sony TV functions correctly.
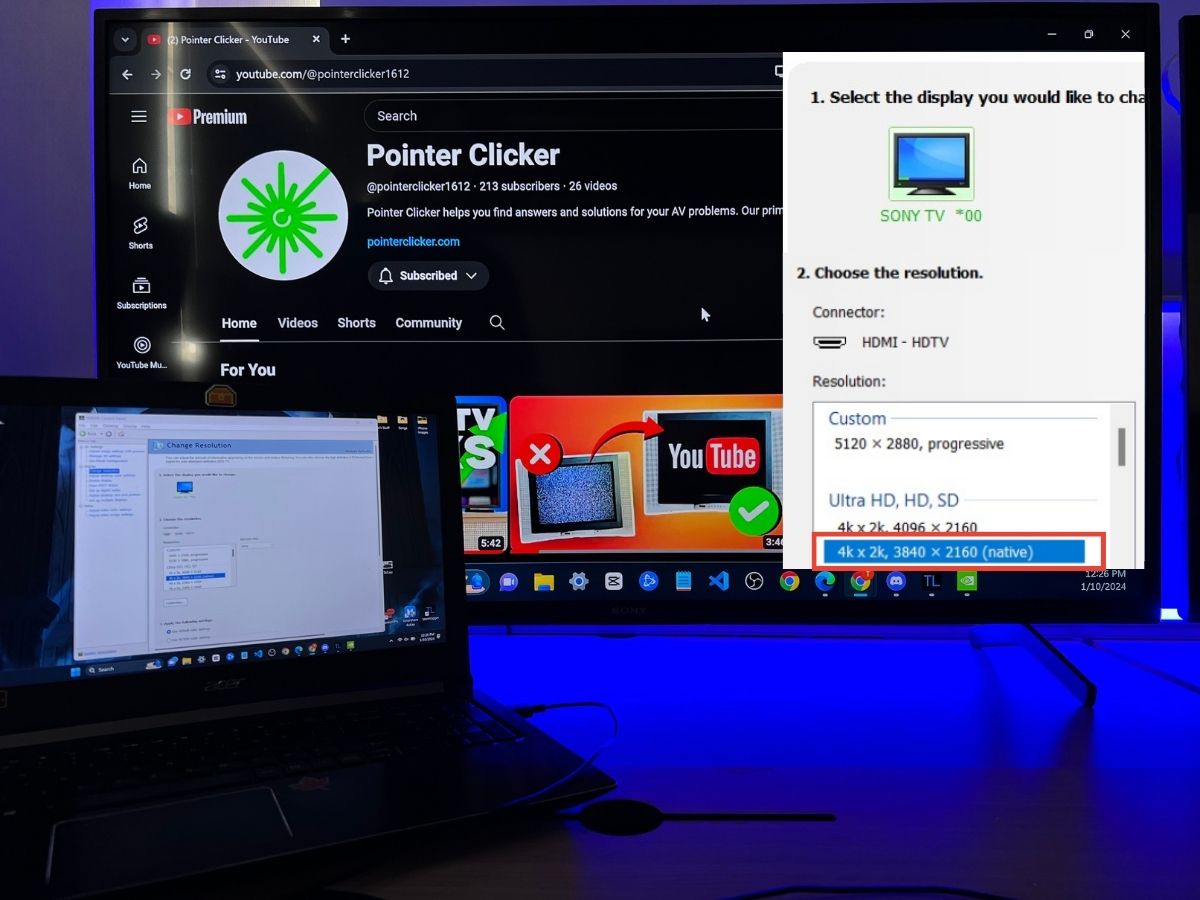
So, if your computer is outputting a resolution that’s higher than what your TV can handle, I suggest lowering the resolution on the source device. This should solve the issue quickly.
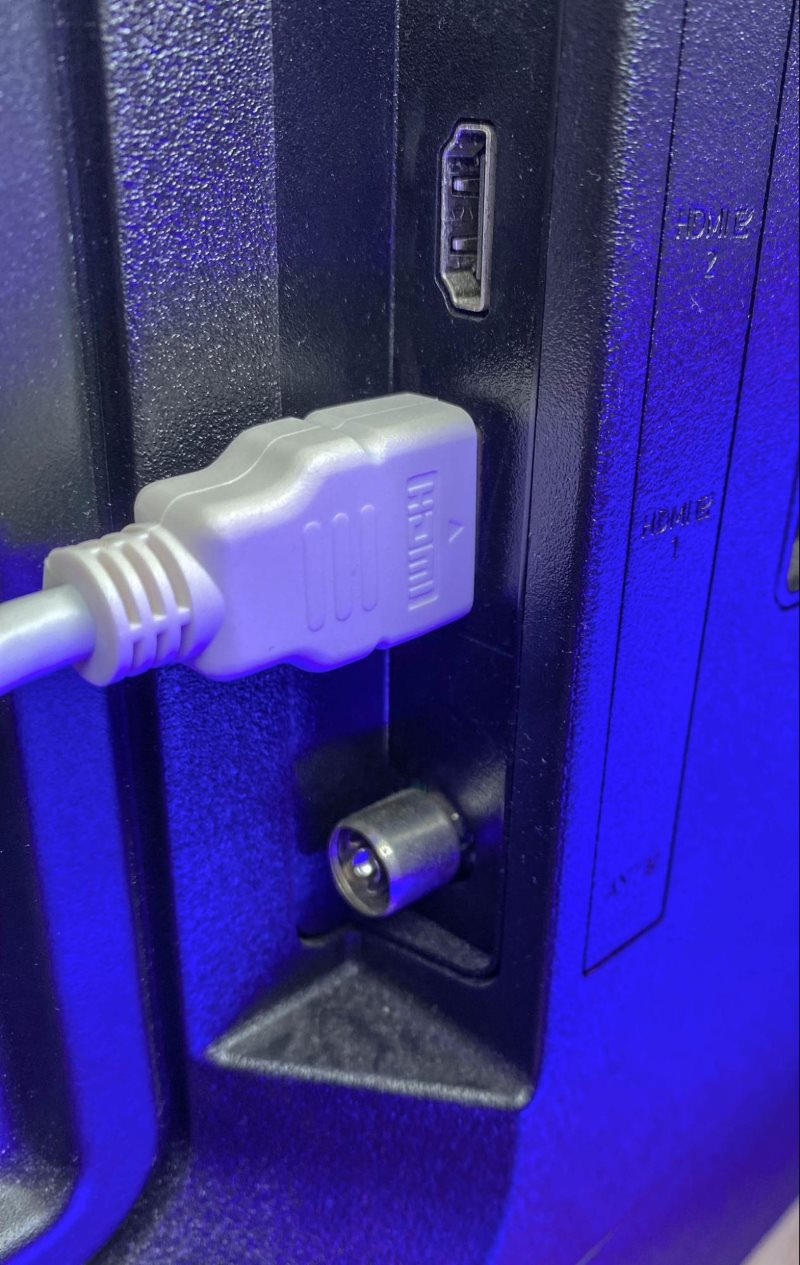
Connect with The Wrong HDMI Port
When linking your PC to your TV using HDMI, it’s crucial to choose the correct HDMI port, especially if your PC includes an integrated graphics card.
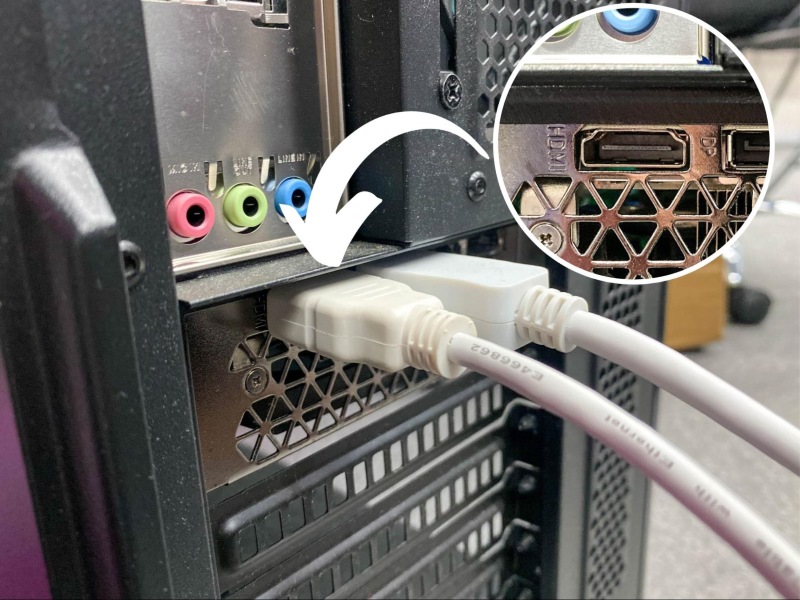
A common oversight is plugging into the motherboard’s HDMI port when you should be using the one on your graphics card.
Technically, you can use the motherboard’s HDMI port by adjusting some settings in the BIOS.
However, I strongly advise against using both the motherboard’s and the graphics card’s HDMI ports simultaneously, as this can lead to conflict in display outputs.
To avoid such conflicts and ensure a smoother HDMI experience, it’s best to directly connect your graphics card to the TV.
Reinstall Display Driver
Sometimes, resolving the ‘HDMI not supported’ issue can be as simple as updating your graphics driver’s firmware.
It’s like hitting the reset button on your display settings.
Here’s a straightforward way to do it:
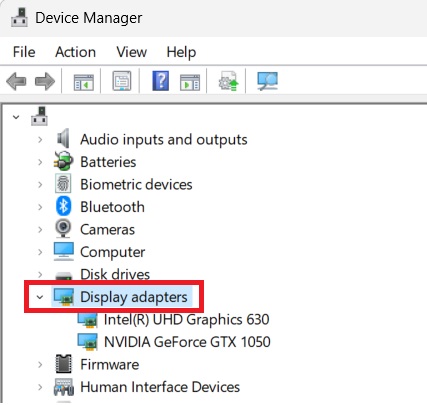
Step 1: On your Windows computer, type Device Manager into the search bar and open it.
Step 2: Search for the Display Adapters section and click the small arrow to expand it, revealing all the graphics cards on your computer.
Step 3: Right-click on the graphics card driver you wish to uninstall. In my case, using a laptop with the GTX 1050, I’ll uninstall that driver.
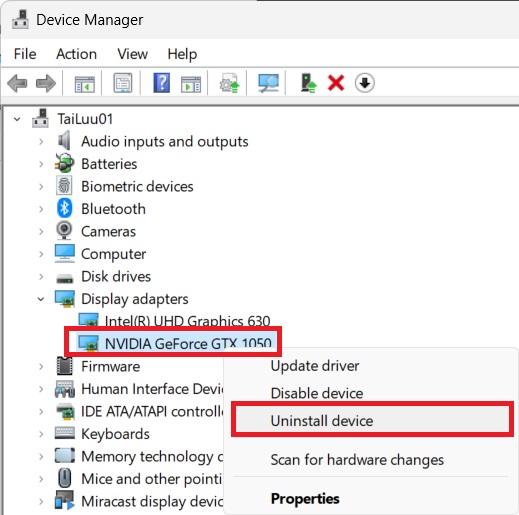
Step 4: Restart your computer. Once the computer turns back on, the driver will automatically reinstall.
After completing these steps, reconnect your computer to the TV using an HDMI cable to check if the issue has been resolved.
HDMI Mode Not Supported When Using Xbox Series X|S with a TV
Encountering an ‘HDMI Mode Not Supported’ error when connecting your Xbox Series X|S to a TV can be frustrating.
This issue often stems from the TV’s inability to support higher resolutions, a problem not uncommon with certain computers as well.
The simplest workaround? Lower the resolution on your Xbox.
Mismatched Refresh Rates and Resolutions: A Personal Encounter
I once grappled with a similar problem where the refresh rate settings on my Xbox Series S clashed with my Sony TV.
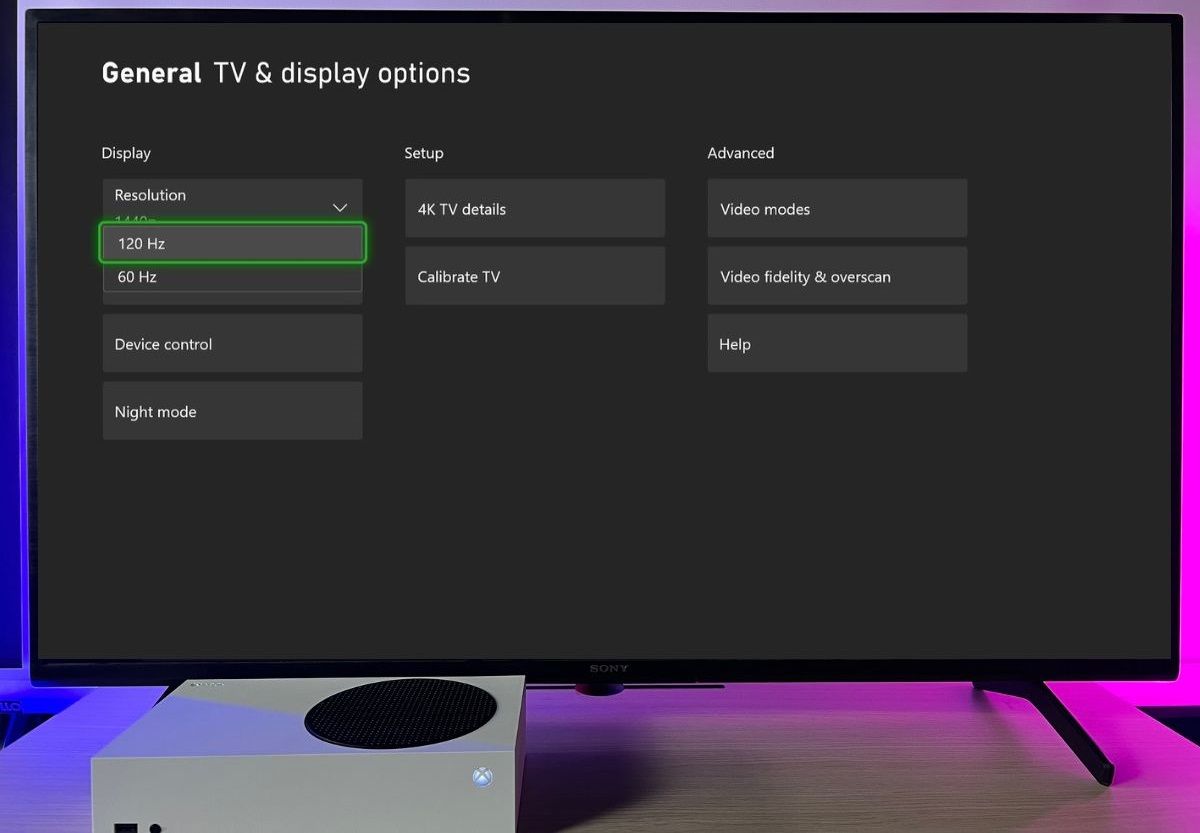
For context, I have a Samsung Odyssey G5 monitor capable of a 120Hz refresh rate. Upon connecting my Xbox to this monitor via HDMI, I configured the Xbox’s output to 120Hz.
Trouble arose when I switched to my older Sony TV, which only supports up to 60Hz, and I forgot to revert the Xbox’s refresh rate.
Initially, I fixed this by reattaching the Xbox to the Samsung monitor and adjusting the refresh rate to 60Hz.
However, I realize this isn’t a practical solution for everyone. Not everyone has a spare monitor lying around.
Luckily, there’s another way that works even without an extra monitor – using the Xbox Startup Troubleshooter.
The Xbox Startup Troubleshooter feature allows you to factory reset your console while preserving all your games and apps.
Here’s how to do it:
Step 1: Perform a soft reset on your Xbox by unplugging all cables. Let the Xbox rest for 30-60 seconds.
Step 2: Reconnect all the cables, including the power and HDMI cables.
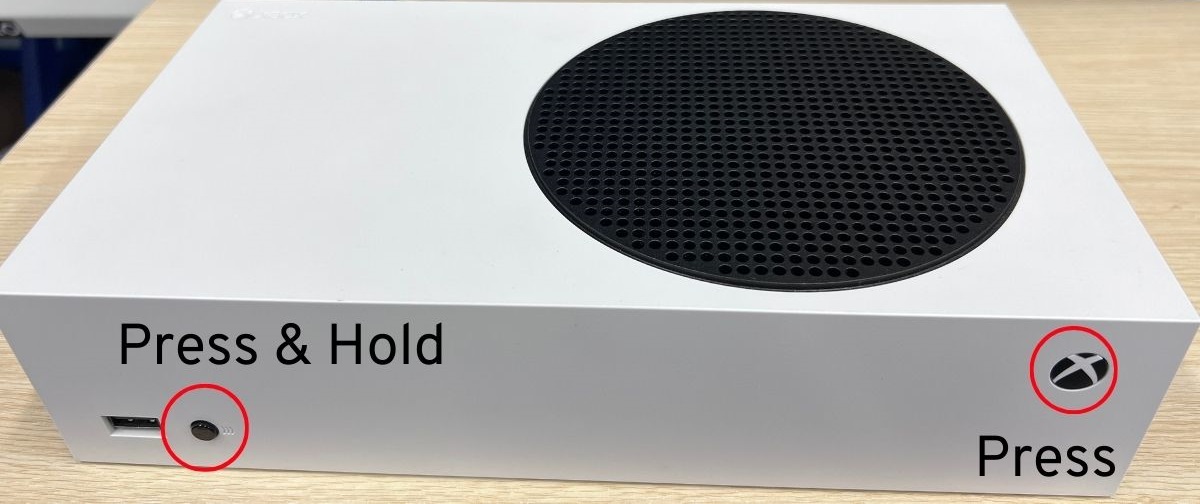
Step 3: Press and hold the Pair (Bluetooth) and Xbox buttons simultaneously for 10-15 seconds.
Release the buttons when you hear the second beep sound from the Xbox.
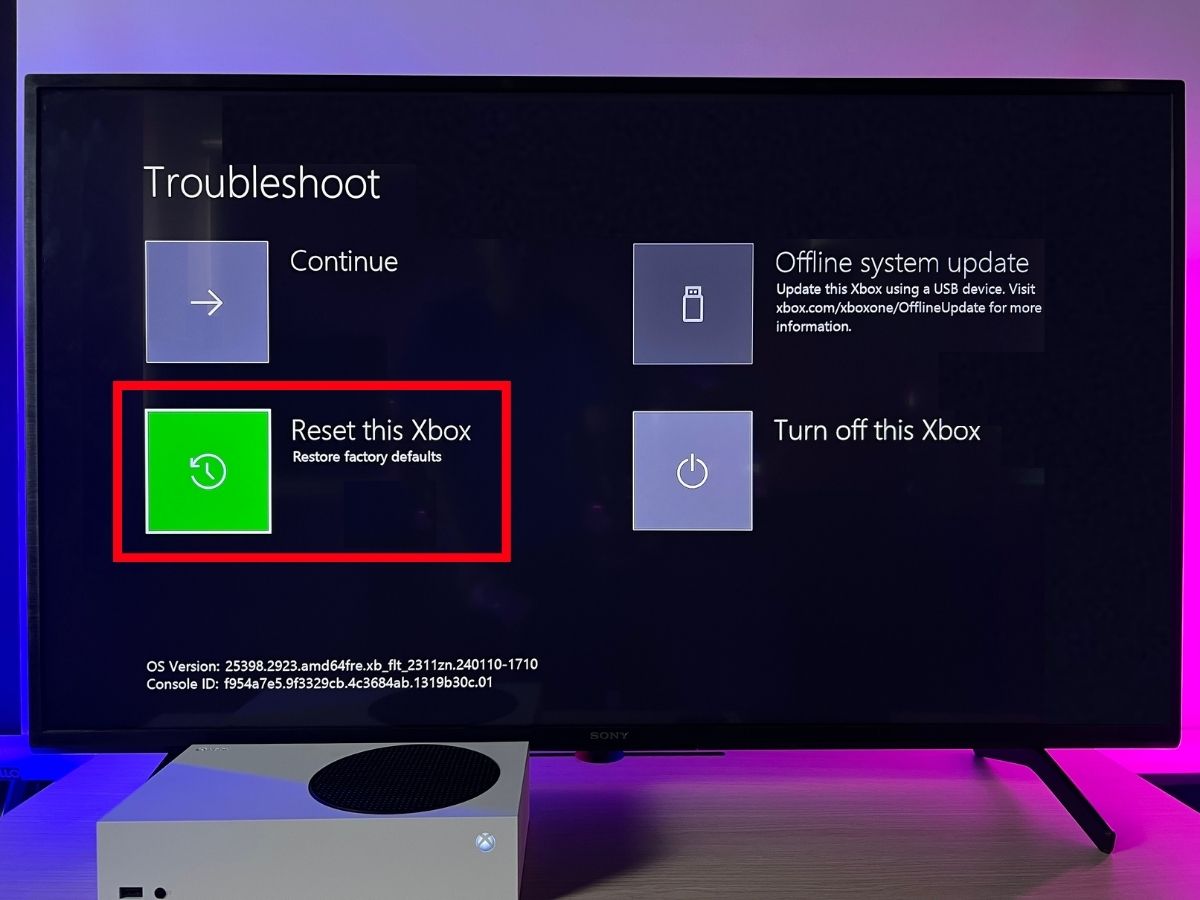
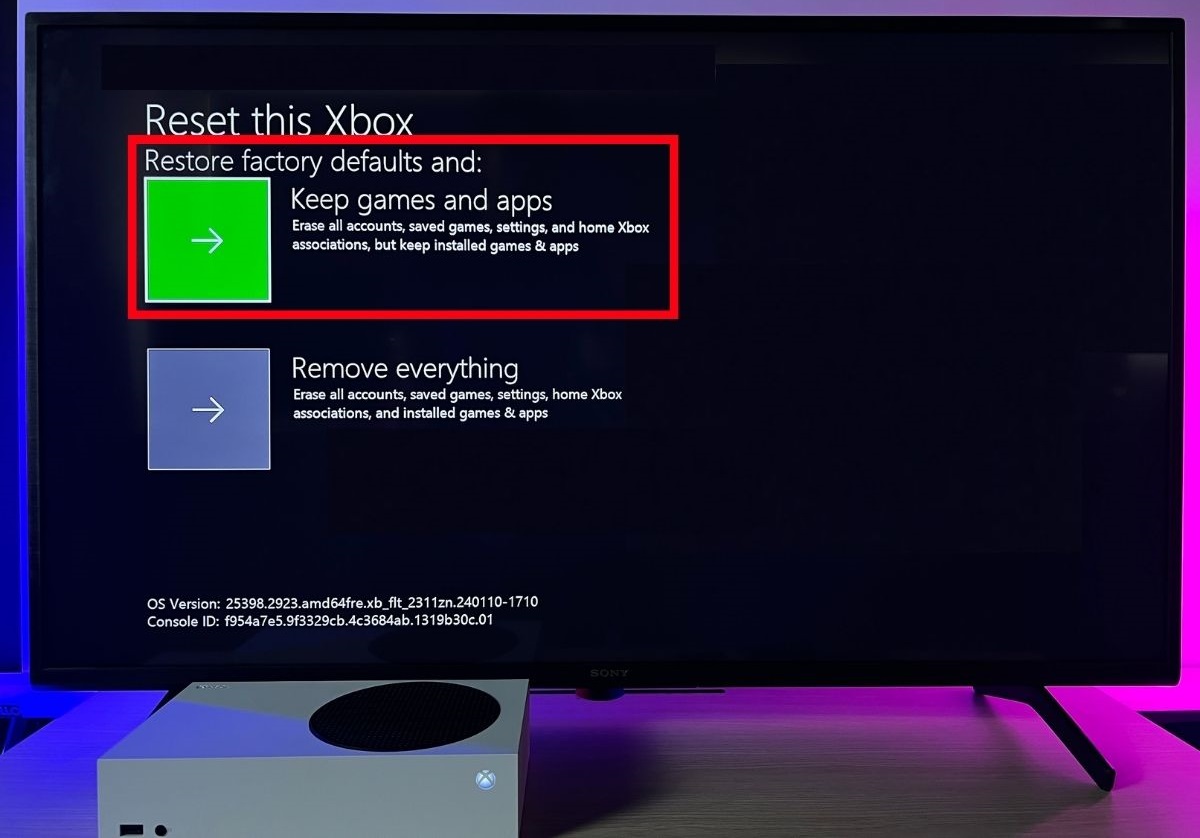
Step 4: The Xbox Startup Troubleshooter will appear on your TV screen. Select Reset This Xbox and choose the Keep Games and Apps option if you wish to keep the games on your Xbox console.
Unplug The TV Cable While the TV is On
Surprisingly, one of the more unique solutions I’ve come across was shared by a user on iFixit. It’s unconventional, but it has worked for many:
Step 1: With your TV on and Xbox connected, carefully unplug the TV’s power cable from its back (leave the power cable plugged into the outlet).
Step 2: Reattach the power cable to your TV. Then, power it on and switch to the HDMI input connected to your Xbox. Many have found that this simple action resolves the compatibility issue.
Safety Note: Exercise extreme caution when handling electrical devices. Unplugging the power cable while it’s still connected to an electrical outlet can be dangerous and may lead to electric shock. Always ensure your safety first. If you’re unsure or uncomfortable with this step, please seek assistance from a qualified electrician or technician.

Tai “Ty” Luu, an Electronics Engineering graduate from Sheridan College, is a passionate technical editor with a deep love for technology and gaming. He constantly seeks new challenges to expand his expertise in the tech and gaming fields.