
Practical iPad Tricks and Shortcuts to Boost Your Productivity

When you got your first iPad, you were a playful teenager looking to do little more than play games, watch movies, and FaceTime with your friends. However, times have changed and you’re heading into your first real office job or college.
Of course, you got a new iPad to celebrate the occasion, whether it’s an iPad Air or iPad Pro.
Now that you’re a full-grown and responsible adult, you’re looking to use your iPad’s hidden features to maximize your productivity and make this new professional transition as seamless as possible. You’ve come to the right place.
I’ve found the best practical iPad tricks and shortcuts, perfect for beginners, college students, teachers, and anyone looking for life hacks to make school, study, and work easier.
Are you ready to quickly become the most productive person in the office or classroom? If so, let’s get started!
Prefer Visuals? Check Out the Video Version below.

Quick Navigation
Organizing Your Home Screen
A messy home screen is like a messy room: disorganized and confusing. Don’t be that person who spends five minutes searching for an app – organize your home screen instead!
Follow our tips and tricks to clean up your iPad’s home screen and make it look squeaky clean.
1. Hide Home Screen Pages
If you frequently pass your iPad around to your colleagues and have a few apps they’d rather not see, you can hide the entire home screen page. This will make it unavailable from your iPad’s home screen, keeping it private from any wandering eyes.
Don’t worry. You can always un-hide it later following the exact same steps.
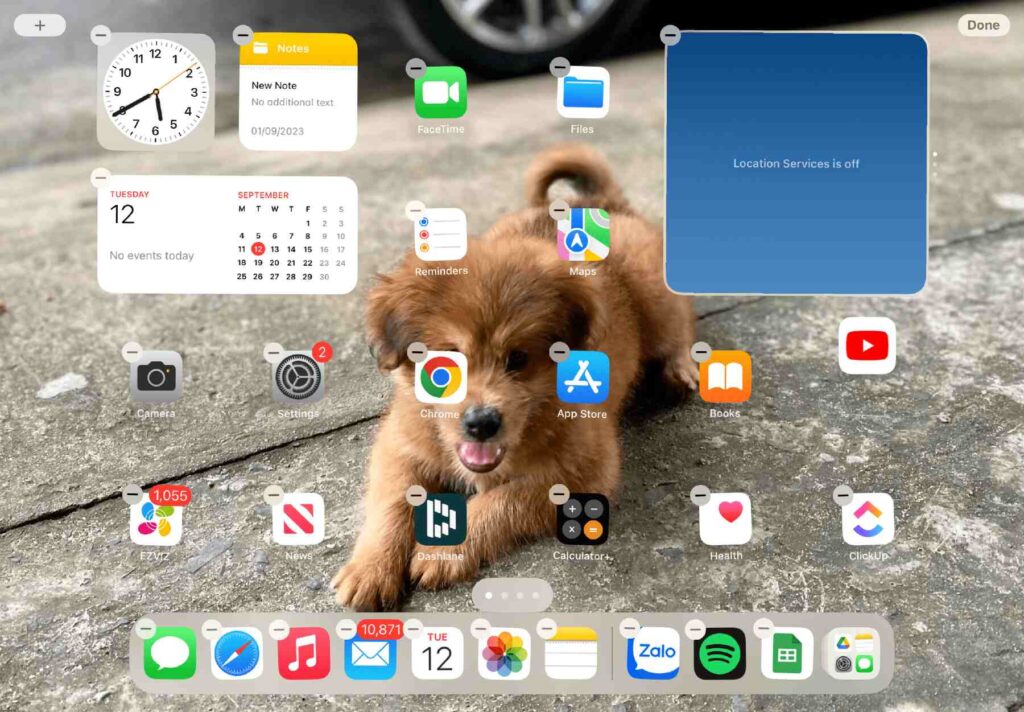
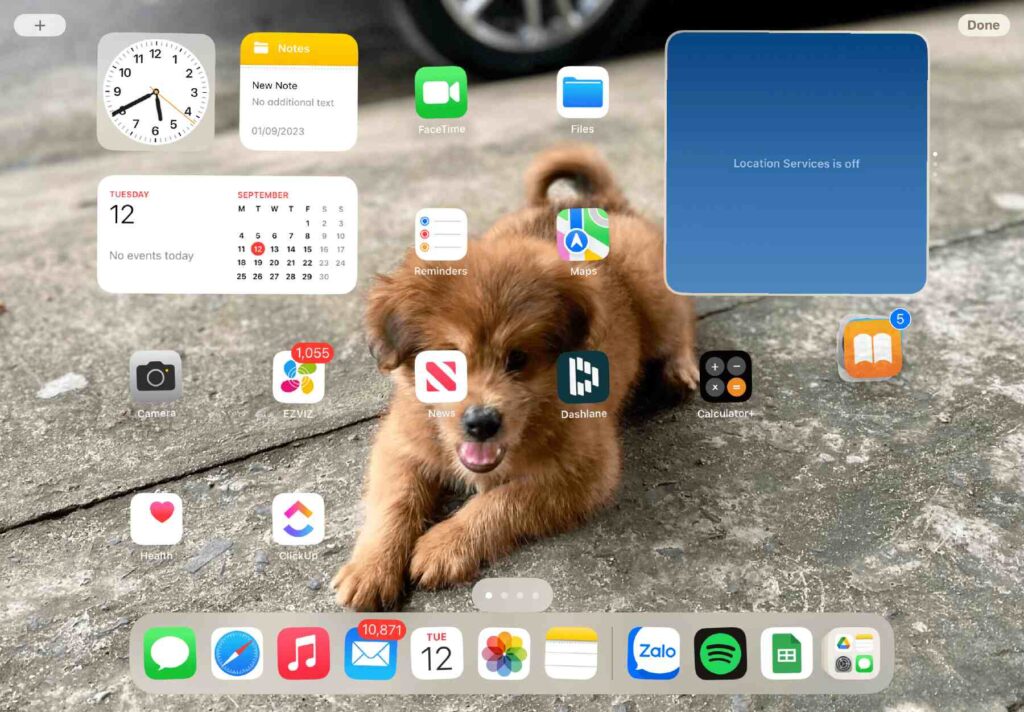
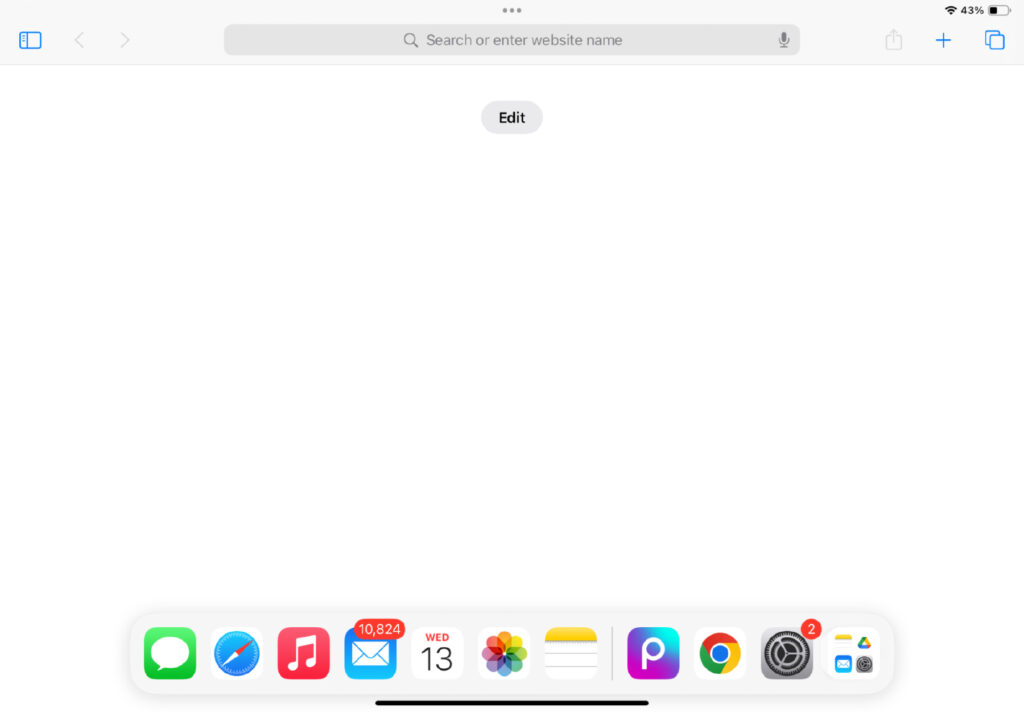
Step 1: Tap and hold any empty area on the Home screen until the app icons begin wiggling.
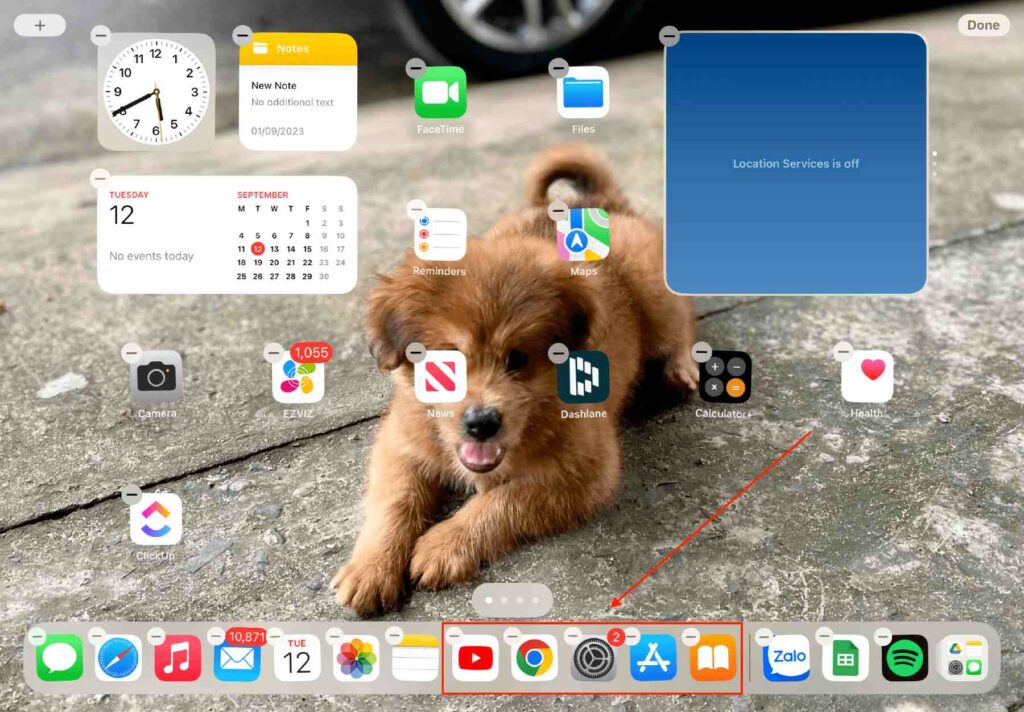
Step 2: Then, tap the dots near the bottom of the screen.
![]()
Step 3: To hide a page, tap the circle beneath it. You can always return to this screen and tap the circle again to display the page.
Step 4: Tap Done to exit the screen.
Hide a Home Screen Page
Unhide a Home Screen Page
2. Rearrange Home Screen Pages
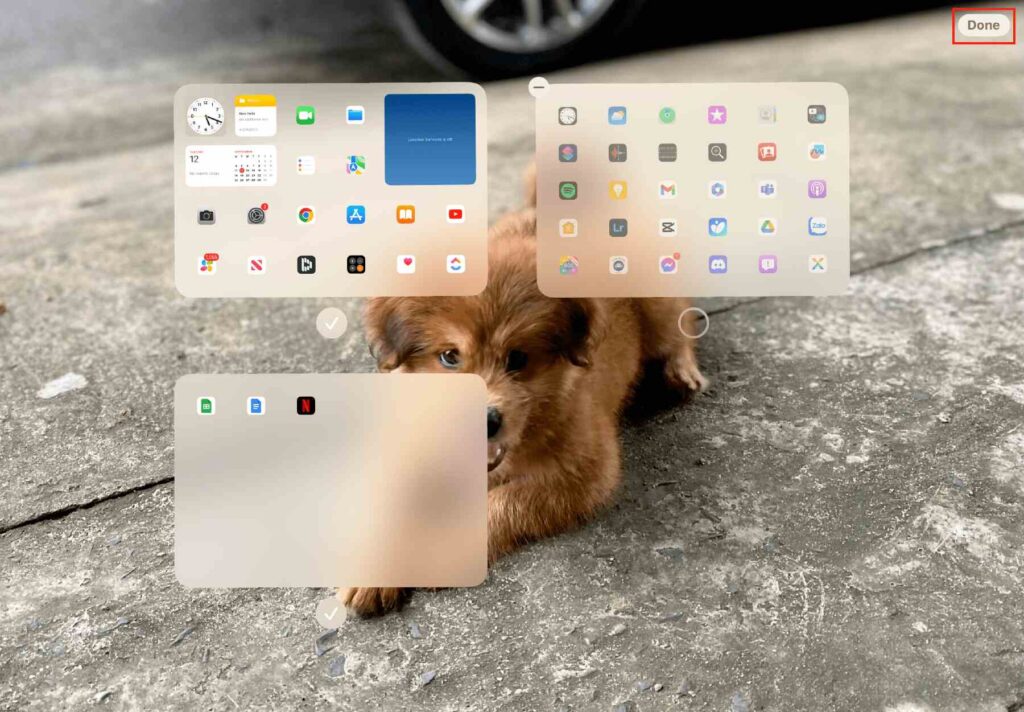
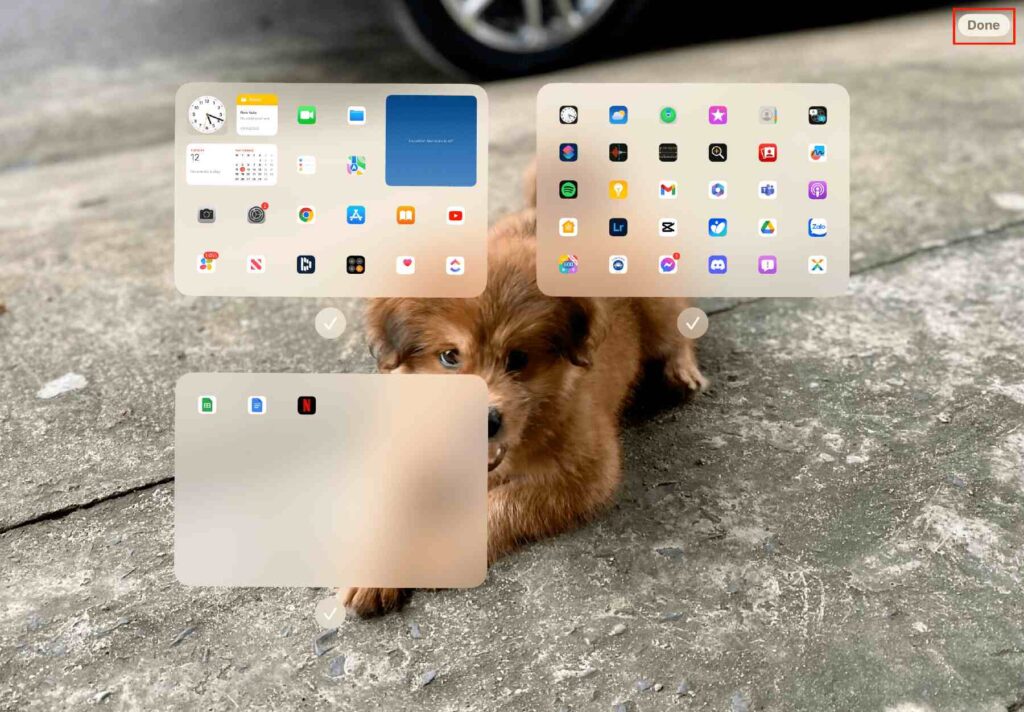
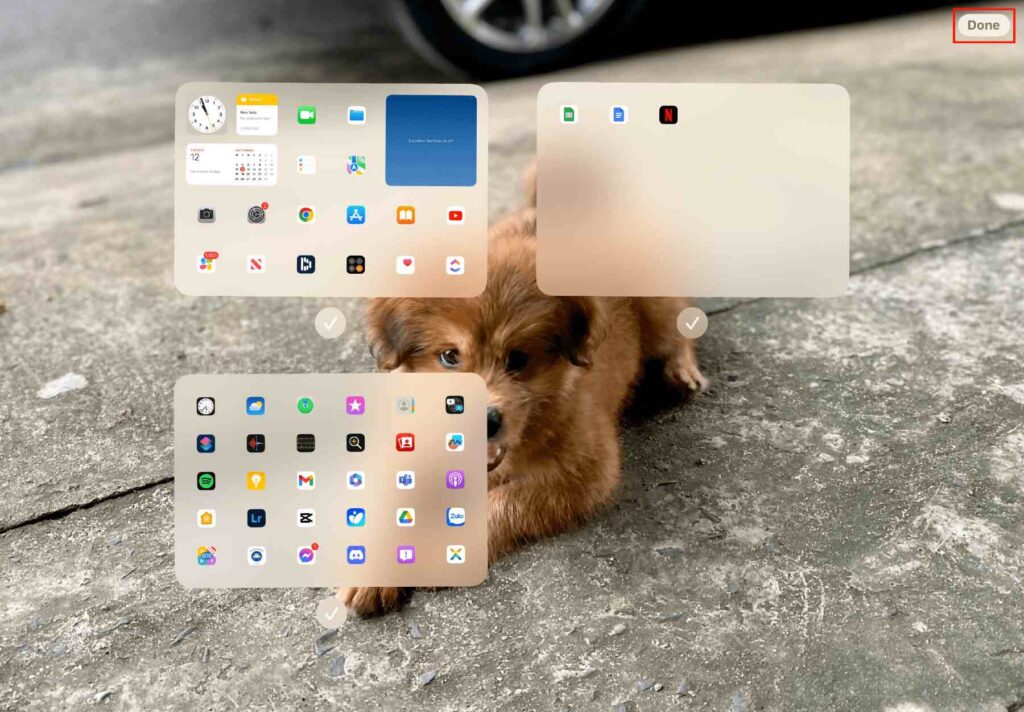
If you want to organize your home screen without moving each app, you can rearrange the Home screen pages instead. This allows you to customize your iPad’s home screen in a few seconds.
Step 1: Tap and hold any empty area on the Home screen until the app icons start shaking.
Step 2: Select the three dots at the bottom of the screen.
Step 3: Now, you can reorder the Home screen pages by dragging them around.

Step 4: Once you’re satisfied with the placement, tap Done.
3. Efficient Stacking
While you could move and save app icons, photos, web images, and files one by one, why would you when you can stack them instead? This nifty trick allows you to swiftly organize and save content on your iPad, saving you invaluable time.
Step 1: Tap and hold one object until it wiggles.
Step 2: Keeping one finger on the object you just selected, tap other objects.
Step 3: Move and drop the objects into your desired location.
You can also use this iPad hack to simultaneously save multiple pictures from your web browser to your Photos.
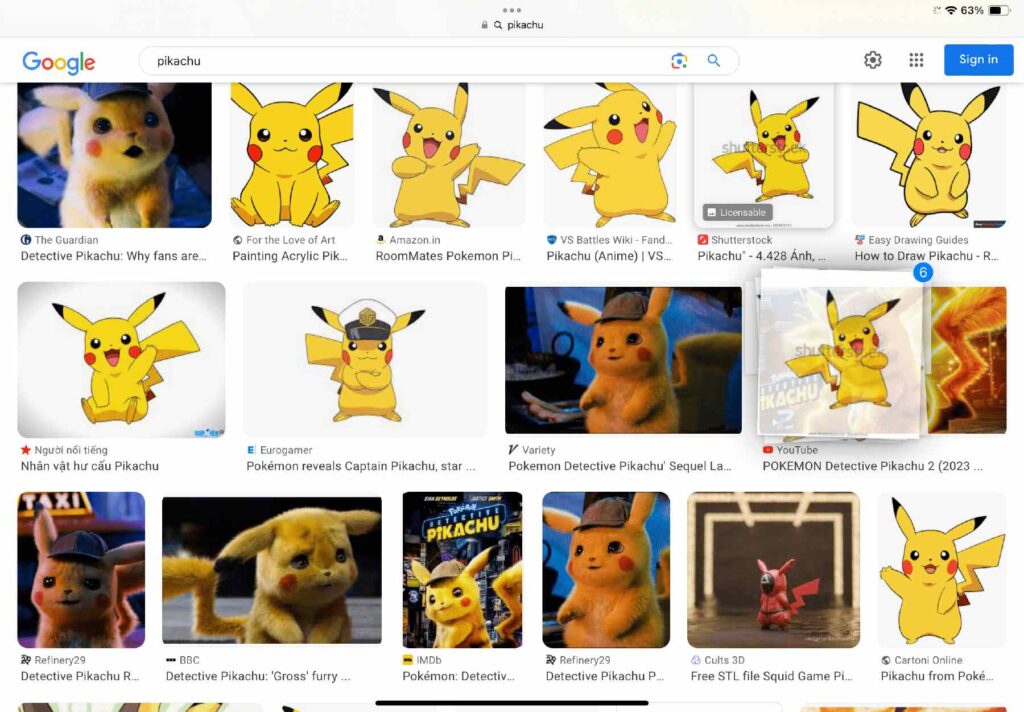
Select multiple images you want to download.
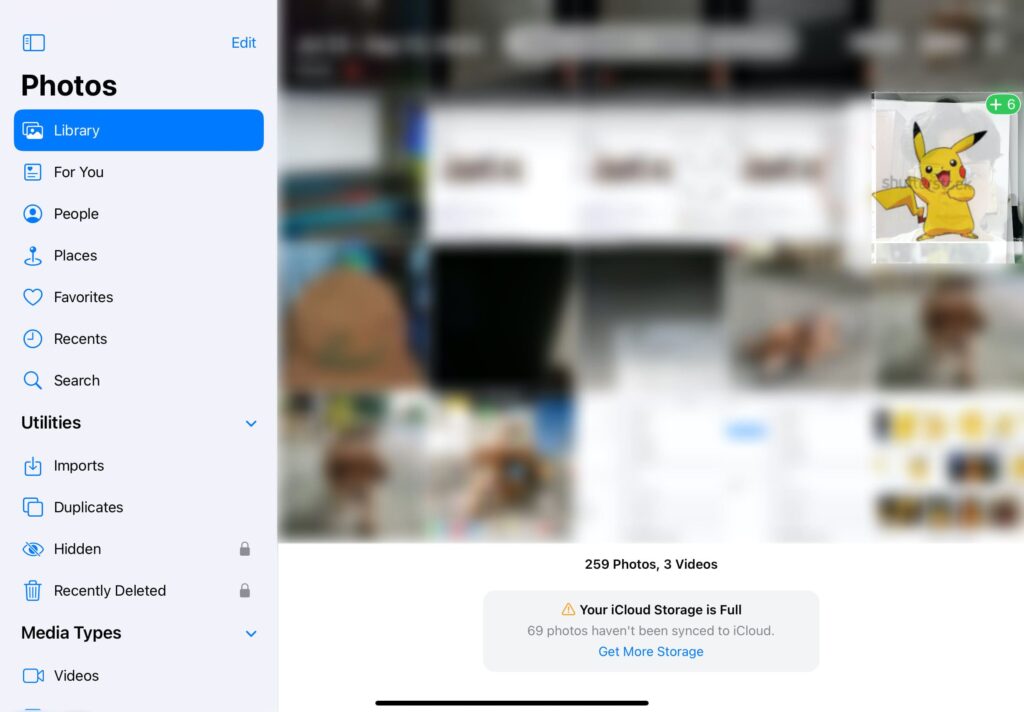
Keep one finger on the images you just selected and move to Photos.
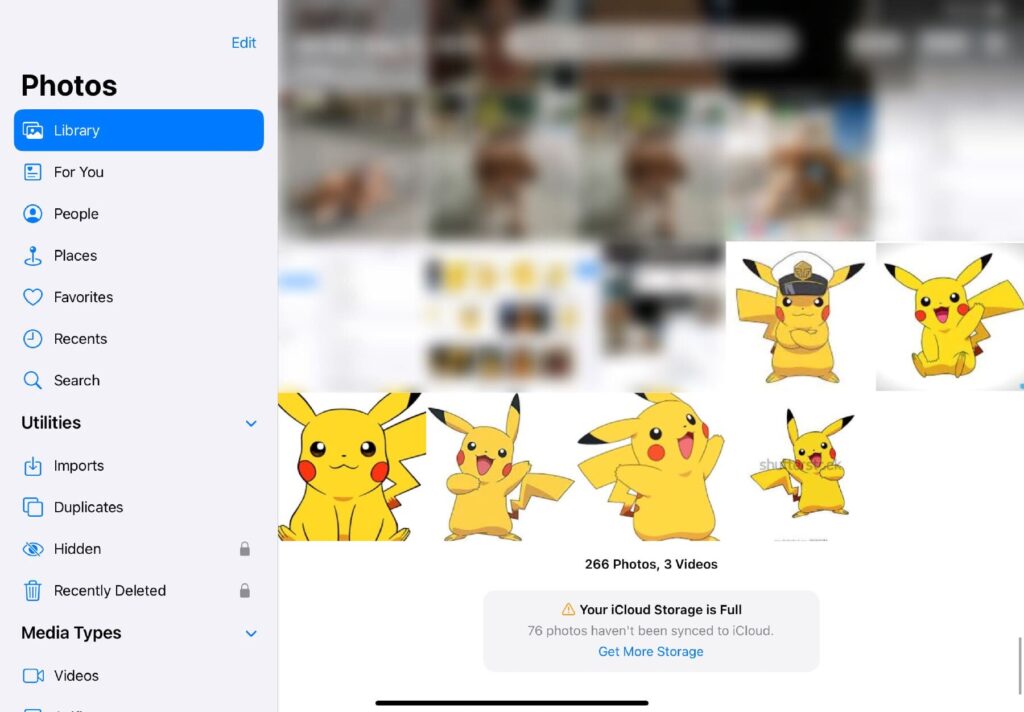
Drop the images into Photos.
Streamlining Your Workflow

Streamlining your workflow can mean different things to different people. For some, it means eliminating any busy work, while for others it means making the task as easy as possible.
Whatever this popular productivity saying means to you, I guarantee you’ll find these tips make your job or studying so easy that it won’t feel like you’re even working!
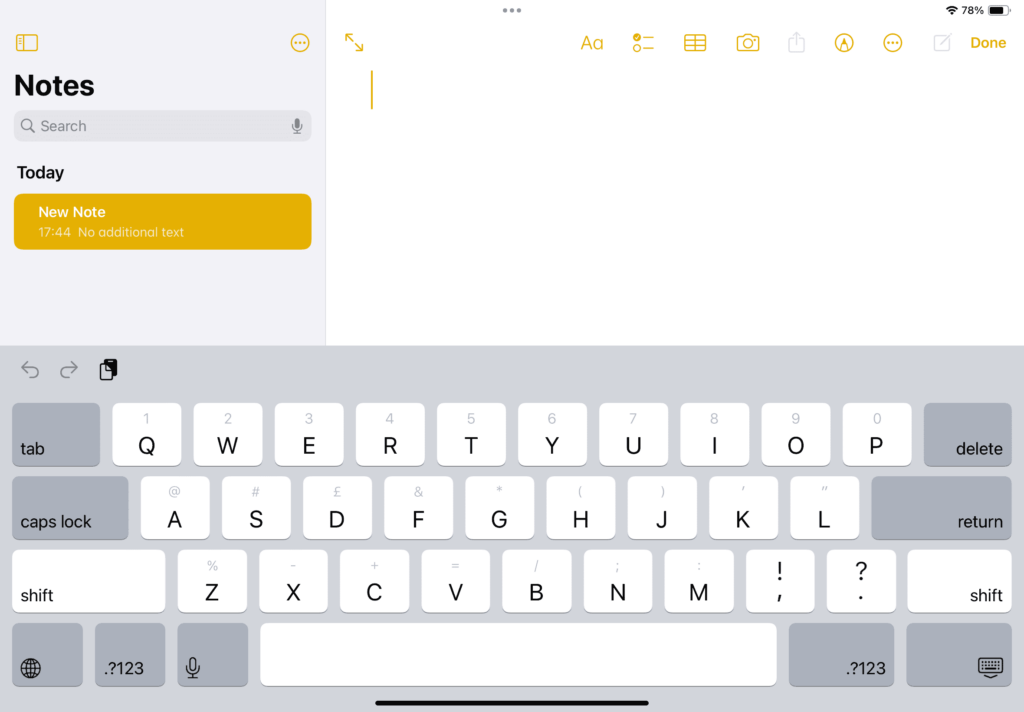
1. Minimize and Maximize Keyboard
Nothing is more annoying than having part of your iPad screen cut off by the keyboard. Luckily, you can minimize and maximize your iPad’s keyboard using this simple trick.
- Minimize the keyboard by pinching the screen with two fingers.
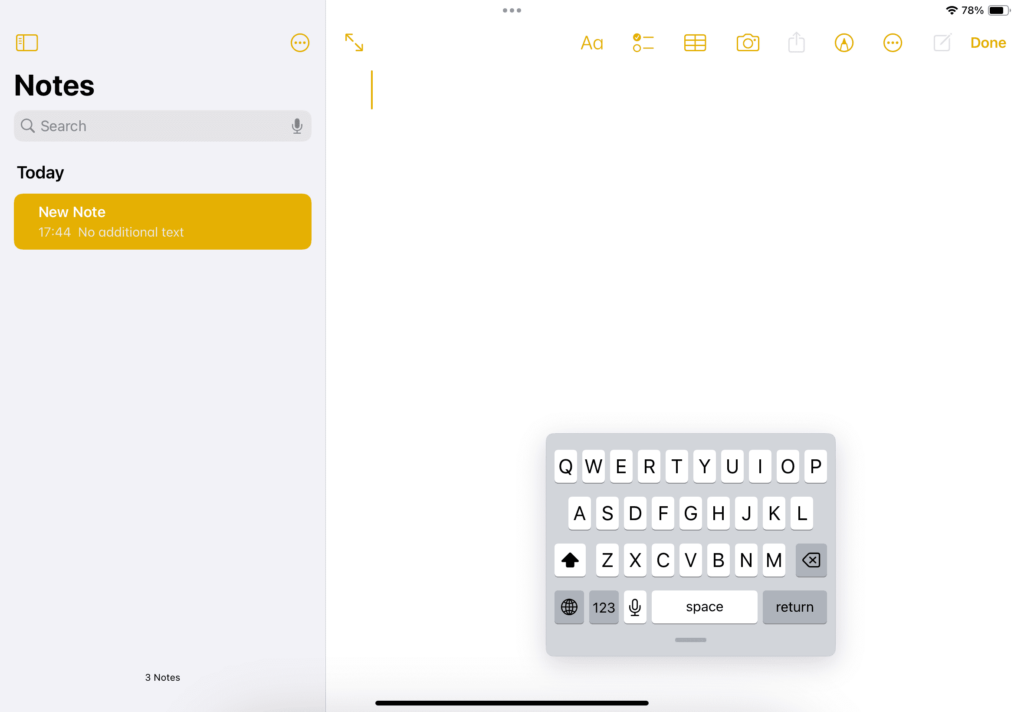
- Maximize the keyboard by spreading two fingers open.
2. Take a Quick Note
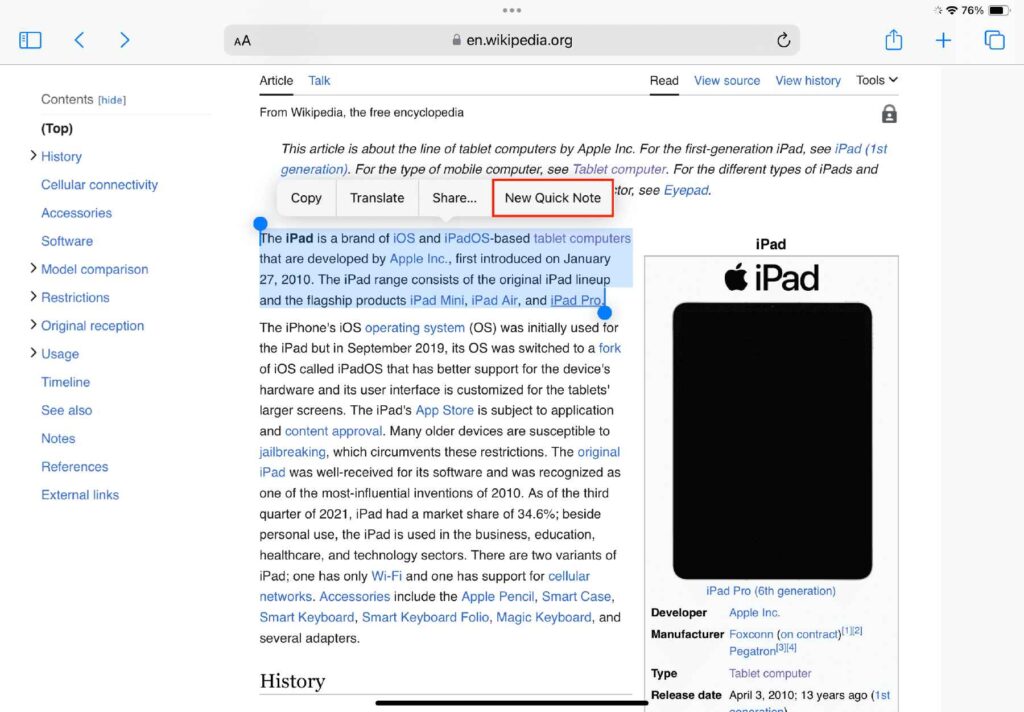
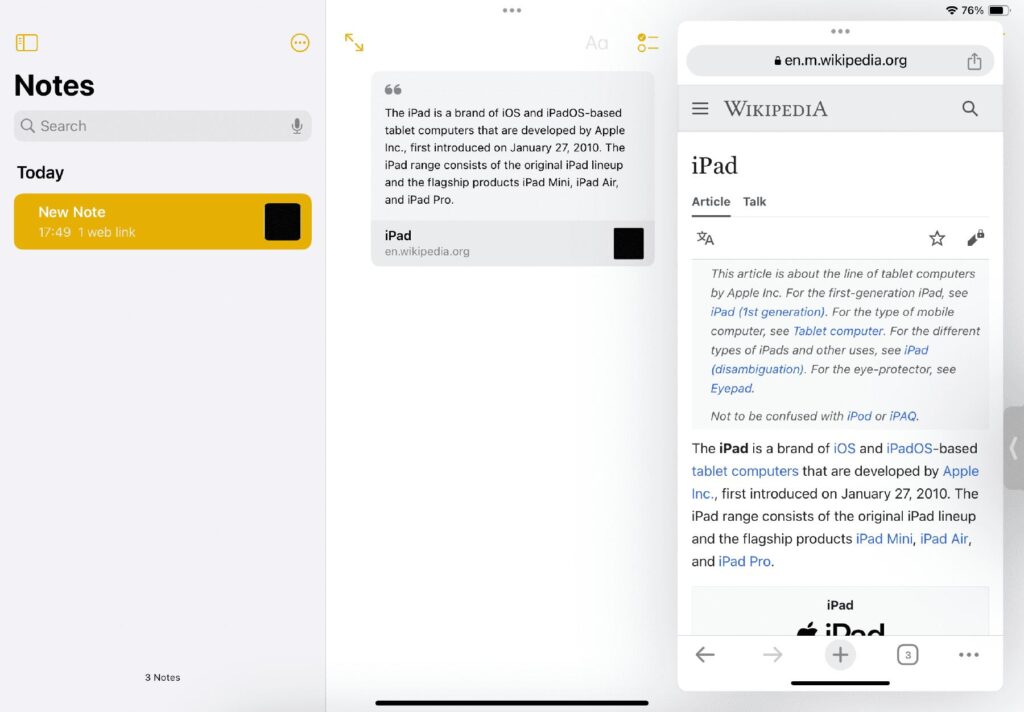
Have you ever seen something in Safari that you knew you just had to save for later? Well, now you can with Quick Note! This revolutionary feature allows you to take quick notes from any interesting web pages you may find online. Please note that this trick only works in the Safari browser.
Step 1: Select your desired text in Safari.
Step 2: Tap New Quick Note to save it to your Quick Notes.
Now, your chosen text will be saved in a new note within your Notes app. When you tap on the note, a side window will pop up, displaying where the note came from in Safari.
3. Convert Handwritten Notes to Text
When traveling, I love taking handwritten notes. There’s something timeless about physically writing out each letter in my handy little notebook. However, at the end of the day, I’d have to type out all my notes to save for later.
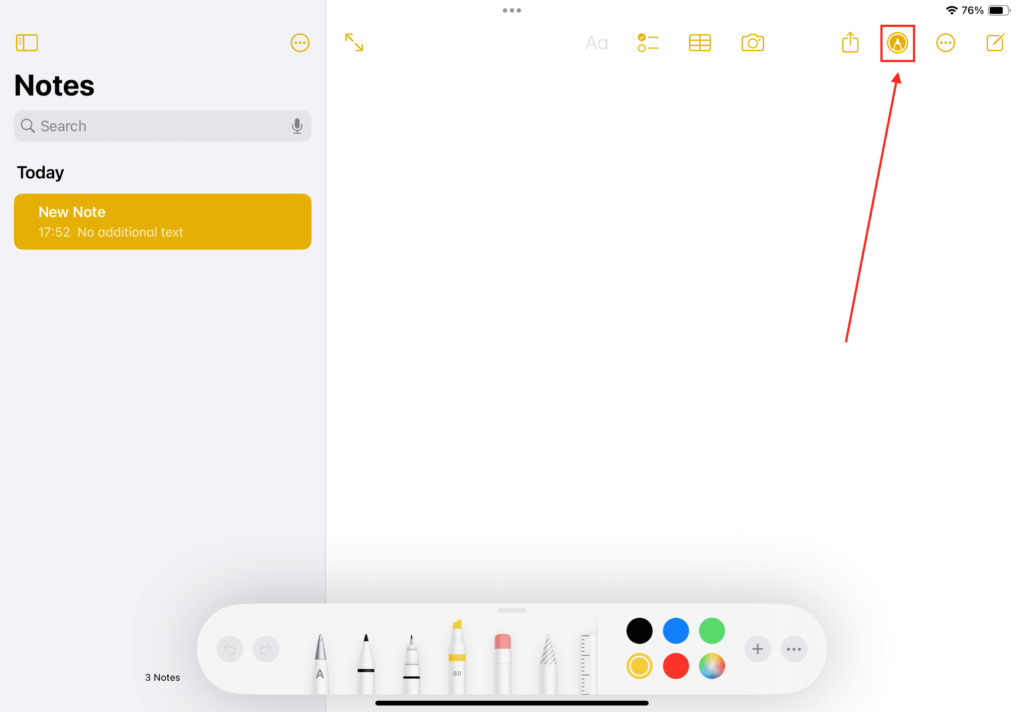
Well, say goodbye to hours of typing out your handwritten notes with your iPad’s Markup feature. Simply tap the Markup button in the top right corner of your screen to launch the Tool Palette. Then, you can start handwriting notes directly on your iPad using either your finger or Apple Pencil.
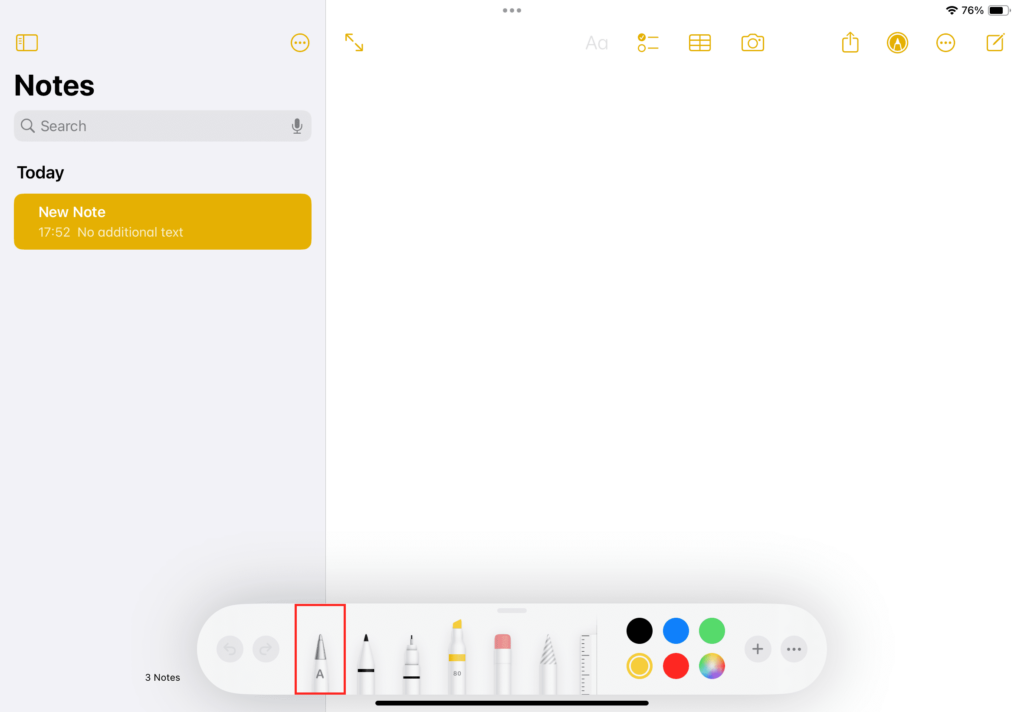
With Apple Pencil
When taking notes with an Apple Pencil, choose the tool marked with an “A” on the palette. This unique pen will automatically convert your handwriting to type as you write!
If that’s not time-saving, then I don’t know what is!
Without Apple Pencil
No Apple Pencil? No problem!
You can convert handwritten notes to text using only your fingers by following the steps below.
With the Tool Palette ON
Step 1: Select the Lasso Tool and use it to trace a circle around the handwriting you’ll convert into text.
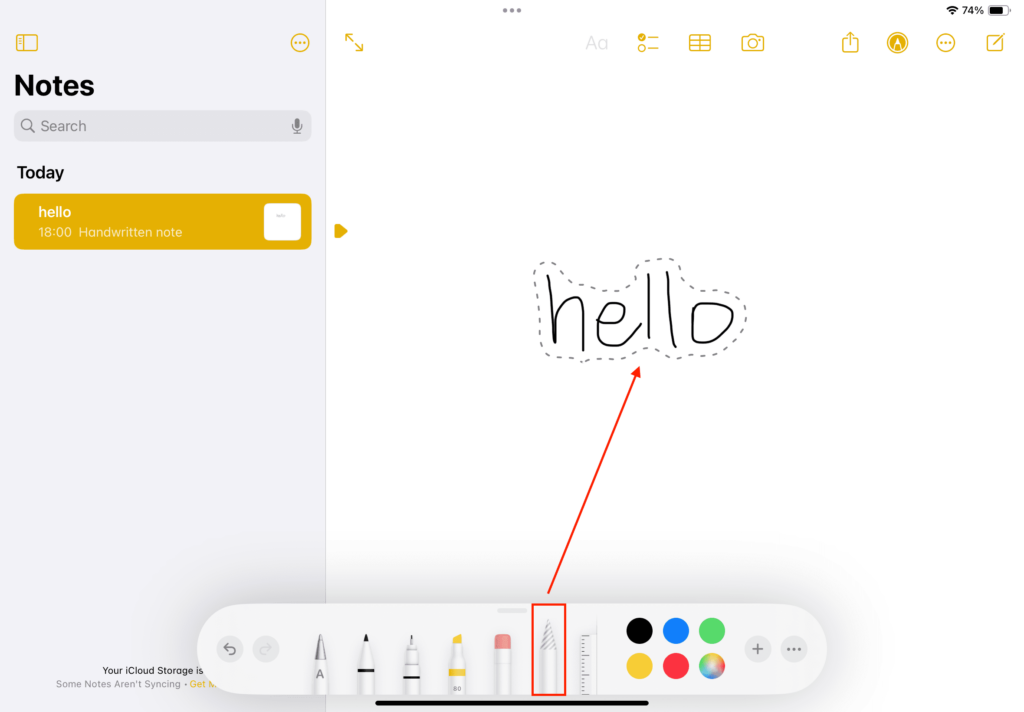
Step 2: Tap the selected words.
Step 3: In the pop-up menu, go to Copy as Text.
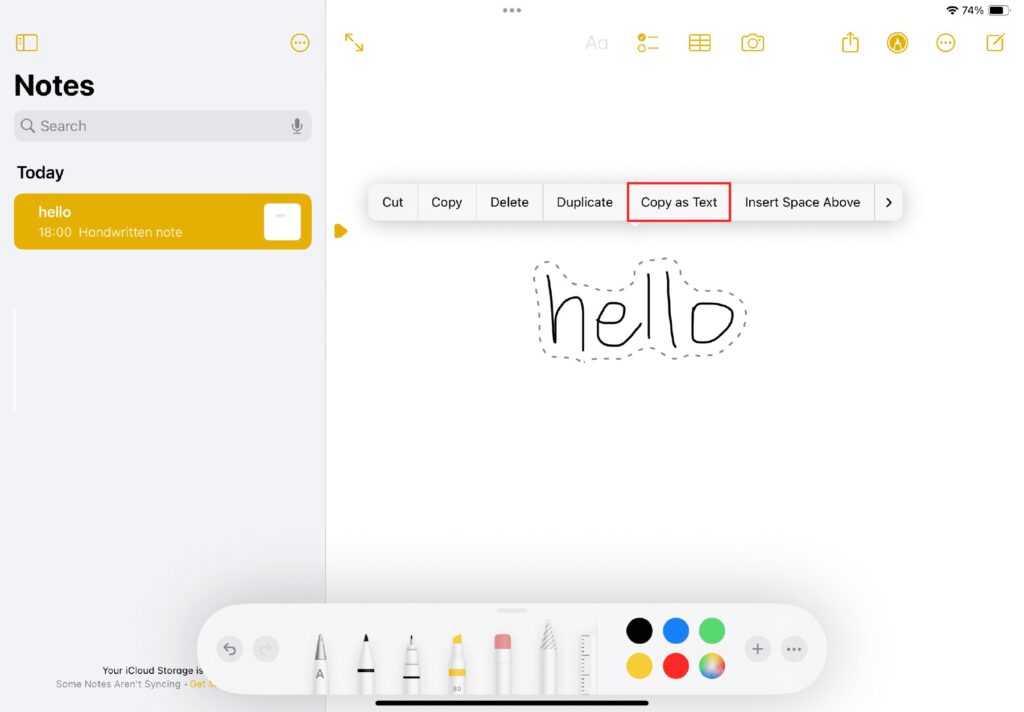
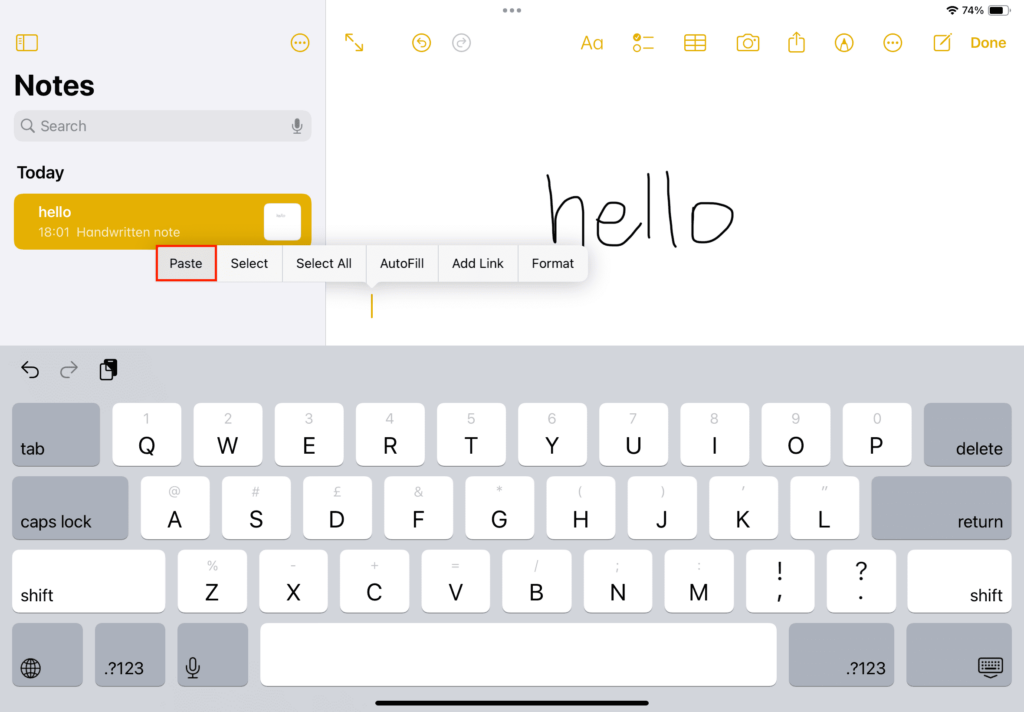
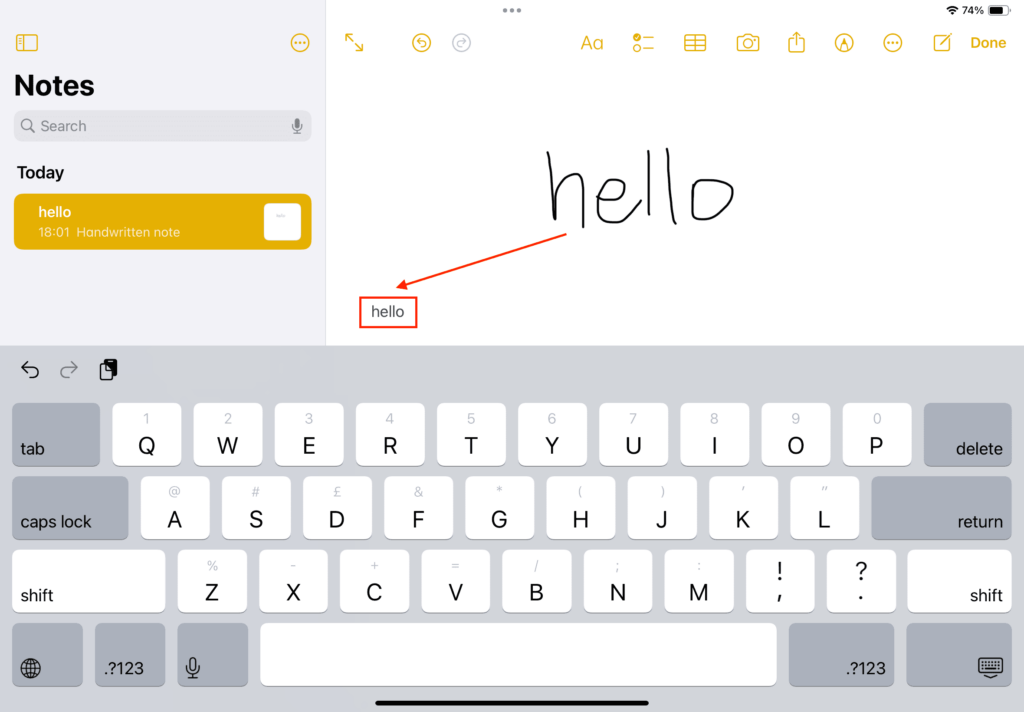
Step 4: Now you can paste the text anywhere you’d like it, be it in the same document or in another app.
With the Tool Palette OFF
Step 1: Select a word by double-tapping or touching it. Then, move your figure to move the highlight to other words. If you’d like to select an entire line, triple-tap it.
Step 2: Once you’ve highlighted your desired words, tap them.
Step 3: In the pop-up menu, choose Copy as Text.
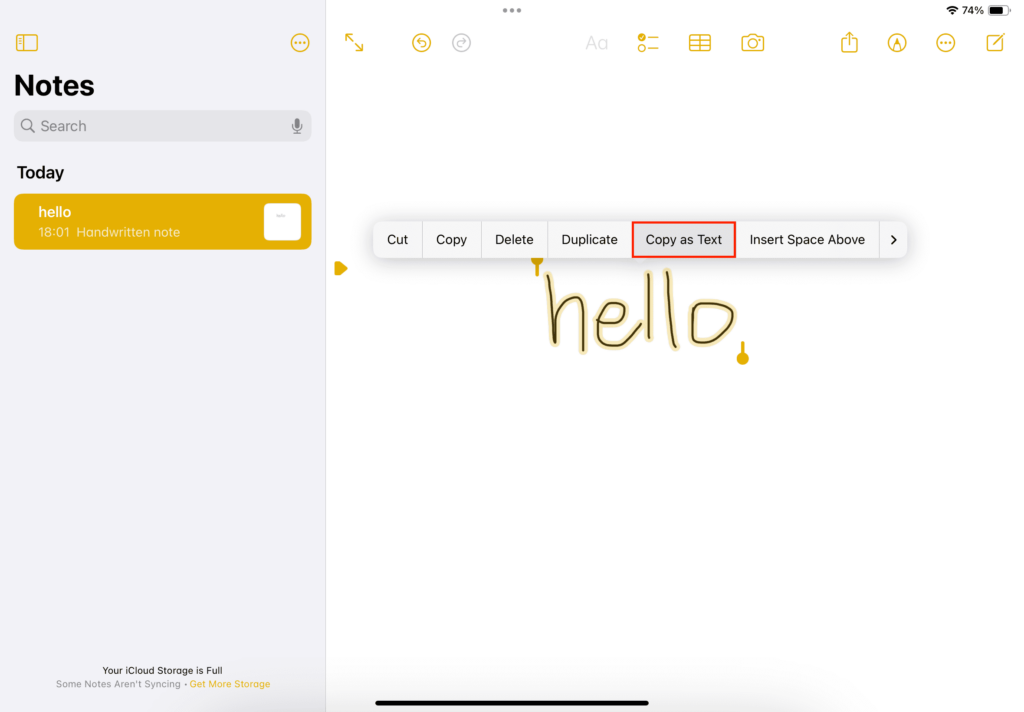
Step 4: Now, simply paste the copied text within the document or in another app.
Mastering Multitasking

You may only have two hands, but you can definitely do more than two tasks at once. If you’re seeking to be multitasking royalty, I’ve got some game-changing tips for you that will have your coworkers saying, “I don’t know how they do it!”
Before following the below tutorials, go to your iPad’s Settings and head to Multitasking & Gestures. Then, toggle each of these functions on.
Multitasking Windows
Long gone are the days of going back and forth between apps when taking notes, giving a presentation, or sending emails. Now, you can view multiple windows at once! I use this feature when sending lengthy emails so I can double-check my notes to ensure I haven’t missed anything.
Your iPad has three multitasking modes:
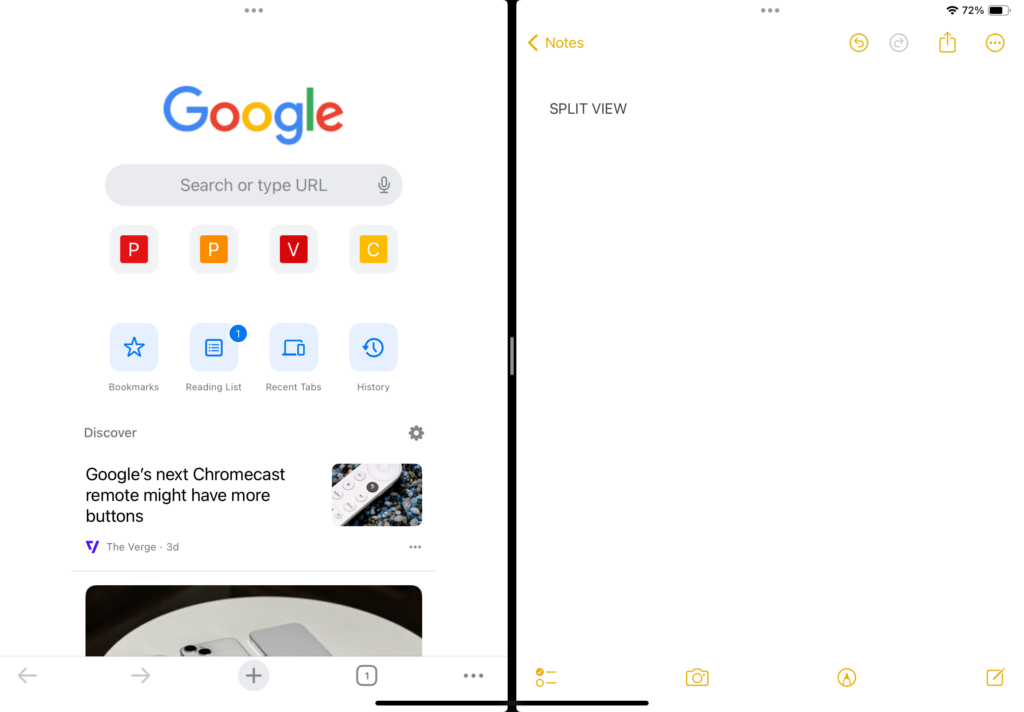
- Split View: Two apps appear vertically side-by-side. You can adjust the apps’ size using the slider between them.
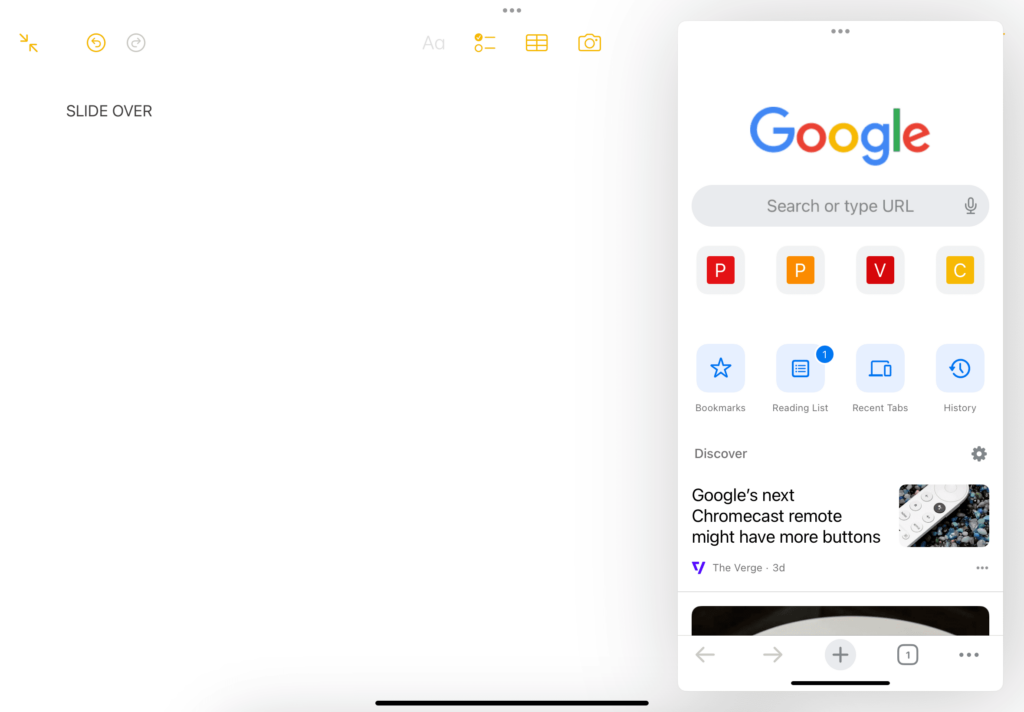
- Slide Over: One app appears in a smaller floating window that you can drag to the left or right side of the screen.
- Center Window: In some apps, you can put specific items (e.g. email or note) into a center window. This allows you to focus on them without closing the apps in the background.
Do note that only select apps support these multitasking modes. So, if the app isn’t responding to your command, it may be incompatible with the selected mode.
Ways to Use Multitasking
Multitasking on your iPad is more than simply having two apps open at once! You can also use this function to organize open apps and their content, spotlight certain items, and more!
Let’s discuss how to use Multitasking on your iPad without shuffling through the Settings menu.
Using the Multitasking Menu
Once you’ve toggled Multitasking on, you’ll see the Multitasking menu at the top of your screen. This menu is your one-stop shop for your juggling needs.
Step 1: Open an app.
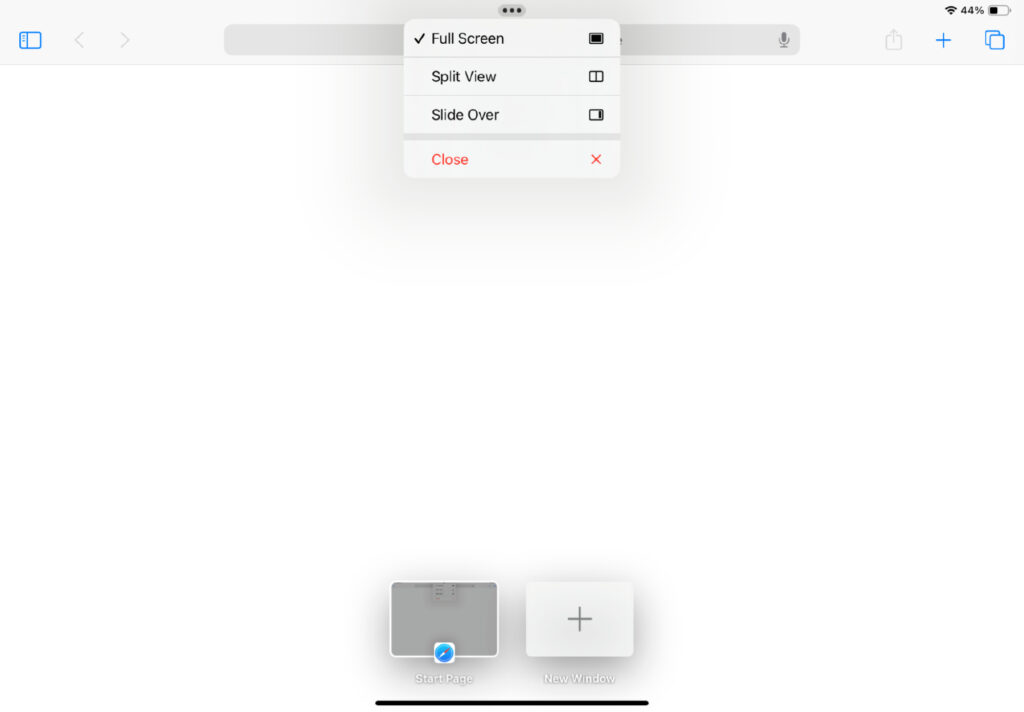
Step 2: Select the Multitasking icon at the top of your screen.
Step 3: Choose either the Split View or Slide Over button. Once selected, the current app will minimize and you’ll see your Home screen.
Step 4: Now, choose a second app from your Home screen. You may also swipe to find apps on other Home screen pages or choose an app from your Dock.
Step 5:
- Choosing Split View will result in the second app appearing vertically side-by-side with the current app.
- Choosing Slide Over will open the second app full-screen and move the current app to a smaller window that you can move to the right or left side of your screen.
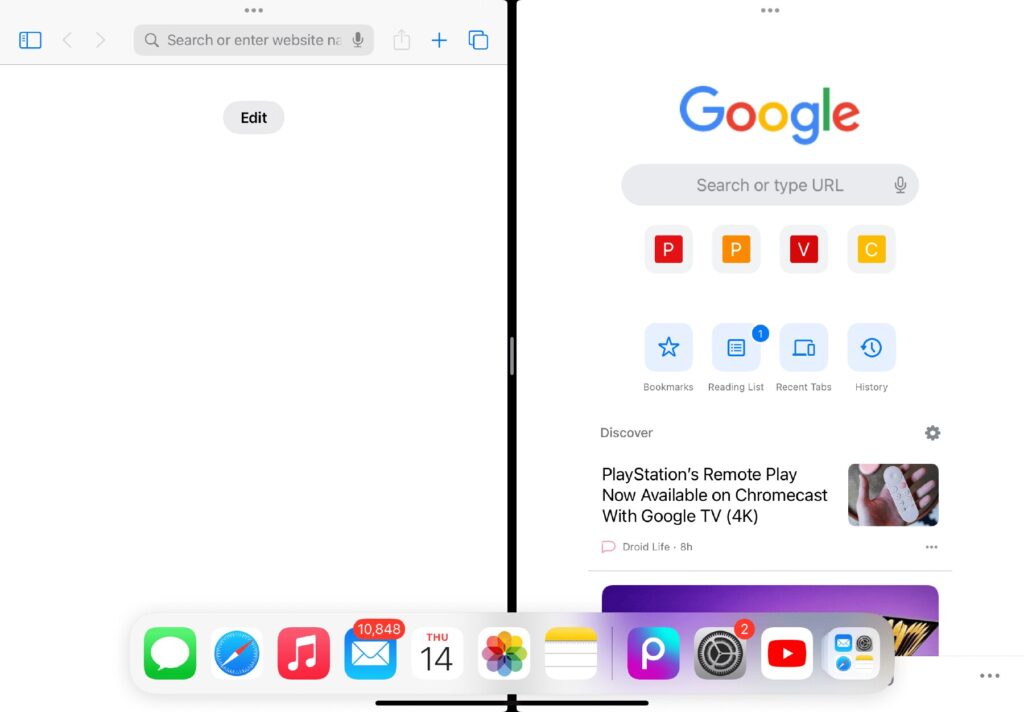
Using the Dock
Your iPad’s Dock does more than store your Flashlight and Calculator apps. You can also use it to go into different Multitasking modes.
Step 1: Open an app.
Step 2: Slide up from the bottom of your screen to reveal the Dock before releasing your finger.
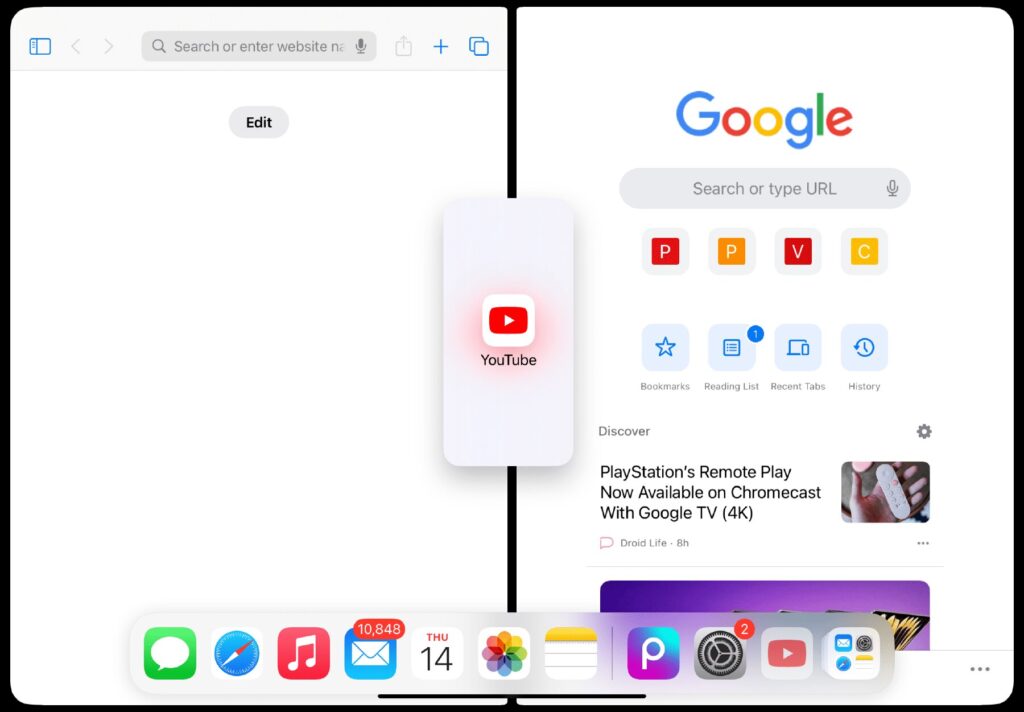
Step 3: In the Dock, tap and hold a second app and drag it out of the Dock window.

- Dragging the app to the left or right edge of the screen will make it appear in Split View with the current app.
- Releasing the app in the middle of the screen will prompt it to appear in a Slide Over window.
Using Spotlight
You must connect a keyboard to your iPad to access the Spotlight for Multitasking tool. Once connected, you can enter Multitasking modes with the click of a button!
Step 1: Open an app.
Step 2: Press your keyboard’s Command–Space bar to launch the Spotlight.
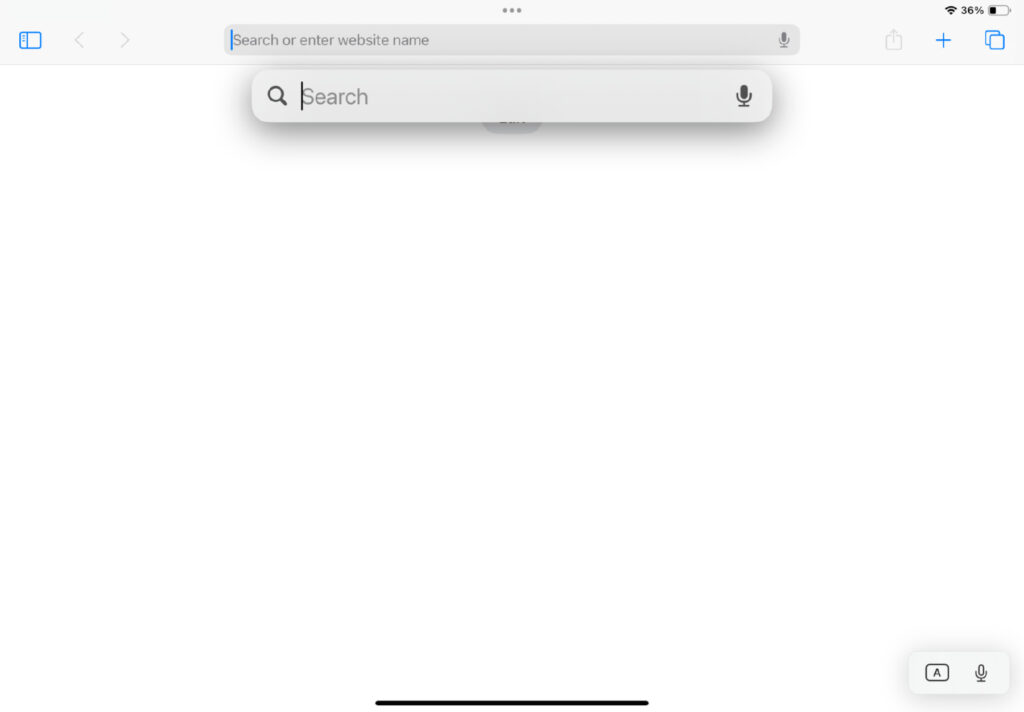
Step 3: Type the name of the second app you want to open into the search bar.
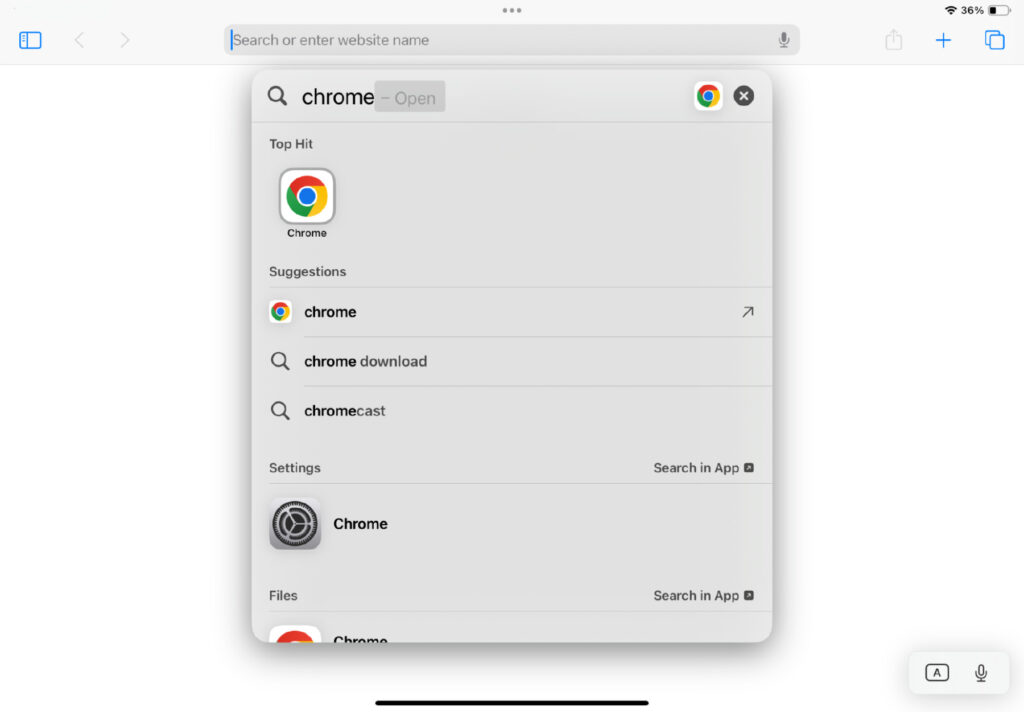
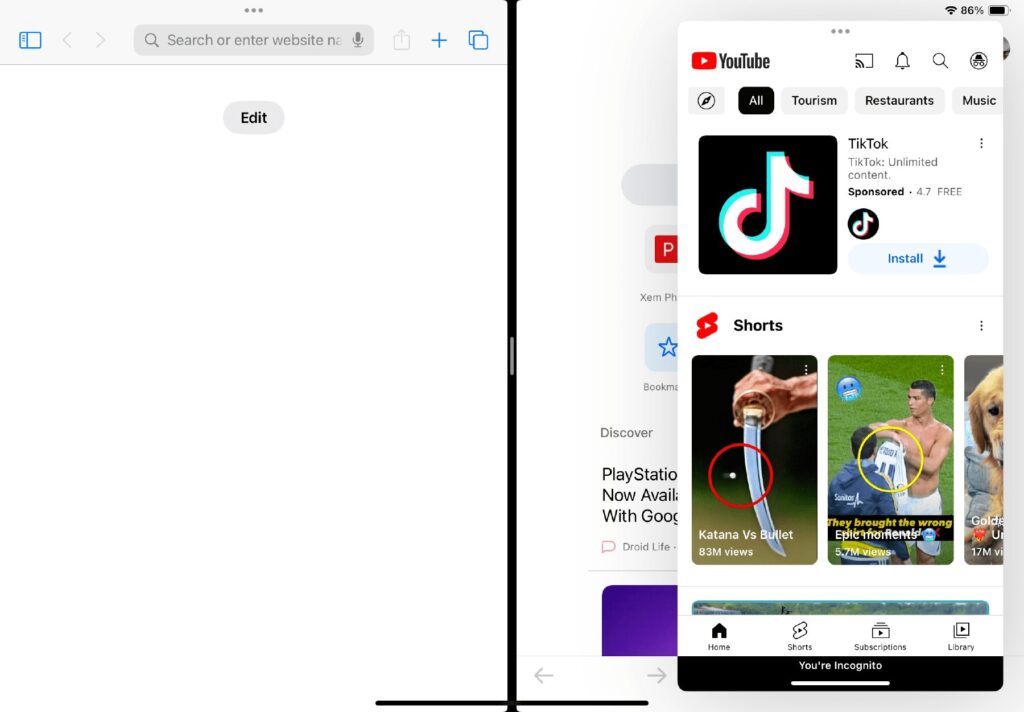
Step 4: Once it appears in the results, tap and hold the app’s icon and drag it out of the Spotlight window.
![]()
- Dragging the app to the left or right edge of the screen will make it appear in Split View with the current app.
- Letting the app go in the middle of the screen will make it appear in a Slide Over window.
How to Open a Center Window
If you’d like to highlight a specific item, you can open it in a center window. This allows you to view one app/item in the center of the screen while keeping the other app in the background.
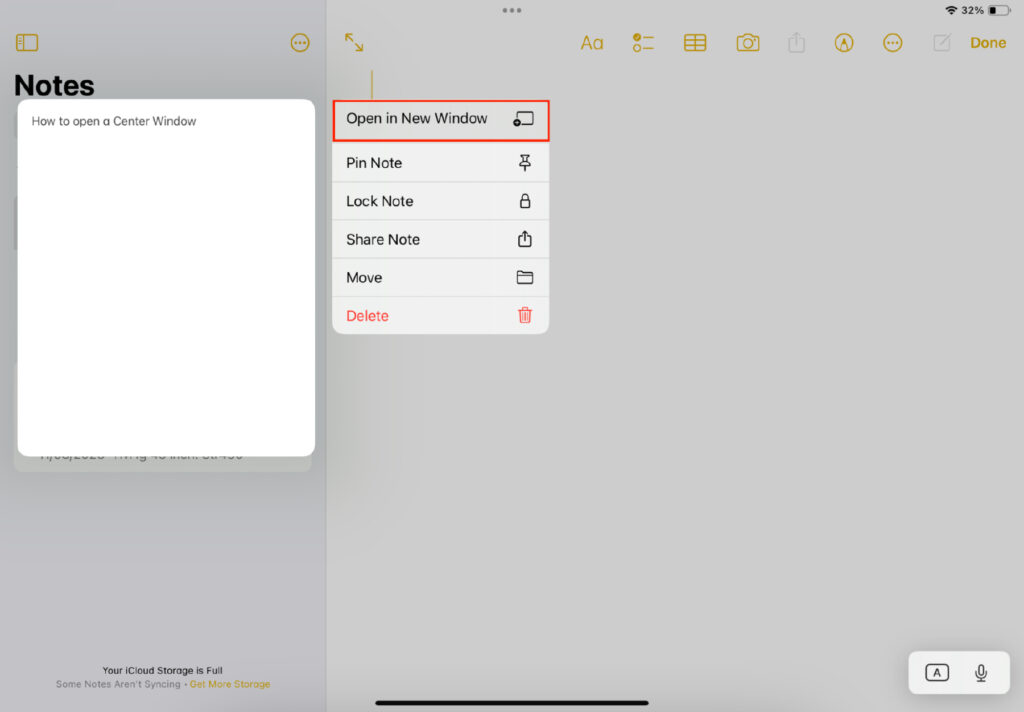
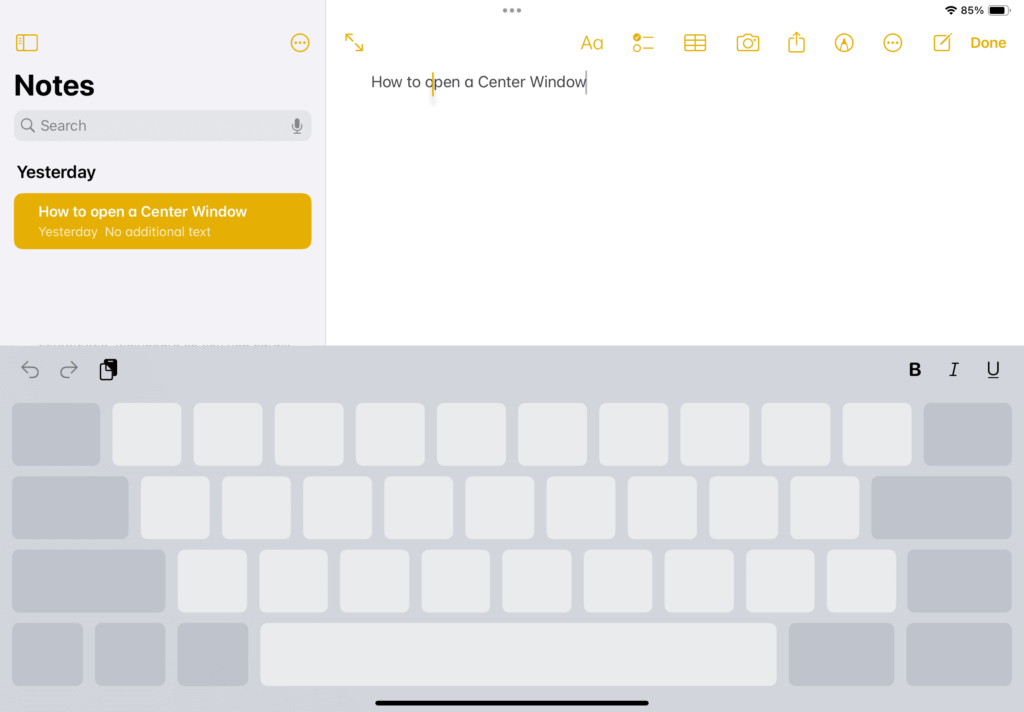
Step 1: Launch an app that supports Center Window mode, like Mail or Notes.
Step 2: Tap and hold a specific email, note, or other item within the app.
Step 3: In the pop-up menu, choose Open in the New Window.
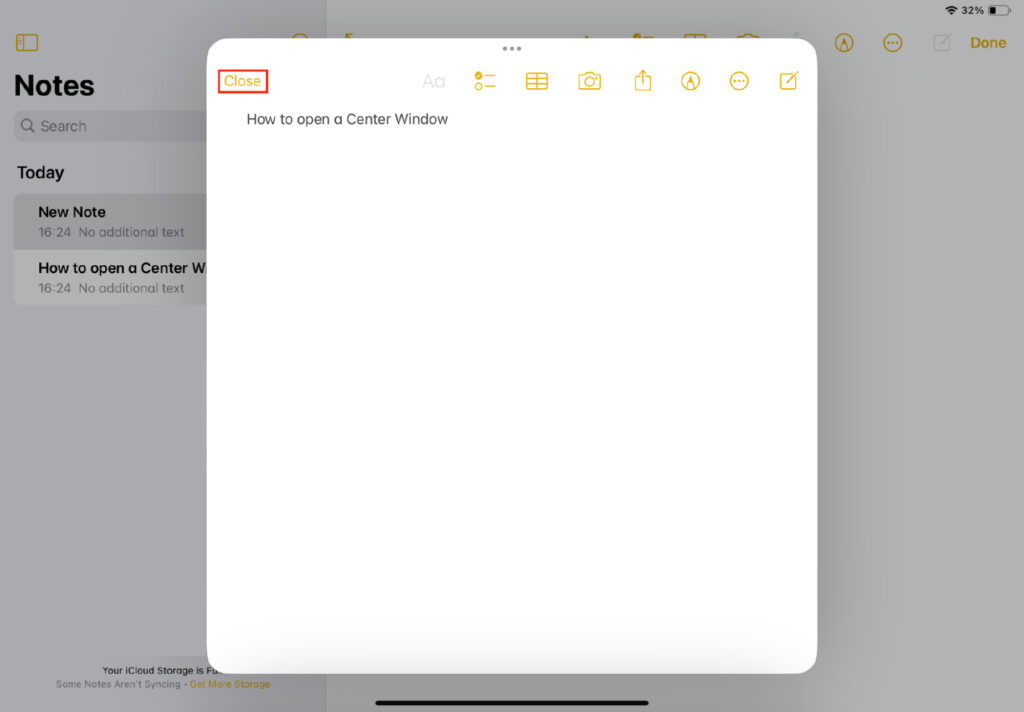
When you’re done reading/editing that specific item, tap Close to exit Center Window mode.
Ways to Adjust Multitasking Windows
While the default setup for Multitasking modes may work for some apps, others may need you to adjust the windows to see everything clearly. You may also want to focus on one window or see one app more clearly while in Multitasking mode.
Follow the tips below to make your iPad’s Multitasking windows fit your specific needs.
Adjust Split View
- Adjust the apps’ sizes by moving the app divider left or right. Move the app divider to the center of the screen to make the apps the same size.
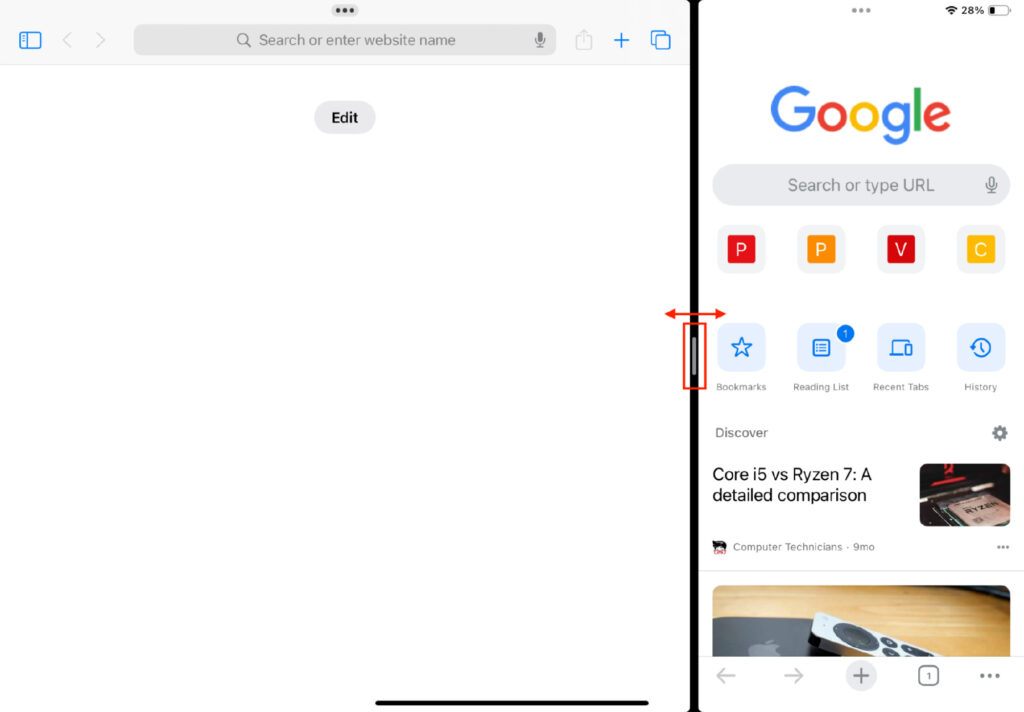
- Convert a Split View app into a Slide Over app by selecting the Multitasking icon followed by the Slide Over icon. Alternatively, tap and hold the Multitasking icon while dragging and dropping one app onto the other.
![]()
- Close Split View by tapping the Multitasking icon in the app you’d like to keep open before selecting the Full Screen icon. Alternatively, drag the app divider over the app you’d like to close.
![]()
- Replace an app by swiping down on the app you’d like to replace before choosing a new one to open from the Home screen or Dock.

- See other apps currently in Split View by touching and holding the bottom edge of one app before dragging it up to get to the App Switcher screen. Now, you can see the other Split View apps. From here, you can either select an app to switch to it or swipe up on an app to close it and remove it from Split View.
Select an app to switch to it in Split View mode.
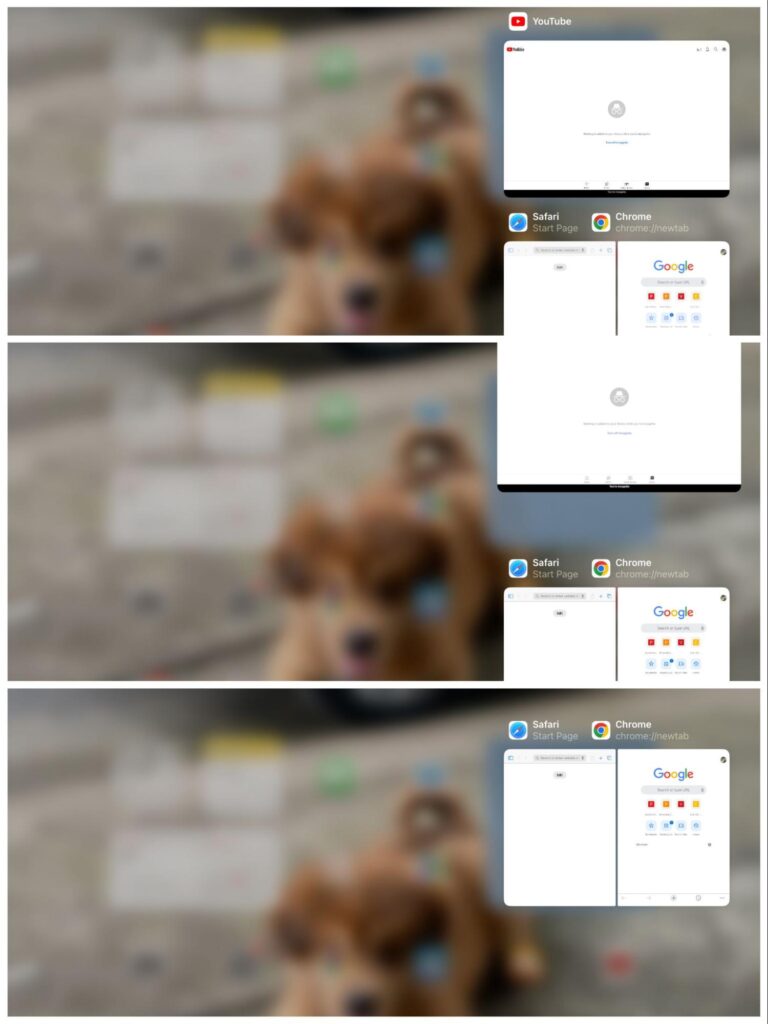
Swipe up on an app to close it and remove it from Split View.
Adjust Slide Over
- Move the Slide Over app by dragging the Multitasking button left or right.
- Convert a Slide Over app into a Split View app by tapping the Multitasking icon before pressing the Split View icon. Alternatively, press and hold the Multitasking icon before dragging the app to the right or left edge of the screen.
- Hide a Slide Over app by pressing and holding the Multitasking icon and moving the app out of the screen.
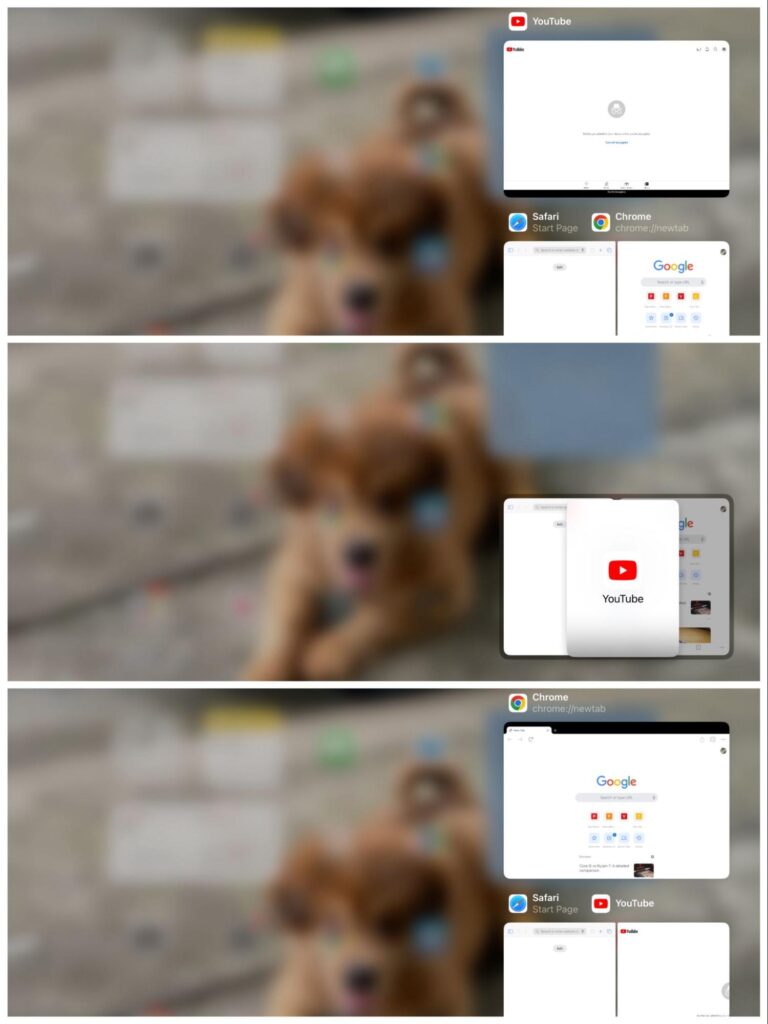
Open Up to Three Apps at Once
Why only have two apps open when you can have three instead? Follow my instructions below to open three apps in Split View.
Step 1: Open two apps in Split View mode.
Step 2: Swipe up from the bottom of your screen to reveal the Dock.
Step 3: Tap and drag the third app out of the Dock and release it in the middle of the screen to open it in Slide Over mode above the two previous Split View apps.
Text Editing Made Easy
Let’s be honest. Most people find typing on an iPad harder than typing on a laptop simply because you don’t have a mouse to highlight, select, copy, and paste text.
While you can connect an external keyboard and mouse to your iPad, there’s an easier way to quickly edit text without using any external devices.
If, like me, you spend your whole day writing, then this section will be an absolute game-changer for you.
Let’s get typing!
1. Select Text
Selecting text without a mouse can be a time-consuming task, that is if you don’t know these nifty selection tips.
I’ll cover some basic text selection methods before moving on to a more advanced method that uses one of your iPad’s hidden features.
Method #1: Basic Selection Methods
- Select a word by double-tapping it with one finger.
- Select a paragraph by triple-tapping it with one finger.
- Select a block of text by double-tapping and holding the first word with one finger before dragging the highlight to the last word. You can drag the highlight both vertically and horizontally.
Method #2: Turn the Onscreen Keyboard Into a Trackpad
Step 1: Tap and hold the Spacebar using one finger until the keyboard turns light gray.

Step 2: Adjust the insertion point by dragging the keyboard around the screen.
Step 3: Keep one finger on the keyboard, and use a second finger to press and hold the keyboard. Move your first finger around the keyboard to adjust the selection highlight.

2. Edit Text
Editing text takes long enough on a laptop, but using your iPad keyboard can slow down this process dramatically. Luckily, there are a few quick commands that can make adjusting text an absolute breeze.
- Cut text by selecting Cut or pinching the screen twice with three fingers.
- Copy text by tapping Copy or pinching the screen once with three fingers.
- Paste text by selecting Paste or spreading three fingers open.
- Redo an action by swiping right with three fingers.
- Undo an action by swiping left or double-tapping the screen with three fingers.

Are you tired of pressing the Home button and scrolling through your apps to find the right one? I know I am.
This process is unnecessarily time-consuming, and when you’re in a high-stakes meeting you need to be able to open apps in a few seconds.
1. Transition Shortcuts
Move in and out of apps and take screenshots/quick notes by following these easy-as-pie transition shortcuts.
- Switch apps by swiping left or right using four or five fingers.
- Go home by pinching the screen with four or five fingers.
- Open the App Switcher by pinching the screen and pausing with four or five fingers.
- Take a screenshot by swiping one finger from the left corner of the screen.
- Take a quick note by swiping one finger from the right corner of the screen.
2. Punctuation and Symbols
Nothing is more annoying than repeatedly tapping the Symbol icon to reveal the Symbol keyboard. Tap it once too many times, and you have to go through the keyboard cycle all over again. Now you can give your fingers a rest with this quick trick.
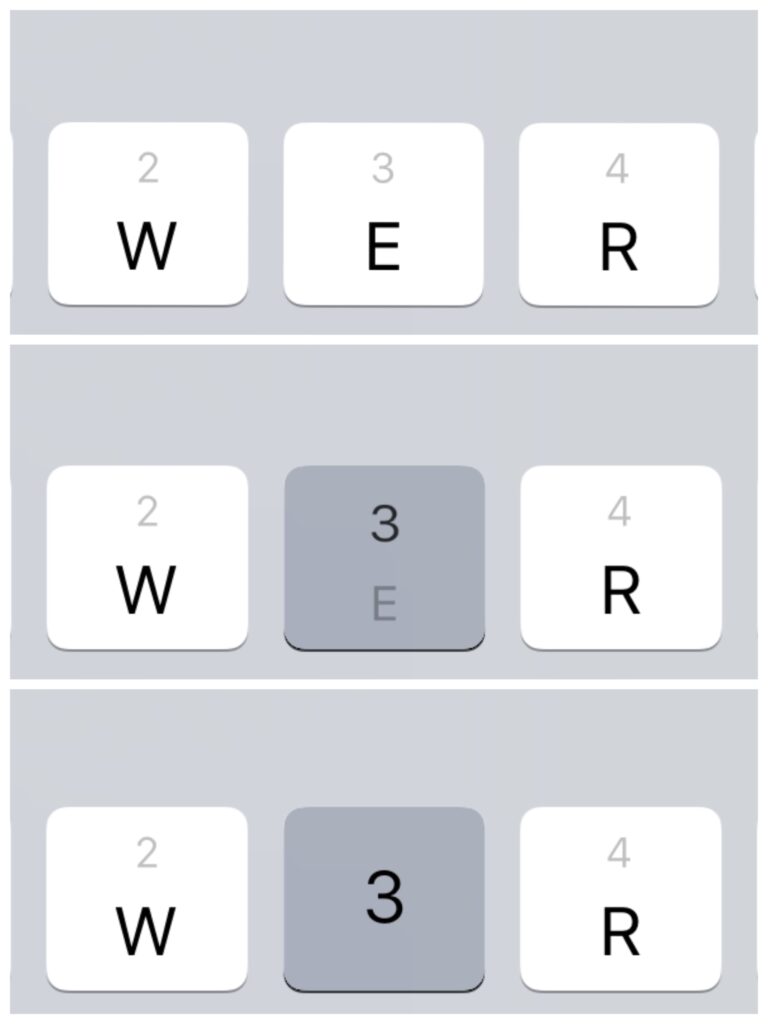
Instantly type punctuation, symbols, and numbers by pressing and swiping down on individual keys.
For instance, tapping the “Q” key will type a “Q,” but swiping down on the same key will type a “1” since “Q” is the first letter in the keyboard. So, swiping down on “W” would produce a “2,” the “E” would type a “3,” and so on.
Wrapping Things Up
iPads are for get-it-done professionals who waste no time dilly-dallying. Now, with these simple tips and tricks, you too can be the ultra-productive person you always dreamed of being. No more fumbling about with your iPad and tapping the screen a million times just to copy and paste text.
These simple shortcuts will help keep your home screen organized and any personal apps private all while streamlining your workflow so you never miss a beat when your boss asks you to pull something up.
A few of these tips may take some time to integrate into your workday. But, once you have them down, they’ll be second nature to you!
Just remember to enable any necessary settings to use these features or else they won’t appear on-screen no matter how many times you tap and pinch it.
Have you used any of these iPad tricks and shortcuts before? Did we miss any tips that helped boost your productivity?
Let us know in the comments below!

Yesenia Achlim is a technical copywriter and editor with a focus on AV equipment. She aims to break down complicated topics and make technology accessible, no matter your technical expertise. When she’s not teaching you how to replace a projector lamp, you can find her reading and baking.