
How to Make Google Slides Automatically Transition in 2 Steps
- Step 1: Select and customize transitions for individual slides or apply a single transition to all slides, adjusting style and speed.
- Step 2: During a live presentation, enable automatic transitions using the Auto-Play feature and set the desired time interval.
- For published presentations, use the Auto-advance slides option to set transition timing, with additional settings for automatic-start, loop, and sharing via a link.
In this article, I’ll show you two simple steps to enable automatic transitions in your Google Slides presentations.
Let’s get started!
Quick Navigation
Step 1: Customizing Transitions for Each Slide
The first thing you will have to do is pick one of the seven transition styles and apply them to your slide. This is where you get to have a little fun adding interesting transitions to your project.
Follow the steps below on exactly how to achieve this:
Step 1: You will obviously need slides to apply the transitions to, so the first step is to create your Google Slides.

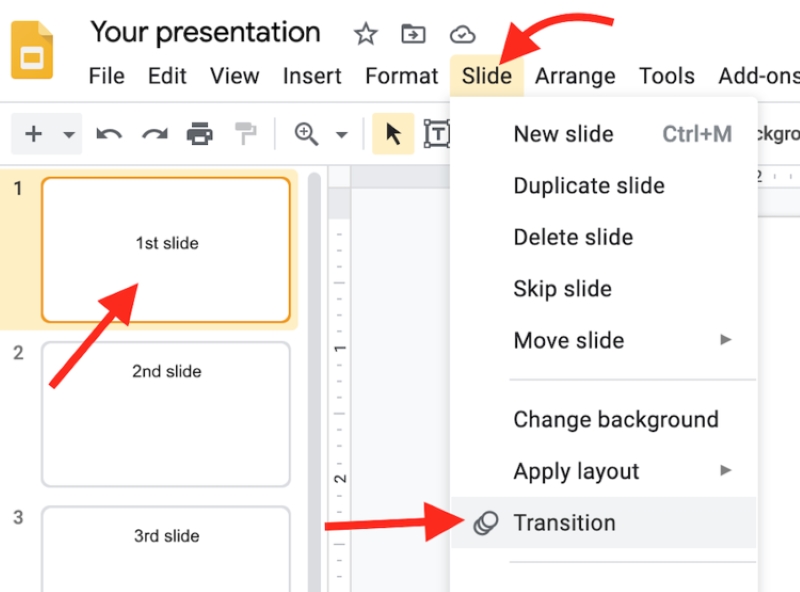
Step 2: Next, decide the slide you want to work on and select it, click the tab labeled Slide at the top, and choose Transition.
Step 3: Select the dropdown menu labeled None. A list of transition types will appear in a dropdown list, these will include: Dissolve, Fade, Slide from Right, Slide from Left, Flip, Cube, and Gallery.
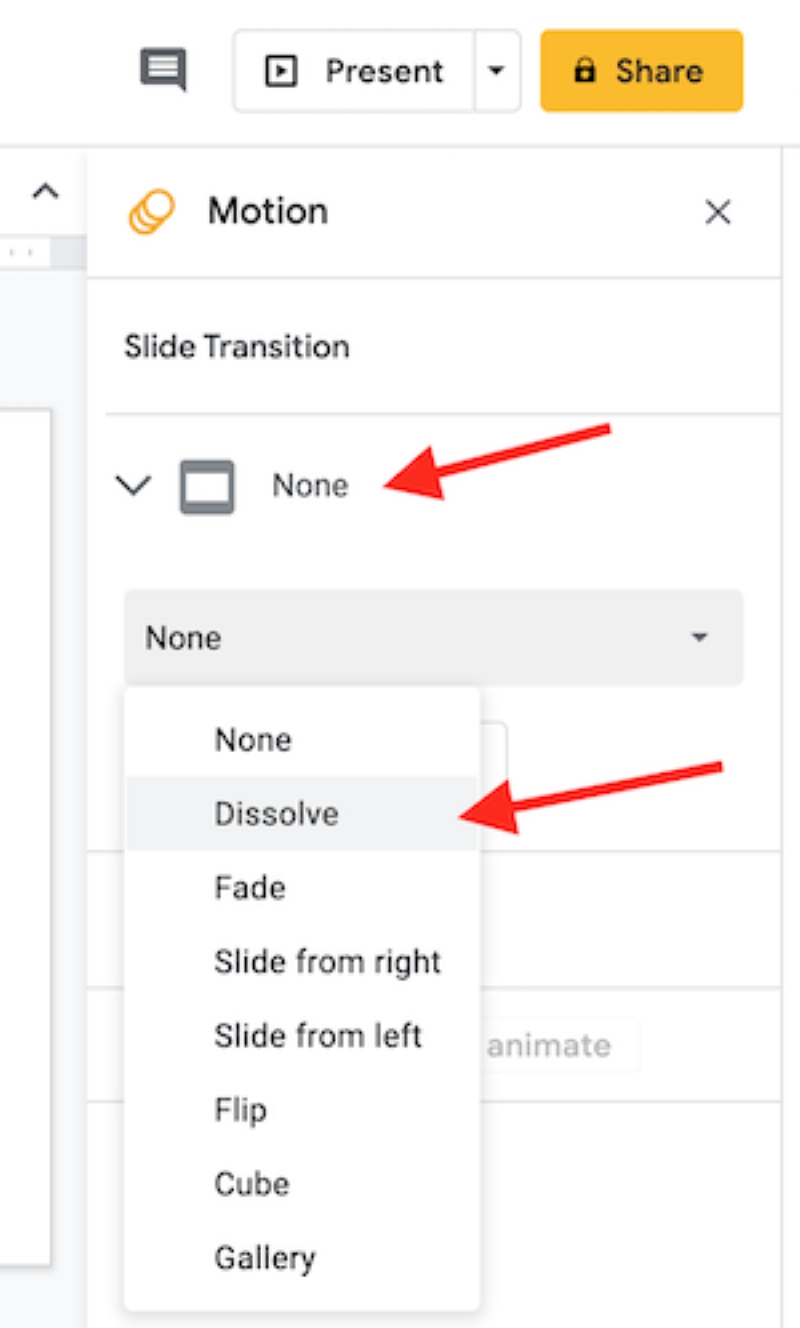
Step 4: Select the transition type that you find suits your presentation the best.
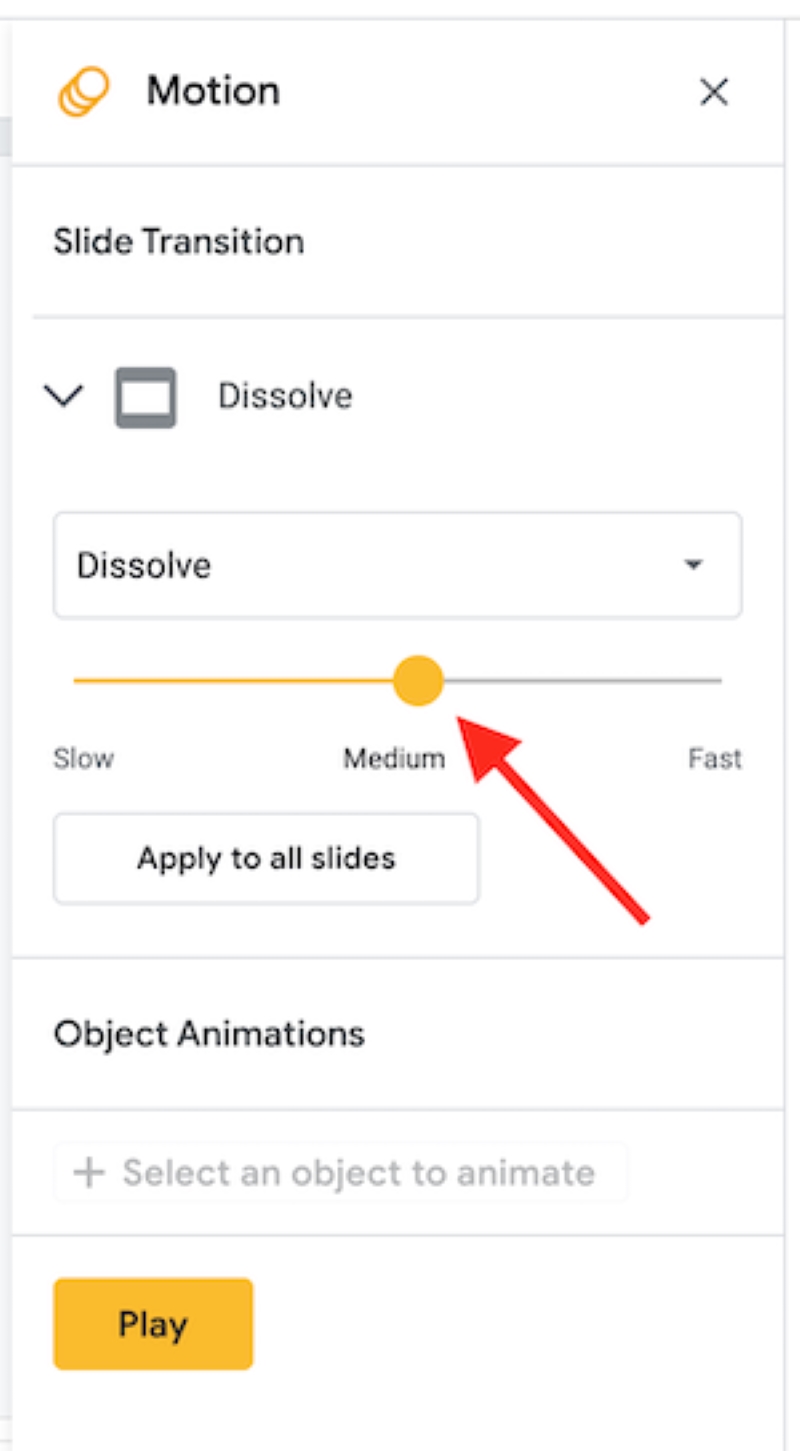
Step 5: You will now be presented with a slider with different speed settings, these range between Slow, Medium, and Fast. Drag the slider from left to right until you land on the ideal speed.
You have now assigned a specific transition to your Google Slide, if you want to have different transitions for each of your slides then simply repeat this step with every slide.
During this process, you will notice a button that reads “Apply to all slides”. If you’d rather have all of your slides use the exact same transition, all you have to do is select your desired style and click this button.
If you are manually selecting each slide individually, make sure not to hit this button by mistake, as it will apply to every slide and you will have to start the process from the beginning.
Step 2: Enabling Automatic Slide Transitions
While this step is as easy as the previous one, there are two methods in which this can be completed. We will review both now:
Method 1 – Use the Auto-Play Feature During Your Presentation
Step 1: Look in the Google Slides ribbon menu, in the top-right corner you should see a button titled “Slideshow”, select it to begin the presentation. You can also press Ctrl + F5 to achieve the same result.
![]()
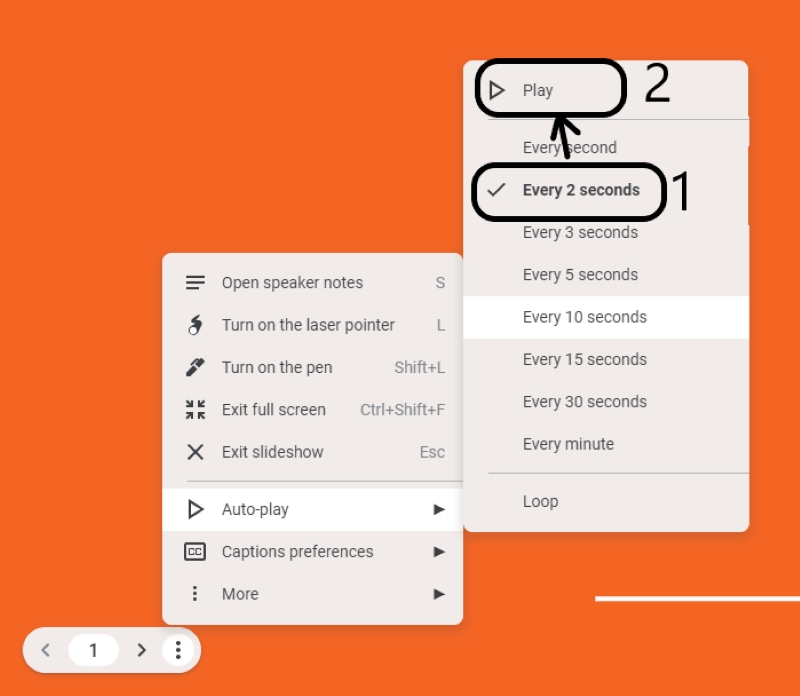
Step 2: Place your cursor in the bottom-left corner of your screen, and a small menu should appear.

Step 3: Press the three-dot icon and then select Auto-Play.
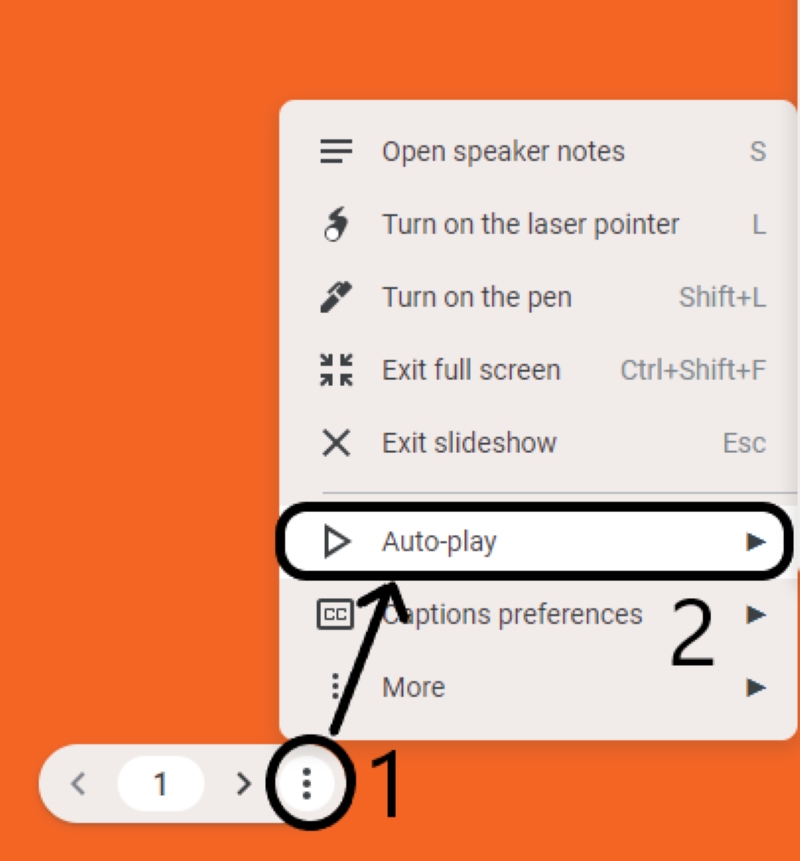
Step 4: You will now be asked to select the time which will elapse between each slide, this will range from every second to every minute. Select your desired time and press play to start your presentation.
If you would like your presentation to automatically restart after reaching the final slide, select Loop, which will also be located in the Auto-Play popup list.
Method 2 – Advance Slides Automatically in a Published Presentation
This method will require you to choose the Auto-advance slides option when you publish your Google Slides file.
Keep in mind, when you choose to publish your presentation you will make it available to anyone who has the link.
Follow the steps below:
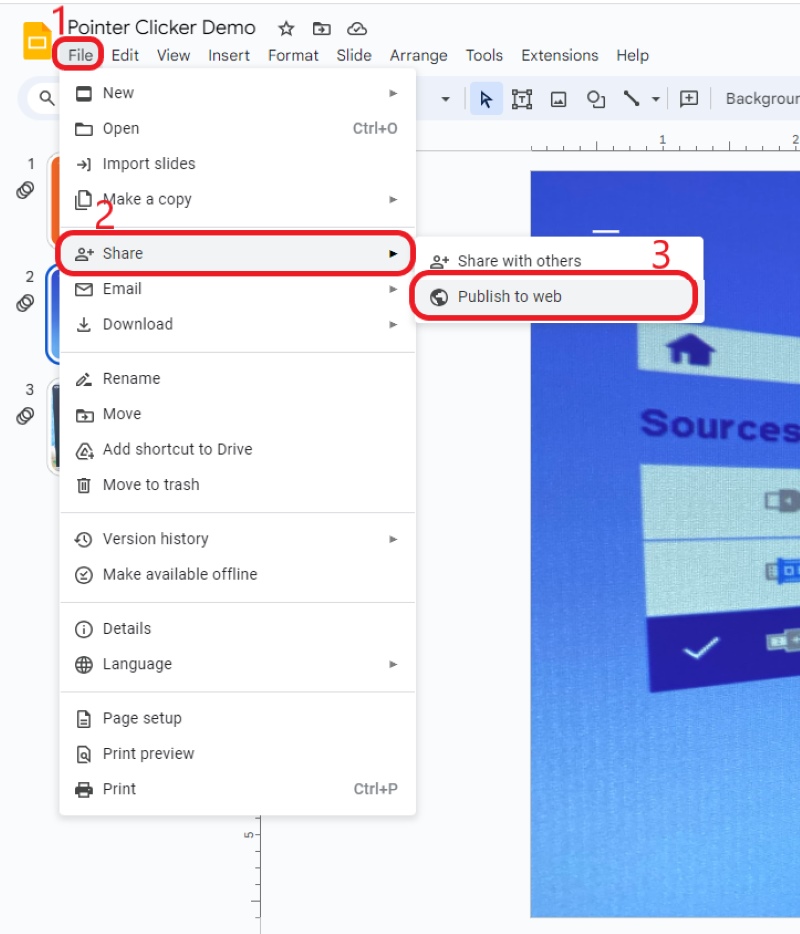
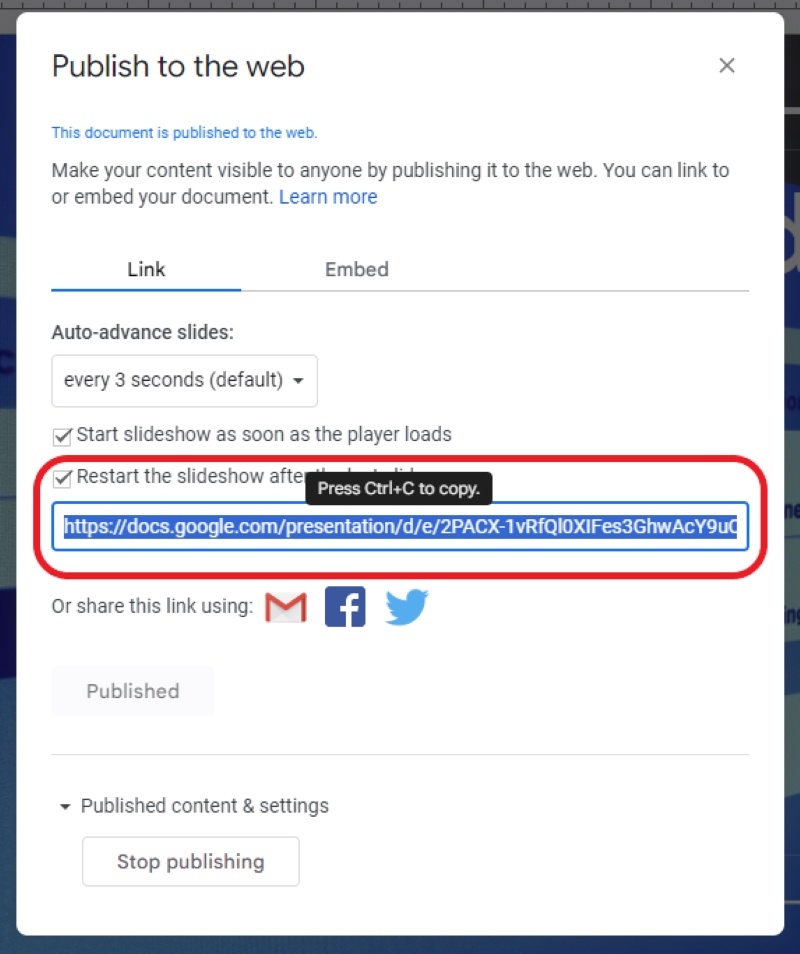
Step 1: Click on the File dropdown menu in the top left-hand corner, select Share, and then Publish to Web.
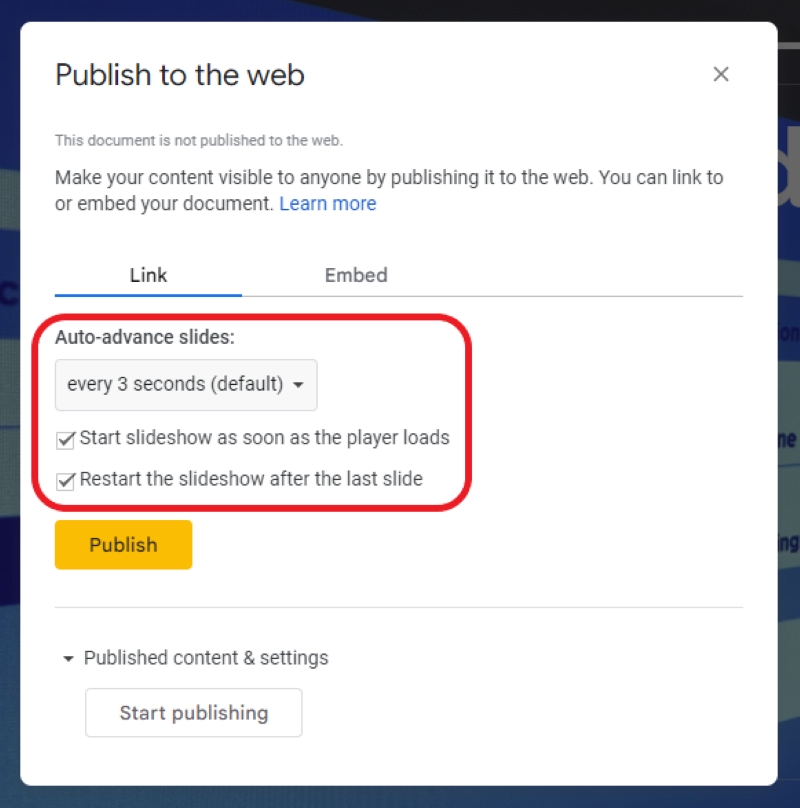
Step 2: Under the Link tab, you will have a section labeled Auto-advance slides. Here you will have to select the duration of time for the pause between slides.
During this step, you also have two other important options you might want to take advantage of.
The first one is “Start slideshow as soon as the player loads”, this will automatically start your presentation once opened.
The second is “Restart the slideshow after the last slide”. This works the same as the Loop function we reviewed earlier in the article. Select this feature if you want your slideshow to restart once it’s finished.
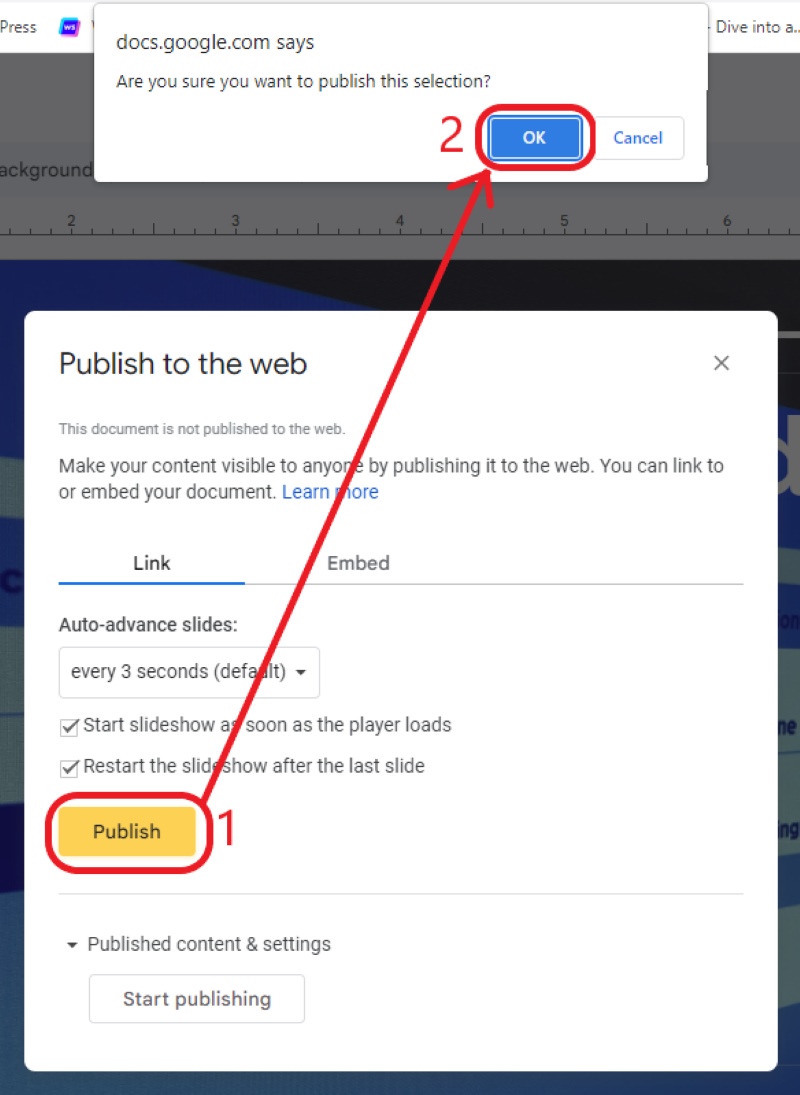
Step 3: Next you will want to click Publish, then click OK on the notification box to publish your Google Slides file.
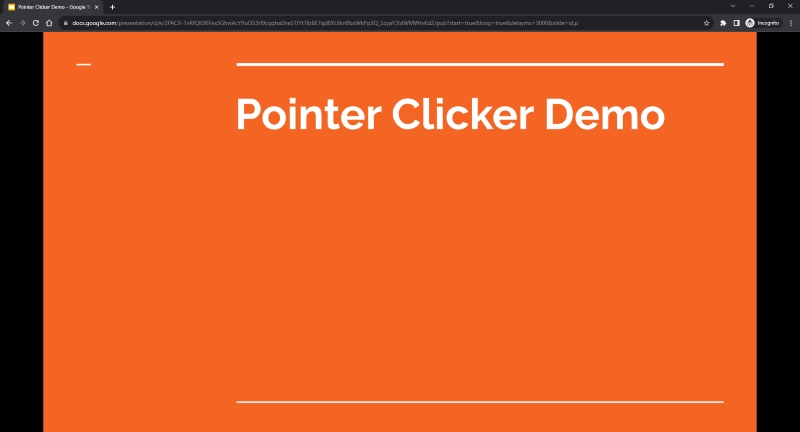
You will be provided a link which you can copy to your clipboard and send to anyone you would like to share your presentation with.
Anyone who accesses this link will be brought directly to your project and it should look something similar to the example below.
It may be necessary to press the “Play” button in order to start the presentation, but after that, your slides should change on their own automatically, in relation to your presets.
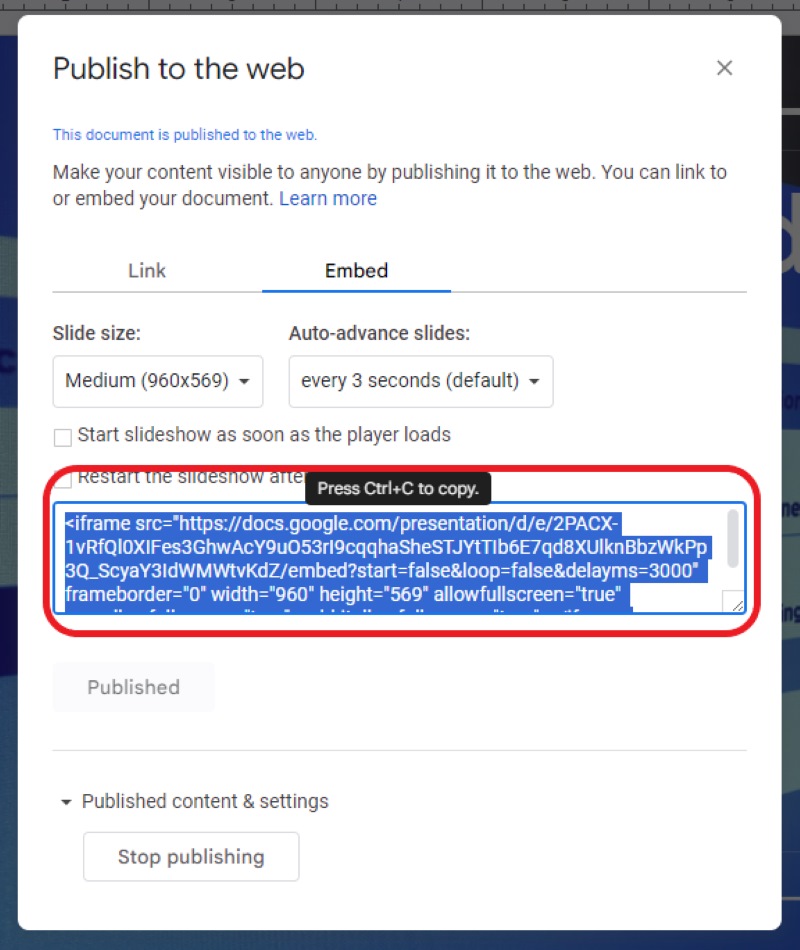
If you were hoping to get the presentation’s custom HTML code to embed the slideshow into a website, you can find a link to this under the “Embed” tab.
Conclusion
Once you have completed your slideshow and you are ready to add a little extra professionalism and jazz to the presentation, having your slides transition automatically is the next viable step.
In this article, we covered how easy it is to add this feature to your project, in two simple steps!
You will impress both your friends and coworkers and soon enough they will be asking you for help with their projects as well.
Do you know of any other methods that we didn’t cover in this article? Any faster methods? Please leave how you accomplished this in the comments below.

Jon Huber is an editor and technical writer who has been a freelancer since 2020. Since the beginning of his writing career, he has consistently written online articles in the tech, sports, and recreation genres. Recently, he has concentrated on scriptwriting for cartoons and puppet shows.
i want the first few slides to auto transition and loop but once I am ready to begin, I want to transition the slides individually. Is this possible?