
Optoma Projector Upside Down Image? Here’s How to Flip Your Projected Screen!

In this guide, I will walk you through the simple steps to flip images on your Optoma projector, ensuring a seamless viewing experience.
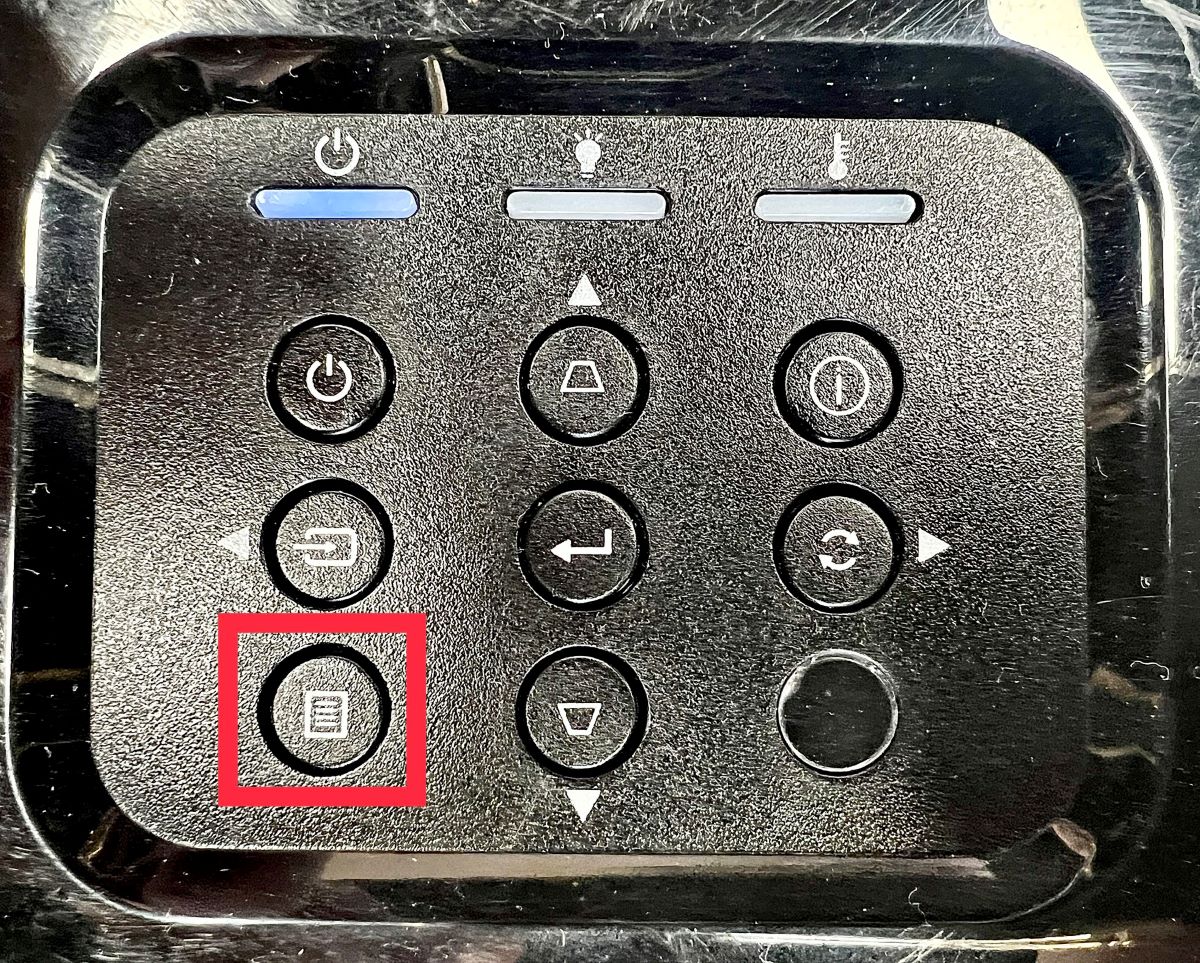
Step 1: Press the Menu button on the Optoma remote or its panel.
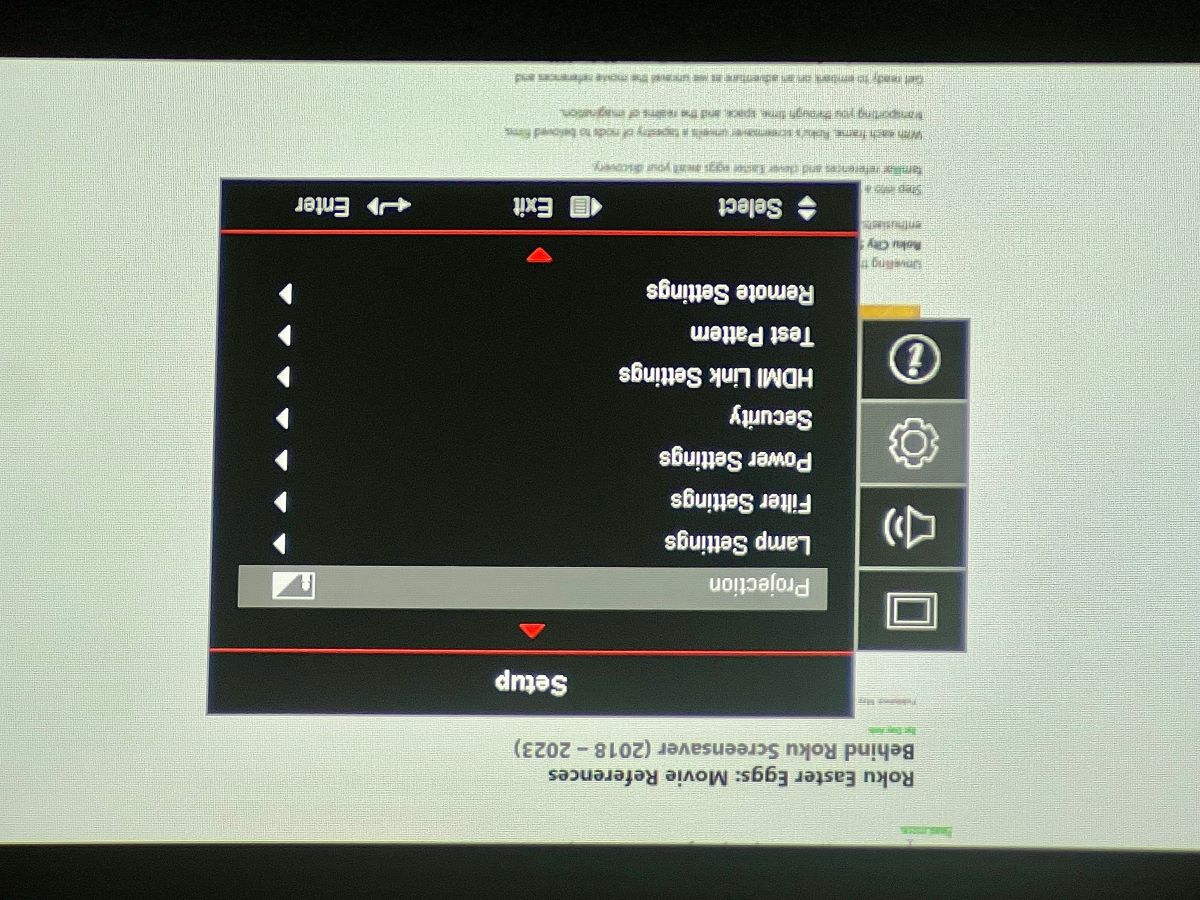
Step 2: Look for the Setup tab and then choose Projection.
Step 3: Select the first projection mode (front-ceiling projection), which is shown in the image below.
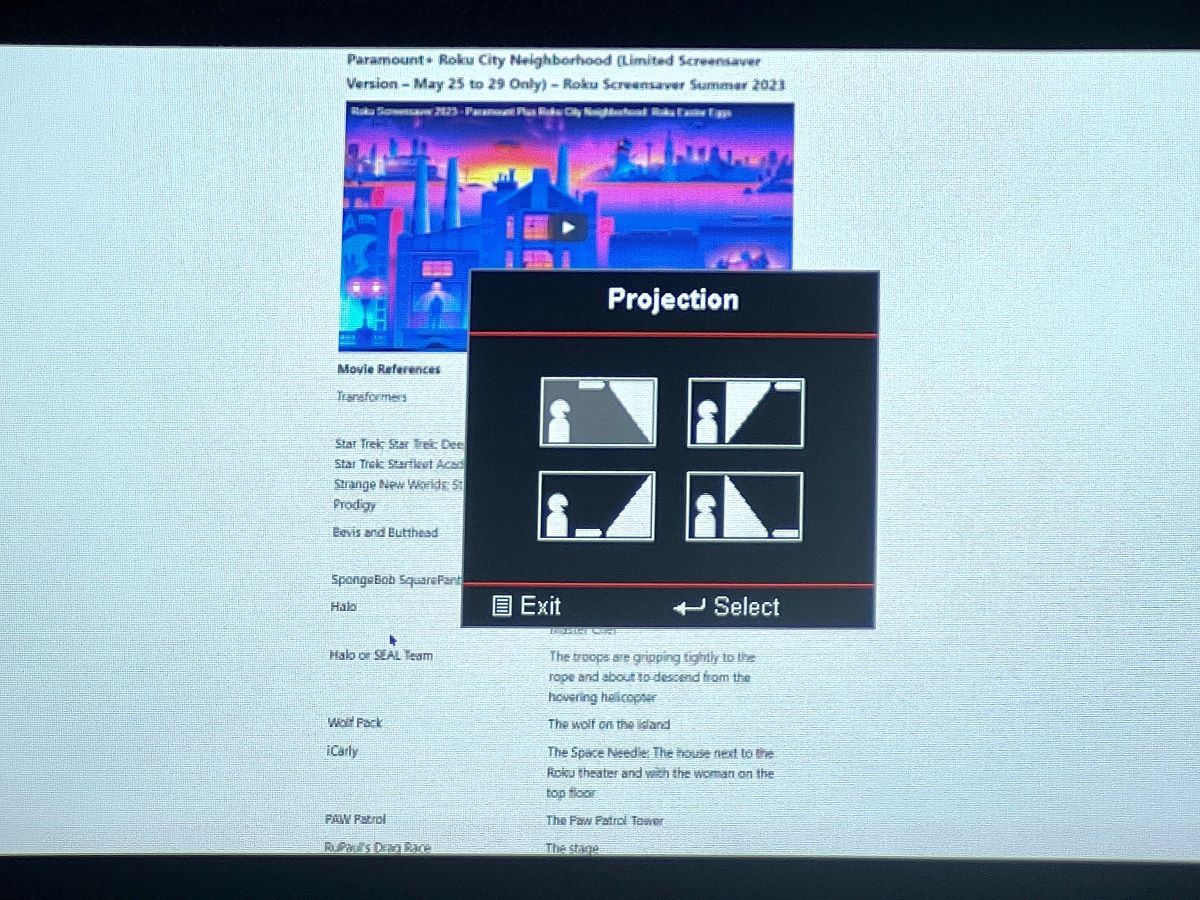
If you continue to experience issues with the projected image, you may want to try selecting the other three projection modes, which involve setting up your Optoma projector in different ways.
Quick Navigation
Other 3 Projection Modes
Depending on your specific setup, there are other projection modes available for different installation scenarios.
If your projector is placed in a rear-ceiling position or on a table, you can choose the appropriate mode from the following options:
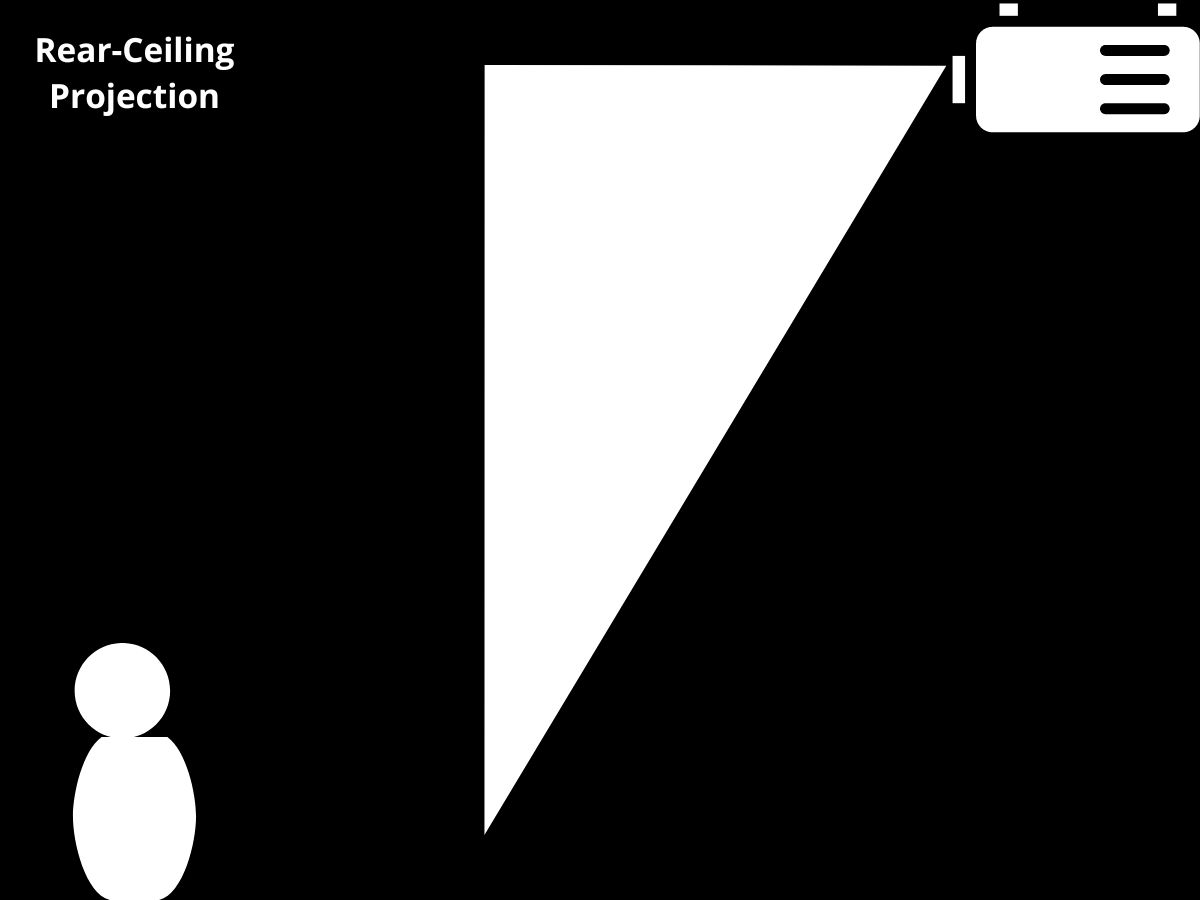
- Rear-Ceiling Projection (Mode 2): This mode is ideal for those who prefer placing the projector behind the screen instead of in front of the audience. It offers a tidier setup, eliminates shadow interference, and improves the projected image quality.
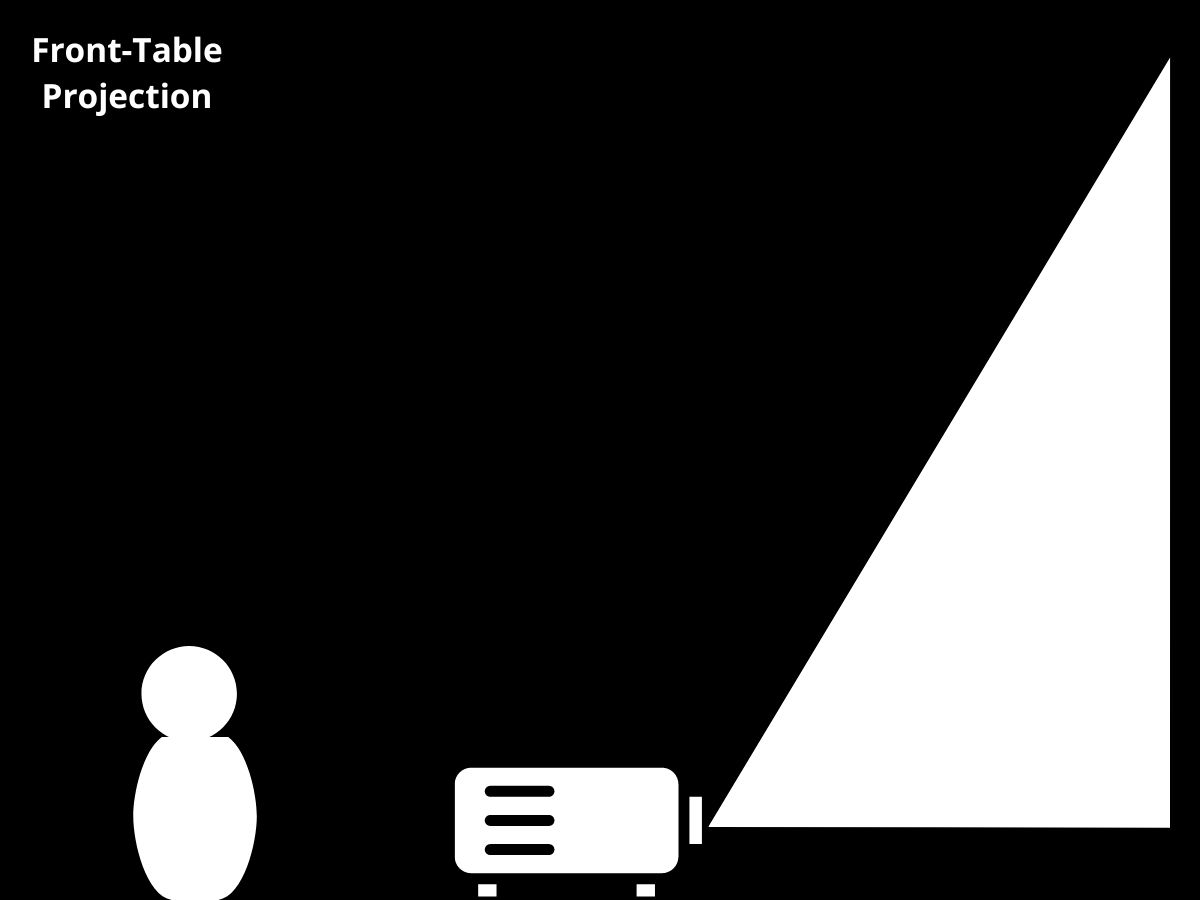
- Front-Table Projection (Mode 3): If your projector is positioned on a table in front of the screen, this mode is suitable for you. It ensures proper image orientation and provides an optimal viewing experience.
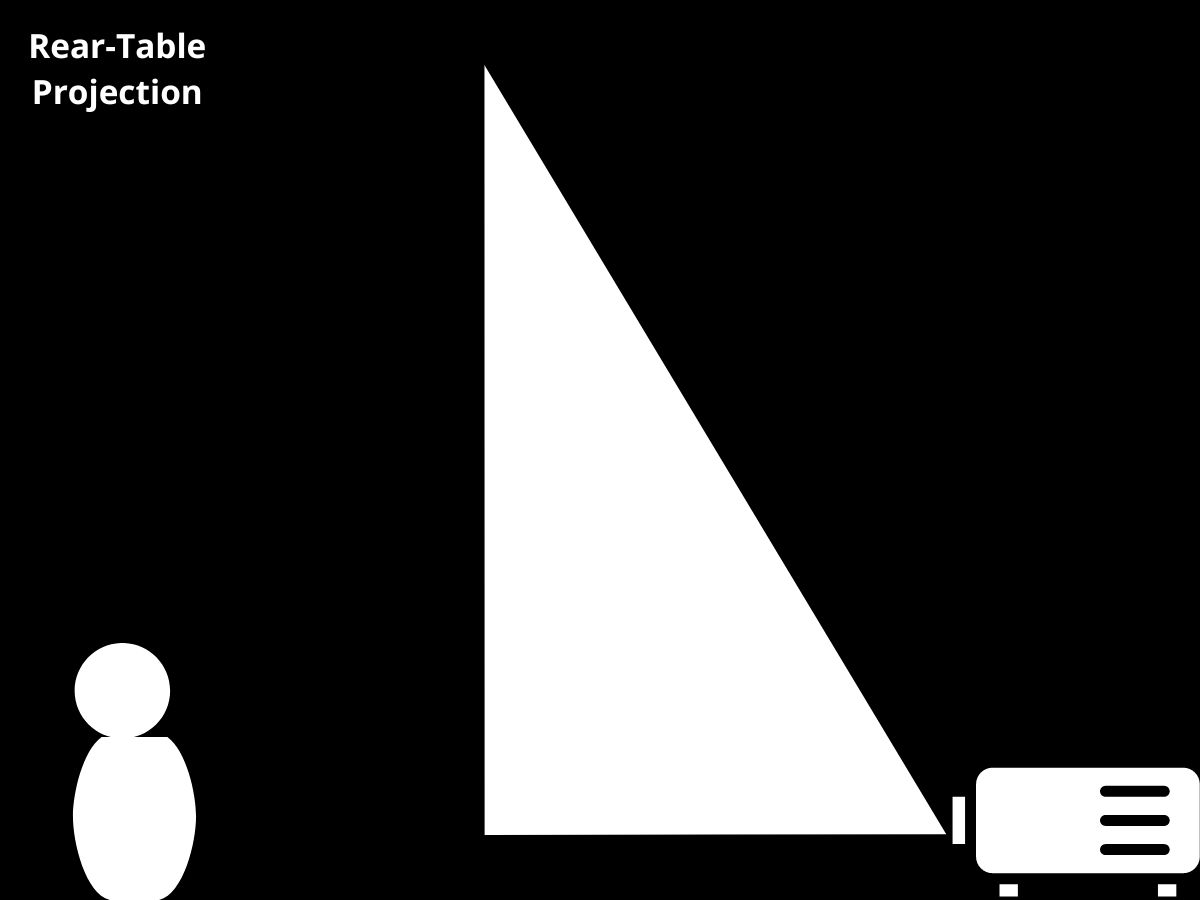
- Rear-Table Projection (Mode 4): Similar to rear-ceiling projection, this mode is intended for placing the projector behind the screen but on a table instead. It offers the advantages of rear projection while accommodating a different setup.
Use Cases for Flipping Images on Your Projector
Front Ceiling Projection
Front ceiling projection is often the preferred setup for any projector. Whether the unit is mounted or not, front projection reflects light off the screen, offering better visuals.
Front ceiling projection clears up valuable floor space, allowing for higher audience capacity. This type of setup is an excellent option for large venues.
With a simple tabletop or front projection, anything between the projector and the screen can disrupt the display or projection image.
The off chance of people standing in front of the projector is less likely with a front ceiling projection setup. However, be mindful of other objects hanging from the ceiling, such as chandeliers.
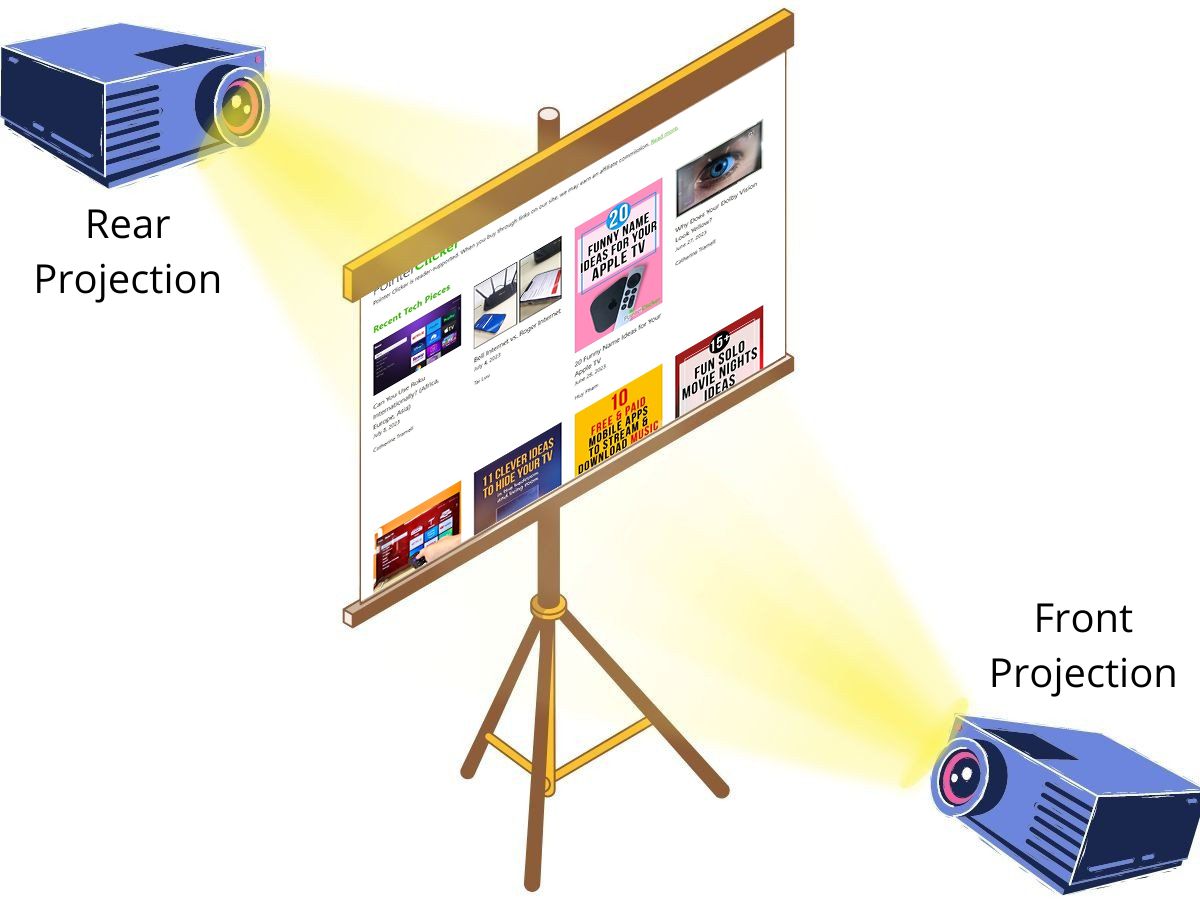
Rear Projection
In some cases, you may prefer to place the projector behind the screen instead of behind or among the audience. It is called a rear-projection setup.
It requires a dedicated space for the projector, so it is better suited for larger venues. However, it allows for a tidier and more professional-looking space as the projector is hidden from the audience.
It also eliminates the chances of people’s shadows walking in front of the projector.
It allows ambient light, such as sunlight or moonlight, to reach the back of the screen, improving the projected image on the front. A rear-projection setup places the projector closer to the screen, requiring fewer lumens or the amount of brightness of a lightbulb, resulting in energy savings.
Rear projection is often preferred by event planners and organizers because it reduces noise levels. Projector fans can create a sound that can be quite distracting.
To set up your Optoma projector for rear projection, follow the steps laid out above, and under Projection, choose the icon with the eyeball and the mounted projector facing each other.
Conclusion
Out of the box, an Optoma projector’s orientation setting is front-projection. If you plan to use it this way, you won’t need to update or change any settings.
However, if you’re planning to mount your projector on the ceiling or position it someplace that doesn’t get in the way of viewers, the tips in this article will help you correctly set up your projector.

Duy Anh is a seasoned technical editor specializing in helping readers troubleshoot TV, projector, and Wi-Fi issues. He’s always been drawn to logical problem-solving. His ability to approach matters from various angles with a neutral mindset enhances his technical expertise.