
How to Show One Screen on a Projector, Another on Your PC: Dual Displays Setup

What To Know
- For Mac users, setting up dual displays is streamlined through Extended Display mode, accessible via System Preferences or keyboard shortcuts (F-keys for older Macs, Command + F1 for newer ones).
- Windows users can utilize Extended Mode through Display settings or a swift shortcut using the Windows key and P key at the same time.
In this guide, I’ll show you how to display one screen on your projector while using a different screen on your PC, whether you’re using a Mac or Windows OS.
Let’s dive in!
Quick Navigation
For Mac Users
As a Mac user, you have a great opportunity to enhance your productivity or make your presentations more dynamic by setting up dual displays.
This means you can show different content on your projector while displaying something else on your computer screen.
This feature is particularly handy for multitasking or when you’re making a presentation.
To achieve this, you’ll need to switch to Extended Display mode, which is different from the usual Mirror Screen mode.
In Mirror Screen mode, both your computer and projector display the same content, but Extended Display mode allows each screen to show different things.
Here’s how to get you started with Extended Display Mode in two simple ways.
1. Accessing Extended Display Mode
Firstly, start by clicking the Apple icon, which is located in the upper left corner of your Mac’s screen.
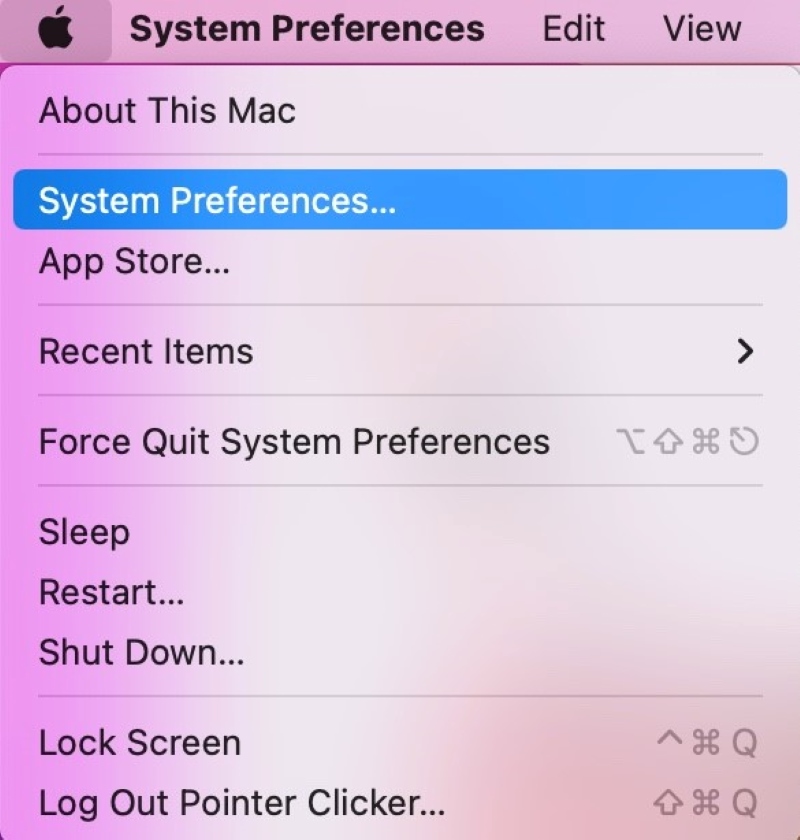
Then, navigate to System Preferences and select the Display option. Here, you will find the settings to manage your screens.
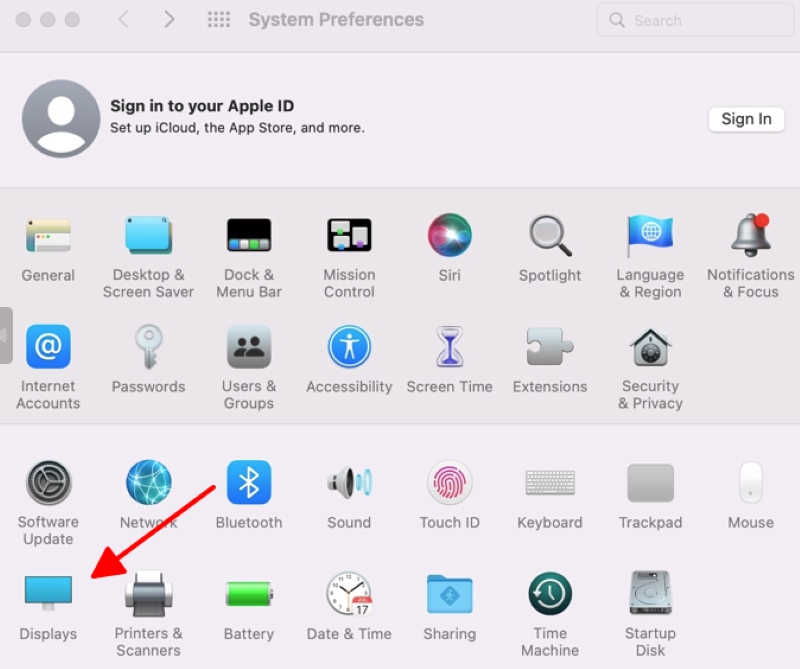
Next, look for the icon that represents your external monitor – in this case, your projector. Double-click on this icon and choose ‘Extend Display‘.
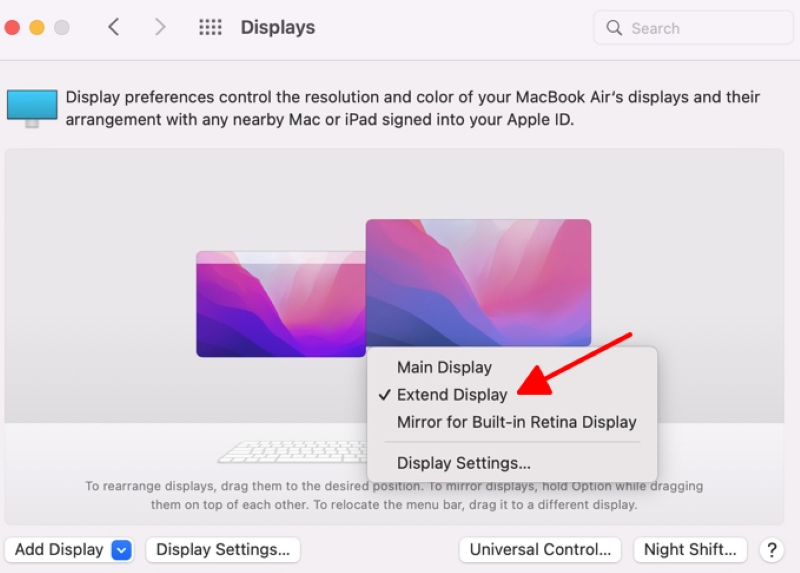
By selecting this option, you’ll turn your projector into a secondary screen.
This allows you to have separate content on each screen, which can be incredibly useful for comparing documents, extending your workspace, or keeping your audience focused on a specific presentation while you manage other content on your computer screen.
2. Using Keyboard Shortcuts
Now, let’s look at how to extend your screen using keyboard shortcuts.
If you’re using an older Mac model, changing display modes is straightforward with the F-keys, specifically F7 or any key below it.
For those with newer Macs, simply pressing Command and F1 simultaneously will do the job.
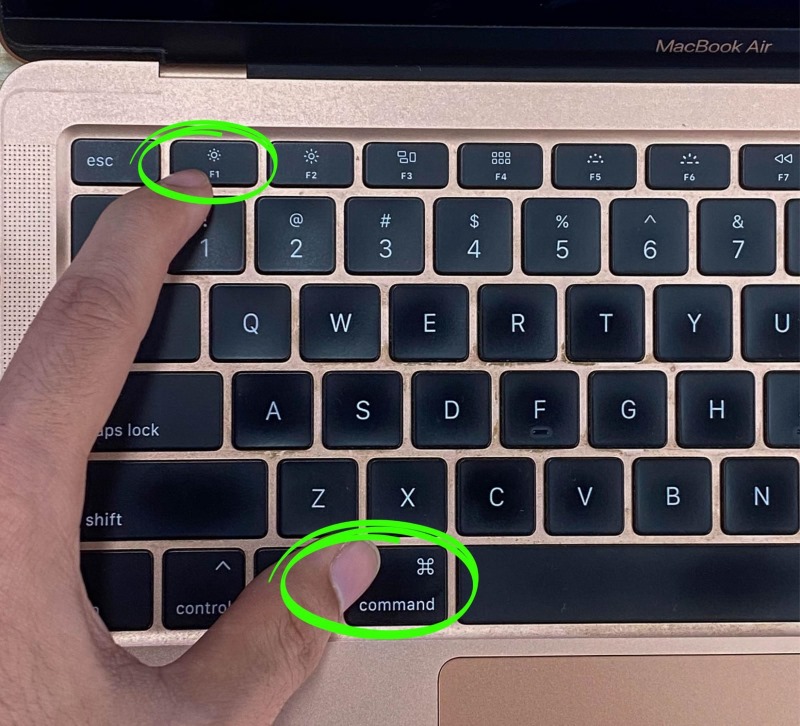
Moreover, you can tailor your display preferences even further by creating a custom shortcut using the Fn key.
This gives you greater flexibility in how you control your screens.
By following these steps, you can efficiently work on your Mac while simultaneously displaying different content on your projector, making activities like presentations much more dynamic and engaging!
For Windows Users
Setting up dual displays on your Windows PC to show different content on your computer and a projector is an easy and exciting process!
Windows offers a feature known as Extended Mode, which effectively turns your setup into a dual-screen workspace.
This can be particularly handy for presentations or multitasking.
There are two main ways to activate Extended Mode, and here’s how you can do it.
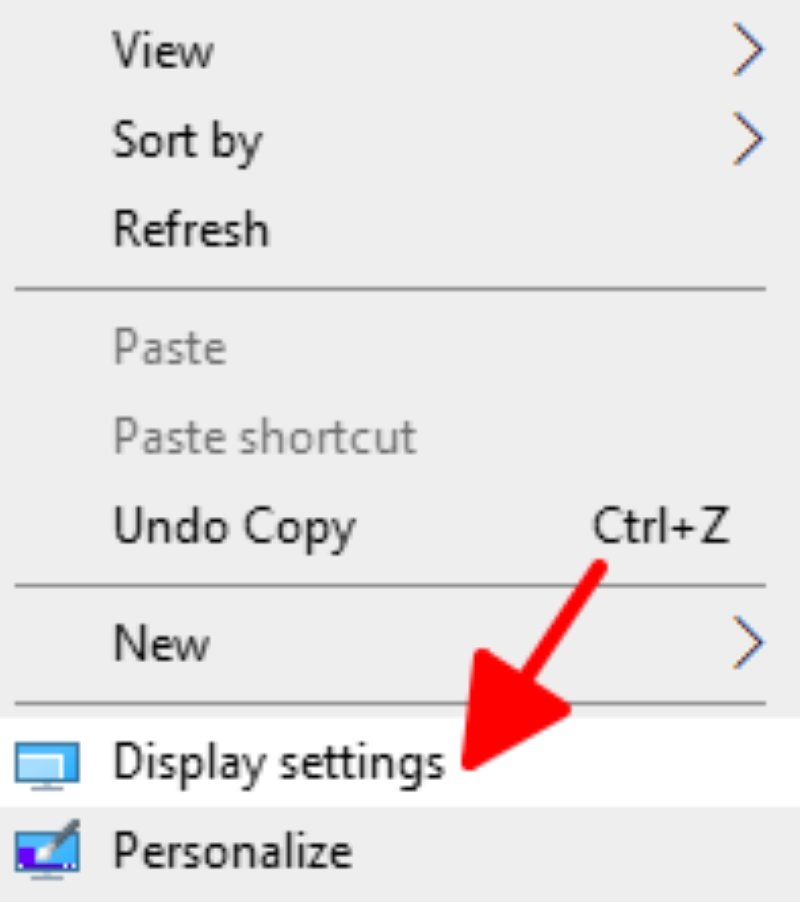
1. Enabling Extended Mode in Display settings
First, you can enable Extended Mode through the Display settings.
Simply right-click on your desktop and select ‘Display settings.’
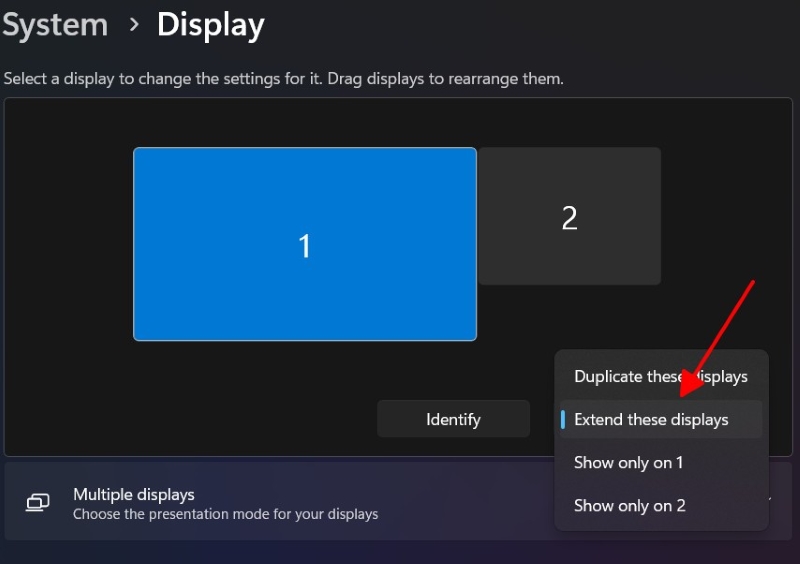
If you’re using Windows 10, navigate to the section labeled ‘Multiple displays.’
Here, you’ll find an option that says ‘Extend these displays.’ Choose this to start using two screens.

For Windows 11 users, the process is very similar. Look for the ‘Extend these displays‘ option in a dropdown menu next to a button marked ‘Identify.’
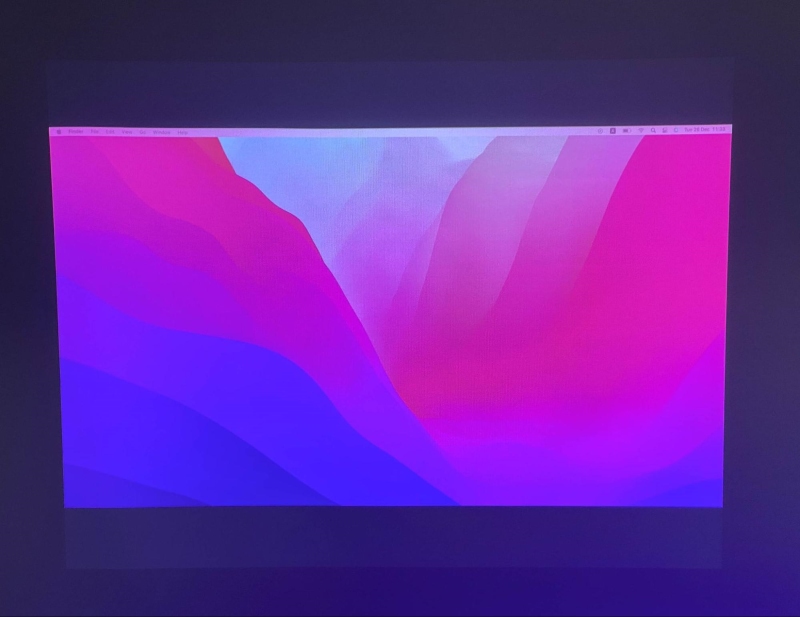
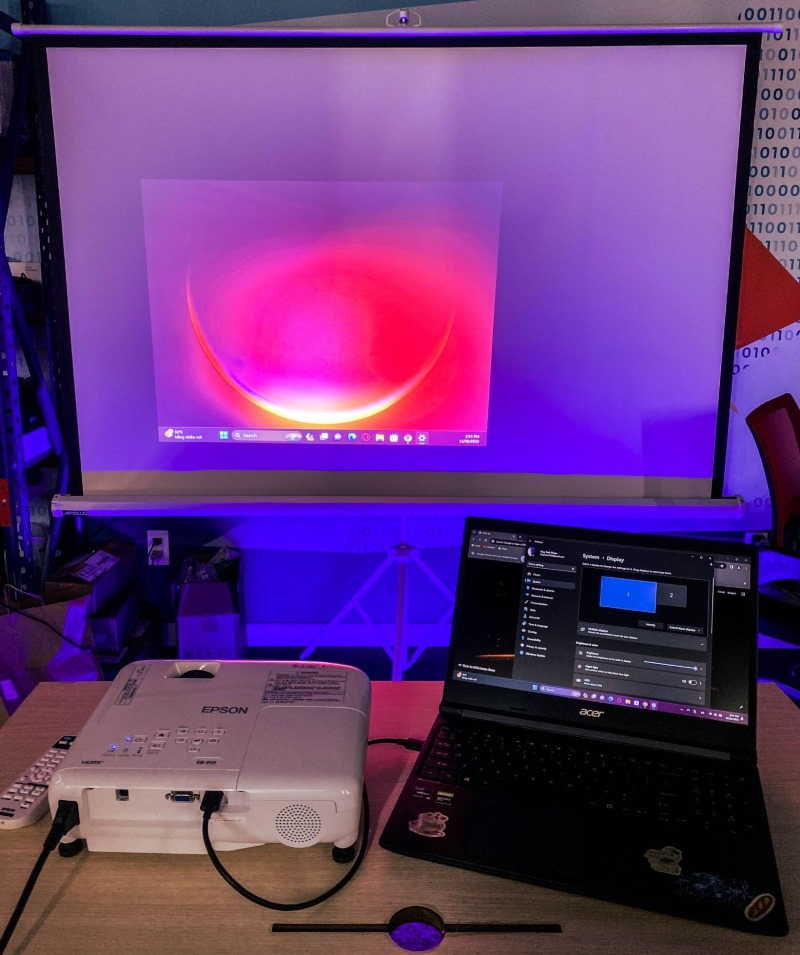
Once you select this, your computer’s wallpaper will appear on the projector screen, indicating that the setup is complete and working correctly.
2. Use Use Shortcut Combinations
Alternatively, there’s a shortcut method that is particularly useful before presentations or when you need to switch display modes quickly.
This involves using a combination of keys on your keyboard.
Simply press the Windows key (the one with the four-pane flag symbol) and the letter ‘P‘ at the same time.
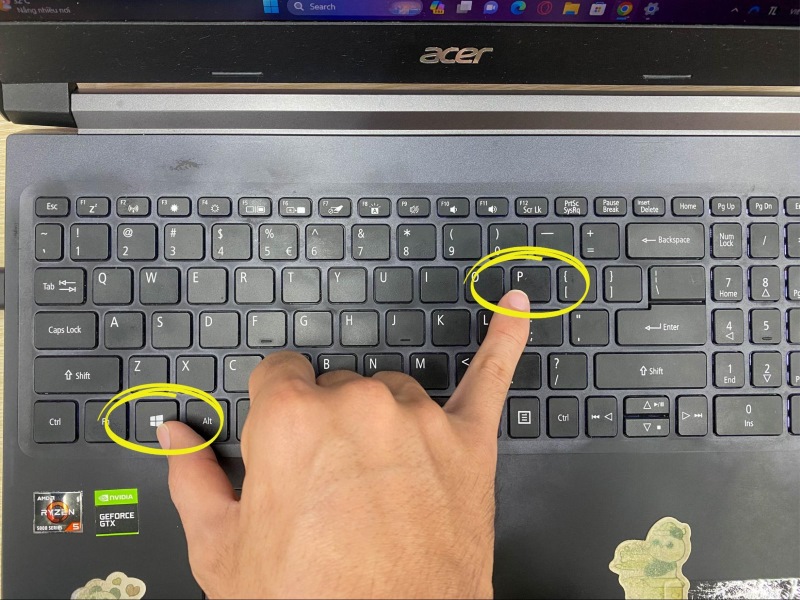
This shortcut enables you to toggle between different screen options swiftly and seamlessly, ensuring your workflow or presentation isn’t disrupted.
By following these simple steps, you can effortlessly set up and manage a dual-display system on your Windows PC, whether for work, school, or personal use.

Meet Vance. He’s a proud dad, a seasoned Electronics Engineer, and an avid tech lover. His proficiency in electronics and troubleshooting skills were instrumental in crafting Pointer Clicker. Vance is passionate about simplifying tech for those who aren’t well-versed in it.