
5 Ways to Connect a Laptop to a Nebula Projector? (macOS & WindowsOS)
")
What To Know
- MacBook users can stream to the Nebula projector using AirPlay after installing a specific app, while Windows laptop users can easily cast content using the Chromecast feature through the Google Chrome browser.
- To ensure the best audio and video quality, both macOS and Windows users are recommended to use an HDMI cable, or an HDMI adapter (USB-C, Mini DisplayPort, VGA, DVI) for laptops lacking an HDMI port, to connect to the Nebula projector.
- Mac users can also streamline the connection process to the Nebula projector by using a streaming device like Roku.
This guide will explore five proven methods to connect your laptop or MacBook to a Nebula projector, complete with easy-to-follow steps and helpful demo images.
Whether you’re aiming for wireless freedom or the reliability of a wired connection, we’ve got you covered.
Let’s get your laptop content up on the big screen right away!
Quick Navigation
1. Utilize AirPlay (for macOS)
Although the Nebula projector doesn’t come with built-in AirPlay support, you can still stream from your MacBook after installing a specific app.
Here’s a simple guide to get you started.
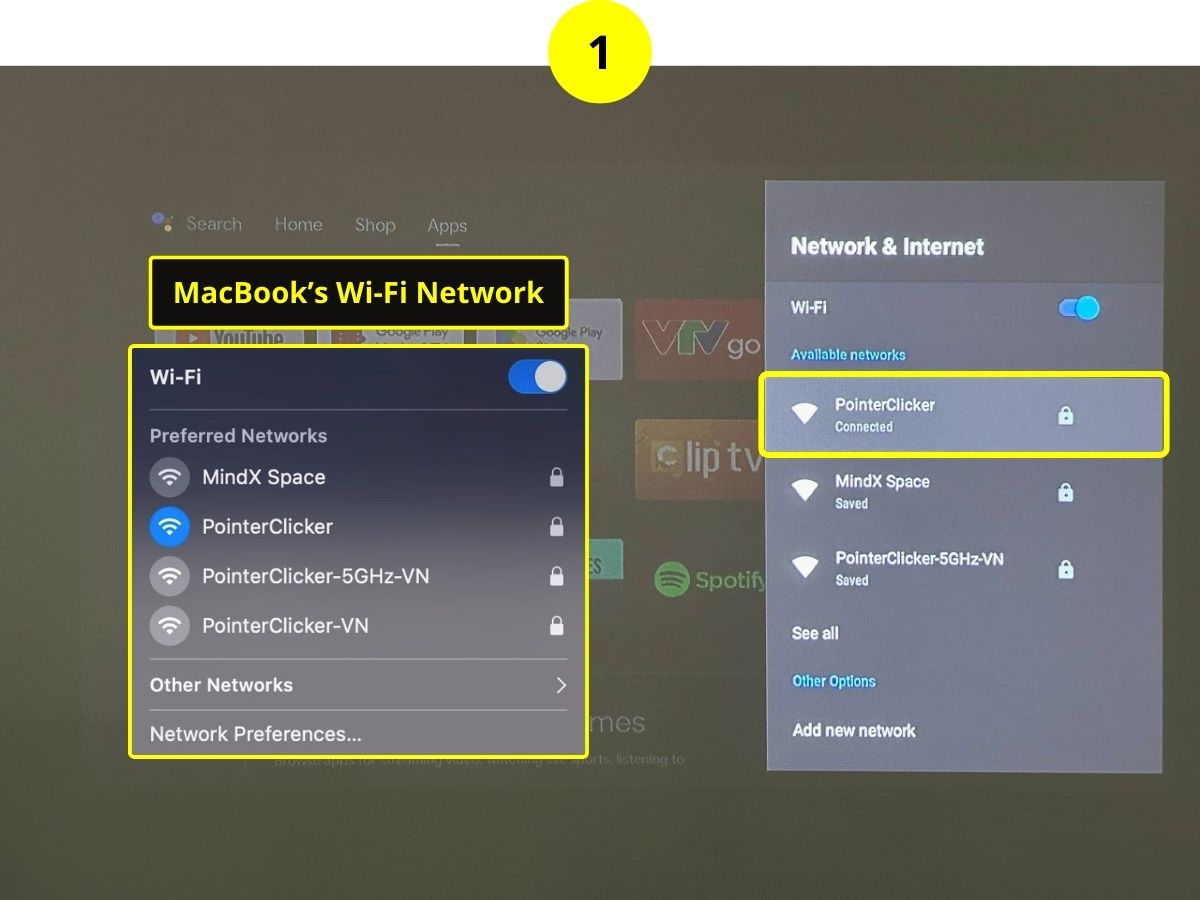
Step 1: Turn on your MacBook and the Nebula projector, making sure both devices are connected to the same Wi-Fi network.
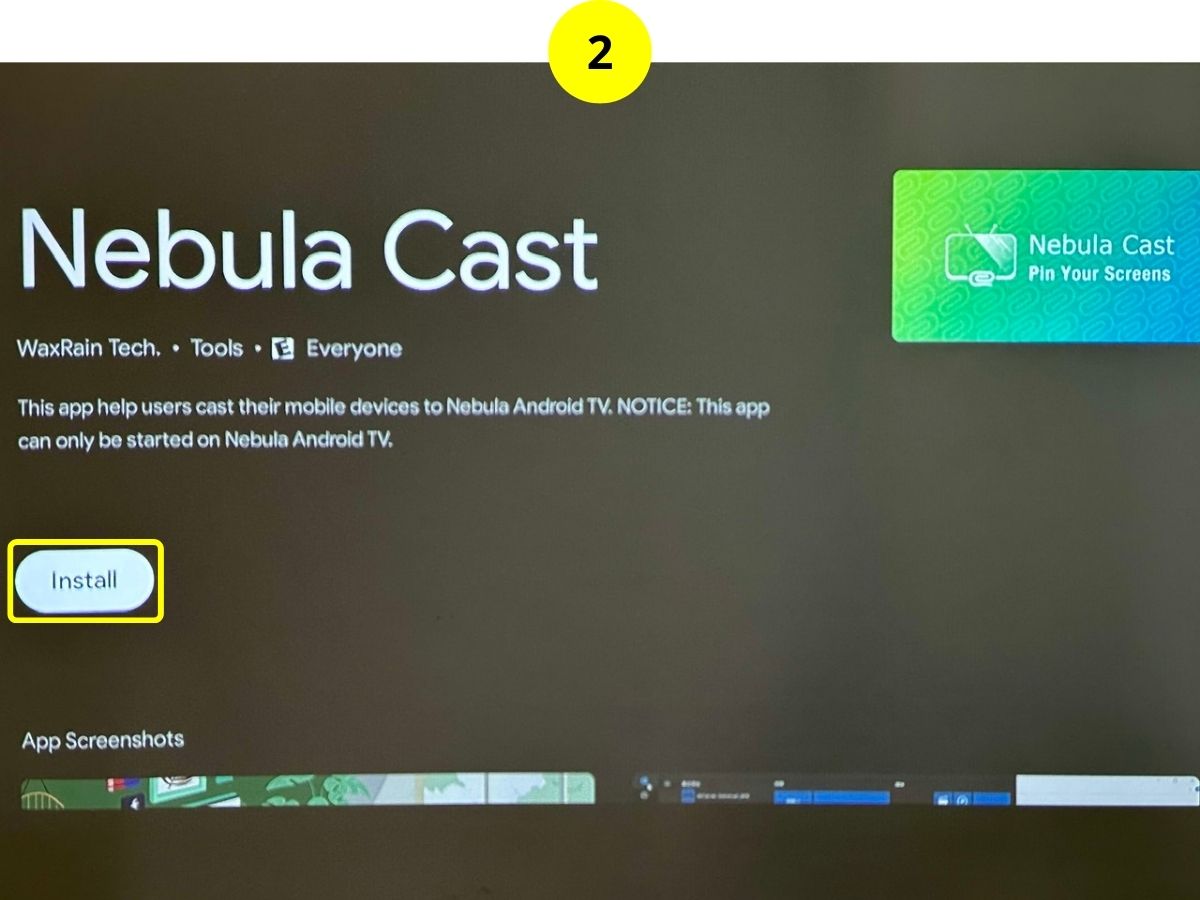
Step 2: On your projector, go to Google Play Store, and download the Nebula Cast app.
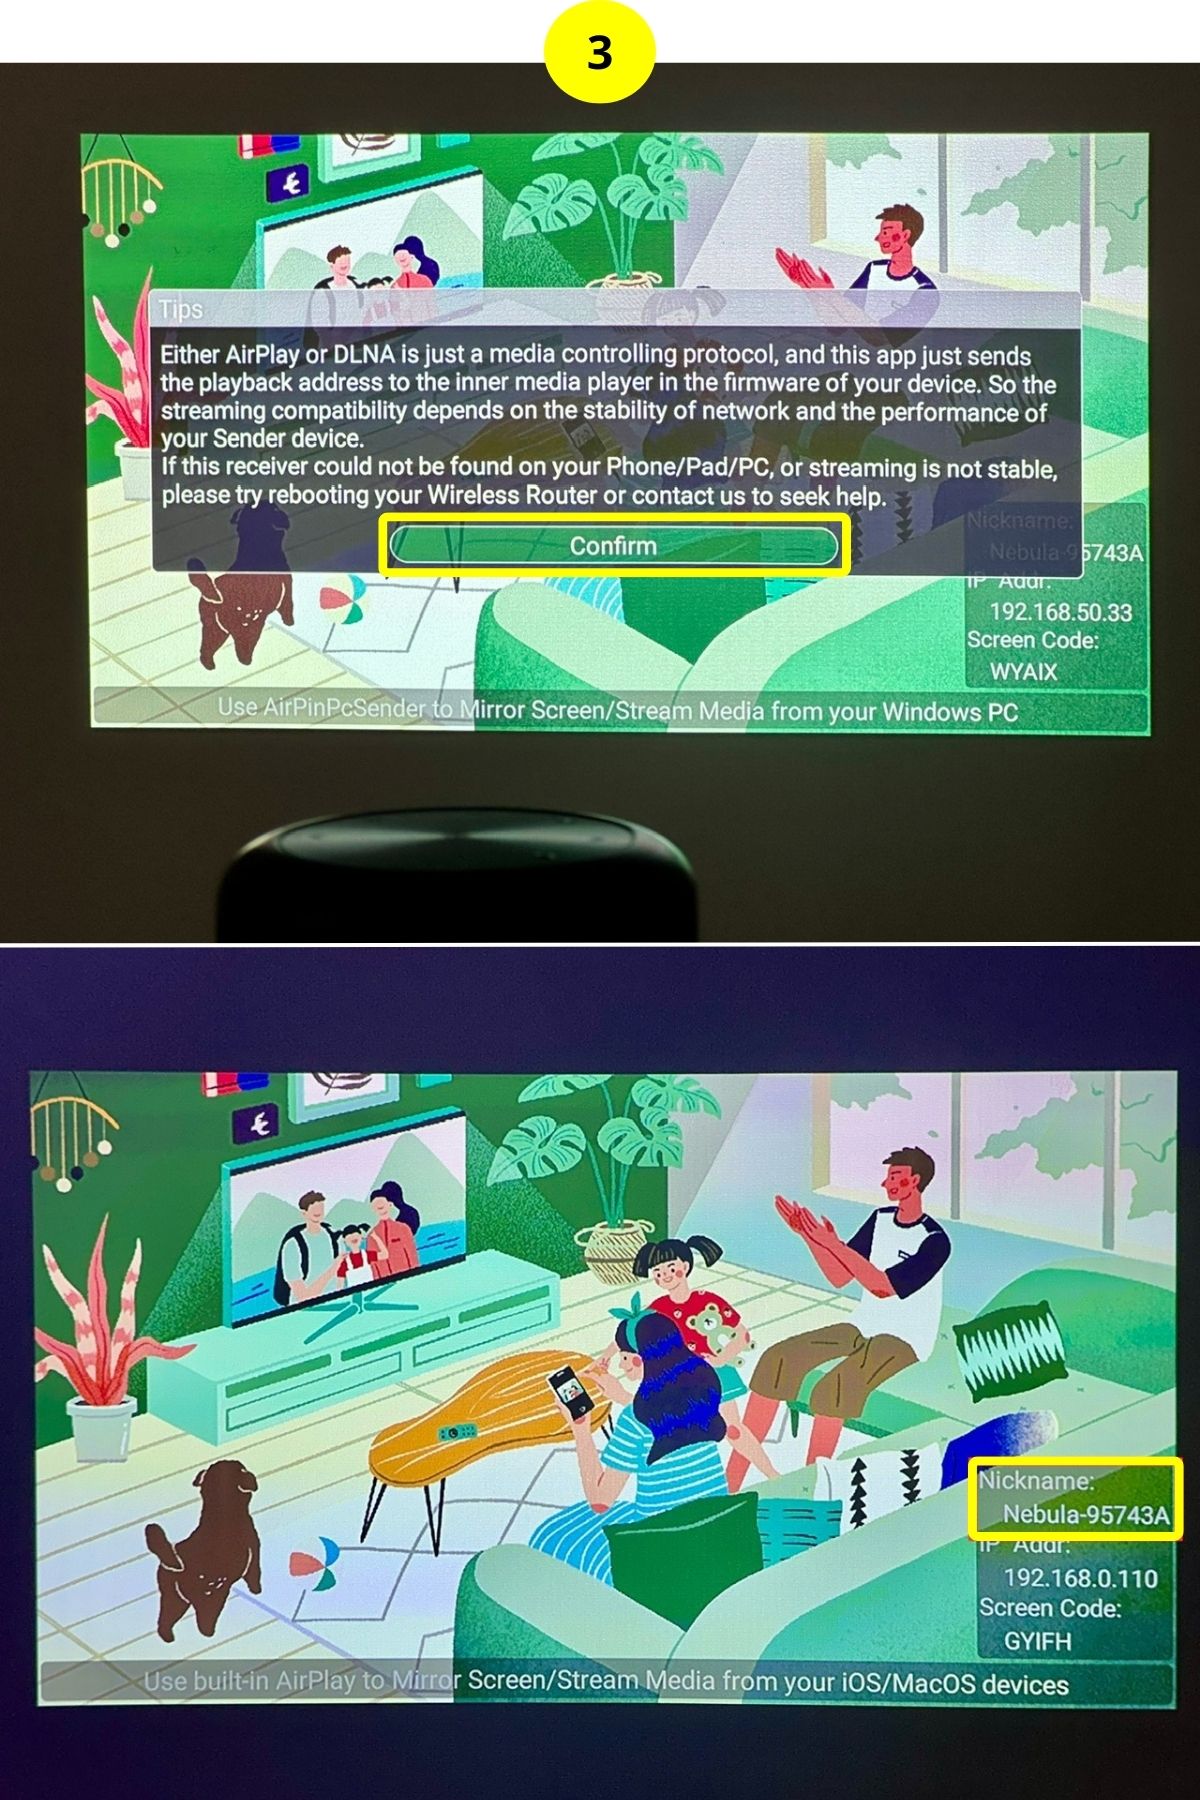
Step 3: Launch the Nebula Cast app and tap on Confirm. Take note of the Nickname displayed on your screen, as this is how your projector will show up in the AirPlay list later.
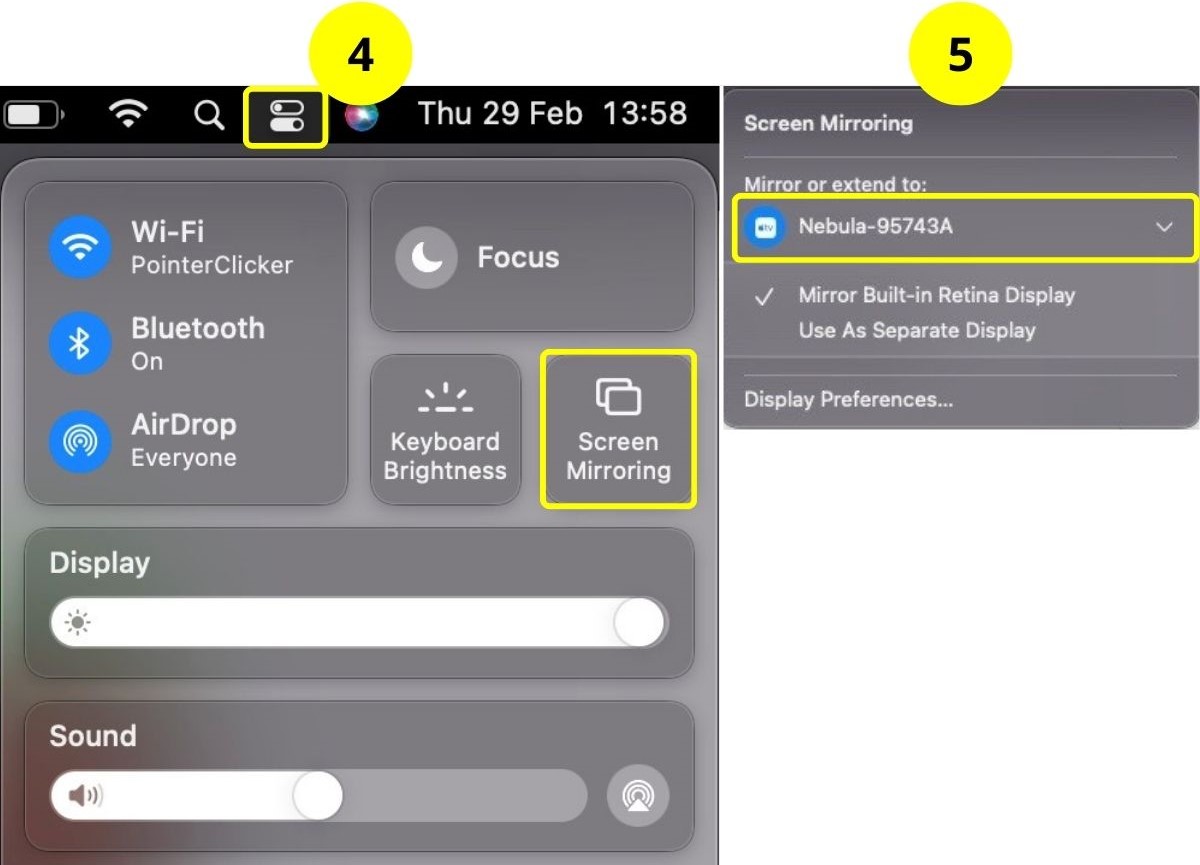
Step 4: On your MacBook, open the Control Center, and click on the Screen Mirror icon.
Step 5: Find your projector’s Nickname in the list and select it.
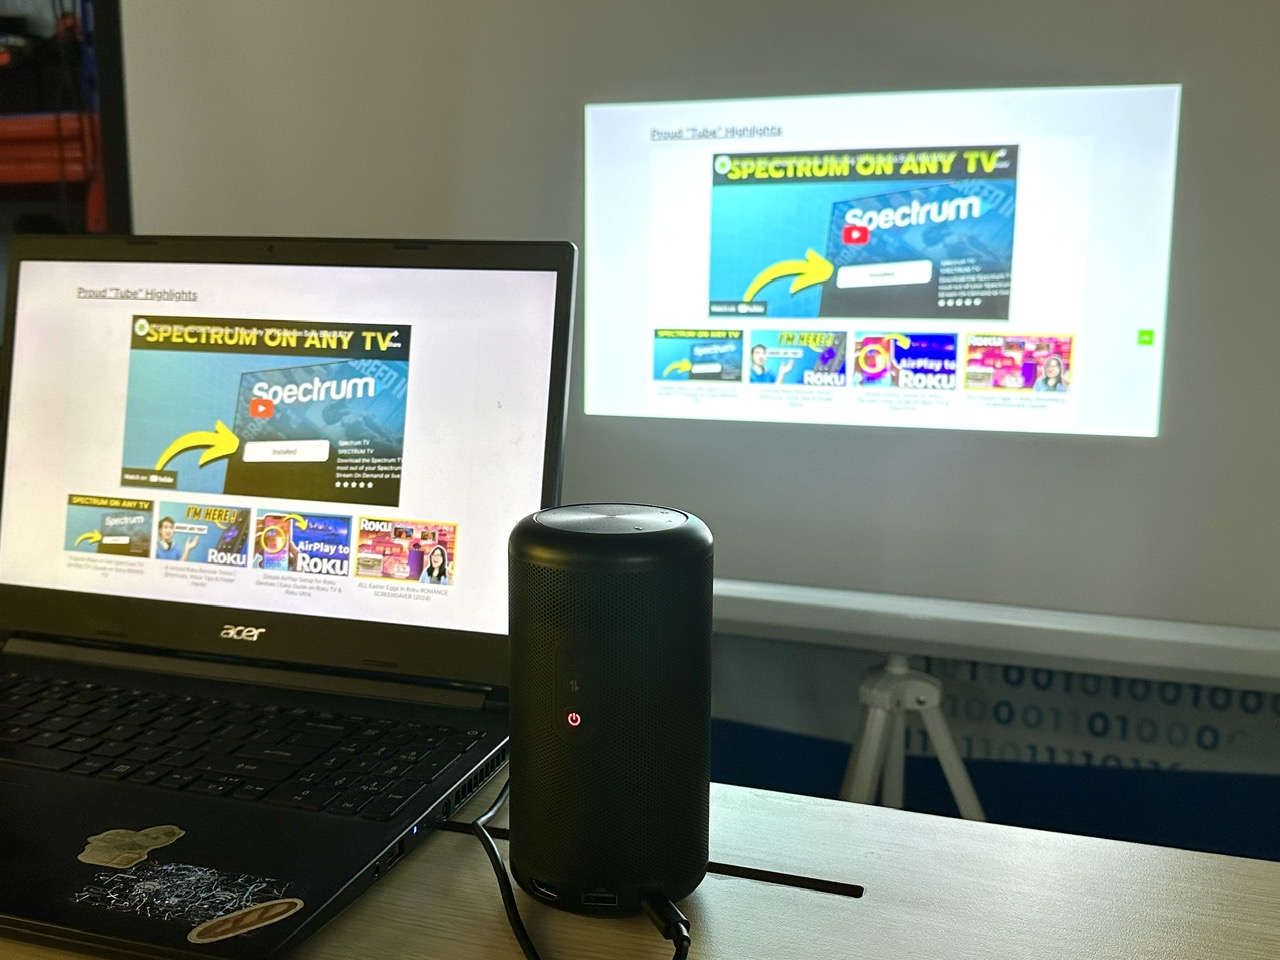
Now you’re ready to enjoy streaming your MacBook’s screen onto your Nebula projector. Happy viewing!
2. Utilize the Chromecast Feature (for Windows OS)
Note: While MacBooks can also use this method, they typically leverage the connection via AirPlay, therefore, I don’t mention those macOS laptops in this section.
You can easily stream content from your Windows laptop to your Nebula projector using the Chromecast feature. Here’s how to set it up:
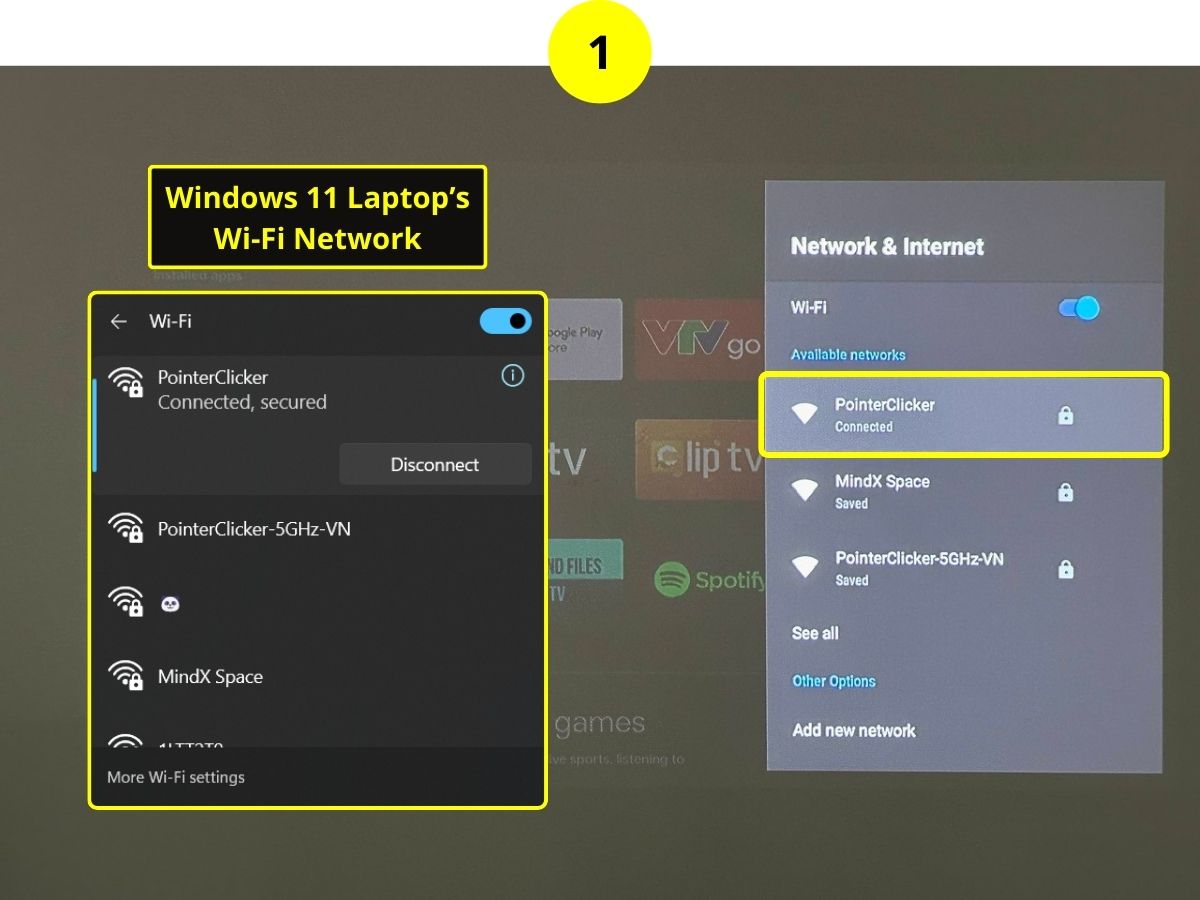
Step 1: Power on both your laptop and Nebula projector, and ensure they’re connected to the same Wi-Fi network.
On the Nebula projector, go to Settings > Network & Internet to choose the Wi-Fi network.
Step 2: On your laptop, open the Google Chrome browser. Click on the three-dot menu (kebab menu) in the top right corner, go to Save and share, and then click on Cast…
Step 3: Select your Nebula projector from the list of available devices.

3. Use an HDMI Cable (for macOS & Windows OS)
Although AirPlay offers the convenience of a wireless connection, it might not always provide the most stable or high-quality experience.
When you stream from a MacBook to a projector, you might notice a drop in image quality.
That’s why using an HDMI cable is recommended to preserve the quality of your content as much as possible.
This method works seamlessly whether you’re connecting a MacBook or a Windows laptop to your Nebula projector. Here’s a quick guide on how to do it:
Step 1: Insert one end of the HDMI cable into your MacBook’s HDMI port.
Step 2: Connect the other end of the HDMI cable to the HDMI port on your Nebula projector.
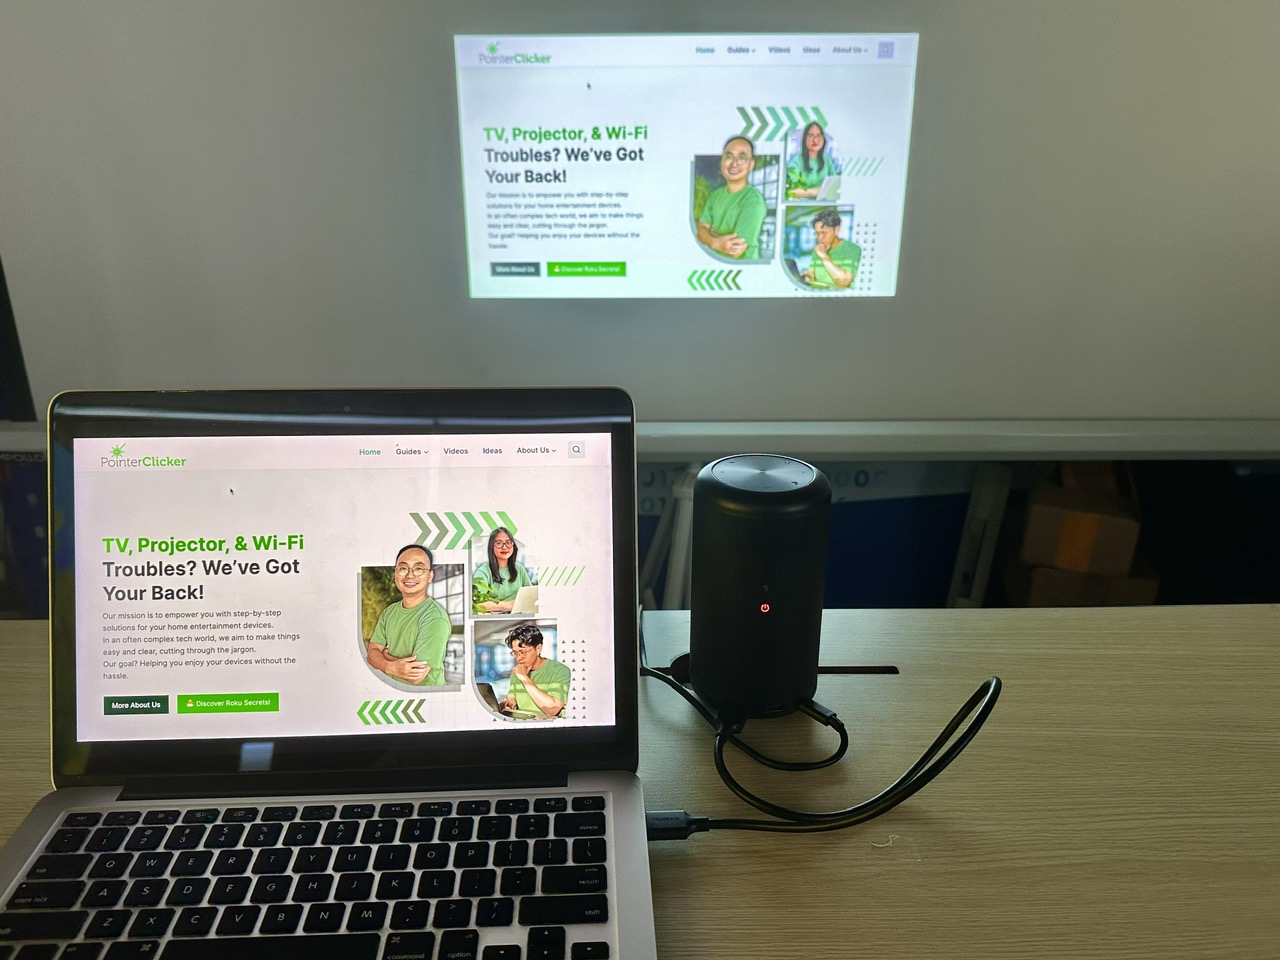
Just like that, you’re all set to display content from your MacBook on the Nebula projector, ensuring you get the best quality possible.
4. Use an HDMI Adapter (for macOS & Windows OS)
For laptops like the MacBook Air that lack an HDMI port, setting up a wired connection is still within reach thanks to HDMI adapters.
Depending on your laptop’s available ports, you might use a USB-C to HDMI adapter or a Mini DisplayPort to HDMI adapter.
Windows laptops might also offer VGA or DVI ports beside the two ports above, making them compatible with VGA or DVI to HDMI adapters for a similar setup.
Here’s how you can connect your laptop to a Nebula projector using an HDMI adapter:
USB-C to HDMI Adapter
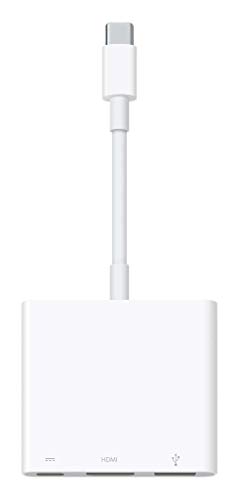
- The USB-C digital AV multiport adapter lets you connect your USB-C enabled Mac or iPad to an HDMI...
- This adapter allows you to mirror your Mac Display to your HDMI-enabled TV or display
- Simply connect the adapter to a USB-C or Thunderbolt 3 (USB-C) port on your Mac or select iPad model...
(Paid Link.)
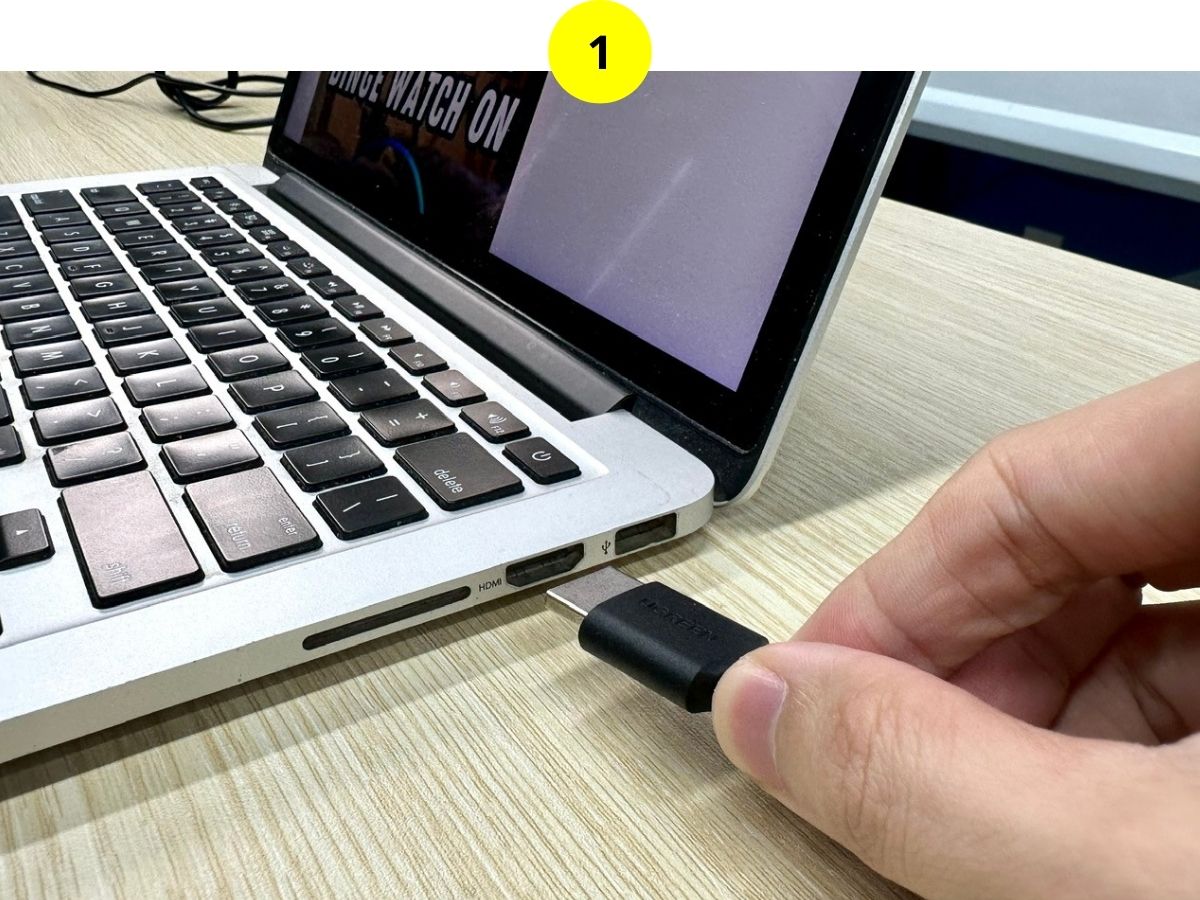
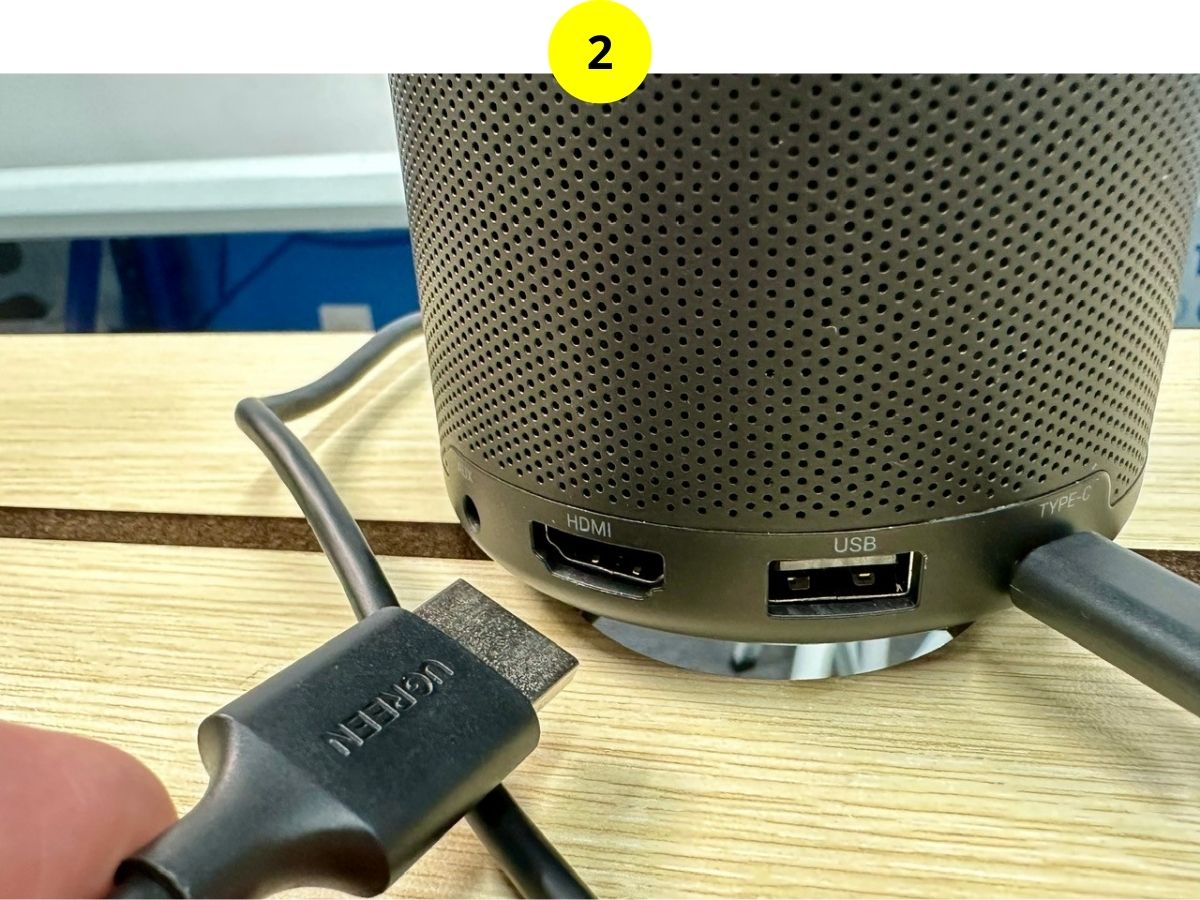
Step 1: Insert the USB-C end of the adapter into your MacBook’s USB-C port.
Step 2: Connect an HDMI cable between the adapter’s HDMI port and the Nebula projector’s.
Step 3: You’re now ready to mirror any content from your MacBook onto the projector.
Mini DisplayPort to HDMI Adapter
![Warrky 4K Mini DisplayPort to HDMI Adapter, [UHD, Gold-Plated Plug, Aluminum Case, Super Slim] Thunderbolt to HDMI Converter Compatible for MacBook...](https://m.media-amazon.com/images/I/41DAMBYB-CL.jpg)
- [Ultra High Definition] Going beyond 1080p, this Mini DisplayPort to HDMI adapter gives you...
- [Design Like No Other] Robust and flexible Strain Relief for durability. Stylish gray metallic case...
- [Top-Notch Quality] Thick gold-plated pins, sturdy aluminum case, 28+32AWG stranded copper wire, and...
(Paid Link.)
Note: MacBooks from 2009 or earlier won’t support audio output through Mini DisplayPort. Only models from 2010 onwards can transmit audio through this port.
Step 1: Plug the Mini DisplayPort end of the adapter into the MacBook’s Mini DisplayPort.
Step 2: Connect an HDMI cable between the adapter and the projector.
Step 3: Begin mirroring your display to the projector
VGA to HDMI Adapter
Since VGA does not transmit audio, it’s advisable to use an adapter that includes audio support to ensure sound playback on your projector.

- COMPACT DESIGN - The BENFEI compact-designed portable VGA to HDMI adapter connects a computer,...
- SUPERIOR STABILITY - Built-in advanced IC chip converts VGA analog signal to HDMI digital signal; It...
- USB AUDIO SUPPORT - with an integrated USB cable that embeds the audio along with the video over...
(Paid Link.)
Step 1: Connect the adapter’s VGA end to your laptop’s VGA port for video.
Step 2: Plug the adapter’s USB-A end into the laptop’s USB-A port for audio.
Step 3: Use an HDMI cable to link the adapter and the projector.
Step 4: Now, display what you desire on your MacBook, which will be projected on the Nebula.
DVI to HDMI Adapter
Like VGA, DVI does not carry audio signals. Opt for an adapter with audio capabilities like the one below to get sound on your Nebula projector.
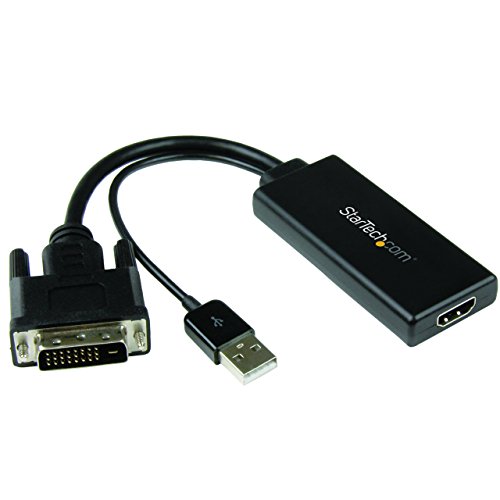
- Connect an HDMI display or projector to your DVI-D computer with audio and power provided over USB
- Works with DVI computers and HDMI monitors televisions and projectors
- Support for resolutions up to 1080p
(Paid Link.)
Step 1: Insert the adapter’s DVI end into your laptop’s DVI port for video.
Step 2: Connect the adapter’s USB-A end to the laptop’s USB-A port for audio.
Step 3: Link both with an HDMI cable and enjoy your viewing on the big screen.
5. Plug in a Streaming Device (for macOS)
Note: As Windows laptops establish a wireless connection to the Nebula projector more easily than MacBooks, this method is more for macOS users.
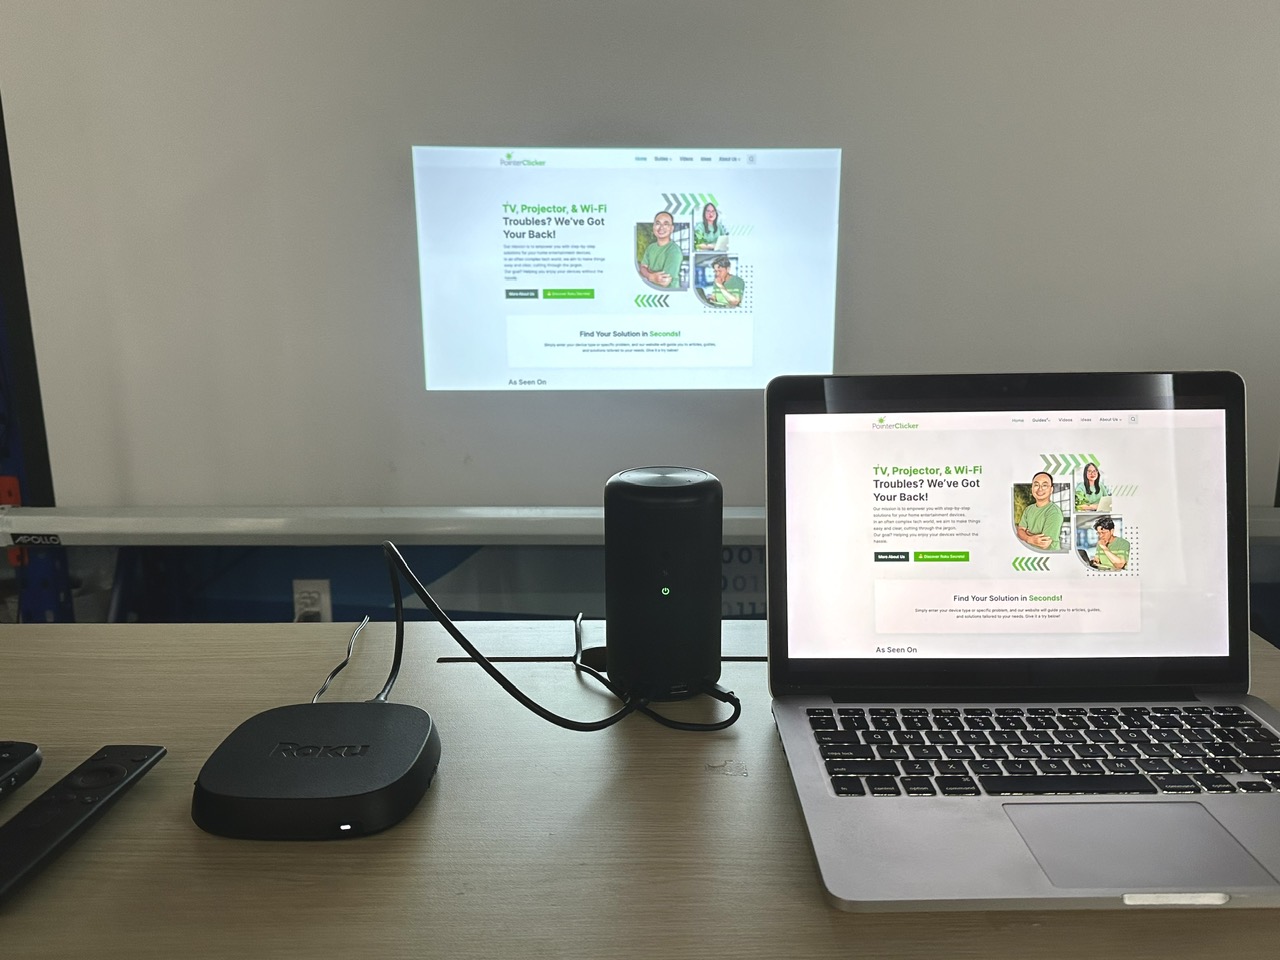
A seamless way to link your MacBook to a Nebula projector is by using a streaming device like Roku.
Roku streamlines the AirPlay connection process, eliminating the need to install the Nebula Cast app on your projector.
Here’s how you can use Roku to connect your MacBook to a Nebula projector:
Step 1: Connect the HDMI cable to the HDMI ports of both your Roku and the Nebula projector. If you’re using a Roku Stick, you can directly plug the stick into the projector.
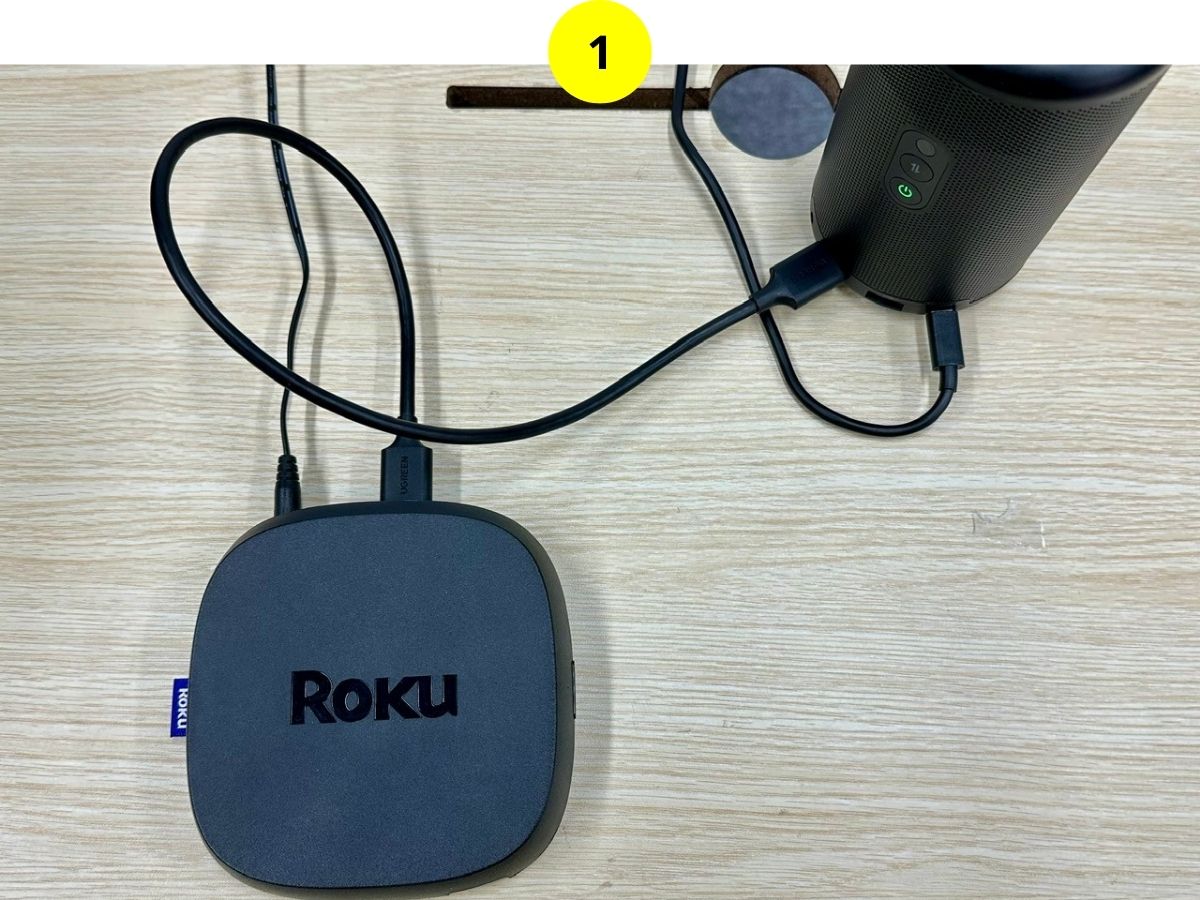
Step 2: On your Roku, go to Settings > Network > Set up connection > Connect to a Wi-Fi network. Then, make sure your MacBook is also connected to the same Wi-Fi network as your Roku.
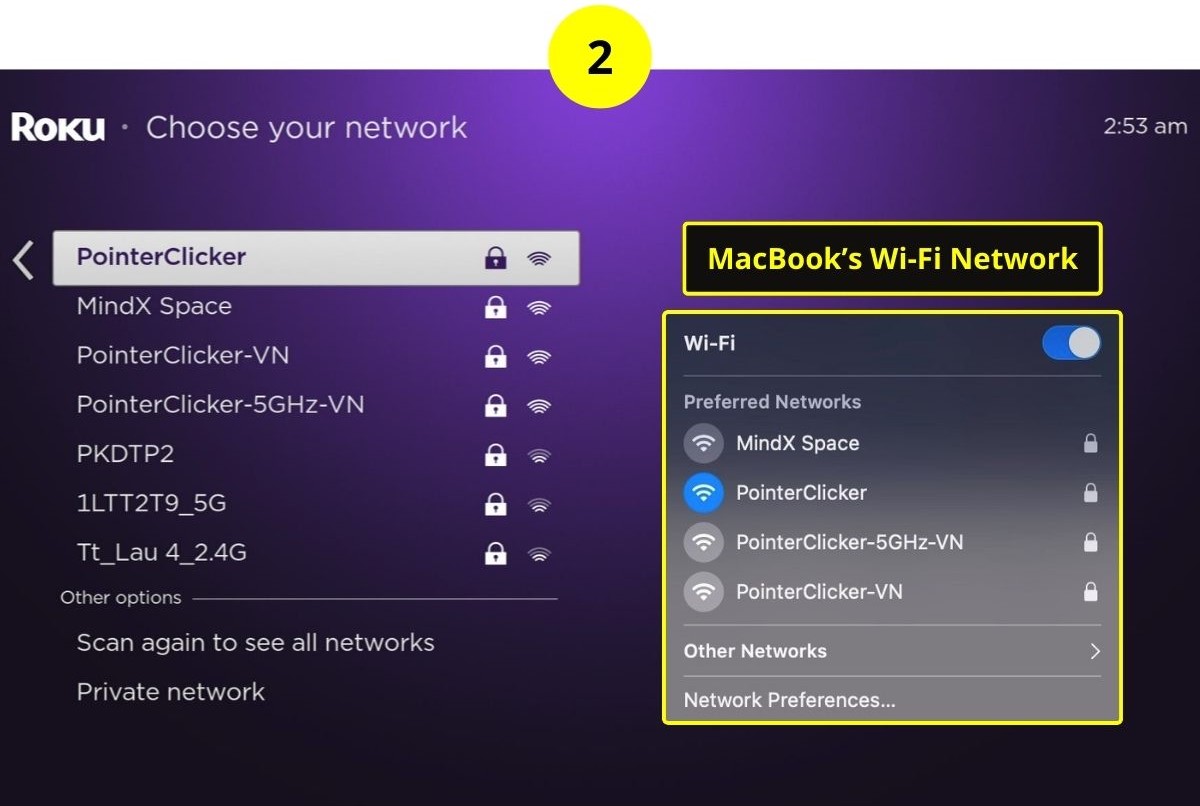
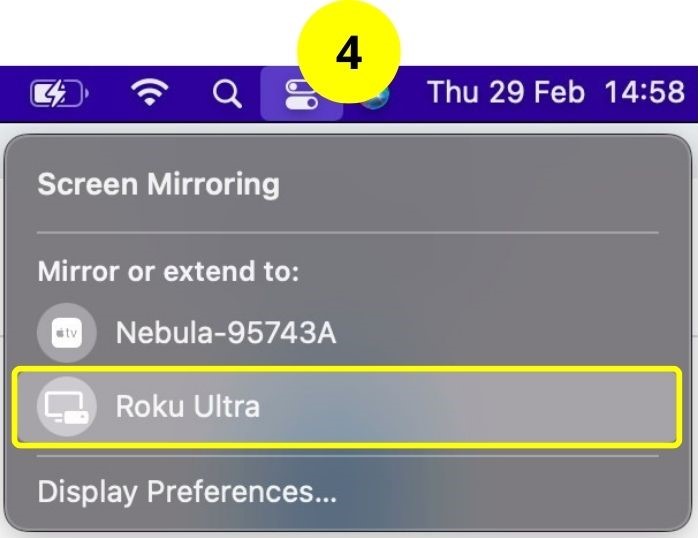
Step 3: On your MacBook, open the Control Center located at the top right corner of the screen, then select Screen Mirroring.
Step 4: Look for your Roku device in the list and select it to start the connection.
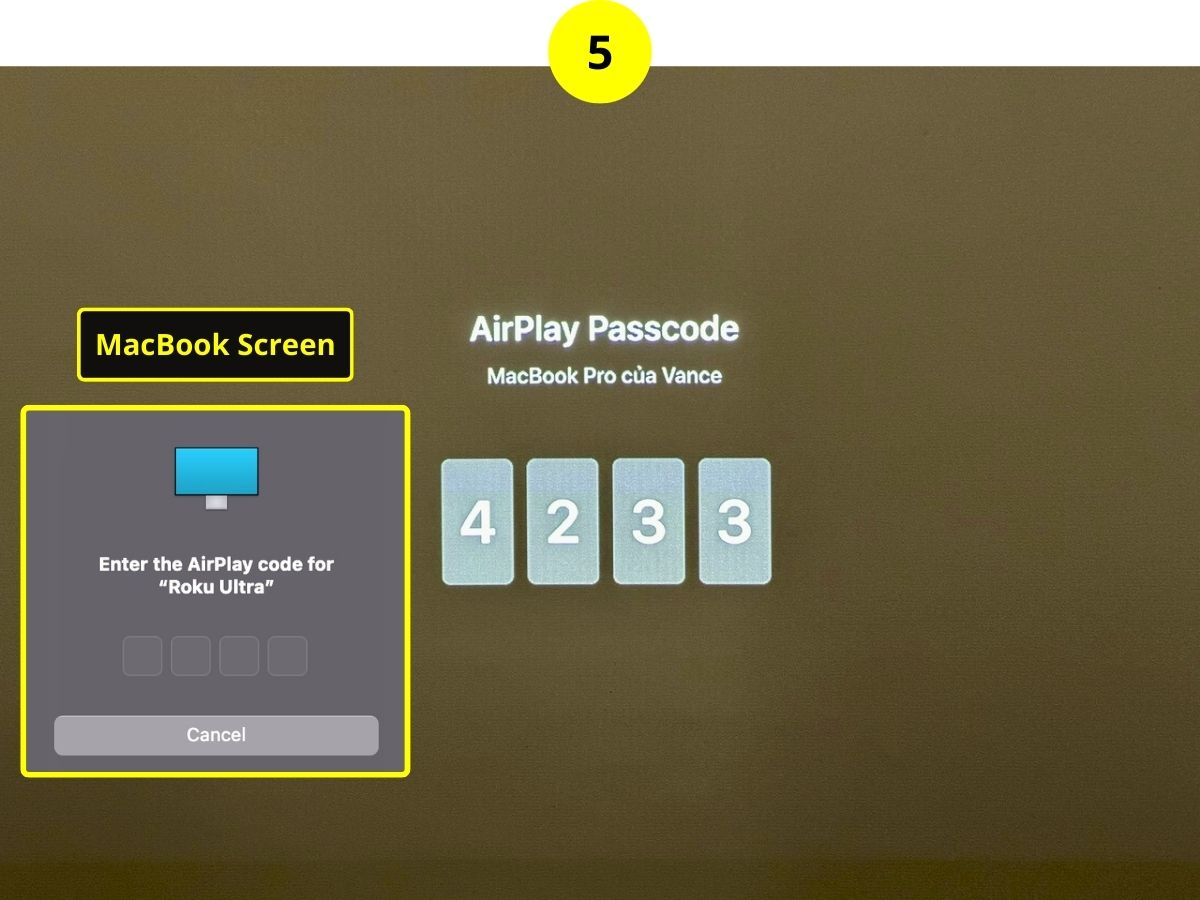
Step 5: Enter the AirPlay code displayed on your Roku to complete the connection.

Duy Anh is a seasoned technical editor specializing in helping readers troubleshoot TV, projector, and Wi-Fi issues. He’s always been drawn to logical problem-solving. His ability to approach matters from various angles with a neutral mindset enhances his technical expertise.