
Why Does My TV Disconnect From Wi-Fi When Turning Off? (Samsung, Hisense & More)

What To Know
- Older TV models may not receive firmware updates anymore, leading to outdated software that could cause Wi-Fi disconnection issues when the TV is turned off.
- TVs may disconnect from Wi-Fi due to a weak signal from the router, particularly when the TV is turned off. A stronger, wired Ethernet connection can help resolve this.
- Inaccurate router settings (like Wi-Fi frequency) and too many devices on the same network can lead to connectivity problems. Adjusting router settings and reducing connected devices can help maintain a stable Wi-Fi connection for the TV.
In this article, I’ll tackle the common issue of TVs disconnecting from Wi-Fi, particularly when turned off.
We’ll delve into the reasons behind this frustrating problem and provide practical solutions, including router adjustments and alternative connection methods.
Prepare to reconnect and enjoy uninterrupted streaming and viewing.
Quick Navigation
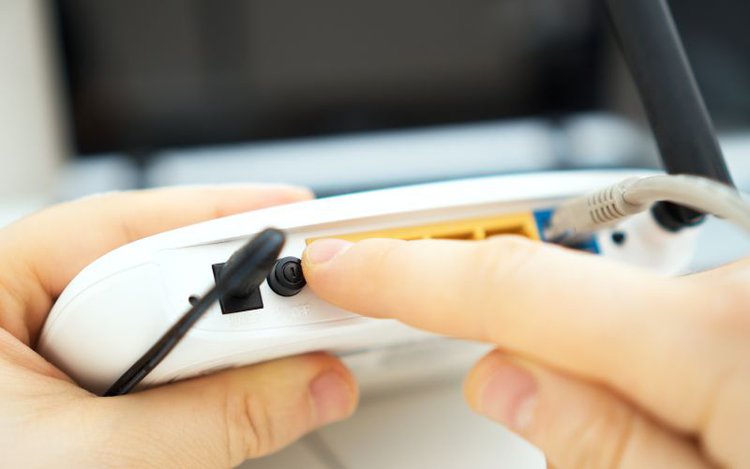
1. Use a Wired Connection
While convenient, Wi-Fi is notably slower than wired internet connections. If your Wi-Fi router’s signal is too weak, it may not be able to maintain a steady connection with your TV, especially when it’s off.
A good way to know if a weak Wi-Fi connection is the root of the problem is by examing your router’s LED lights indicating its signal strength. These lights are usually found on the front of your router in the shape of a Wi-Fi signal.
If your router doesn’t have these lights, observe the Wi-Fi strength signal symbol on your phone or laptop. If two or fewer of the signal bars are illuminated, then your Wi-Fi strength is probably too weak to support your TV.
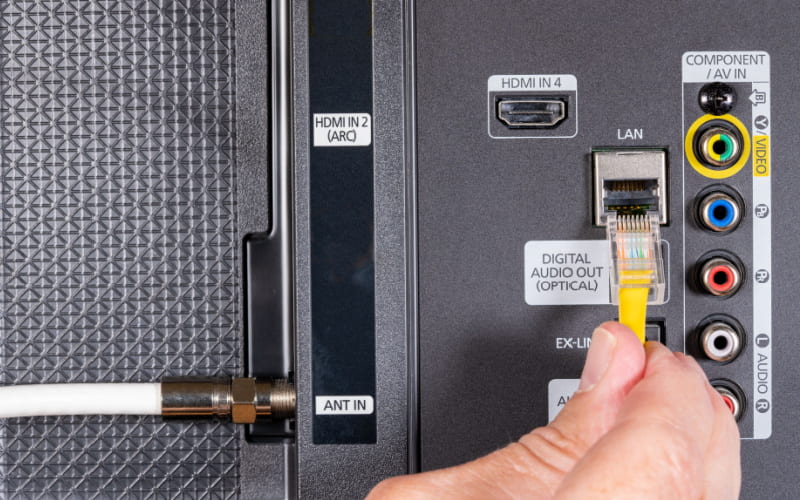
One way to counteract this is to connect your Wi-Fi router to your TV with an Ethernet cable.
Before proceeding with this solution, check that your smart TV has an Ethernet port. If it doesn’t, use an Ethernet adapter, such as the Cable Matters USB to Ethernet Adapter which is compatible with smart TVs.
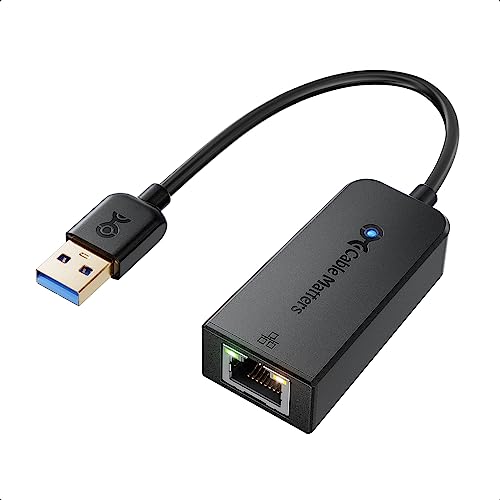
- USB 3 to Ethernet adapter adds network connectivity to a computer with a USB 3.0 port; The USB to...
- Wireless alternative USB to RJ45 adapter for connecting to the Internet in Wi-Fi dead zones,...
- Driver free installation with native driver support in Chrome, Mac, and Windows OS; The USB to...
Last update on 2024-04-16 / Paid Link.
Please note that you may have to change your smart TV’s network settings from Wireless to Wired for it to accept a wired internet connection.
Pro Tip: Many routers come with Ethernet cables, so check your router’s original packaging to see if there’s an Ethernet cable hidden away in there.
2. Cold Boot Your TV
Some smart TVs, like the Samsung RU7 Series UHD TVs, may benefit from being cold rebooted. This process resembles that of a soft reset, as it quickly reboots the TV’s power and software without deleting any of its data.
Cold booting your TV can help resolve connectivity issues and allow it to establish a secure connection with your Wi-Fi router.
Samsung Support outlines two ways you can do this: using your remote’s power button or your TV’s power cable.
While the first option may not work on every TV model, the second option is universally used to cold boot TVs.
Let’s learn how to do both!
Using Your TV’s Remote

Step 1: Press and hold your TV remote’s Power button, which is represented by a circle with a line going through the top.
Step 2: Observe your TV shut off and then restart.
Step 3: Release your TV remote’s Power button.
Using the Power Cable
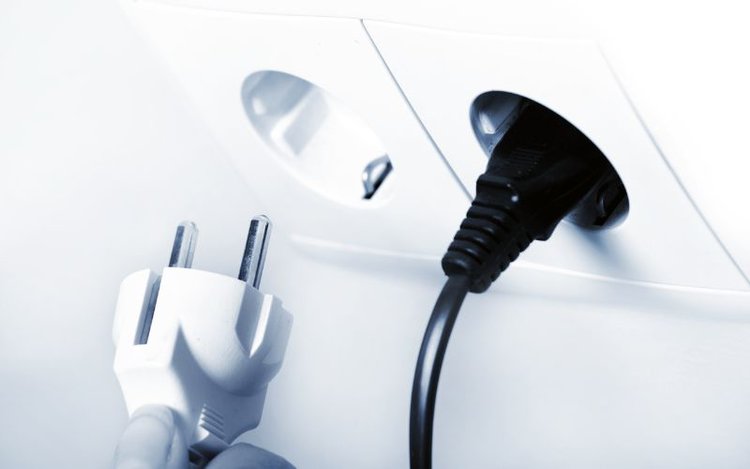
Step 1: Power your TV off using either the remote’s Power button or through your TV’s settings. Wait for it to completely shut down before proceeding to the next step.
Step 2: Unplug the TV’s power cable from its power source, whether it’s a wall outlet or a power strip. If you are using a power strip, please be sure to physically remove the plug from it as opposed to simply turning the strip off.
Step 3: While some TV models only need to be unplugged for 30 seconds to cold boot, others may require longer. If you’re unsure how long your TV needs to remain unplugged to cold boot, your safest bet is to leave it unplugged for at least 60 seconds
Step 4: Plug your TV back into power, turn it on, and allow it to fully restart.
3. Make Sure the TV Is Updated
In 2021, several Hisense users reported that their TVs began disconnecting from Wi-Fi when turned off. They had not experienced this issue before and found that it may have been related to a recent software update.
While some users claimed this problem arose after installing the latest software update, others said that they were only able to resolve the issue after updating their TVs to the latest version.
This is not an uncommon story in the smart TV world, as complex software updates may have bugs in them leading to various software problems, such as network connectivity issues.
While some TVs update automatically when in standby mode, others do not. So, you may need to install your TV’s latest software updates manually.
Lucky for you, we’ve included instructions below on how to update Samsung and Hisense smart TVs in a few simple steps.
Let’s learn how!
Samsung
Step 1: Click your Samsung TV’s Home button.
Step 2: Head to the Settings icon on the Home page, represented by a gear icon. This setting can usually be found on the side or bottom of your screen, depending on your TV’s model.
Step 3: Next, navigate to Support.
Step 4: Click on the Software Update option from the menu, followed by Update Now.
Your TV will now install any software updates.
If your TV’s software is updated to the latest version, the Software Update option will be greyed out, preventing you from selecting it. In this case, proceed to the next step.
Step 5: If you were unable to select Software Update, press your remote’s Source/Input button.
Step 6: Adjust your TV’s source to TV by clicking it repeatedly until “TV” appears in the top-right corner of the screen.
Step 7: Now, repeat Steps 1 to 4.
Watch the video below demonstrating how to update your Samsung smart TV whether the Software Update option is available or not.

Hisense
Step 1: Press your Hisense smart TV remote’s Home button.
Step 2: Navigate to the Settings, which will look like a small gear icon.
Step 3: Head to Device Preferences.
Step 4: Next, go to About.
Step 5: Then, click on System Update.
Step 6: Wait for your TV to check for any available updates.
If there are available updates, select Install to install them. If there aren’t any available updates, check back every few days.
Watch the video below demonstrating how to update your Hisense smart TV’s software.

4. Power Cycle Network Devices
If you’ve cold booted and updated your smart TV but are still experiencing connectivity issues, it’s time to turn your attention to your router.
Like all electronic devices in our homes, routers can glitch, causing them to randomly disconnect from other devices.
The easiest way to resolve these glitches is by power cycling your router and modem. This is similar to rebooting it, as you’ll be draining its power allowing it to fully restart.
Note: While the instructions below outline how to power cycle your router and modem, many modern internet setups feature one device which is a combination of the two. If this is the case in your home, you can follow the same steps on your home’s sole network device.
Step 1: Find and press your router’s power button, if available. Then unplug its cable from the wall outlet or power strip. Simply turning off the power strip will not suffice.
Step 2: Now, unplug the modem from its wall outlet or power strip. If it has a power button, press it to power it off before unplugging it.
Step 3: Leave your router and modem unplugged for at least 30 seconds. You can take this opportunity to cold boot your TV if you haven’t done so already.
Step 4: Once 30 seconds have elapsed, plug your modem back into power. You may have to press its power switch to turn it on.
Step 5: Then, plug your router back into power, press its power button (if available), and wait for it to restart. You’ll know it’s fully rebooted when its LED lights illuminate.
5. Change the Wi-Fi Channel and Frequency

If rebooting your router hasn’t solved the problem, you may need to try some more technical solutions.
Changing your Wi-Fi’s channel and frequency can ensure it’s compatible with your smart TV and that the Wi-Fi signal isn’t being interrupted.
Don’t worry. It’s not as complicated as it sounds and we’ll walk you through the process step-by-step.
Note: The processes listed below may vary depending on your location and your router’s maker and model.
Wi-Fi Channel
Wi-Fi routers operate on channels that can overlap with each other. This is especially common if you live in a crowded apartment building since your neighbors’ routers’ channels may interfere with your own.
A common symptom of overlapping Wi-Fi channels is slow internet speed and connectivity issues, resulting in your devices frequently disconnecting from the network.
Luckily, this can be resolved by adjusting your router’s settings by following the steps below.
Step 1: To get into your Wi-Fi router’s settings, you will need to find its default gateway or IP address. This can typically be found on the back of your router and will be eight digits separated by periods.
This information may also be found in your router’s original packaging.
Step 2: Once you’ve found your router’s IP address, head to your computer and open a browser. Then, type the IP address into the browser’s URL bar.
Step 3: You will be brought to a login page where you must insert your router’s username and password. This information can also be found on the back of your router.
Step 4: Then, navigate to the WLAN menu.
Step 5: Once you’ve found and opened the WLAN menu, click on WLAN Advanced.
Step 6: Now, changed the Wi-Fi channel to 1, 6, or 11.
Wi-Fi Frequency
Several smart TV users found that their TVs were attempting to connect to an incompatible Wi-Fi frequency. Many smart TV models, like Samsung TVs, only support 2.4GHz Wi-Fi, however, they can try to connect to 5GHz Wi-Fi if it’s available.
The best solution here is to disable your router’s 5GHz Wi-Fi so that your TV will not accidentally try to connect to it.
You will need to access your Wi-Fi router’s settings to complete this process.
Step 1: Head to the back of your router and take note of its default gateway or IP address, which will be a string of eight digits.
Step 2: Then, go to your computer and launch a web browser. Next, type the IP address into the URL bar, ensuring that it’s correct.
Step 3: Find your router’s username and password on its back and type them into its login page.
Step 4: Find and open the Network menu.
Step 5: Click on Wireless (5GHz) and uncheck the checkbox labeled Enabled to disable it.
Do you need some extra guidance? Watch the video below demonstrating how to change your Wi-Fi router’s frequency in a few short steps.

6. Lessen Devices Connected to Wi-Fi Network
Wi-Fi routers have limited bandwidth, so your TV will receive less bandwidth if there are several other devices connected to the same network.
Low bandwidth commonly leads to slow internet speeds, which can cause your TV to struggle to establish a connection with the router.
You have two options here.
The first option is to disconnect all devices, except your TV, from your Wi-Fi router. Be sure to also disconnect devices that you’re not actively using, since they will continue to consume bandwidth when locked or in standby mode.
The second option is to connect your smart TV to a different router with fewer or no other devices connected to it. This will ensure it receives a sufficient amount of bandwidth.
You can also try connecting your smart TV to your mobile hotspot, though bear in mind that streaming content consumes vast amounts of data.
Good luck!

Yesenia Achlim is a technical copywriter and editor with a focus on AV equipment. She aims to break down complicated topics and make technology accessible, no matter your technical expertise. When she’s not teaching you how to replace a projector lamp, you can find her reading and baking.