
How to Flip an Upside-Down Projector Image: NEC, Hitachi, Panasonic, Sony Guide

- To rotate the NEC projector screen: Open Menu > Setup > Installation > Orientation > Select Ceiling Front.
- To flip the Hitachi projector image: Access Menu > Installation > Adjust to Front or Ceiling.
- To flip the Panasonic projector image: Open Menu > Projector Setup > Projection Method > Choose Front/Ceiling.
- To rotate the Sony projector screen: Launch Menu > Installation > Image Flip > Select HV.
So, you’ve set up your projector, and the excitement turns to confusion as the image isn’t oriented correctly.
Whether you’re dealing with an NEC, Hitachi, Sony, or Panasonic model, flipping the image is a common concern.
Dive into this guide where we unravel the steps to set things right.
Drawing from our tech team’s expertise and user-driven insights, you’ll be ready for that movie night in no time.
Quick Navigation
For NEC Projectors
Follow the steps below to adjust your NEC projector’s orientation.
Step 1: Open the Menu.
Step 2: Go to Setup.
Step 3: Select either Installation or Installation 1.
Step 4: Head to Orientation.
Step 5: Click on the Ceiling Front option.
Watch the video below demonstrating how to change an NEC projector’s orientation.

For Hitachi Projectors
Step 1: Access the Menu.
Step 2: Head to Installation.
Step 3: Adjust this setting to Front or Ceiling.
Watch the tutorial below to learn how to flip your Hitachi projector’s image.

For Panasonic Projectors
Step 1: Open your Panasonic projector’s Menu.
Step 2: Go to Projector Setup.
Step 3: Head to Projection Method.
Step 4: Choose Front/Ceiling.
For Sony Projectors
Step 1: Find and launch your Sony projector’s Menu.
Step 2: Open Installation.
Step 3: Navigate to Image Flip.
Step 4: Select HV.
Four Projector’s Orientation Modes
In your projector’s orientation settings, you will find four different projection modes. You can find how each of these four projection setups is labeled depending on the projector brand in the table below.
Once you’ve found your projector brand in the following table, keep reading to learn more about what this projection mode means.
| Front-Table Projection | Front-Ceiling Projection | Rear-Table Projection | Rear-Ceiling Projection | |
| NEC | Desktop Front | Ceiling Front | Desktop Rear | Ceiling Rear |
| Hitachi | Front / Desktop | Front / Ceiling | Rear / Desktop | Rear / Ceiling |
| Panasonic | Front/Desk | Front/Ceiling | Rear/Desk | Rear/Ceiling |
| Sony | Off (Without flipping) | HV (Flip horizontally & vertically) | H (Flip horizontally) | V (Flip vertically) |
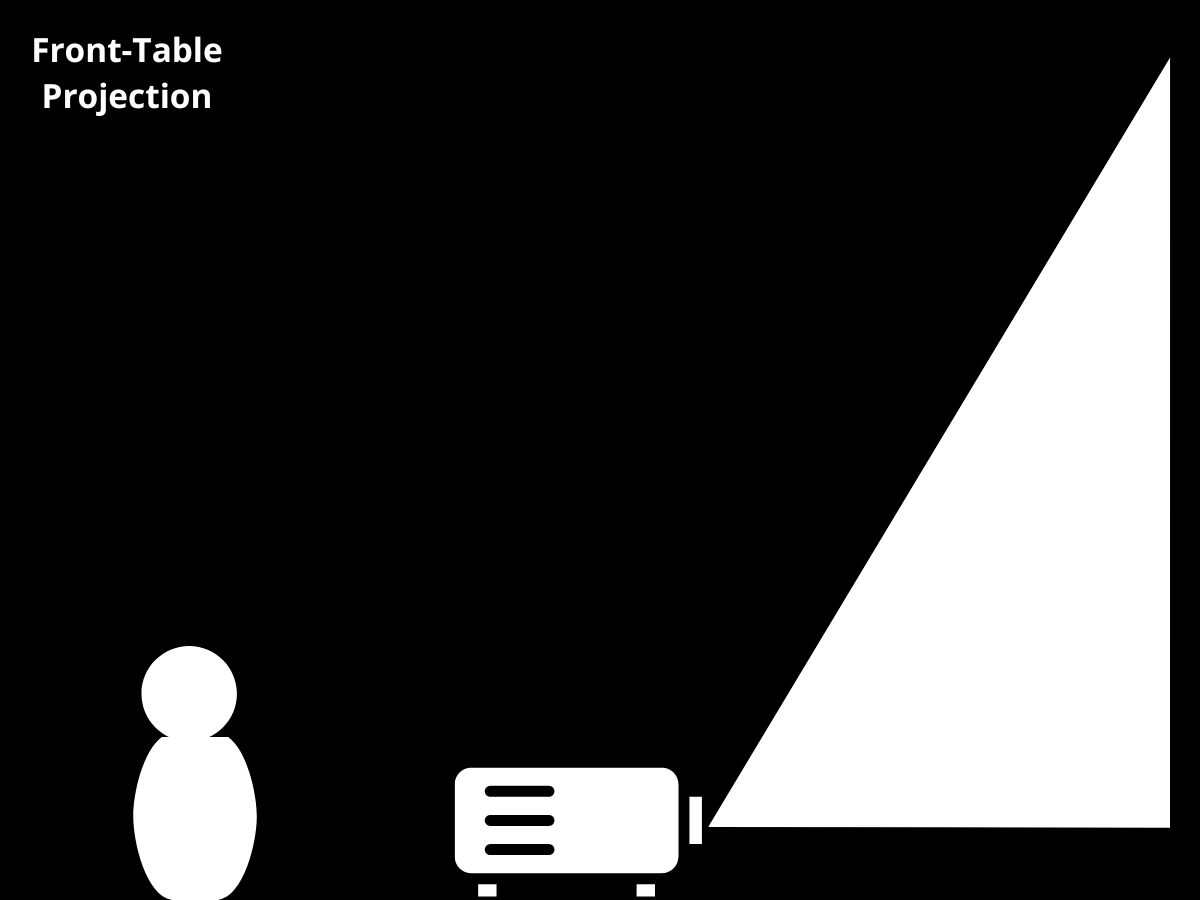
- Front-Table Setup: This is probably the most common projector setup as it involves placing the projector on a flat surface (e.g. table, tripod, projector stand, etc.) directly in front of the screen.
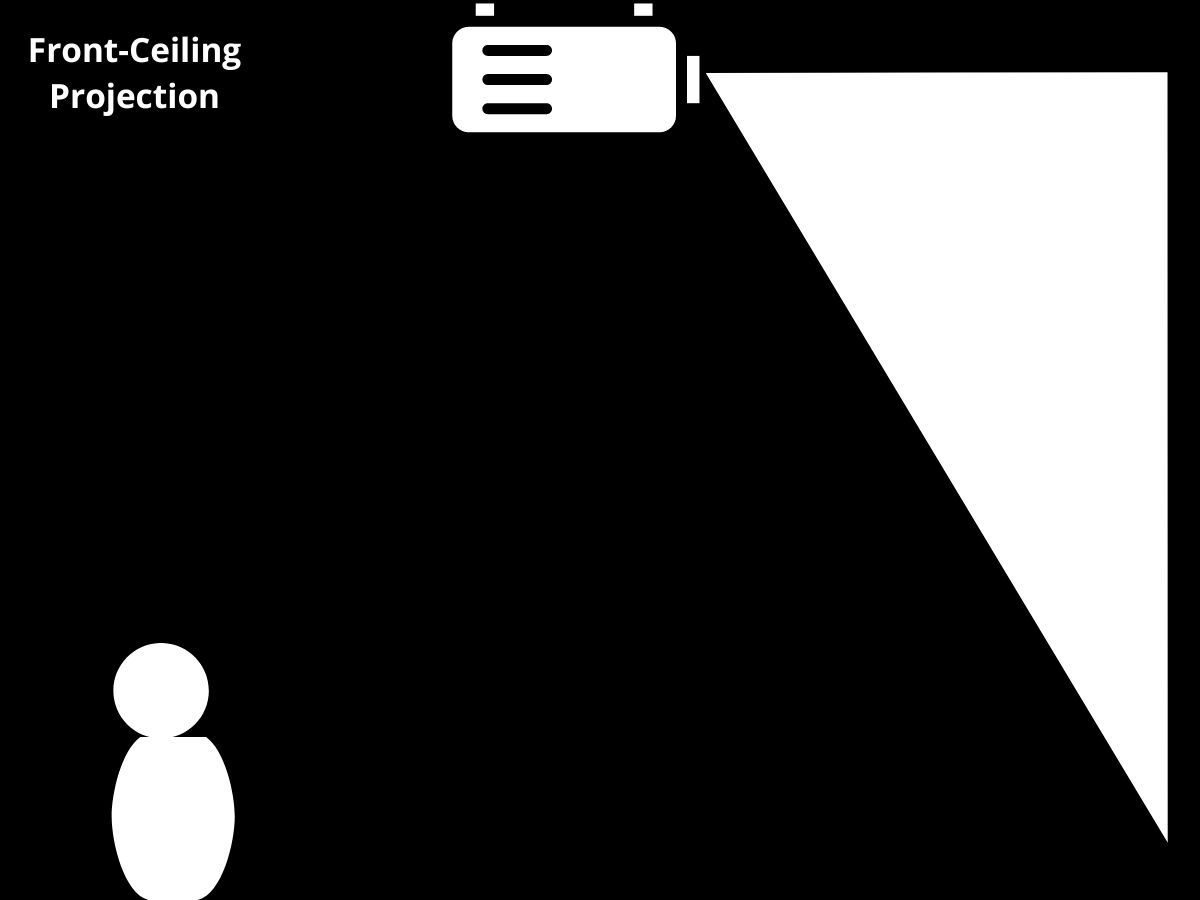
- Front-Ceiling Setup: This mode is best for those mounting their projector to the ceiling in front of the projector screen. This mode will commonly flip your projector image so it’s the right way up.
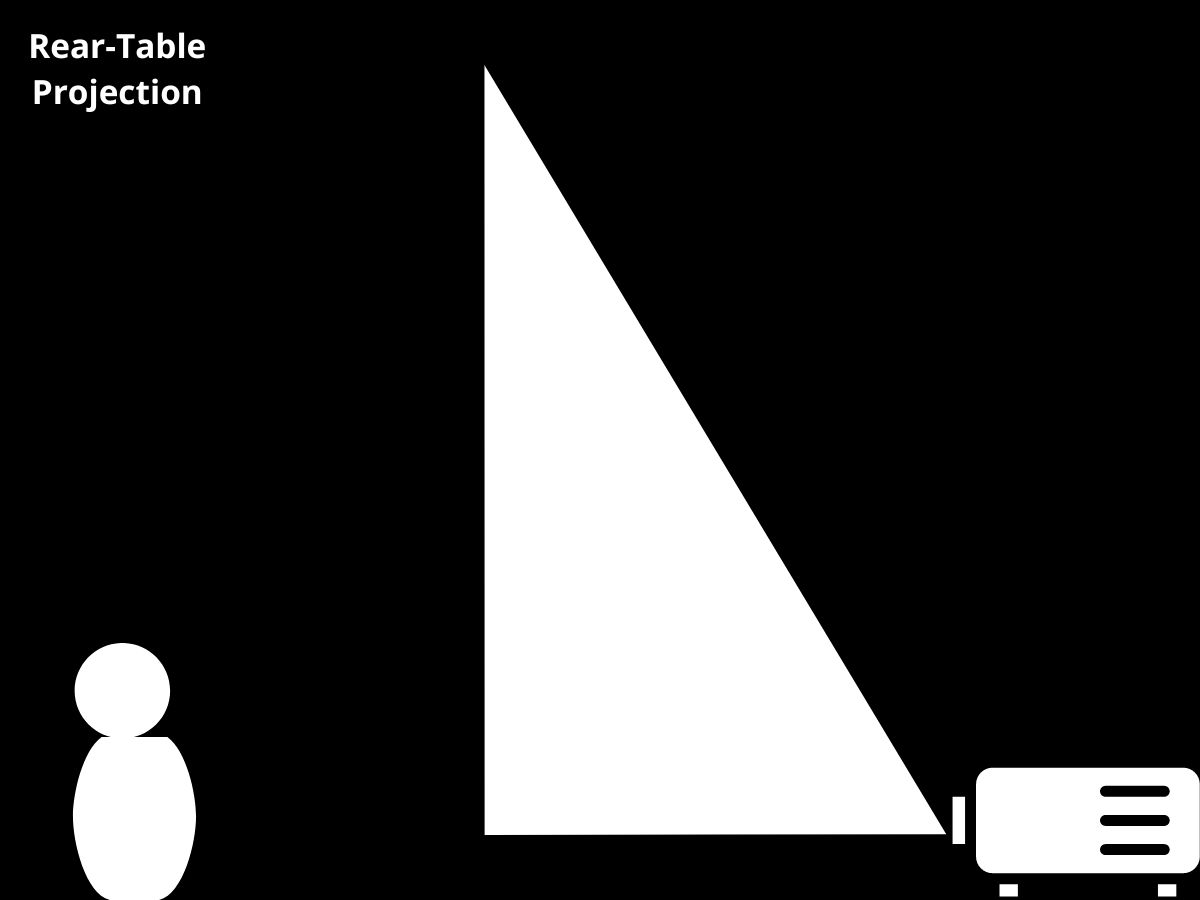
- Rear-Table Setup: This option is for those who set up their projector behind the screen on a flat surface like a table, tripod, and so on. Many ultra-short-throw projectors are commonly set up behind the projector screen, but their images must be oriented for this position.
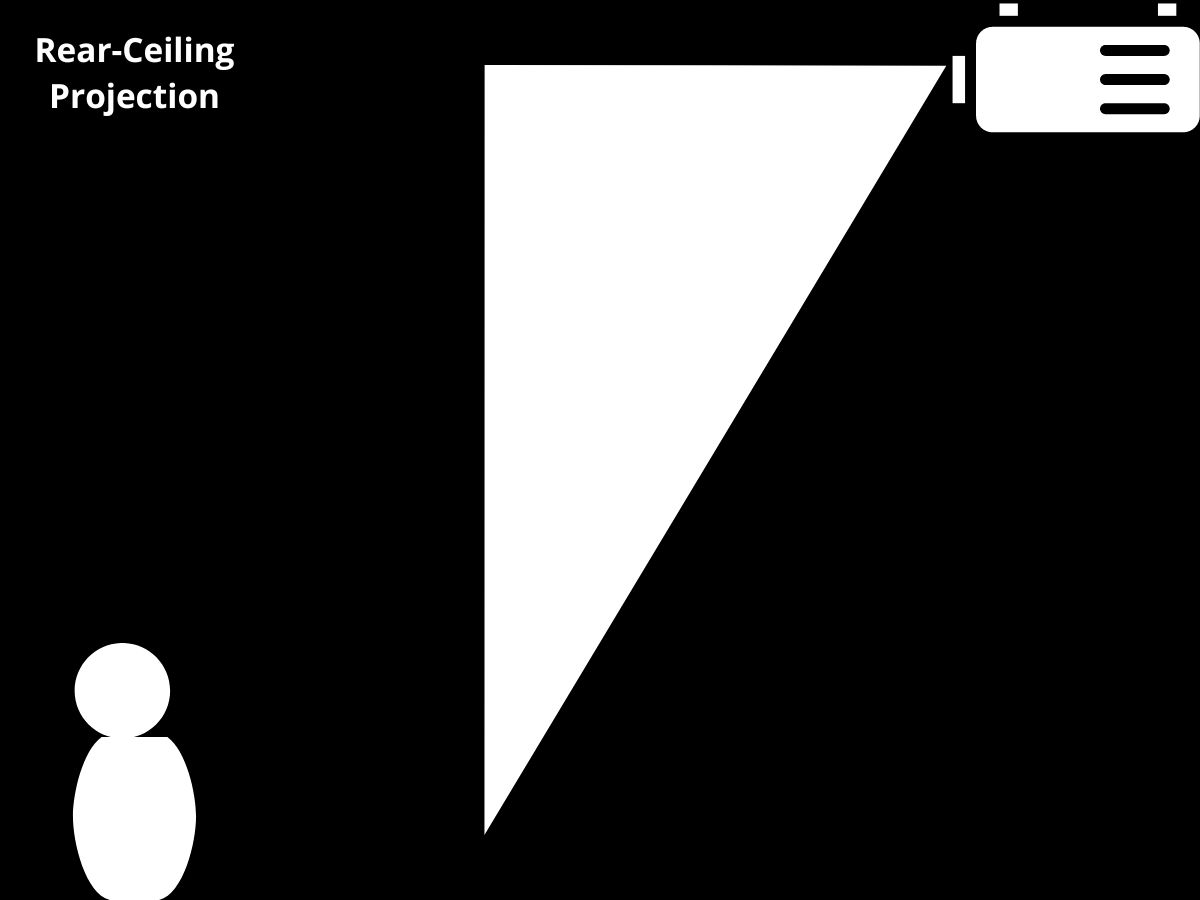
- Rear-Ceiling Setup: Finally, if you’re mounting your projector on the ceiling behind the screen, this option is for you, as it will rotate and flip the image so it’s neither backward nor upside down.


Wrapping Things Up
Projectors’ default orientation settings may be good when you’re simply placing the unit on a table in front of the screen. Still, if you plan on ceiling mounting it, you’ll need to adjust its orientation accordingly.
Your projector should have four different projection modes for you to choose from depending on its orientation. If you’re not sure what your unit’s projection modes mean, refer to our table above.
What’s your experience rotating or flipping your projector image?
Let us know in the comments below!

Yesenia Achlim is a technical copywriter and editor with a focus on AV equipment. She aims to break down complicated topics and make technology accessible, no matter your technical expertise. When she’s not teaching you how to replace a projector lamp, you can find her reading and baking.

Duy Anh is a seasoned technical editor specializing in helping readers troubleshoot TV, projector, and Wi-Fi issues. He’s always been drawn to logical problem-solving. His ability to approach matters from various angles with a neutral mindset enhances his technical expertise.