
How to Connect Your Epson Projector to Wi-Fi: A Step-by-Step Guide
Better Epson Wireless Dongle Replacement Solution
- For a reliable connection to an Epson projector without Wi-Fi, the Ugreen Wireless HDMI Extender offers a simple plug-and-play solution.
- Streaming devices like Roku and Fire TV Stick, are recommended for their convenience and compatibility with Epson projectors.
In this article, I’ll guide you through the best methods for wirelessly casting from any source device to your Epson projector—no Wi-Fi or app installation required.
If you’re still using the Epson network dongle, don’t worry; I’ve included the solution as well.
To help you follow along, I’ve added images detailing each step.
Let’s begin.
Quick Navigation
1. How to Cast to Your Epson Projector Wirelessly Without Wi-Fi
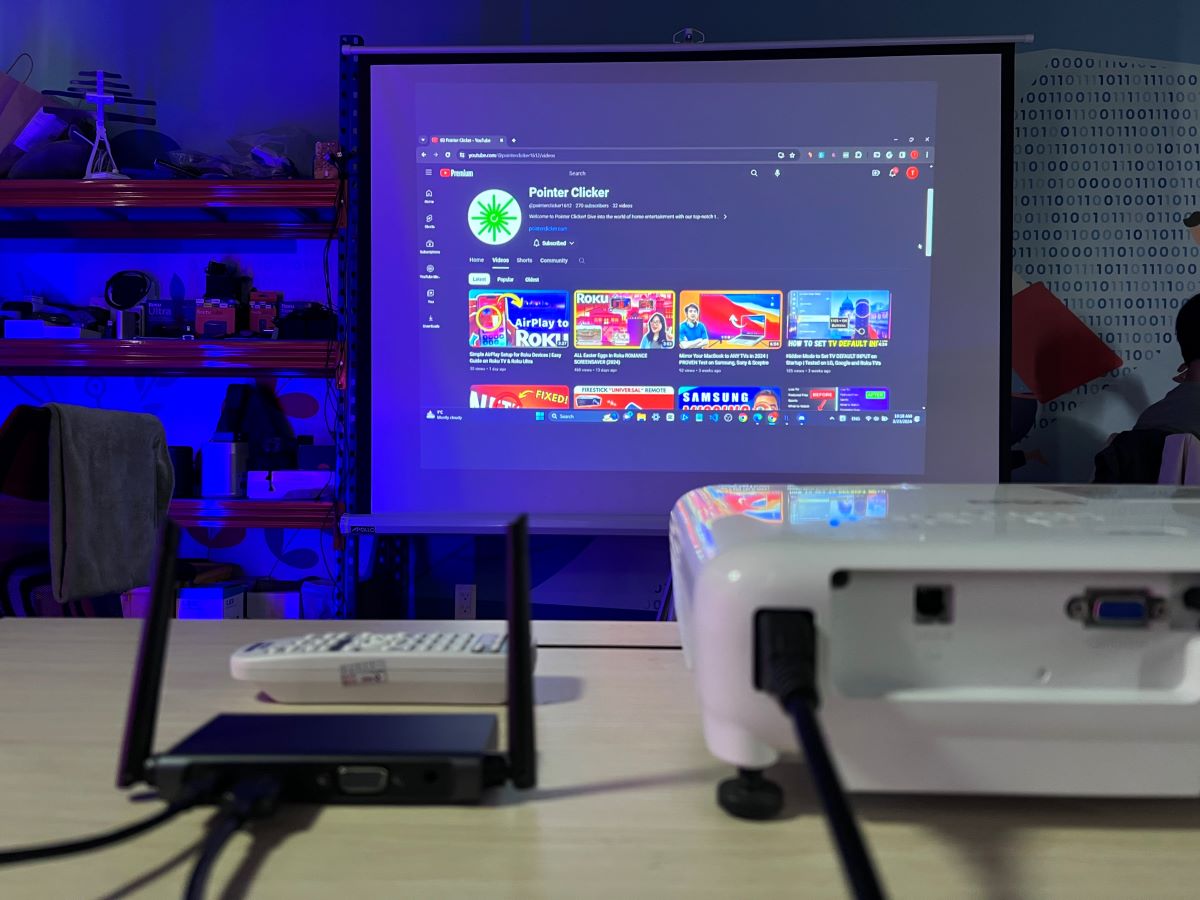
We all know that the iProjection feature from Epson projectors can be unpredictable—sometimes the connection works seamlessly, and other times, it simply fails.
Troubleshooting the Epson dongle or the network connection between the dongle and your casting devices, like laptops, phones, or streaming devices, often consumes too much time.
I’ll introduce a more reliable alternative to the Epson network dongle: the Ugreen Wireless HDMI Extender. With the Ugreen HDMI extender, you’ll enjoy a hassle-free experience:
- No app installation is required.
- No need to connect to any Wi-Fi network.
- Simple plug-and-play functionality.
Here is what is inside the box of the Ugreen Wireless HDMI Extender
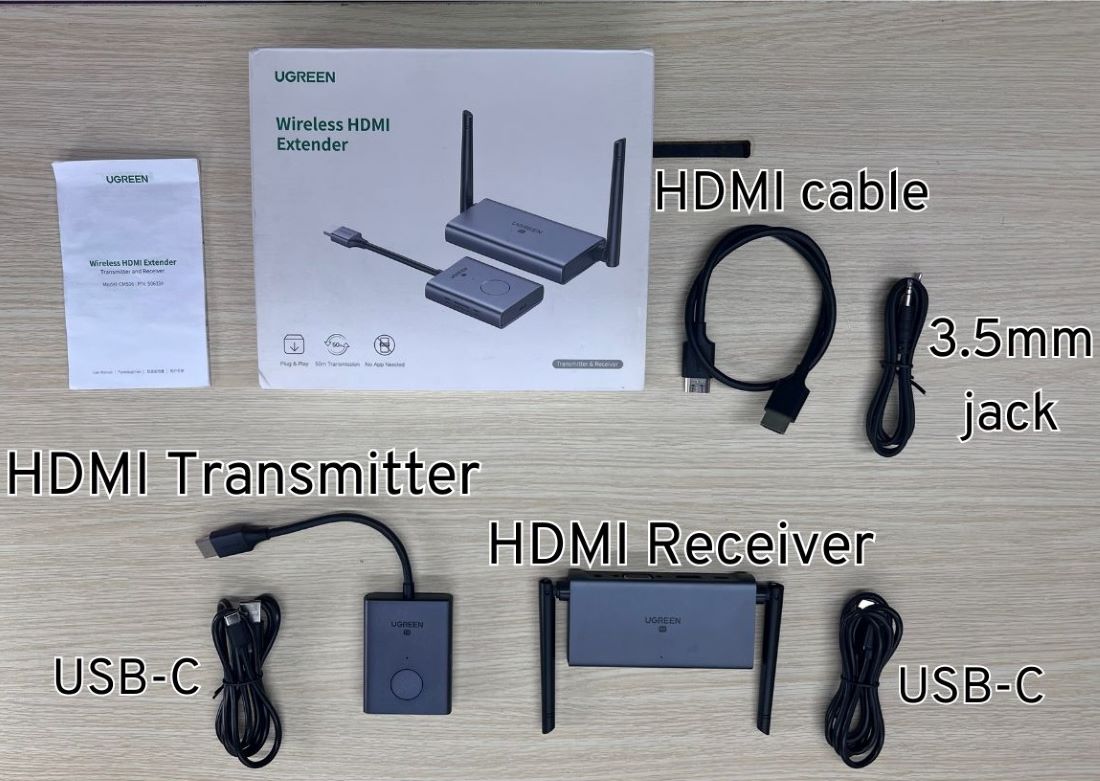
Once you have an idea which to plug into which device then let’s begin our setup guide:
For this demonstration, I’ll use my Windows laptop and the Epson EB-E01 model.
I’ve also tested the HDMI extender with a variety of other devices, including the PS4, Roku Ultra, and iPhone 13 Pro Max, to ensure its broad compatibility.
I have included images of the results at the end of the instructions for your reference.
Step 1: Connect one end of the HDMI cable to the Epson projector’s HDMI input port and the other end to the receiver’s HDMI output port.
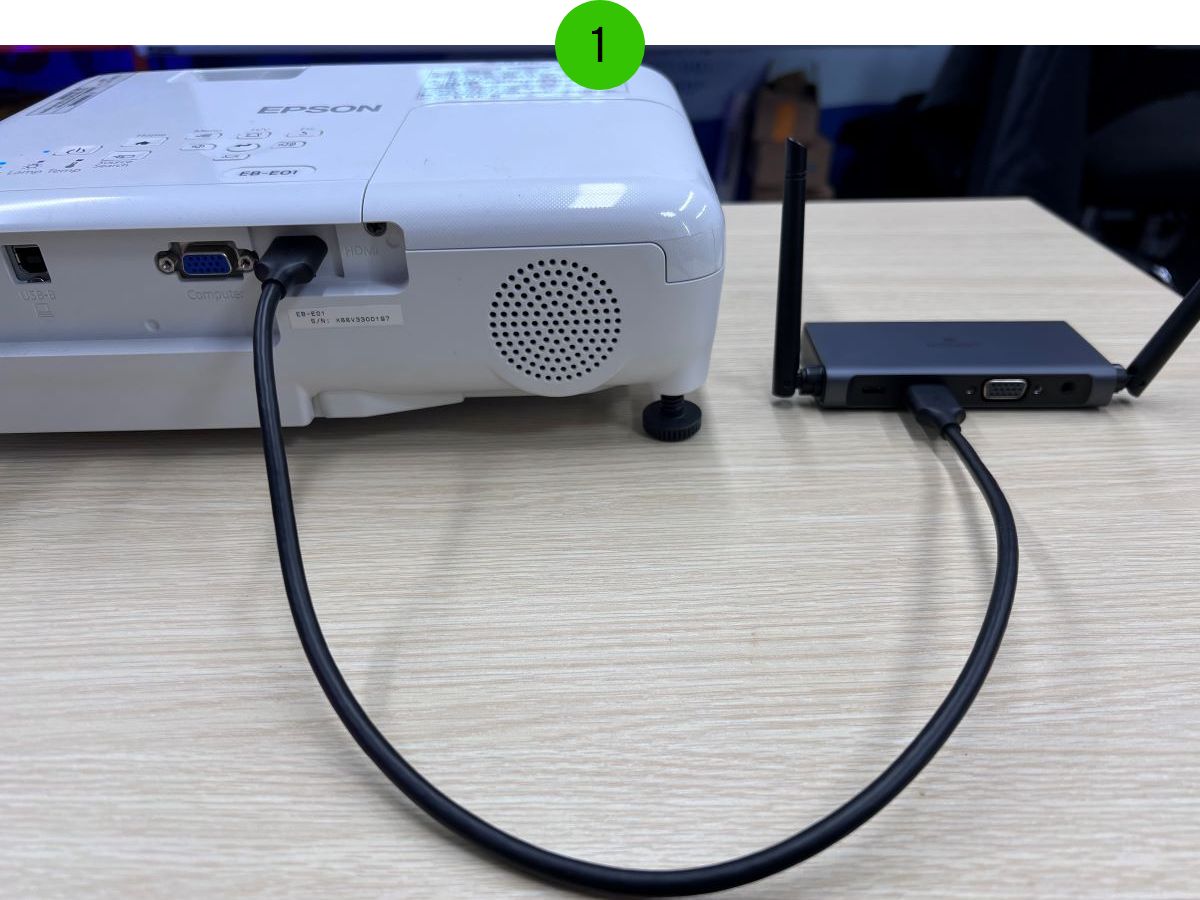
Make sure to connect the USB-C cable to power the HDMI receiver.
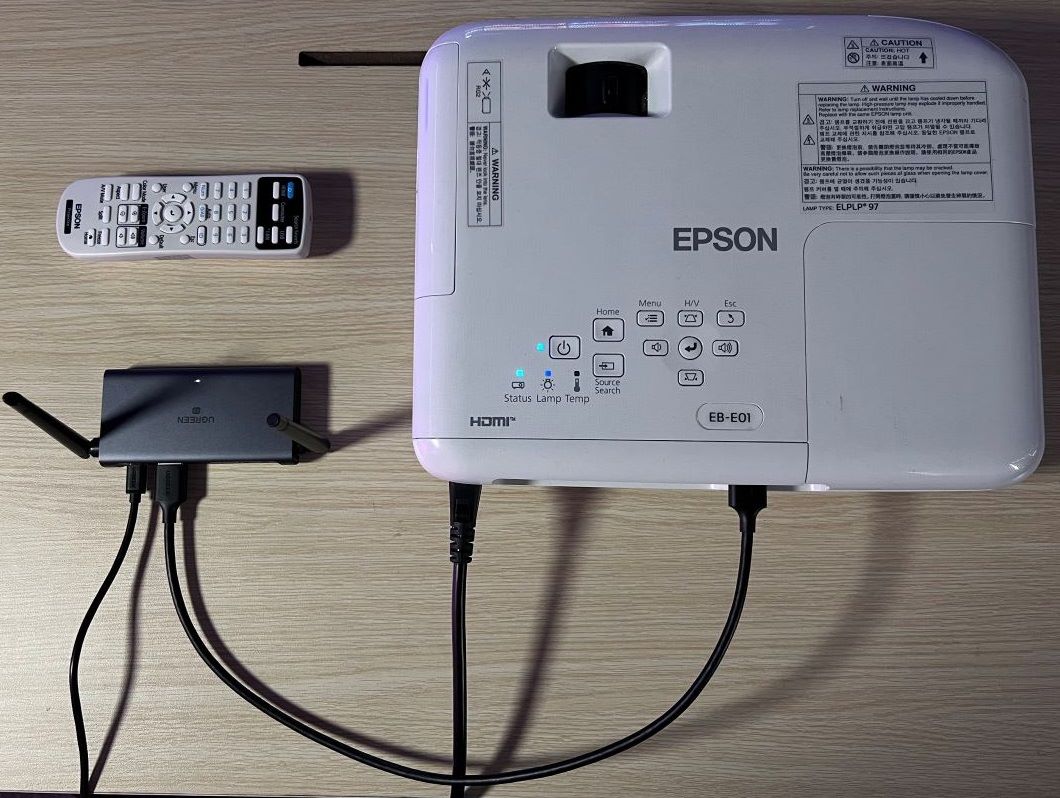
Once the connection is successful, you’ll notice Ugreen’s setup instructions displayed on the projector’s screen.
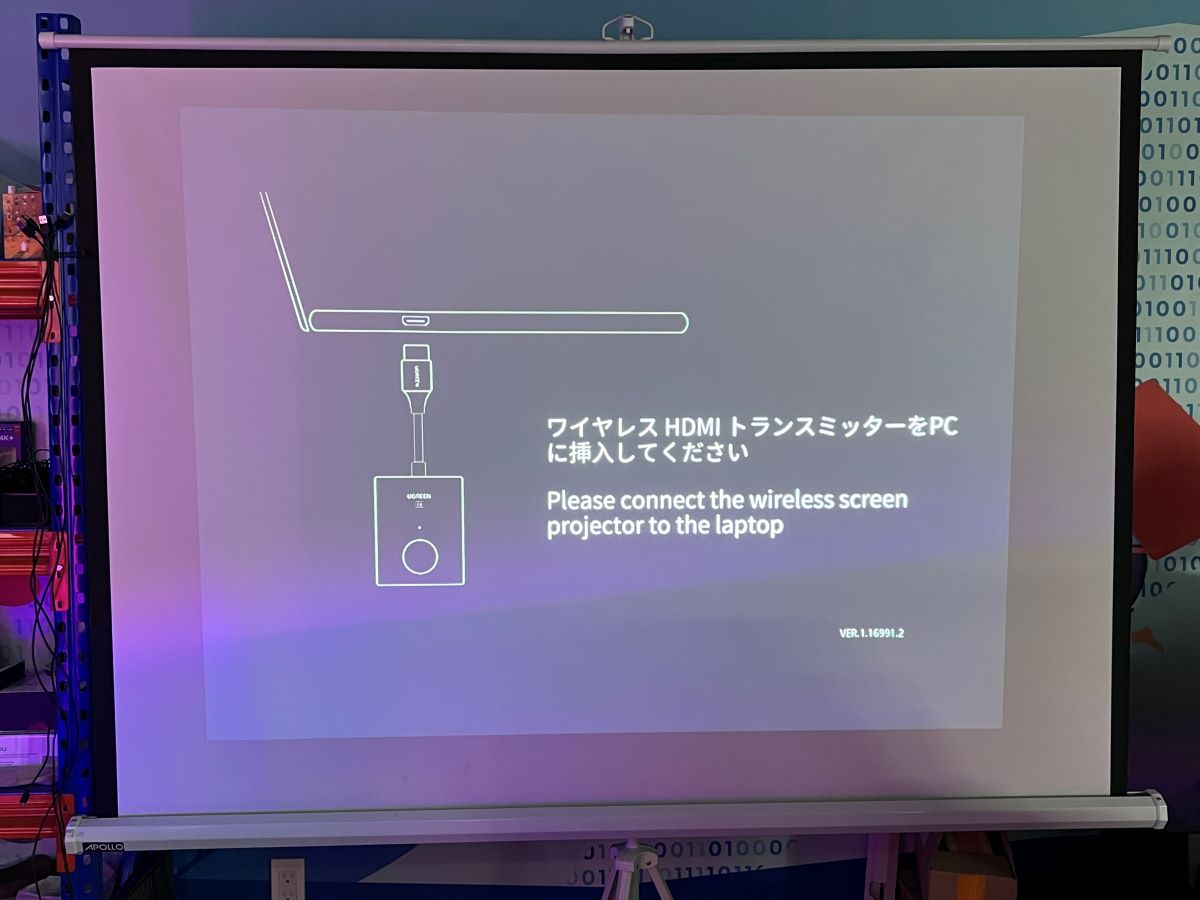
This indicates that the HDMI receiver is functioning correctly with your Epson projector.
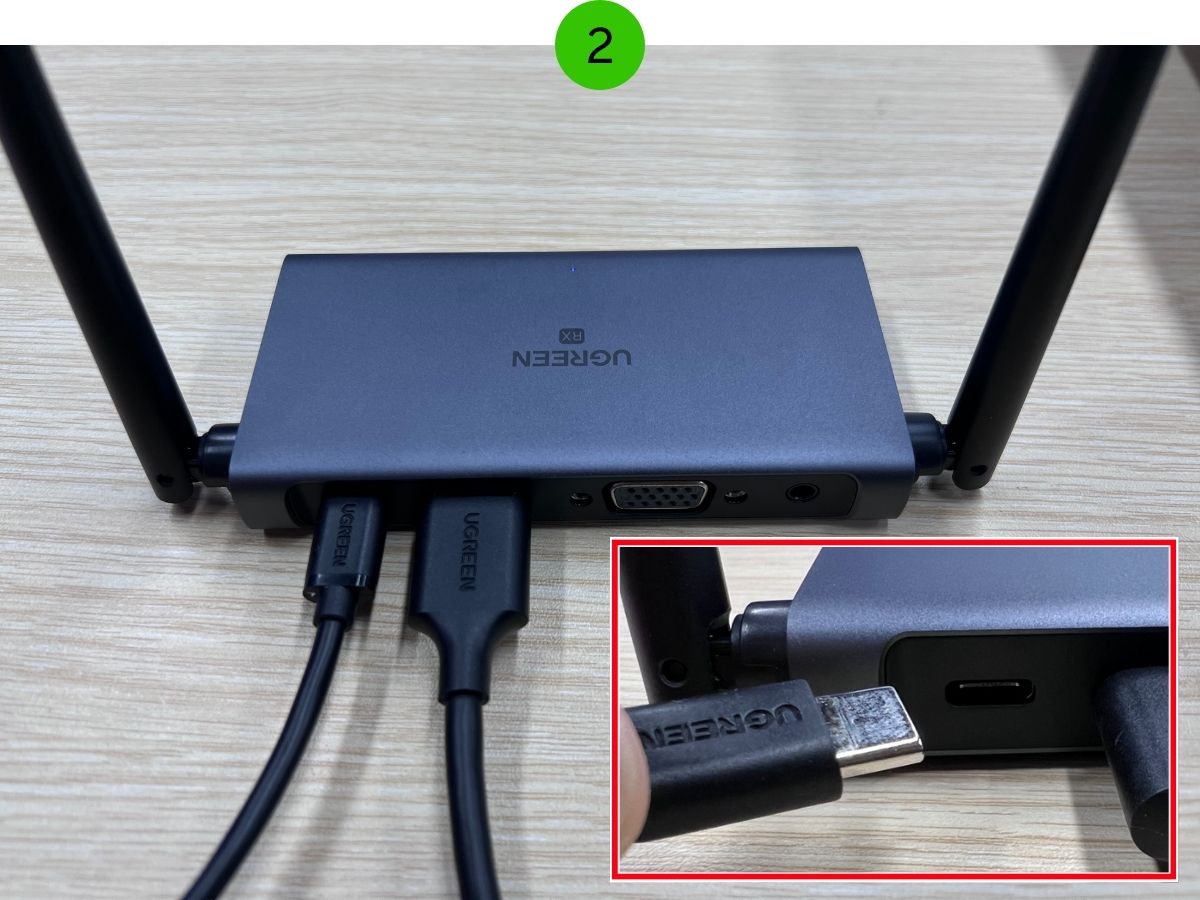
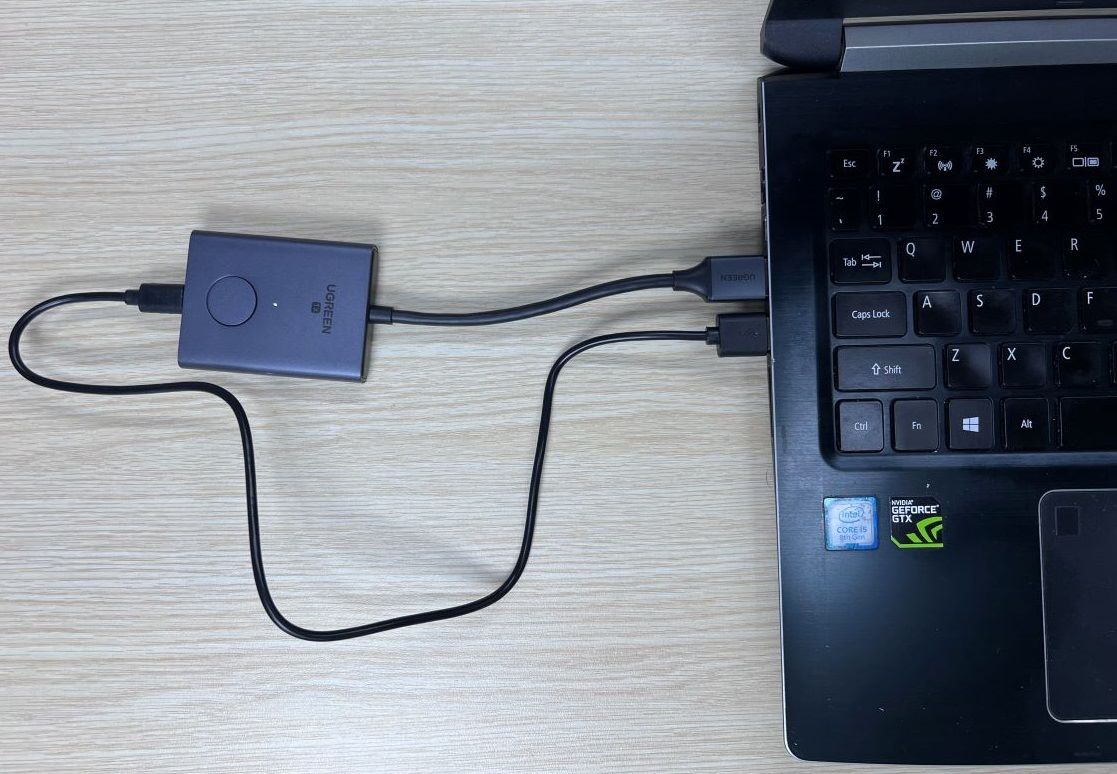
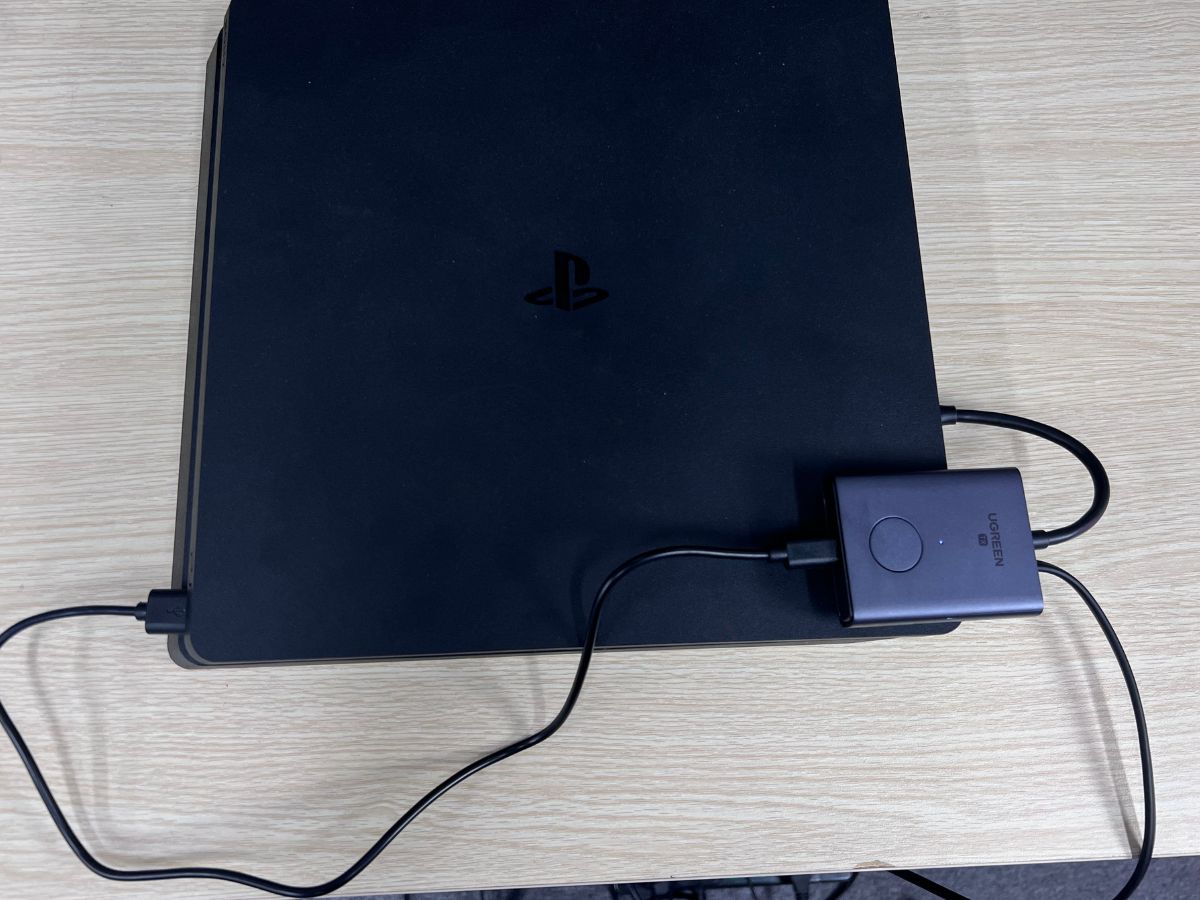
Step 2: Plug the HDMI transmitter directly into the HDMI output port of your source device, whether it’s a computer, game console, streaming device, or any other.
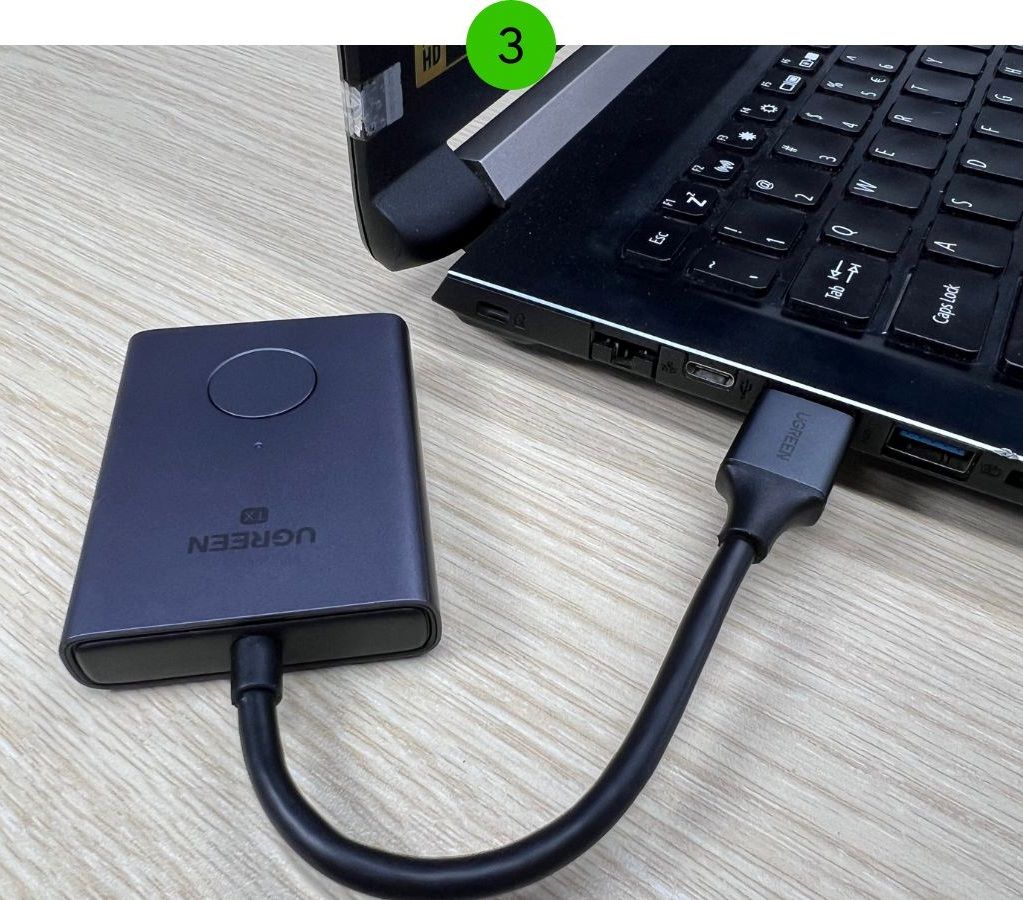
Make sure to power the transmitter using the USB-C cable that comes with the HDMI extender. In my case, I’ll be powering the HDMI transmitter using my computer’s USB port.
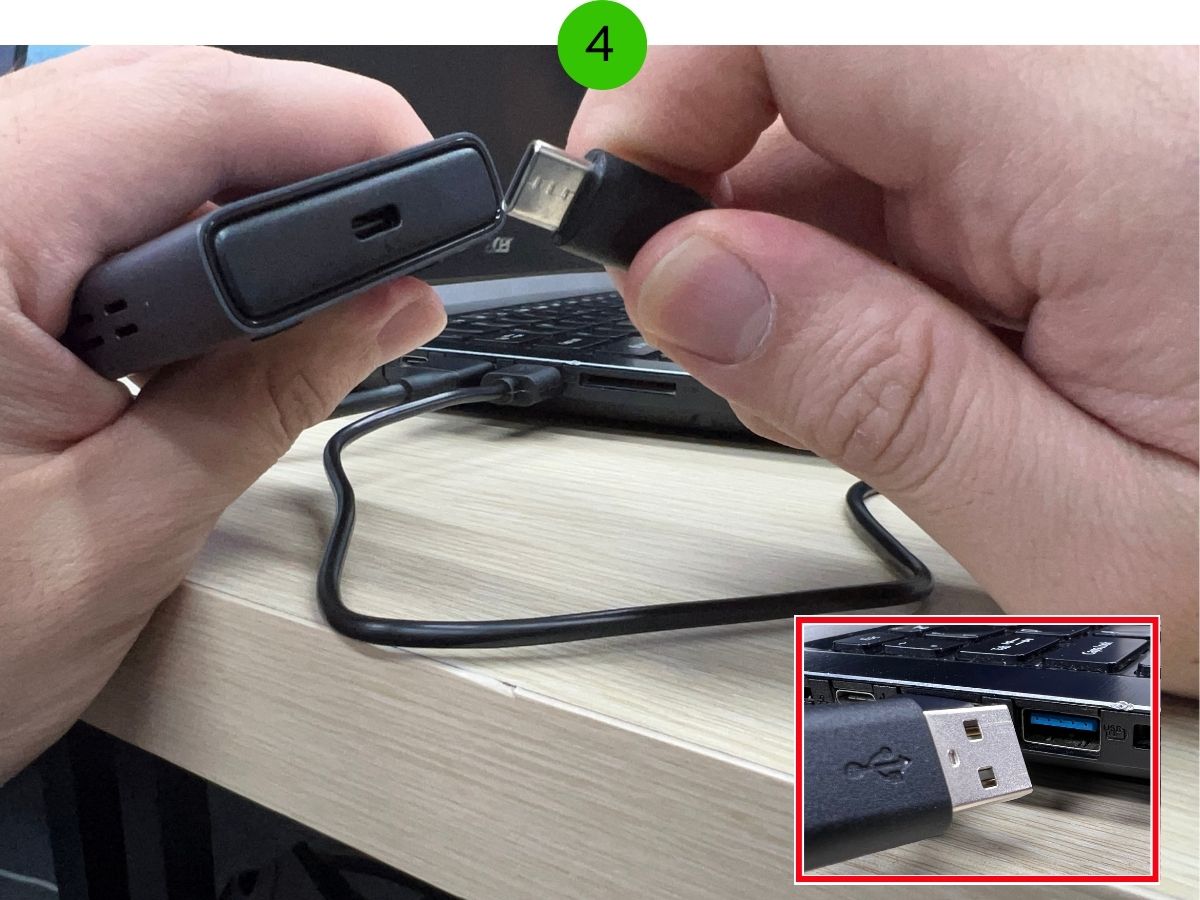
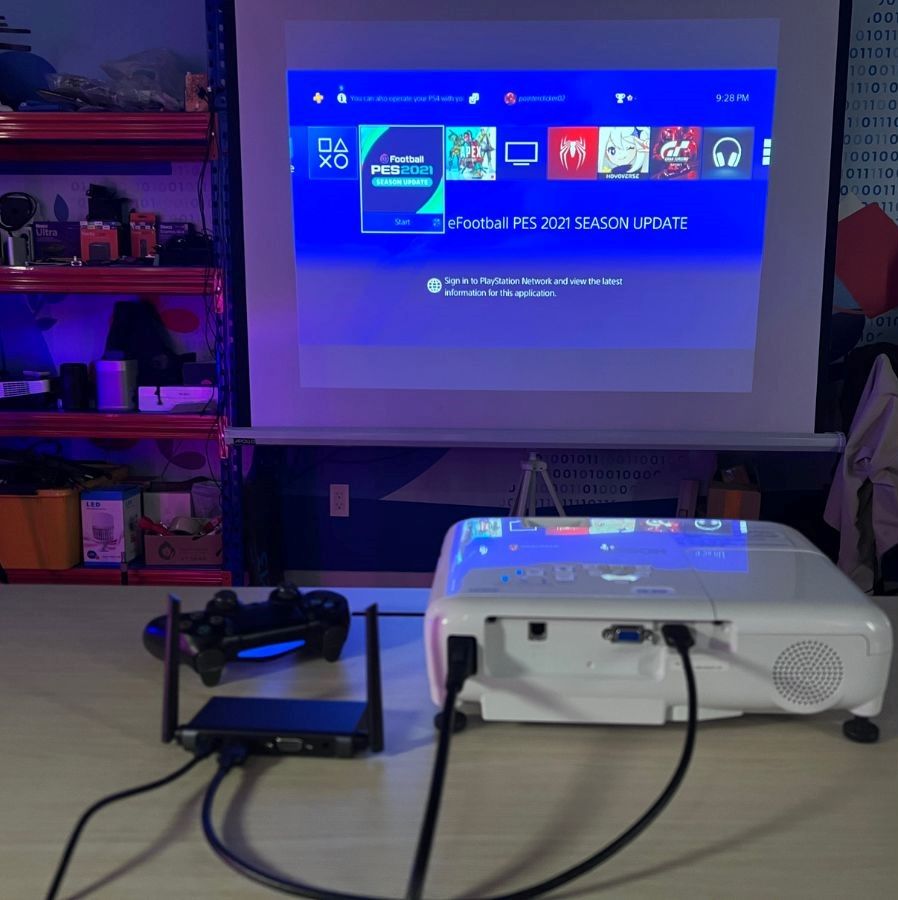
Step 3: On the HDMI transmitter, press the pair button. Wait for the indicator light to flash, signaling that it’s starting to transmit the HDMI signal to the receiver.
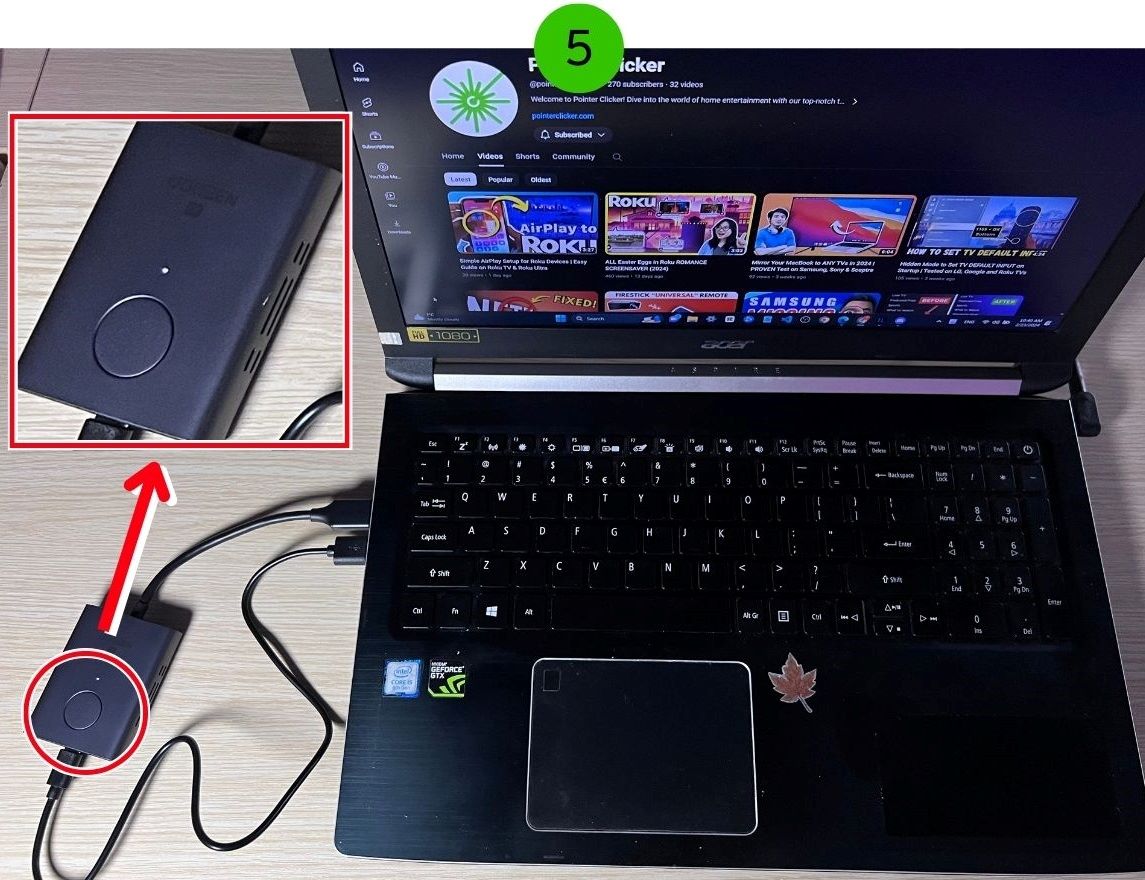
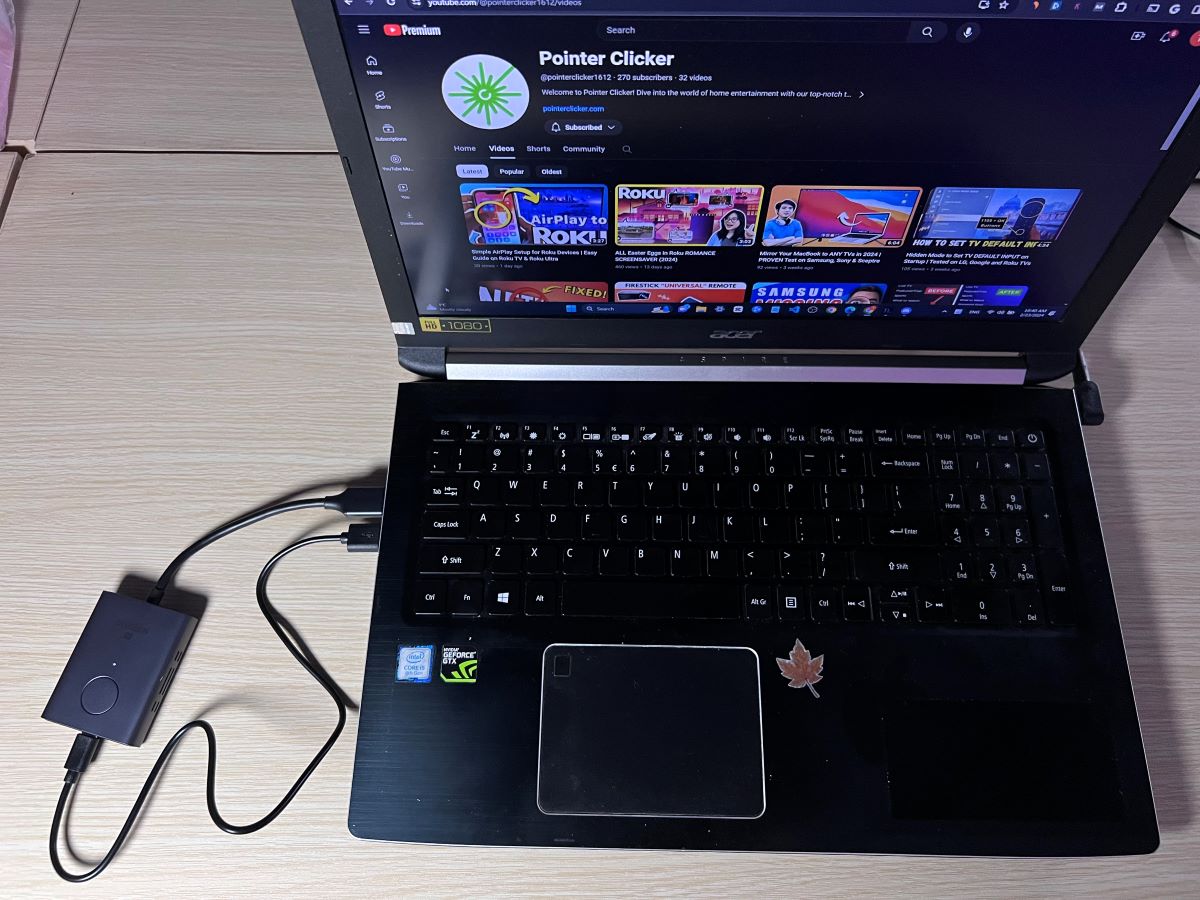
Here is the result
Here are the results from further testing with other devices:
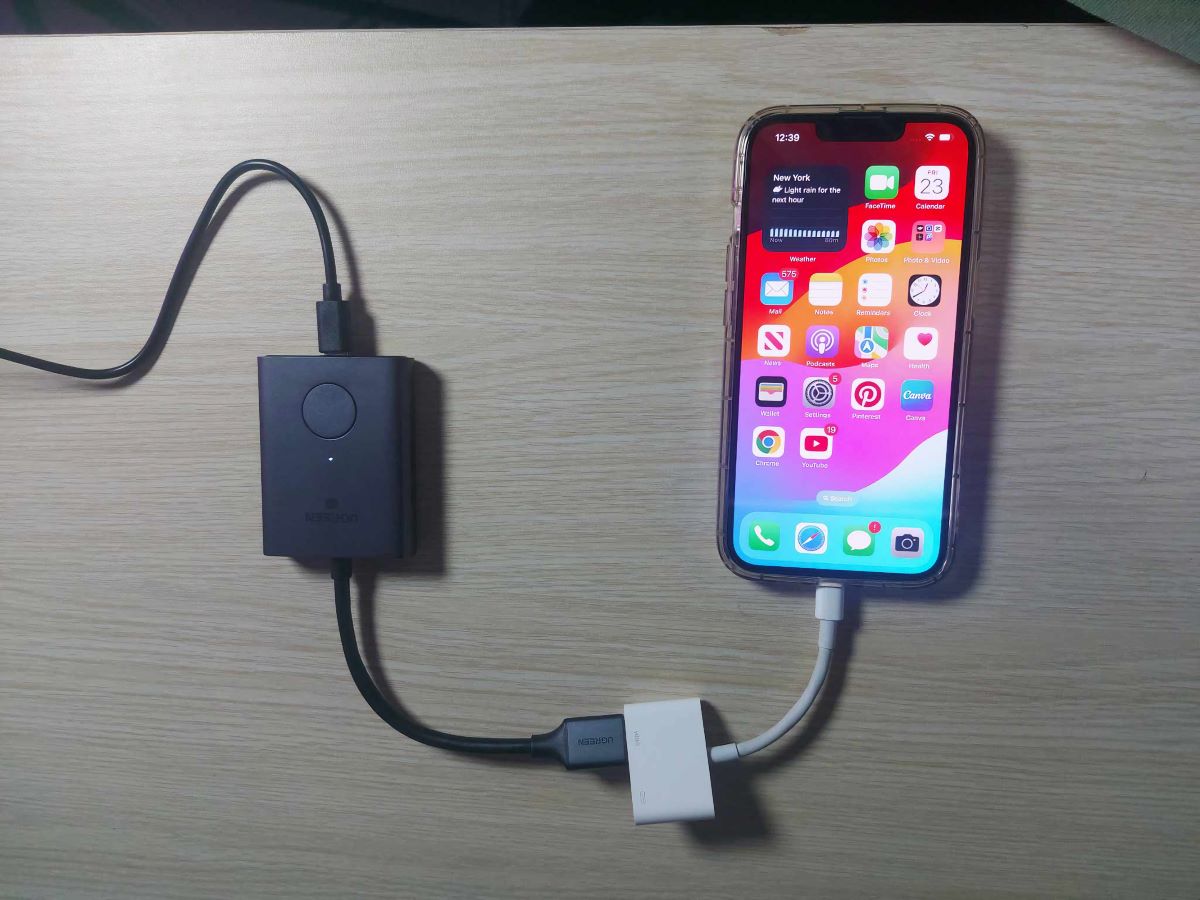
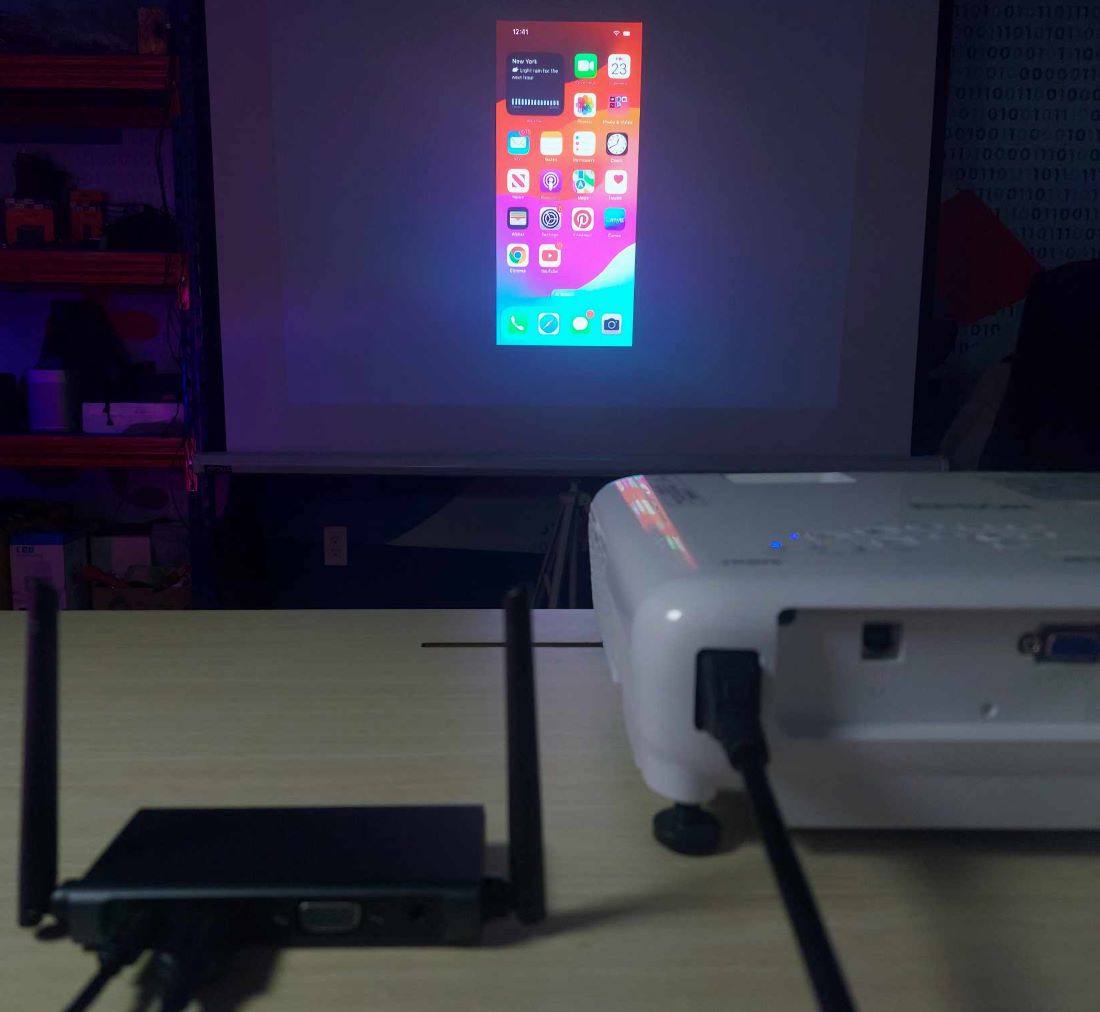
iPhone 13 Pro Max:
To connect the iPhone 13 Pro Max to the projector, a Lightning-to-HDMI adapter is required.
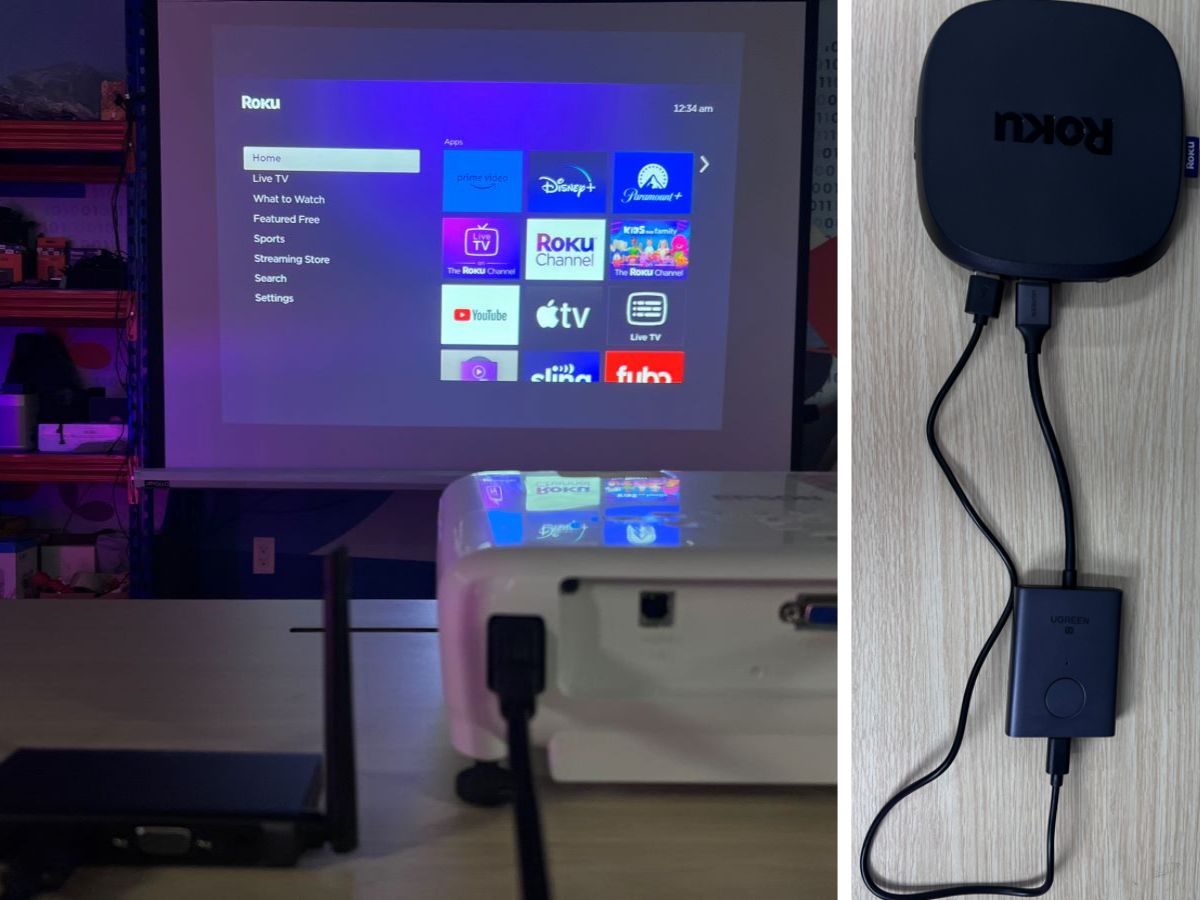
Roku Ultra:
PS4: For those considering gaming on the PS4 with this connection, be aware that the input lag is quite noticeable and could detract from your experience.
2. Use a Streaming Device
Wireless LAN modules may be a great investment for some, but given their high price point, they may be too expensive for people looking to cast on a budget.
Luckily, you can cast content to your non-smart Epson projector with a streaming device. Not only are these devices compact and budget-friendly, but they’re also compatible with every projector model since they connect via HDMI.

You can even connect them to older projectors without HDMI ports using an HDMI adapter! Head to our article How to Connect a Chromecast to a TV/Projector Without an HDMI Port? to learn how to connect a streaming device to any old projector.
Roku, Fire TV Stick
Rokus and Fire TV Sticks connect to projectors exactly the same way they connect to TVs. The device’s interface will also be exactly the same.
Simply connect one end of an HDMI cable to your Roku or Fire TV device before connecting the other end to your projector. Don’t forget to also connect your streaming device to power!
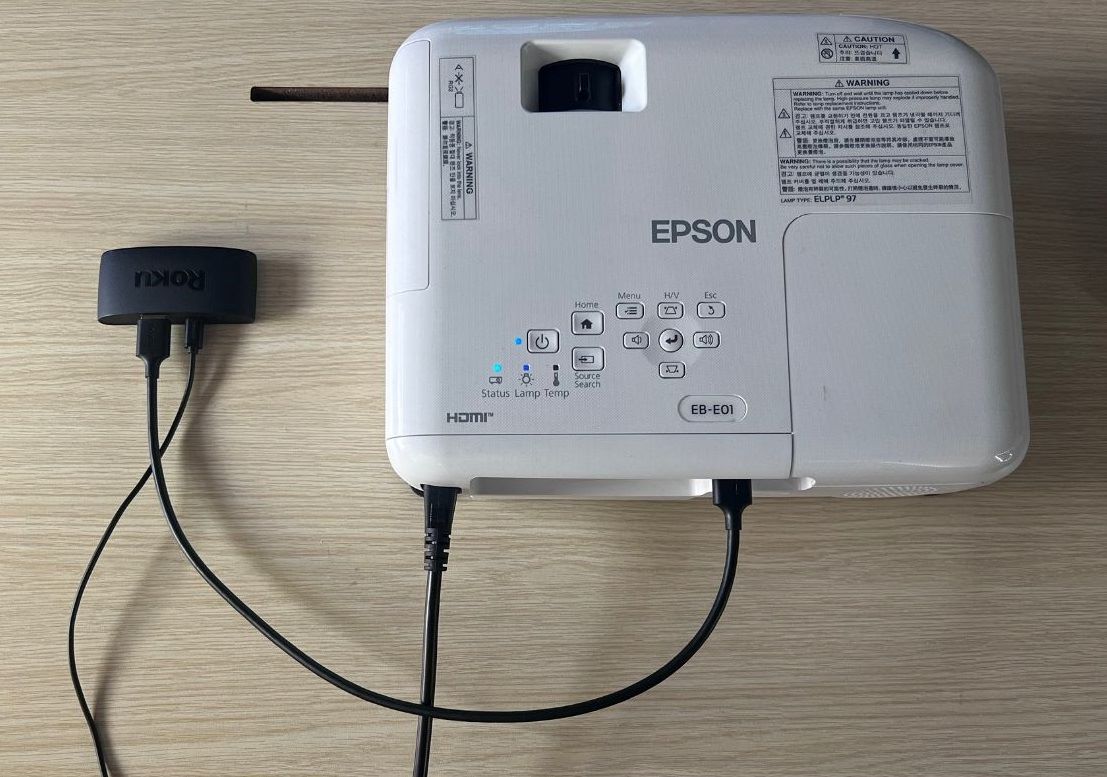
Then, adjust your projector’s input to HDMI so it displays the streaming device’s interface.

You can cast your Mac or iOS device’s screen to your Roku or Fire TV by heading to Apple AirPlay and HomeKit in your device’s settings, and then following any additional instructions on-screen.
Remember to connect your Roku/Fire TV and device to the same Wi-Fi network since AirPlay works via Wi-Fi.
You can also screen mirror your Windows OS laptop to your Roku or Fire TV by following the steps below.
Screen Mirror Windows OS To Roku
I will demonstrate how to cast content using my Windows laptop to an Epson projector via a Roku Express 4K+.
First, ensure your Roku Express 4K+ is connected to the Epson projector. Once this connection is established, you can begin casting from your laptop directly to the projector.
Here’s how:
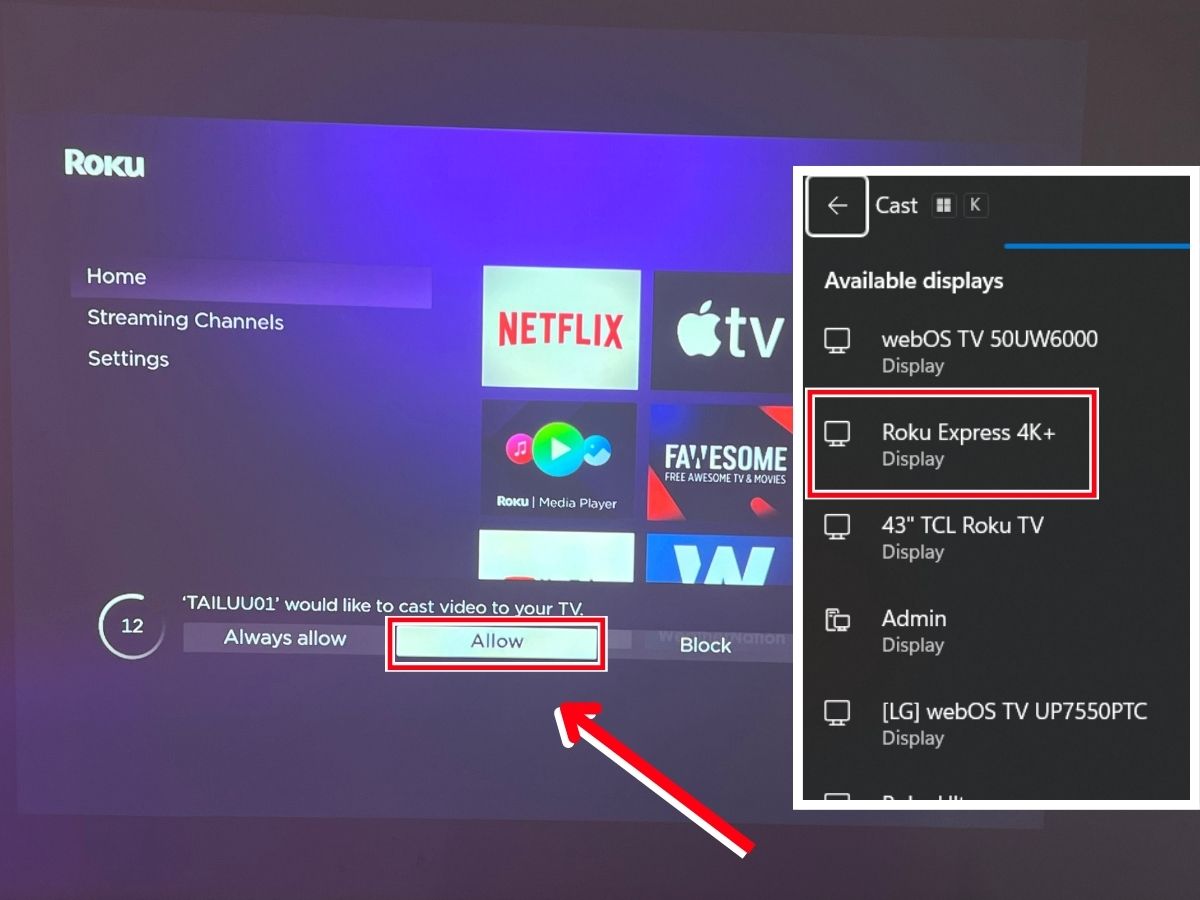
Step 1: On your laptop keyboard, press Windows + K to show the Wireless casting.

Step 2: You will see the Roku Express appear on the casting devices list, select to start casting.
Step 3: On your Roku screen, you’ll see a prompt asking if you want to allow content to be cast. Select Allow to proceed. After completing this step, you’ll be casting from your laptop to the Roku Express.
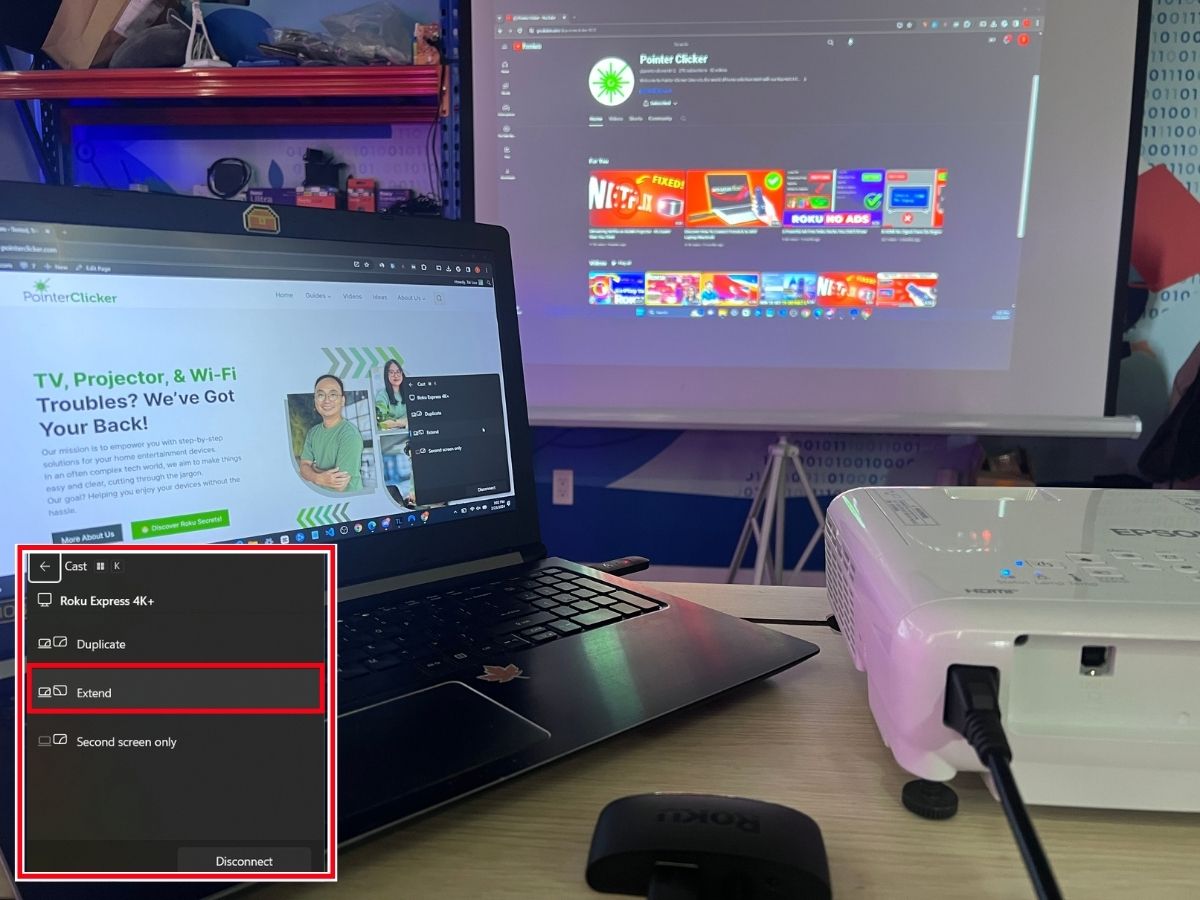
To further enhance your viewing experience, Windows offers several display settings options. You can choose to Duplicate the screen, Extend it, or opt to show only the Second screen.
3. iProjection Solution from Epson
If your Epson projector is smart and has a built-in Wi-Fi function, you can connect it to a Wi-Fi network and cast content to it by following the steps below.
Step 1: Hit the remote’s Menu button.
Step 2: Go to Network and click Enter.
Step 3: Ensure Wireless Mode is turned ON.
If you’d like to connect your non-smart Epson projector to Wi-Fi without a streaming device, consider investing in a Wireless LAN module that connects to your projector’s USB port. Please note that while this device is convenient, it is on the pricier side.

- Compliant with 802.11 b/g/n standards
- Uses USB type A connector
- Compatible with PC or Mac
Last update on 2024-04-10 / Paid Link.
- Compliant with 802.11 b/g/n standards
- Uses USB type A connector
- Compatible with PC or Mac
Once your Epson projector is connected to Wi-Fi, you’re ready to start casting content to it. To cast content from an iPhone or laptop, you must install the iProjection app before following the steps below.

Step 1: Launch the iProjection app on your device.
Step 2: Find and select your projector’s name within the app. If you don’t see your projector’s name, go to your unit’s Network settings and take note of its IP address. Then, enter this address into the iProjection app by selecting the Search by IP address option.
Step 3: Once you’ve found and selected your projector within the app, select OK to connect your device to your projector.
Now you’re ready to start casting to your Epson projector!

Tai “Ty” Luu, an Electronics Engineering graduate from Sheridan College, is a passionate technical editor with a deep love for technology and gaming. He constantly seeks new challenges to expand his expertise in the tech and gaming fields.
How do I get my search access point to light up so I can click on it I’ve turned my connection mode to advanced and my wireless is turned on