
Can You Change the Resolution on Your BenQ Projector?

What To Know
- BenQ projector resolution is native and cannot be changed; you can only adjust the resolution on the source device to match the projector’s.
- For compatible display settings, adjust the connected device’s resolution through its specific menu, whether it’s Windows, Mac, streaming device, or gaming console.
- A 4K BenQ projector displays in 4K by default and downscales only when the input is of lower resolution; input device resolution, throw distance, screen size, and calibration affect viewing quality.
Now you know that you can’t change your BenQ projector’s resolution, but you can still ensure your movies and presentations look their best by tweaking the resolution on your source device to match your projector’s capabilities.
Quick Navigation
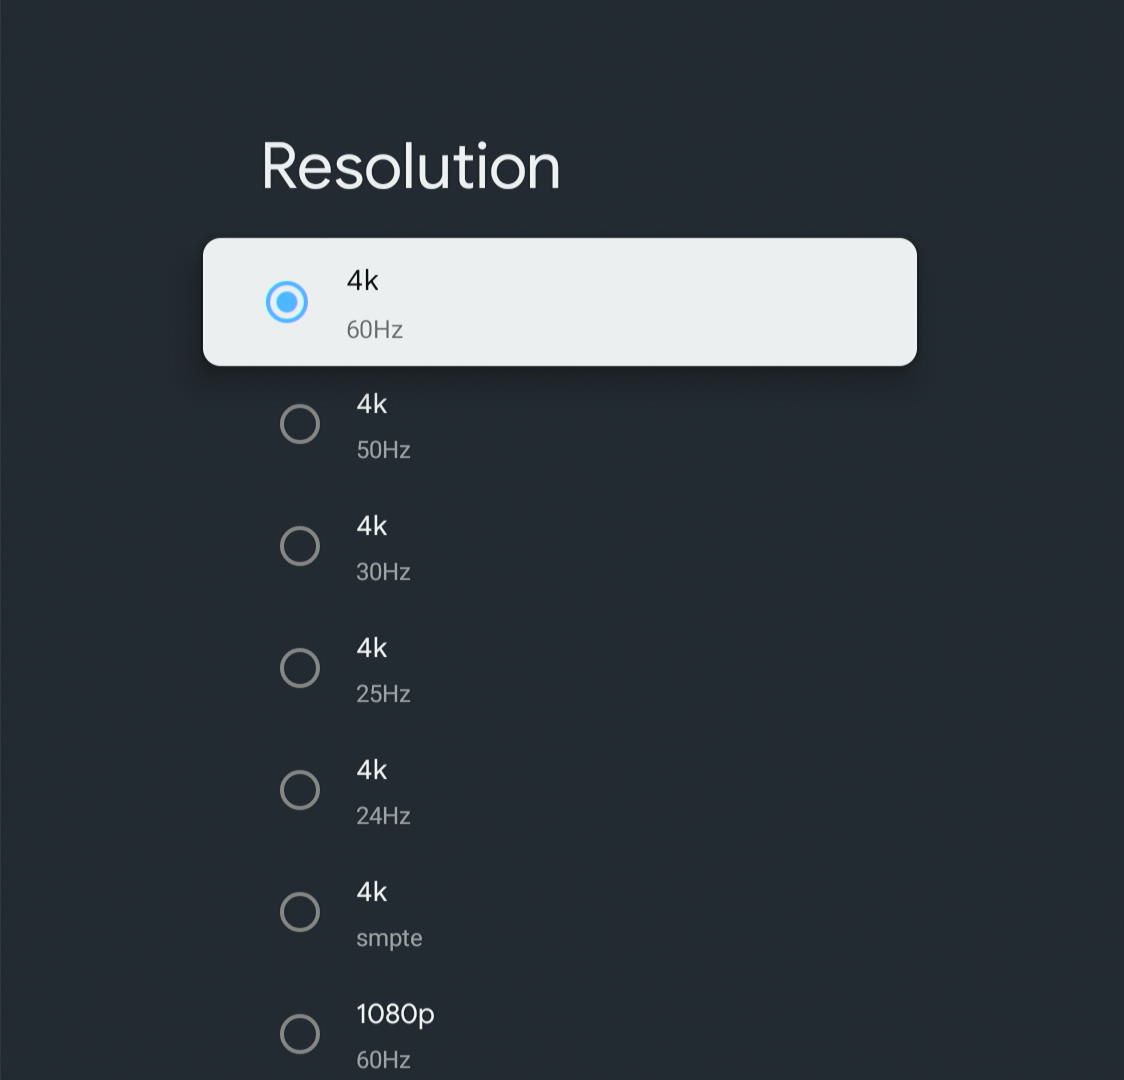
How to Change the Resolution of the Source Device?
Your BenQ projector and most other display-bearing devices connected to an external machine modify their resolution or display visuals according to the connected device’s resolution.
Note that the two devices’ native resolutions must match. Your projector screen will show an error message if there’s a discrepancy. The steps to set a matching resolution can differ based on the input device’s operating system.
If your source device is a Windows computer, here are the steps to choose a compatible resolution:
- Open the Settings menu.
- Click System from the left menu and select Display from the options.

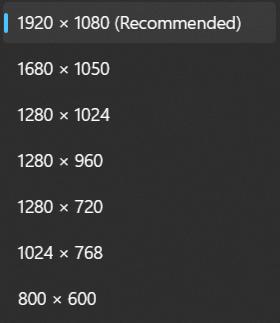
- Click the drop-down to the right of Display resolution and choose the resolution matching your projector.


If using a Mac, follow these instructions instead:
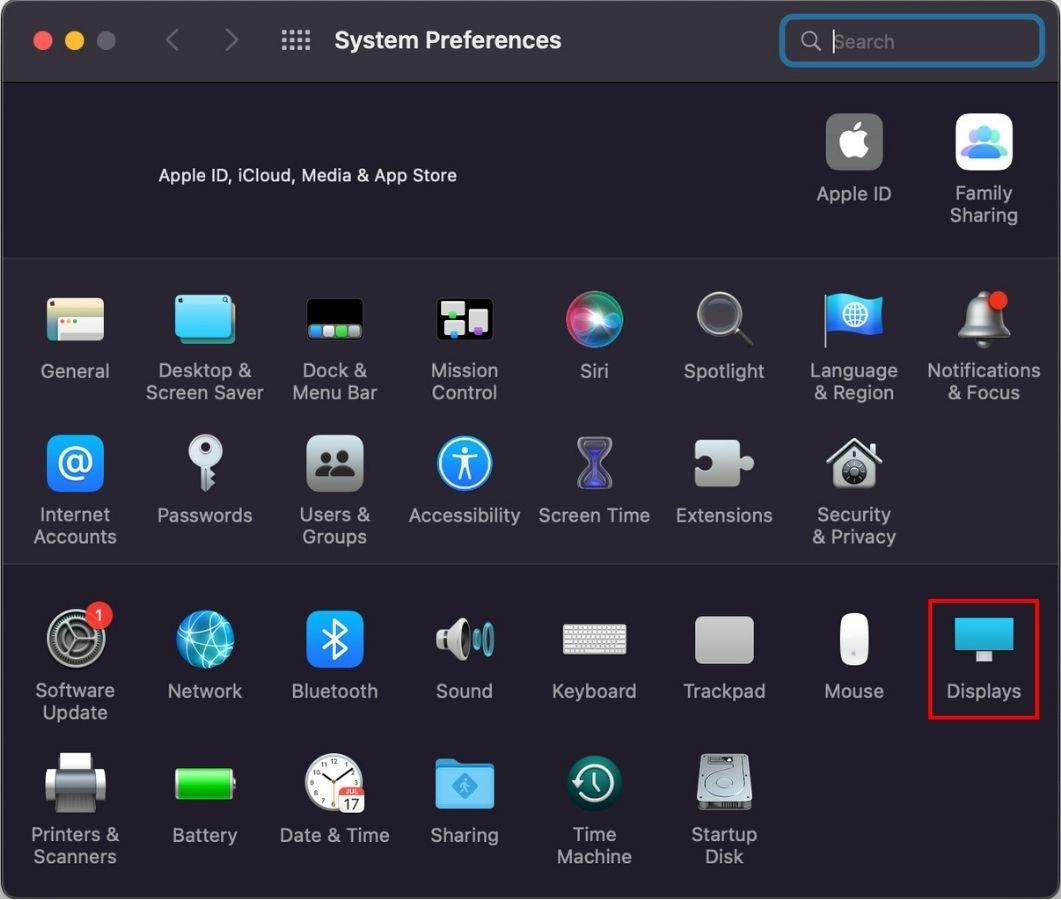
- Click the Apple logo/menu on the top left of your home screen.
- Click System Preferences from the drop-down and select the Display tab.
- Next to Resolution, choose Scaled and select the compatible resolution from the options below.


If using a streaming player, the steps will change based on whether it’s a Roku, Fire TV, etc. For example, if you use a Roku, here is how you change the resolution:
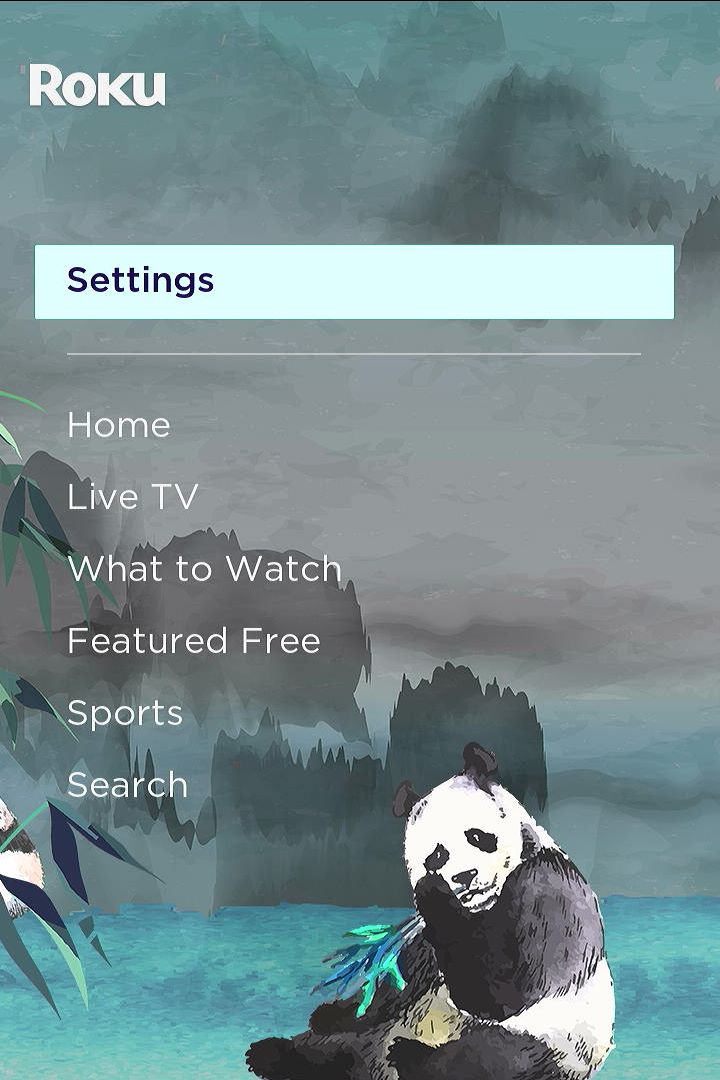
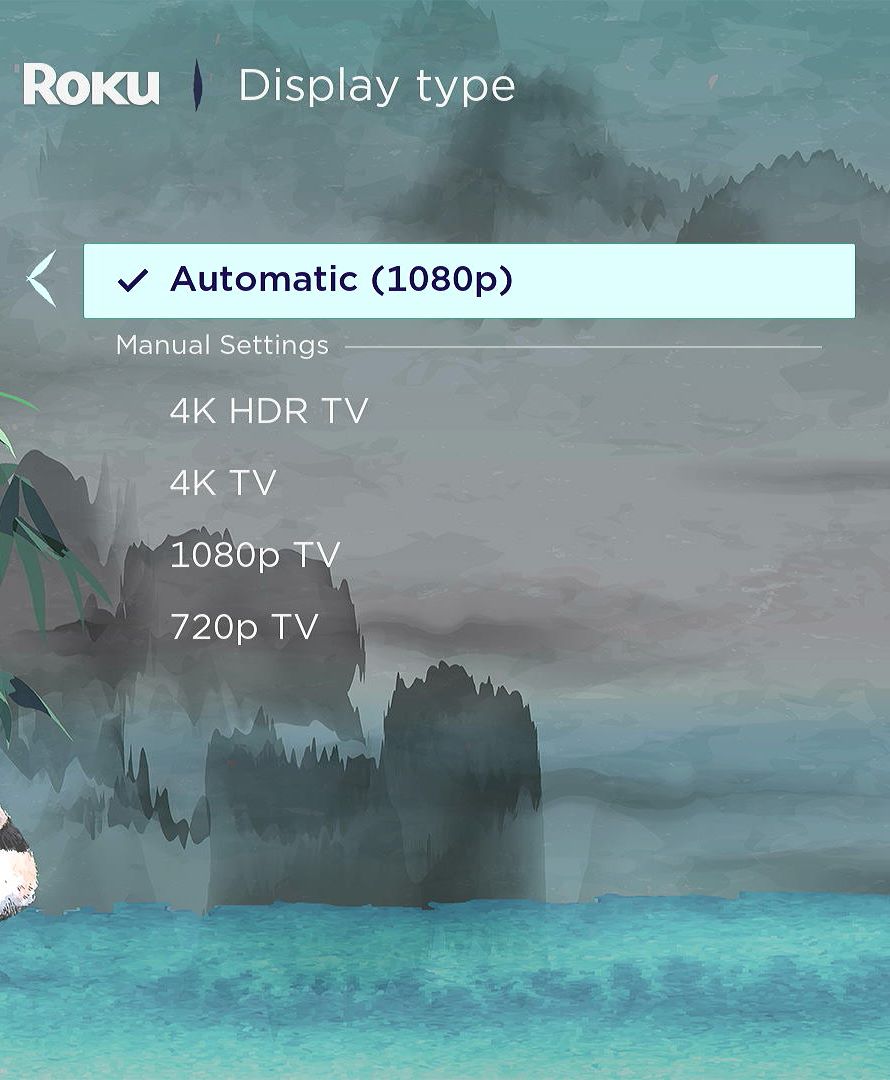
- On your Roku Homescreen, navigate to Settings.
- On the next page, scroll down to Display type.
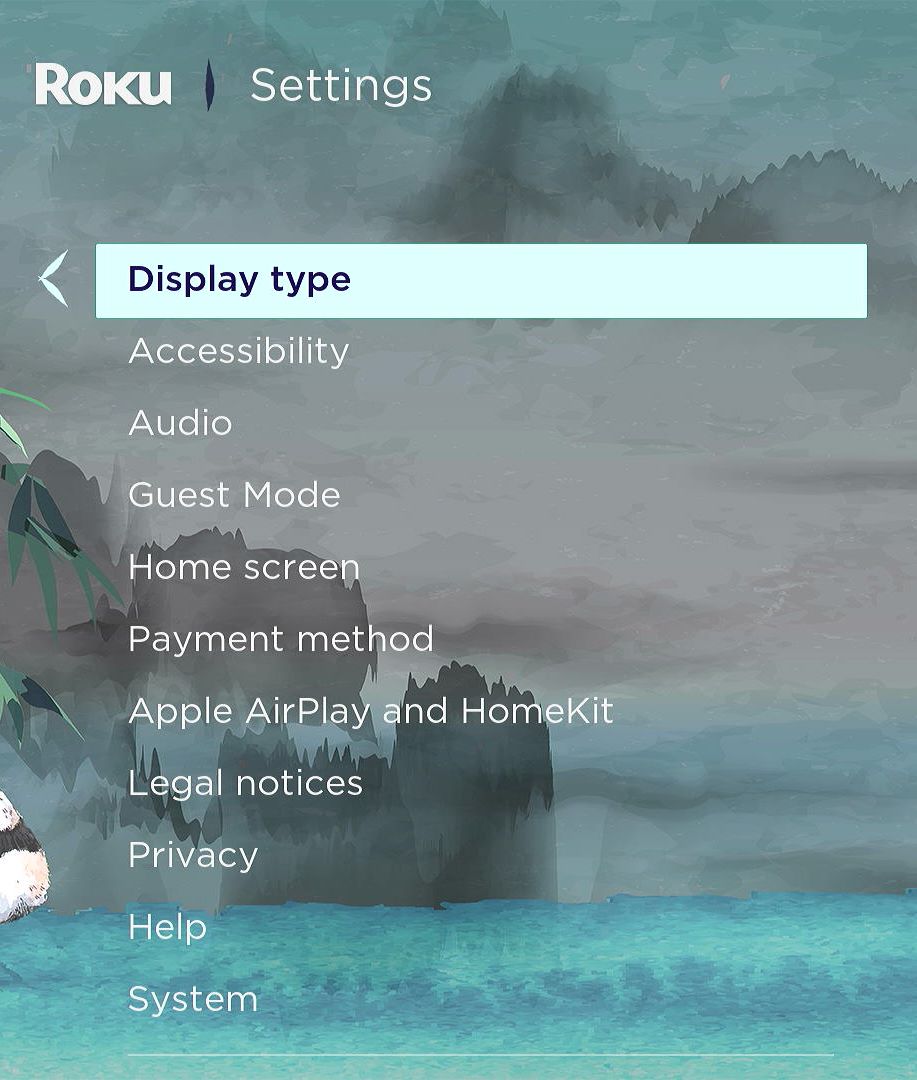
- Hit the right arrow key on your remote to reveal all the resolution options.
- Choose the resolution your BenQ projector supports, or select Automatic to let the Roku do it for you.


For Fire TV devices, follow these steps:
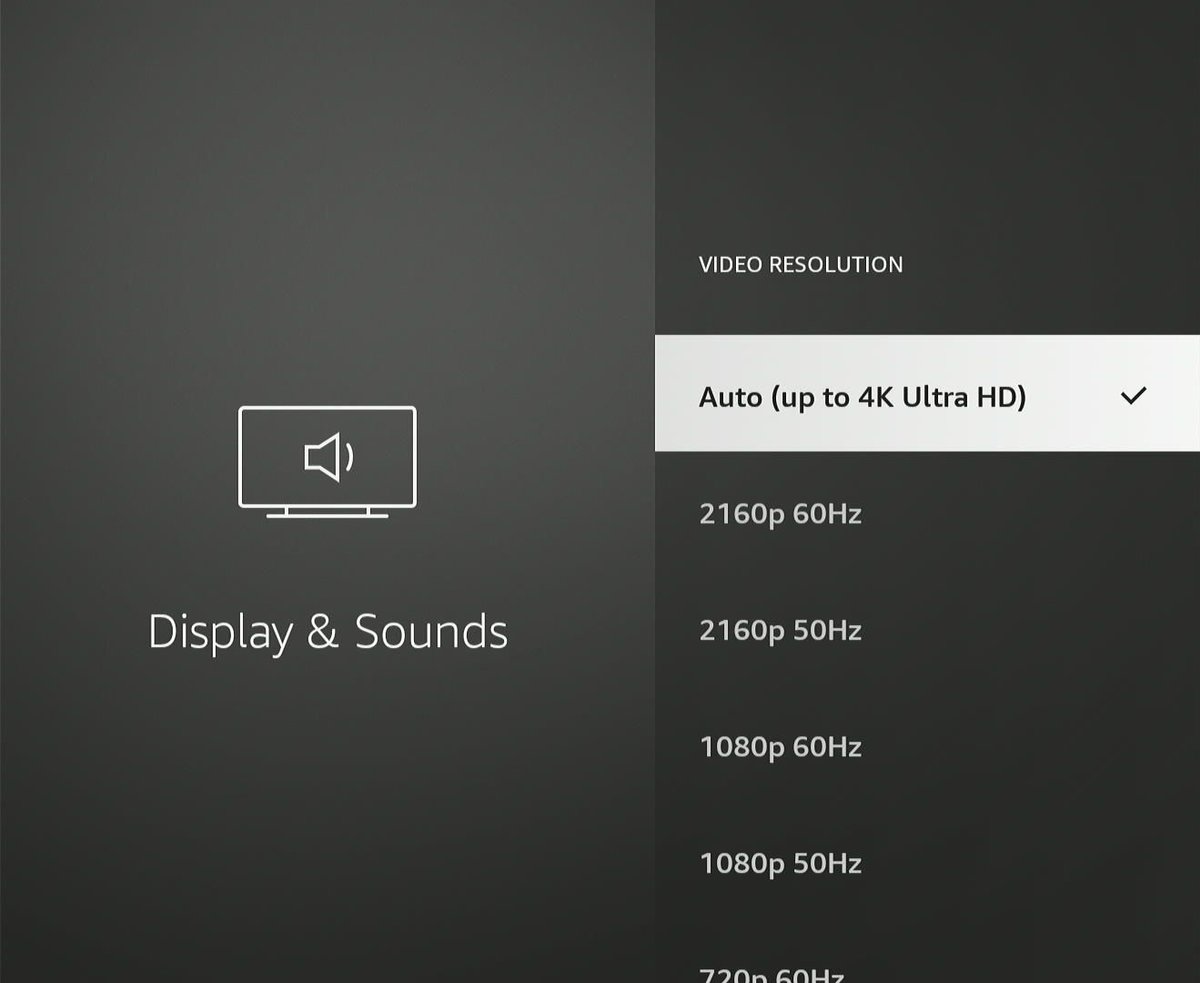
- On the home page, head to Settings.

- Choose Display & Sounds and then go to Display.
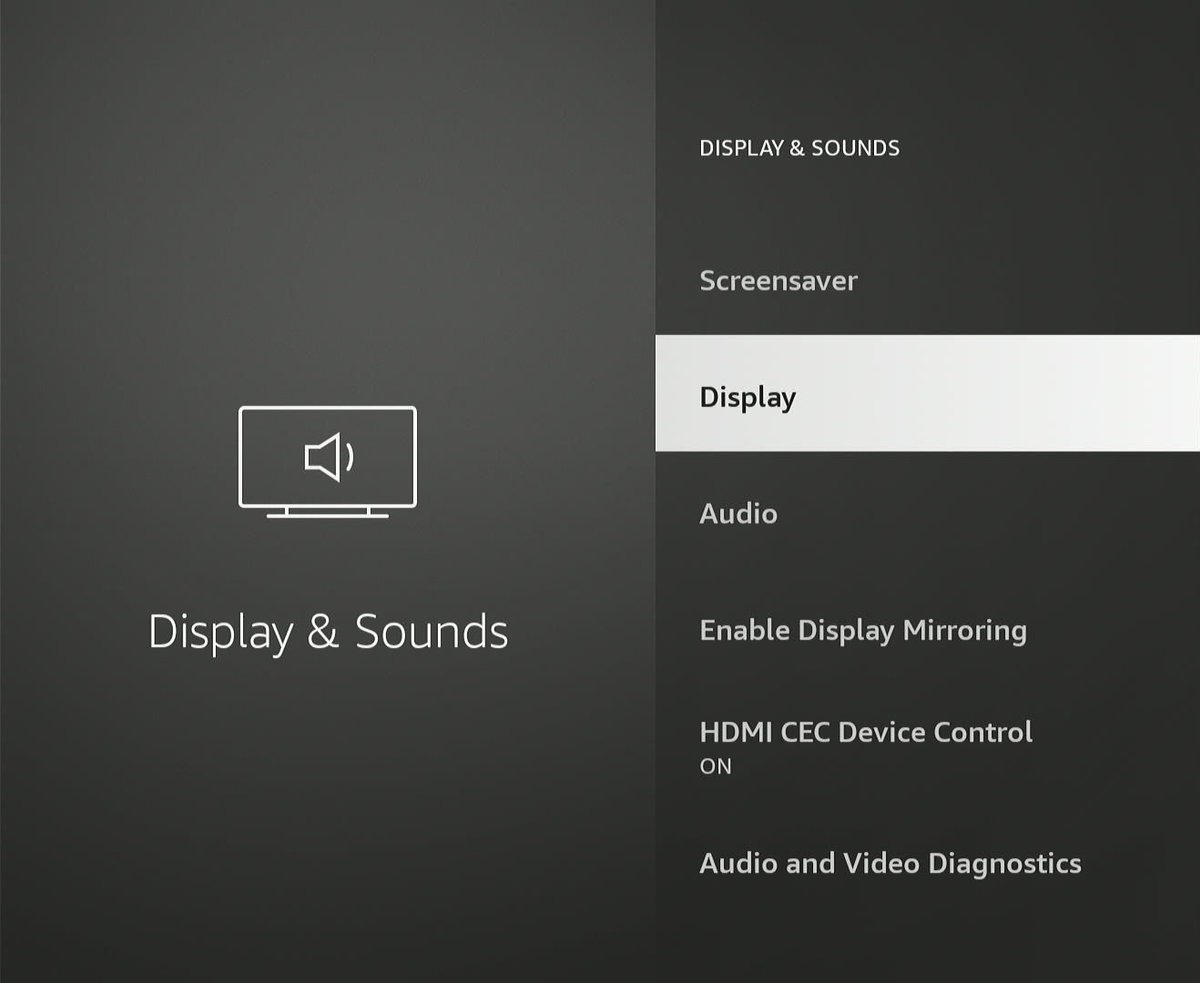
- Select Video Resolution and choose the compatible resolution.


There is another way to change the resolution or let the Fire Stick do it for you.
Press the “Up navigation” and “rewind” keys on the Fire TV remote together and keep them pressed for a few seconds until the auto-resolution screen shows, press Enter to select the resolution that is compatible with your projector.

The following instructions apply for those using Chromecast with Google TV:
- Head to your profile icon on the top-right and select Settings from the drop-down.
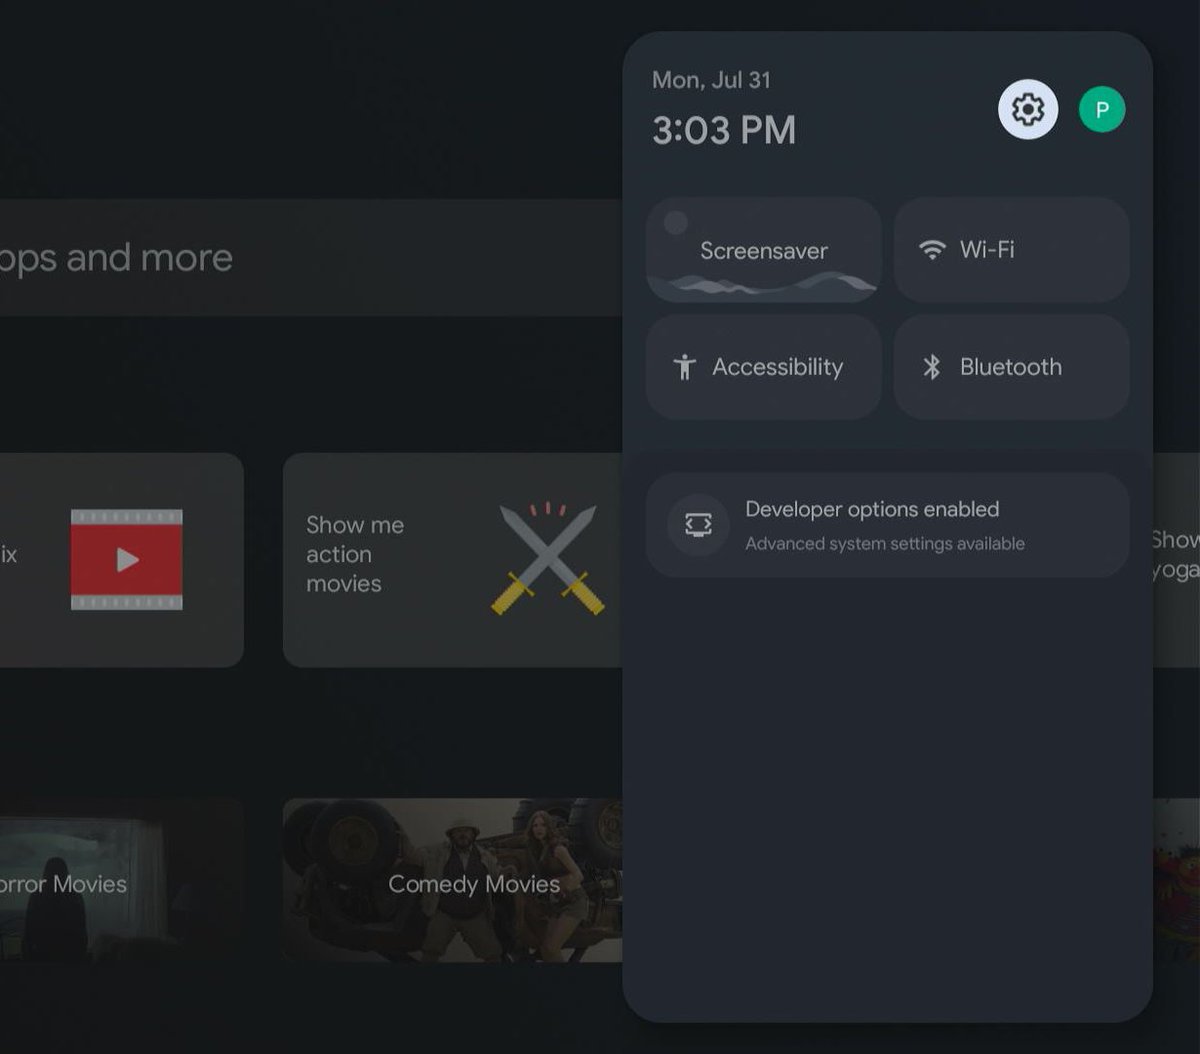
- Select Display & Sound and then Resolution.

- Choose the compatible resolution.
If using a gaming console, Blu-ray player, or other input source devices, accessing those devices’ settings menu shouldn’t be very different from above.
If you’re stuck, refer to the product manual or look for tutorials or guides online.
Your 4K BenQ Projector’s Native Resolution Cannot Be Scaled Down
Unlike in Windows or Mac, or even streaming devices, your 4K BenQ projector has no software setting that lets you set the projector’s resolution below 4K or lower than the native resolution.
Your 4K BenQ projector’s output is 4K by default. It will display a lower resolution only if the input device or source file is sub-4K.
For example, connecting a Full HD streaming device or Blu-ray player will nudge your 4K BenQ projector to detect and downscale the source device’s 1080p resolution automatically. If the media player outputs a 4K signal, the projector will display in 4K.
Factors to Consider With Regard To Projector Viewing Experience
For your BenQ projector to project the best visuals, it needs help from others, as stated above. It cannot do it all by itself. Here are the various factors to consider in detail:
1. Source Device & Video

Your BenQ projector displays what it’s fed. It doesn’t work autonomously or cannot turn a 720p video input into a 4K video.
If fed with a 1080p video file (movie or game), your 4K BenQ projector will scale down the image, potentially introducing some artifacts alongside loss of detail.
Similar is the case with the source device. If your laptop, for instance, can output at a maximum native resolution of 1080p, the projector will play the video at Full HD (1080p), even if it can support up to 4K natively.
In short, the input device and video must match your BenQ projector’s maximum resolution capabilities to achieve the desired result. They must be in sync with each other that way.
2. Throw Distance & Screen Size

Throw distance is the distance between the projector and the screen. The closer the two elements are, the smaller the projected visuals will be.
Throw distance and screen size also determine how sharp the video is. In other words, a 1080p projection on a 60-inch screen won’t be as crisp on a 100-inch canvas.
To spread and encompass the larger screen, the pixels in the 1080p footage must scatter, resulting in noticeable distortion in the visuals.
You can reduce the projection’s size and make the visuals sharper or increase the “pixel density” due to the concentration in a smaller region.
Therefore, buy a projector screen accordingly. Don’t buy a 120-inch screen if you’re not planning to do 4K or 8K projections soon.
Also, opt for a throw distance that provides a picture size per the projector screen’s dimensions and your viewing preferences.
3. Projector Calibration

Projector calibration is adjusting different settings (brightness, contrast, color saturation, color temperature, etc.) on your projector to achieve optimal and actual image quality.
Calibrate your BenQ projector after you set it up during or before your first projection. The changes made to the various screen settings will impact its resolution.
The calibration doesn’t directly affect resolution. But because it influences the projected images’ quality and accuracy, the image clarity improves post-calibration.
In short, a fine-tuned 1080p projection will look better than a non-calibrated one. If you want a projector calibration guide for newbies, read our write-up here.
Note that calibrating a projector, TV, monitor, etc., is not a set-it-and-forget-it activity.
Based on usage, device aging (degrading of imaging panels or lamps), etc., your projector will require calibration intermittently. The frequency will depend on your environment or usage pattern.
Also, if you replace or repair the lamp or other light-related components, the output quality will take a hit.
Although not very likely, different content sources (Blu-ray players, gaming consoles, etc.) with varying color profiles could collapse the custom settings, warranting recalibration.
4. Your Purposes

The activities for which you use your projector also dictate the resolution.
You would want the highest possible resolution to watch movies, play games, etc. For business presentations, however, the best picture quality is not mandatory.
The audience will not be glued to the slideshow and won’t care too much about the details in the images, unlike when playing a game or watching a movie. The communicated message holds more precedence.
A business or school presentation audience will spend more time looking at the speaker and listening to them than focusing on the screen. They will glance at the slideshow when asked to or directed by the presenter.
Similarly, 4K projection is not needed when watching a TV show. Full HD shall suffice. We’ve discussed the same in great detail below.
What is the Best Resolution for My BenQ Projector?
The best resolution for your BenQ projector is the one that best suits the purpose.
Although 4K is ideal, 1080p projection is not sub-par by any stretch of the imagination. Again, the content, environment, etc., have a say.
| Purposes | Best Resolution |
| Watching movies | Full HD – 4K |
| Watching live sports | Full HD |
| Gaming | Full HD – 4K |
Movies

Movies are still mainly released and consumed in 1080p. The primary reason 4K has not become the standard in movie production is cost (camera, post-production, etc.).
Lower-resolution shooting helps manage costs. The footages are also smaller and more manageable during editing.
Moreover, most theaters and streaming services are not ready to handle 4K content’s bandwidth and other requirements. The reasons are many, and why 4K has not become mainstream in movies yet can be a separate article by itself.
Most importantly, movie production houses don’t consider Full HD a compromise. One reason why the transition to 4K has been slow is that 1080p resolution feels good enough.
On the consumer side, 4K streaming is relegated to the upper echelons of streaming subscriptions, which most people cannot afford or don’t bother signing up for. Again, for most movie and TV show streaming requirements, Full HD suffices.
Moreover, 4K hardware, such as TVs and projectors, is expensive. For instance, a BenQ 4K projector is considerably pricier than a 1080p projector.
If the cost gap is small, the Full HD projector may offer additional features and functions over the 4K device. The difference in prices, however, is shrinking, and 1080p-only projectors are slowly being phased out.
Sports
Sports broadcasting not being in 4K primarily is also due to various equipment and production bulwarks.
Multiple cameras are needed to broadcast live sports. Although some cameras may be 4K-compatible, the majority do Full HD recording. The costs would be humungous if 100 4K cameras were used to capture a sporting event.
But that isn’t the biggest roadblock, for sports broadcasting firms can very well afford those cameras. But what about the equipment needed to handle the massive 4K signals generated?
Extra and thicker cables, bigger vehicles to haul the girthy cords, more labor to install the additional wires, etc., will shoot up the costs and time required to set up the broadcasting massively.
And these costs, we assume, barely scratch the surface. It’s improbable that existing equipment will be compatible with the new cables. In other words, a significant equipment overhaul will be needed.
If there were a return in sight, companies would not hesitate. But 4K streaming doesn’t fetch broadcasters more ad money or extra revenue in any other way.
And since most sports fans don’t watch sports in 4K or there’s no public outcry over why 4K in sports is not the norm, sports divisions have no incentive to graduate to 4K production and broadcasting.
Gaming

Gaming is more interactive than watching movies and sports. Therefore, gaming in 4K is more complicated—at least on the consumer’s side.
The costs may be more or less to produce games in 4K. But the hardware and raw graphics power needed to play 4K games is much more than 1080p gaming.
Moreover, gamers prioritize frame rates over resolution or color accuracy. They value smooth and responsive gaming the most.
Running 4K games will be demanding, and achieving 60 FPS (frames per second) or greater may entail compromising on specific visual settings (response time, input lag, etc.) that may be detrimental to the gaming experience.
Upgrading to the latest and greatest graphics cards will likely be the only solution to overcome this problem.
On the display front, a 4K gaming monitor or 4K BenQ projector purchase may make sense or seem like an investment if you are a hardcore gamer or game professionally. For others, a 1080p BenQ projector or monitor will suffice.
And even if you upgrade to a 4K BenQ projector for casual gaming pursuits, remember the gaming console or source device must also support 4K to derive the maximum from your 4K projector.
The PlayStation 5 and the Xbox Series S/X devices support 4K natively. The PS4 only does 1080p.
And if you like to play older games, they may not be 4K-optimized, not utilizing the benefits of your 4K projector and other 4K hardware, as a result.
Most importantly, gaming monitors or the projector screen size is usually around the 32-inch mark. The higher pixel density of 4K won’t be very noticeable in the constricted space.
Conclusion
Your Full HD BenQ projector’s resolution cannot be converted into 4K.
There’s no denying 4K content projected through a 1080p device will look better than Full HD content on the same projector. But that cannot parallel the experience of projecting a 4K movie on a native QHD BenQ projector.
If you regularly consume 4K content, buy a 4K projector. It will also futureproof your home theatre setup.
But if you don’t want to spend the extra money now and can wait until 4K production becomes the standard across movies and sports or want streaming services to stop marketing/selling 4K streaming as a “premium” option, stick to your existing Full HD device.

Catherine Tramell has been covering technology as a freelance writer for over a decade. She has been writing for Pointer Clicker for over a year, further expanding her expertise as a tech columnist. Catherine likes spending time with her family and friends and her pastimes are reading books and news articles.

Duy Anh is a seasoned technical editor specializing in helping readers troubleshoot TV, projector, and Wi-Fi issues. He’s always been drawn to logical problem-solving. His ability to approach matters from various angles with a neutral mindset enhances his technical expertise.